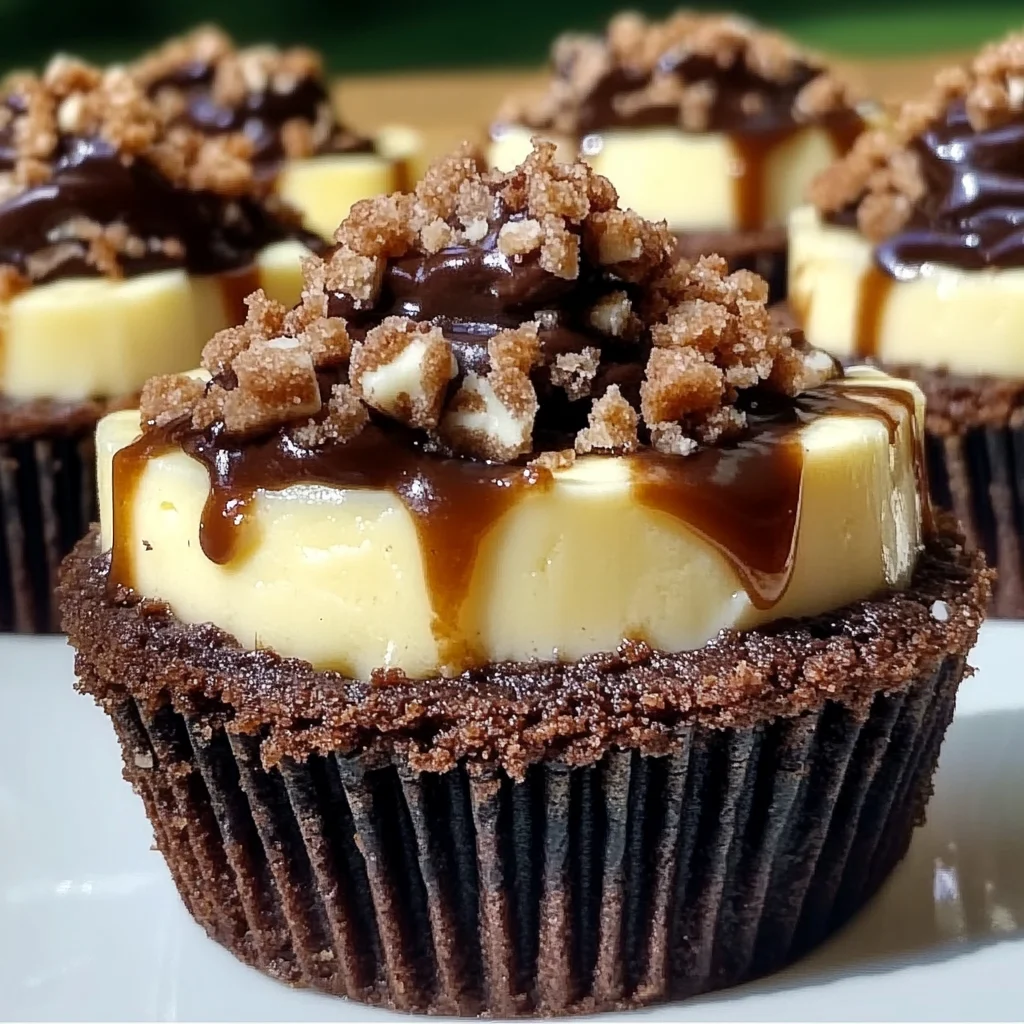
Oh, my sweet friends, do you ever get that craving for a dessert that’s rich, creamy, chocolatey, and utterly satisfying, but you just don’t have hours to spend in the kitchen? I know I do! There are days when I want that luxurious, indulgent treat, but life is simply too busy for elaborate baking projects. That’s exactly where these incredible Loaded Brownie Cheesecake Cups step in! They’re the kind of dessert that tastes like you fussed for hours, but actually comes together in a flash. Imagine fudgy brownies, creamy cheesecake, and drizzles of chocolate and caramel all layered together in a perfect individual serving. Pure bliss, I tell you!
These little beauties are not only unbelievably easy and quick to whip up, but they also make a memorable impression. They’re perfect for a weeknight treat, a spontaneous get-together, or even a thoughtful homemade gift. Trust me, once you try them, they’ll become a staple in your dessert rotation!
Why You’ll Love Loaded Brownie Cheesecake Cup
- Fast: Seriously, these come together in minutes, especially if you use store-bought brownies!
- Easy: No baking required for the cheesecake filling, just mixing and layering.
- Giftable: Individually portioned, they’re ideal for sharing with friends, neighbors, or as party favors.
- Crowd-Pleasing: Who can say no to the magical combination of brownies and cheesecake?
Ingredients
Gathering your ingredients for these delightful cups is super simple. Most of these are probably already hanging out in your pantry and fridge!
- 2 cups fudgy brownies, crumbled: You can grab a box mix and bake them up, or for ultimate ease, pick up some pre-made brownies from your local bakery or grocery store. The fudgier, the better! If you’re feeling ambitious and want to bake your own fudgy base, my Grandma’s Easy Lunch Lady Brownies are absolutely perfect!
- 1 ½ cups cream cheese, softened: This is the heart of your luscious cheesecake filling. Make sure it’s at room temperature for a super smooth, lump-free mixture.
- ½ cup powdered sugar: Also known as confectioners’ sugar, this sweetens our cheesecake filling and dissolves beautifully, leaving no grainy texture.
- 1 teaspoon vanilla extract: A classic for a reason! It really enhances that creamy, sweet flavor.
- 1 cup heavy whipping cream, whipped to stiff peaks: This is what gives our cheesecake its light, airy, and fluffy texture. Don’t substitute this with regular milk!
- Chocolate ganache (made from melted chocolate and heavy cream): You can buy pre-made chocolate syrup, but a simple homemade ganache takes it to the next level. Just melt chocolate chips with a splash of hot heavy cream until smooth.
- Caramel sauce: Store-bought caramel sauce is perfectly fine here. If you’re feeling fancy, a homemade one is always a treat!
- Extra brownie crumbs: For that final flourish and a little extra brownie goodness on top.
How to Make Loaded Brownie Cheesecake Cup
Alright, apron on, and let’s get those hands-on with this sweet creation!
- Prepare Cheesecake Filling: First things first, grab a medium-sized mixing bowl. Toss in your softened cream cheese, powdered sugar, and vanilla extract. Now, beat them together with an electric mixer until the mixture is beautifully smooth and creamy. No lumps allowed! In a separate, chilled bowl, whip your heavy cream until it forms stiff peaks. You’ll know it’s ready when you lift the beater and the peaks hold their shape. Now, here’s the gentle part: very carefully fold the whipped heavy cream into your cream cheese mixture until it’s just combined. You want to keep that lovely airiness!
- Assemble Cups: Time for the fun part – building these masterpieces! Grab your individual serving cups (small mason jars, dessert glasses, or even clear plastic cups work great). Spoon about a quarter cup of your crumbled fudgy brownies into the bottom of each cup, pressing gently to form a base. Next, spoon or pipe a generous layer of that dreamy cheesecake filling over the brownie layer. Then, drizzle generously with your chocolate ganache and a swirl of rich caramel sauce.
- Layer Repetition: Don’t stop there! We’re all about those layers. Repeat the process: another layer of crumbled brownies, followed by more creamy cheesecake filling, and don’t forget those luscious drizzles of chocolate ganache and caramel sauce. Keep going until your cup is delightfully full.
- Final Topping: For the grand finale, top off each cup with a sprinkle of extra brownie crumbs. Feel free to add a final, dramatic drizzle of both chocolate and caramel for that professional touch and extra flavor burst.
- Chill: Patience is a virtue, especially when it comes to cheesecake! Pop your assembled cups into the refrigerator for at least 1 hour. This chilling time is super important as it allows the cheesecake filling to firm up and all those amazing flavors to meld together. Trust me, it’s worth the wait!

Substitutions & Additions
One of my favorite things about a recipe like this is how versatile it is! You can easily swap things out or add in extra goodies to make it your own. Here are a few ideas:
- Brownie Base Variations: Instead of classic fudgy brownies, try chocolate chip brownies, peanut butter brownies, or even a gluten-free brownie mix. You could also use crushed Oreo cookies for a different base!
- Cheesecake Flavor Boosters: A little lemon zest folded into the cream cheese mixture would add a lovely zing. Or, for a mocha twist, add a teaspoon of instant coffee powder. A touch of almond extract instead of vanilla could also be delightful.
- Mix-Ins & Toppings Galore:
- Candy Crumbles: Crush up your favorite candy bars like Reese’s, Butterfingers, or Snickers.
- Nuts: Toasted pecans, walnuts, or chopped peanuts add a lovely crunch.
- Fresh Fruit: A few fresh raspberries, sliced strawberries, or blueberries would add a beautiful pop of color and a tart counterpoint to the sweetness.
- Extra Chocolate: Mini chocolate chips, chocolate curls, or even a different type of chocolate sauce like white chocolate ganache.
- Coconut Flakes: Toasted coconut would add a tropical flair.
- Different Sauces: Try a raspberry coulis, a peanut butter drizzle, or even a white chocolate sauce instead of or in addition to the chocolate and caramel.
If you’re looking to feed a crowd or want an even more dramatic presentation, consider turning this concept into a Caramel Cheesecake Brownie Trifle. It uses similar flavors but in a show-stopping large-format dessert!
Tips for Success
Even though this recipe is super easy, a few little tips can help you achieve dessert perfection every time:
- Softened Cream Cheese is Non-Negotiable: I can’t stress this enough! If your cream cheese isn’t soft and at room temperature, you’ll end up with lumps in your cheesecake filling. Take it out of the fridge at least 30 minutes to an hour before you start.
- Don’t Overmix the Whipped Cream: Once you’ve folded in the whipped cream, stop mixing as soon as it’s combined. Overmixing will deflate the air you’ve just whipped in, resulting in a denser filling.
- Chill Time is Your Friend: Resist the urge to dive in immediately! The hour of chilling allows the cheesecake layer to set properly, making it sturdy and even more delightful to eat. It also helps the flavors meld together beautifully.
- Portion Control: These are rich! Using smaller cups can help with portion control, especially if you’re serving them after a big meal.
- Pipe for Pretty Layers: If you want super neat layers, use a piping bag with a round tip for the cheesecake filling. It makes assembly a breeze and looks fantastic!
How to Store Loaded Brownie Cheesecake Cup
These Loaded Brownie Cheesecake Cups are best enjoyed chilled, and they store wonderfully, making them a fantastic make-ahead dessert!
- Refrigeration: Store any leftover (if there are any!) cups in an airtight container in the refrigerator. They’ll stay fresh and delicious for up to 3-4 days.
- Freezing: You can actually freeze these too! Once fully chilled, wrap each cup individually in plastic wrap, then place them in an airtight freezer-safe container. They can be frozen for up to 1 month. To enjoy, simply thaw them in the refrigerator for a few hours before serving. The texture might be slightly different upon thawing, but still delightful!
FAQs
Got questions? I’ve got answers!
Q: Can I use homemade brownies instead of store-bought?
A: Absolutely! Homemade brownies will make these cups even more special. Just make sure they’re completely cooled before crumbling them.
Q: Can I make one large Loaded Brownie Cheesecake instead of individual cups?
A: You sure can! You could layer this in a 9×13 inch pan or even a springform pan for a cheesecake-style presentation. Just be sure to adjust the chilling time, potentially increasing it to 3-4 hours or even overnight to ensure it sets properly.
Q: What if my heavy cream won’t whip to stiff peaks?
A: Make sure your cream is very cold, and preferably, chill your mixing bowl and whisk attachment for 10-15 minutes before whipping. This really helps!
Q: I love no-bake desserts! Do you have other recommendations?
A: Oh, you’ve come to the right place! If you adore quick, no-bake desserts as much as I do, you might also swoon over my No-Bake Oreo Cheesecake. It’s another family favorite that disappears quickly!
I hope you have the most wonderful time making and devouring these Loaded Brownie Cheesecake Cups. They truly are a little cup of joy! Happy baking (and no-baking), friends!
For more delicious recipes and kitchen inspiration, be sure to follow us on Pinterest!
Loaded Brownie Cheesecake Cups
Ingredients
Equipment
Method
- Step 1: Prepare Cheesecake Filling: In a medium-sized mixing bowl, combine softened cream cheese, powdered sugar, and vanilla extract. Beat with an electric mixer until smooth and creamy. In a separate, chilled bowl, whip heavy cream until stiff peaks form. Gently fold the whipped heavy cream into the cream cheese mixture until just combined, maintaining airiness.
- Step 2: Assemble Cups: Spoon about a quarter cup of crumbled fudgy brownies into the bottom of individual serving cups (e.g., small mason jars, dessert glasses), pressing gently to form a base. Spoon or pipe a generous layer of cheesecake filling over the brownie layer. Drizzle generously with chocolate ganache and caramel sauce.
- Step 3: Layer Repetition: Repeat the layering process: another layer of crumbled brownies, followed by more creamy cheesecake filling, and additional drizzles of chocolate ganache and caramel sauce. Continue until your cup is delightfully full.
- Step 4: Final Topping: Top off each cup with a sprinkle of extra brownie crumbs. Add a final drizzle of both chocolate and caramel for garnish.
- Step 5: Chill: Place the assembled cups into the refrigerator for at least 1 hour. This allows the cheesecake filling to firm up and the flavors to meld together.