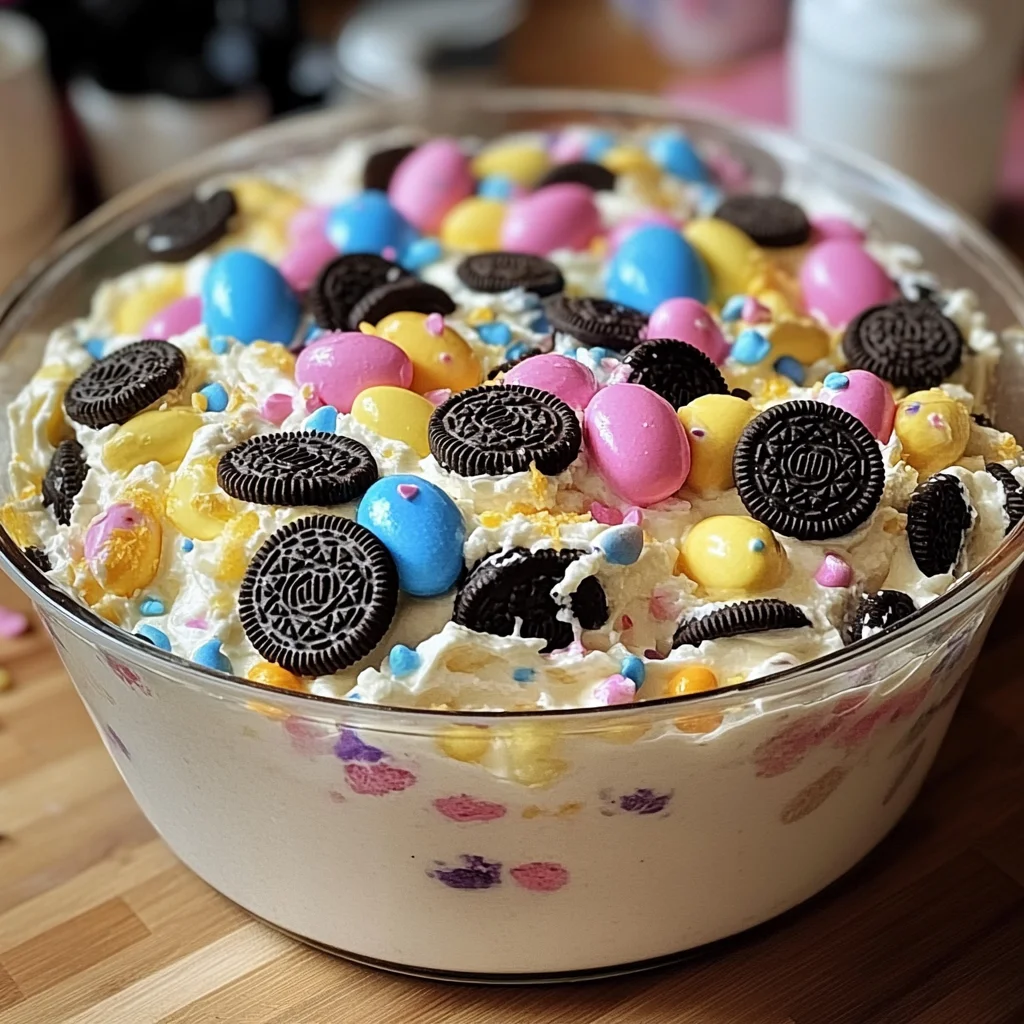
Nothing says springtime and celebration quite like Easter desserts that bring everyone around the table with smiles and full bellies. I remember those cozy family gatherings where the table was packed with colorful treats and laughter filled the air. One dessert that has become a beloved tradition in my home is this Easter Oreo Cookie Casserole. It’s like an Easter egg hunt in a dish—full of crunchy Oreo goodness, creamy layers, and festive candy surprises on top. The best part? It’s incredibly easy to make, requires no baking, and can be whipped up in under 30 minutes. Whether you’re hosting a big family brunch or need a quick dessert to bring as a gift, this casserole is sure to be a crowd-pleaser.
If you love a dessert that combines nostalgic flavors with a fun, modern twist, you’re going to adore this recipe. It’s creamy, crunchy, and sweet, with a playful Easter vibe that’s perfect for spring celebrations. Plus, it’s a fantastic way to use up those leftover Easter candies and Oreo cookies—trust me, nothing goes to waste here!
Why You’ll Love Easter Oreo Cookie Casserole
- Fast: Ready in under 30 minutes with minimal prep.
- Easy: No baking required—just mix, layer, and chill.
- Giftable: Makes a fantastic dessert to bring to potlucks or family gatherings.
- Crowd-pleasing: Combines classic Oreo flavor with creamy pudding and festive Easter candies everyone adores.
Ingredients
Every ingredient in this Easter Oreo Cookie Casserole plays a special role in building layers of flavor and texture. Here’s what you’ll need:
- 1 family-size (14.3 oz) package Oreo cookies, roughly crushed: These form the crunchy crust and topping. I like to keep some chunkier bits to add a little texture contrast.
- 1 (5.1 oz) package instant vanilla pudding mix: This adds a smooth, sweet, and creamy layer that pairs beautifully with the Oreos.
- 3 cups cold whole milk: For mixing with the pudding to get that perfectly creamy consistency.
- 1 (8 oz) package cream cheese, softened: Cream cheese brings a rich, tangy element to the middle layer that balances the sweetness.
- 1 cup powdered sugar: Sweetens the cream cheese layer just right.
- 1 (8 oz) container frozen whipped topping, thawed: Lightens the cream cheese mixture, making it fluffy and dreamy.
- 1½ cups assorted Easter candies, for topping: Think pastel M&Ms, mini chocolate eggs, jelly beans, or any colorful candy you love. This is where the fun and festive Easter spirit shines!
How to Make Easter Oreo Cookie Casserole
Let’s walk through this recipe together, step by step. It’s as simple as mixing, layering, and chilling, but with a few tips to make sure it turns out perfect every time.
Step 1: Prepare the Oreo Crust
Start by placing the Oreo cookies into a large resealable plastic bag. Grab a rolling pin or even a heavy pan and crush the cookies into coarse crumbs. I like to leave some bigger pieces here and there for added texture—you don’t want it finely ground like powder. Then, press most of these crumbs evenly into the bottom of a 9×13-inch baking dish, creating a firm crust layer. Be sure to reserve about half a cup of crumbs for the topping later on. Pressing the crumbs firmly helps the crust hold together when you scoop out the casserole later.
Step 2: Make the Vanilla Pudding
In a medium mixing bowl, whisk together the instant vanilla pudding mix and the cold whole milk. Whisk vigorously for about 2 minutes until the mixture thickens slightly and becomes smooth. Let it sit for about a minute to fully set. This pudding layer will add a luscious creaminess that’s perfectly balanced with the crunchy Oreos.
Step 3: Prepare the Cream Cheese Layer
In a large mixing bowl, beat the softened cream cheese using an electric mixer until it’s completely smooth and creamy. Gradually add the powdered sugar, continuing to beat until everything is fully combined and silky. This step is crucial to avoid lumps and ensure a smooth texture. If you’ve ever made a cheesecake filling, this is similar!
Step 4: Fold in the Whipped Topping
Using a rubber spatula, gently fold the thawed whipped topping into the cream cheese mixture. Be careful not to overmix—you want the mixture to be light and fluffy with no streaks of whipped topping visible. This creates a dreamy, airy middle layer that melts in your mouth.
Step 5: Assemble the Layers
Spread the cream cheese mixture evenly over the Oreo crust in your baking dish. Smooth it out gently with a spatula or the back of a spoon. Next, spread the prepared vanilla pudding layer evenly over the cream cheese layer. This layering makes every bite deliciously creamy and textured.
Step 6: Top with Oreo Crumbs and Easter Candies
Sprinkle the reserved half cup of Oreo crumbs evenly over the pudding layer. This adds a nice chocolate crunch on top. Then, scatter your favorite assorted Easter candies over the top. This is where you can get creative—pastel-colored M&Ms, mini chocolate eggs, and jelly beans all add that festive Easter charm and an extra pop of color and sweetness.
Step 7: Chill and Serve
Cover the dish with plastic wrap or foil and refrigerate for at least 2 hours, or even better, overnight. Chilling allows the layers to set and the flavors to meld together beautifully. Serve chilled and watch your friends and family dive in!
Substitutions & Additions
One of the best things about this Easter Oreo Cookie Casserole is how versatile it is. Here are some fun substitutions and additions to make it your own:
- Cookie Options: Swap the Oreos for other sandwich cookies like Golden Oreos or chocolate sandwich cookies for a different twist. If you want a gluten-free option, consider gluten-free sandwich cookies crushed for the crust.
- Pudding Flavors: Try chocolate or banana pudding mix instead of vanilla for a new flavor profile. I once made this with chocolate pudding and it was a chocolate-lover’s dream!
- Milk Alternatives: Use almond milk, oat milk, or any milk substitute in the pudding to make it dairy-free or lighter.
- Whipped Topping Variations: You can substitute the frozen whipped topping with homemade whipped cream if you prefer a fresher taste.
- Extra Layers: Add sliced strawberries or bananas between layers for a fruity surprise. This addition pairs beautifully with the creamy layers and adds a fresh element that balances the sweetness.
- Candy Toppings: Besides Easter candies, crushed peppermint candies or toffee bits add a delightful crunch and flavor twist.
- Nutty Touch: Sprinkle chopped toasted pecans or almonds on top for a crunchy, nutty finish.
If you enjoy layering desserts, you might also appreciate the delightful texture and flavor contrasts in this No Bake Oreo Bars, another easy Oreo-based dessert that’s perfect for any occasion.
Tips for Success
Making this Easter Oreo Cookie Casserole is easy, but a few tips can help you get the best results every time:
- Softening cream cheese: Make sure your cream cheese is softened to room temperature before mixing. This prevents lumps and gives you a smooth, creamy texture. I find popping it in the microwave for 15 seconds helps speed this up without melting it.
- Crush Oreos carefully: Don’t over-crush the Oreos into powder. Keeping some chunks adds a lovely, chewy texture contrast that makes the dessert more interesting.
- Whisk pudding thoroughly: Whisk the pudding mix and milk well for a smooth, thickened pudding. Letting it sit for a minute helps it set before layering.
- Folding technique: When folding whipped topping into cream cheese, use gentle motions to keep the mixture light and fluffy.
- Chill time: Don’t skip the chilling step! At least 2 hours in the fridge lets everything set perfectly, making it easier to slice and serve.
- Prep ahead: This casserole is great for making a day ahead. Prepare it the night before your Easter celebration for stress-free hosting.
If you’re looking for more make-ahead dessert ideas that are just as delicious and easy, you might want to check out my recipe for Easy No Bake Caramel Pretzel Bars. They’re a sweet and salty delight that pairs wonderfully with any holiday table.
How to Store Easter Oreo Cookie Casserole
Storing your Easter Oreo Cookie Casserole properly is key to keeping it fresh and delicious. Here’s how I recommend handling leftovers:
- Cover tightly: Use plastic wrap or an airtight container to cover the casserole and prevent it from absorbing other fridge odors.
- Refrigerate: Keep the casserole refrigerated and consume within 3 to 4 days. The layers will stay fresh, and the texture remains delightful during this period.
- Freezing: I don’t recommend freezing this casserole because the whipped topping and pudding layers can separate and become watery when thawed.
- Before serving leftovers: If the top looks a little soggy or the candy has softened, freshen it up by adding a sprinkle of extra crushed Oreos or a handful of fresh Easter candies before serving again.
For other make-ahead dessert ideas that store beautifully, you might want to explore my collection of easy no-bake treats, including the popular No Bake Oreo Cheesecake Sushi Rolls, which are just as fun and festive.
FAQs
Can I use low-fat milk or a milk alternative for the pudding?
Yes! You can substitute low-fat milk or plant-based milk like almond or oat milk. Just keep in mind that whole milk gives the creamiest texture, but alternatives will still work great.
Do I have to use frozen whipped topping, or can I use fresh whipped cream?
Frozen whipped topping is convenient and stable, but fresh whipped cream works beautifully too. Just make sure it’s whipped to soft peaks and fold it gently into the cream cheese mixture.
Can I prepare this casserole in individual servings?
Absolutely! You can layer the ingredients in small mason jars or dessert cups for cute individual servings—perfect for parties or Easter brunch. Just follow the same layering steps.
How far in advance can I make this dessert?
This casserole can be made up to 24 hours ahead of time. Just cover it and keep it refrigerated until ready to serve. The flavors meld wonderfully when made in advance!
If you love easy, festive desserts like this, be sure to check out other seasonal recipes such as the Easy Easter Dirt Cake Casserole—another no-bake favorite that’s bursting with fun flavors and textures.
Thanks for stopping by and letting me share one of my favorite Easter desserts with you. This Oreo Cookie Casserole is a guaranteed hit that brings smiles and sweet memories to your table. Don’t forget to experiment with your favorite candies and pudding flavors to make it uniquely yours. Happy Easter and happy eating!
For more delicious recipes and ideas, be sure to follow me on Pinterest for daily inspiration and kitchen fun.
Delightful Easter Oreo Cookie Casserole
Ingredients
Equipment
Method
- Step 1: Place Oreo cookies in a large resealable plastic bag and crush with a rolling pin or heavy pan into coarse crumbs, leaving some larger chunks. Press most crumbs evenly into the bottom of a 9x13-inch baking dish to form a firm crust. Reserve about ½ cup of crumbs for topping.
- Step 2: In a medium mixing bowl, whisk together instant vanilla pudding mix and cold whole milk vigorously for about 2 minutes until thickened and smooth. Let sit for 1 minute to set.
- Step 3: In a large mixing bowl, beat softened cream cheese with an electric mixer until smooth and creamy. Gradually add powdered sugar and continue beating until fully combined and silky.
- Step 4: Gently fold thawed whipped topping into the cream cheese mixture using a rubber spatula until light and fluffy with no streaks.
- Step 5: Spread the cream cheese mixture evenly over the Oreo crust in the baking dish, smoothing gently. Then spread the prepared vanilla pudding layer evenly over the cream cheese layer.
- Step 6: Sprinkle the reserved Oreo crumbs evenly over the pudding layer, then scatter assorted Easter candies on top for a festive finish.
- Step 7: Cover the dish with plastic wrap or foil and refrigerate for at least 2 hours or overnight to allow layers to set and flavors to meld. Serve chilled.