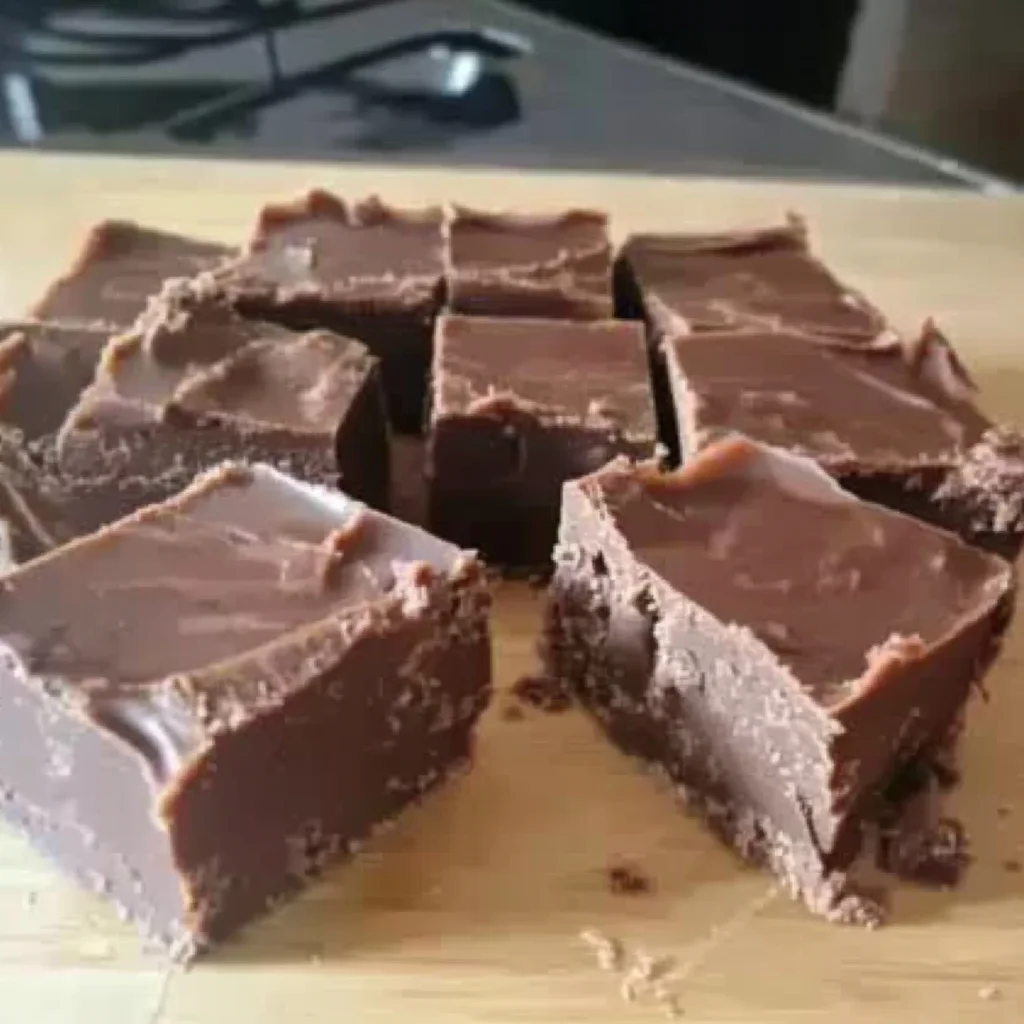
Oh, friend, do you ever get that craving for a taste of pure nostalgia? That rich, velvety square of chocolatey goodness that just melts in your mouth and instantly transports you back to simpler times? For me, it’s home-style recipes like this Old Fashioned Fudge that truly warm the soul. I remember my grandma making batch after batch, filling her kitchen with the most incredible aroma of chocolate and sweetness. She’d always have a little square ready for me, and it felt like the greatest treat in the world.
This isn’t some fancy, complicated dessert. This is the real deal: a truly old-fashioned fudge recipe that’s ridiculously easy, comes together quickly, and delivers that unforgettable creamy texture every single time. Seriously, if you’ve ever been intimidated by fudge, this recipe is about to become your new best friend. It’s perfect for gifting, sharing, or just keeping all to yourself (no judgment here!).
Why You’ll Love Old Fashioned Fudge
- Fast: Ready from start to cool-down much quicker than you might think!
- Easy: No candy thermometer needed, just simple steps and a watchful eye.
- Giftable: A homemade treat that everyone adores, especially during holidays.
- Crowd-pleasing: Who can resist a square of creamy, dreamy fudge?
Ingredients
Gathering your ingredients for this classic fudge is a breeze. You likely have most of these on hand already!
- 2 cups Granulated Sugar: Our sweet foundation, ensuring that perfect fudgy texture.
- 4 tablespoons Cocoa Powder: For that deep, rich chocolate flavor we all love. Don’t skimp on quality here if you want truly delicious fudge!
- 1 stick (8 tablespoons) Salted Butter: Hello, richness! This adds a beautiful depth of flavor and helps create that creamy mouthfeel.
- 5-ounce can Evaporated Milk: This is the secret weapon for super creamy, smooth fudge. Don’t swap it for regular milk; it has a different fat and water content that’s crucial for this recipe.
- 1 teaspoon Vanilla Extract: A touch of vanilla rounds out the chocolate flavor beautifully.
- Optional: 1/2 cup Chopped Nuts: If you’re a fan of a little crunch in your fudge (and I definitely am sometimes!), chopped walnuts or pecans are absolutely divine here.
How to Make Old Fashioned Fudge
Alright, let’s get that fudge magic happening! You’ll be amazed at how simple this process is. Just follow along, and soon you’ll have a pan full of irresistible fudge.
- Prep Your Dish: First things first, grab your trusty 8×8-inch baking dish. Lightly butter it all over. This tiny step ensures your beautiful fudge won’t stick and will pop out perfectly for cutting later.
- Combine Wet & Dry: In a medium saucepan, let’s get our dry ingredients mingling. Add the granulated sugar and cocoa powder. Give them a quick stir to combine. Then, add in the salted butter and the entire can of evaporated milk.
- Bring to a Boil: Place your saucepan over medium heat. Now, this is where your stirring arm gets a little workout! You’ll need to stir continuously as the mixture heats up. Keep going until it reaches a full, rolling boil. You’ll know it’s a “rolling boil” when it continues to bubble vigorously even while you’re stirring it.
- Boil for Exactly 7 Minutes: This part is key, my friend! Once it hits that rolling boil, set a timer for precisely 7 minutes. Continue to boil and stir continuously for the entire 7 minutes. Don’t walk away! Consistent stirring is important to prevent scorching and ensure even cooking.
- Remove from Heat & Add Flavor: As soon as your timer dings, remove the saucepan from the heat. Now’s the time for that lovely vanilla extract. Stir it in along with your optional chopped nuts, if you’re using them.
- Stir, Stir, Stir!: Don’t stop stirring just yet! This is another crucial step for that smooth, creamy texture. You’re going to stir the mixture continuously for an additional 3 minutes. This helps the fudge cool slightly and encourages the formation of tiny sugar crystals, which gives fudge its characteristic smooth finish.
- Pour and Set: Immediately pour that beautiful, molten chocolate into your prepared baking dish. Work quickly, as it will start to set pretty fast!
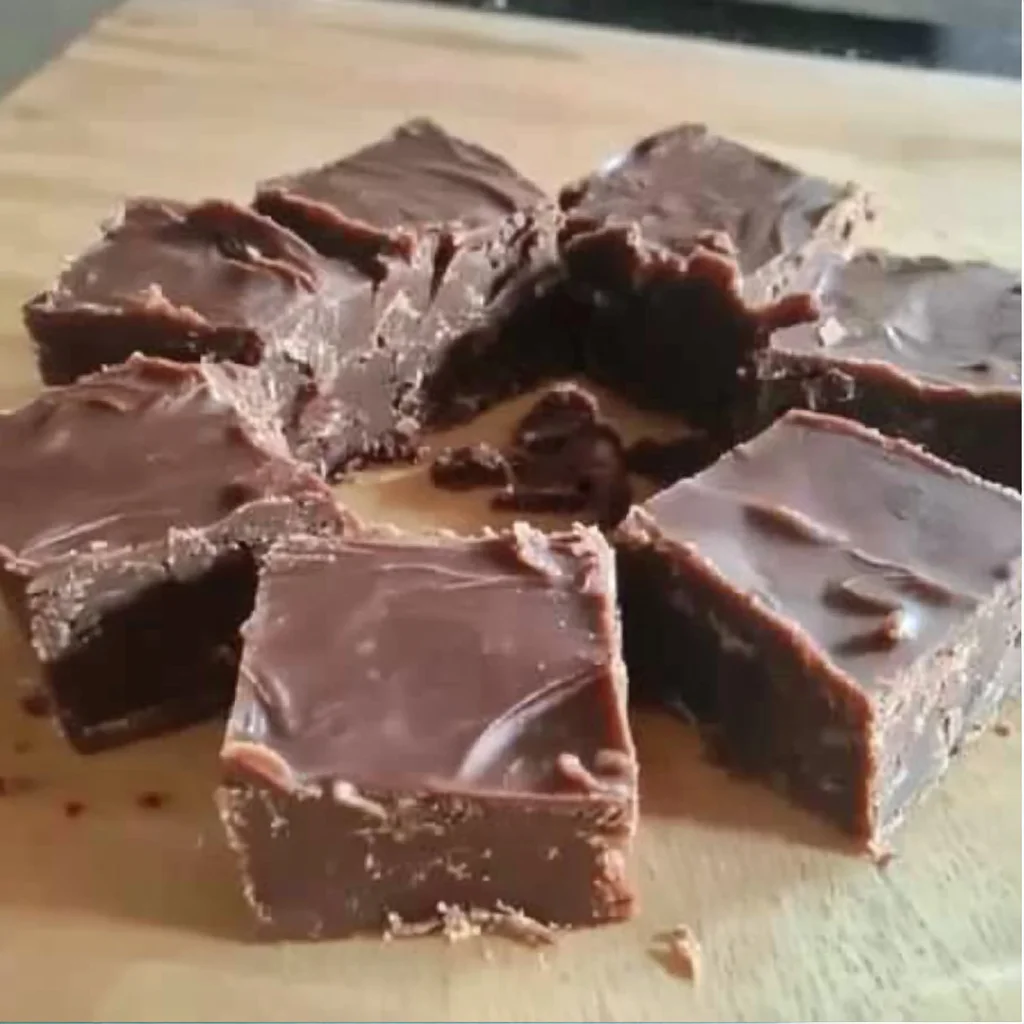
- Cool Completely: Patience, my dear! This is the hardest part. Allow the fudge to cool and set completely. You can do this at room temperature, which might take a few hours, or pop it in the refrigerator to speed things up (about 1-2 hours). Once firm, cut it into delicious squares and enjoy!
Substitutions & Additions
This Old Fashioned Fudge is fantastic as is, but it’s also a wonderful canvas for your creative kitchen experiments! Here are some ideas:
- Nutty Variations: While pecans or walnuts are classic, try almonds or even peanuts for a different crunch.
- Extract Excitement: Swap out half of the vanilla for peppermint extract for a festive holiday treat, or try almond extract for a delicate, nutty note. A hint of orange zest can also be delightful!
- Mix-In Mania: Right after step 5, fold in some mini marshmallows, chocolate chips (milk, dark, or white!), sprinkles, or crushed candy canes. If you’re looking for another quick, sweet snack to make that’s perfect for movie night, you might love our Muddy Buddies.
- Flavor Swirls: Before pouring into the dish, swirl in a tablespoon or two of peanut butter or softened caramel sauce for a marbled effect.
Tips for Success
Making fudge from scratch is incredibly rewarding, and a few simple tips can ensure yours turns out perfectly every time.
- Measure Accurately: Baking and candy-making are sciences! Use proper measuring cups and spoons for precise results.
- Stir Continuously: This can’t be stressed enough. Constant stirring prevents the bottom from scorching and helps the sugar dissolve evenly, leading to smooth fudge.
- Don’t Scrape the Sides: After the boiling process, when you’re stirring in the vanilla and nuts, try not to scrape down the sides of the saucepan. Any undissolved sugar crystals on the sides can cause your fudge to become grainy.
- Work Quickly: Once the fudge is off the heat and you’ve added the vanilla, it will start to set relatively fast. Pour it into your prepared dish without delay.
- Patience is a Virtue: Resist the urge to cut into the fudge before it’s completely set. Rushing this step will result in a messy, soft fudge that won’t hold its shape.
- Prep Ahead: This fudge holds up beautifully, making it an excellent candidate for making ahead. It’s perfect for gifting during the holidays, just like these delightful No-Bake Peppermint Bark Snowballs!
How to Store Old Fashioned Fudge
Once your delectable Old Fashioned Fudge has cooled and set, you’ll want to store it properly to keep it fresh and delicious.
- Airtight is Key: Store your fudge in an airtight container at room temperature. It will stay fresh and soft for up to 1-2 weeks.
- Refrigeration: If you prefer your fudge a bit firmer, or if your home is particularly warm, you can store it in an airtight container in the refrigerator for up to 3-4 weeks. Just let it come to room temperature for a few minutes before serving for the best texture.
- Freezing: Fudge freezes wonderfully! Wrap individual pieces or the entire block tightly in plastic wrap, then place it in a freezer-safe bag or container. It will last for up to 3 months in the freezer. Thaw at room temperature when you’re ready to enjoy.
FAQs
Got a question about this old-fashioned favorite? I’ve got answers!
Q: Why is my fudge grainy or crumbly?
A: This is usually due to sugar crystallization. It can happen if the mixture wasn’t stirred enough during boiling, causing sugar crystals to form, or if you scraped the sides of the pan after boiling, reintroducing undissolved crystals. Consistent stirring and not scraping the sides are your best defense!
Q: Can I use regular milk instead of evaporated milk?
A: I don’t recommend it for this particular recipe. Evaporated milk has a specific consistency and fat content that is crucial for achieving the creamy, smooth texture of this old-fashioned fudge. Regular milk contains more water and less fat, which will likely result in a different, less desirable outcome.
Q: How long does it take for the fudge to set?
A: It typically takes at least 2-4 hours at room temperature, or about 1-2 hours if you chill it in the refrigerator. The longer it sets, the firmer it will become.
Q: Can I double this recipe?
A: You can, but you’ll need a much larger saucepan to prevent overflow. Also, keep in mind that the boiling time (the 7 minutes) might need to be slightly adjusted, possibly increased by a minute or two, to reach the correct consistency due to the larger volume. If you love a quick, no-fuss dessert like this fudge, you might also adore our Easy No-Bake Caramel Pretzel Bars.
For more delicious, home-style recipes that bring joy to your table, be sure to check out Easily Cooked!
For even more delicious recipes and kitchen inspiration, be sure to follow us on Pinterest!
Grandma’s Best Old Fashioned Fudge Recipe: So Easy, So Creamy, Pure Nostalgia!
Oh, friend, do you ever get that craving for a taste of pure nostalgia? That rich, velvety square of chocolatey goodness that just melts in your mouth and instantly transports you back to simpler times? For me, it’s home-style recipes like this Old Fashioned Fudge that truly warm the soul. I remember my grandma making batch after batch, filling her kitchen with the most incredible aroma of chocolate and sweetness. She’d always have a little square ready for me, and it felt like the greatest treat in the world.
This isn’t some fancy, complicated dessert. This is the real deal: a truly old-fashioned fudge recipe that’s ridiculously easy, comes together quickly, and delivers that unforgettable creamy texture every single time. Seriously, if you’ve ever been intimidated by fudge, this recipe is about to become your new best friend. It’s perfect for gifting, sharing, or just keeping all to yourself (no judgment here!).
Why You’ll Love Old Fashioned Fudge
- Fast
- Easy
- Giftable
- Crowd-pleasing
Ingredients
Gathering your ingredients for this classic fudge is a breeze. You likely have most of these on hand already!
- 2 cups Granulated Sugar: Our sweet foundation, ensuring that perfect fudgy texture.
- 4 tablespoons Cocoa Powder: For that deep, rich chocolate flavor we all love. Don’t skimp on quality here if you want truly delicious fudge!
- 1 stick (8 tablespoons) Salted Butter: Hello, richness! This adds a beautiful depth of flavor and helps create that creamy mouthfeel.
- 5-ounce can Evaporated Milk: This is the secret weapon for super creamy, smooth fudge. Don’t swap it for regular milk; it has a different fat and water content that’s crucial for this recipe.
- 1 teaspoon Vanilla Extract: A touch of vanilla rounds out the chocolate flavor beautifully.
- Optional: 1/2 cup Chopped Nuts: If you’re a fan of a little crunch in your fudge (and I definitely am sometimes!), chopped walnuts or pecans are absolutely divine here.
How to Make Old Fashioned Fudge
Alright, let’s get that fudge magic happening! You’ll be amazed at how simple this process is. Just follow along, and soon you’ll have a pan full of irresistible fudge.
- Prep Your Dish: First things first, grab your trusty 8×8-inch baking dish. Lightly butter it all over. This tiny step ensures your beautiful fudge won’t stick and will pop out perfectly for cutting later.
- Combine Wet & Dry: In a medium saucepan, let’s get our dry ingredients mingling. Add the granulated sugar and cocoa powder. Give them a quick stir to combine. Then, add in the salted butter and the entire can of evaporated milk.
- Bring to a Boil: Place your saucepan over medium heat. Now, this is where your stirring arm gets a little workout! You’ll need to stir continuously as the mixture heats up. Keep going until it reaches a full, rolling boil. You’ll know it’s a “rolling boil” when it continues to bubble vigorously even while you’re stirring it.
- Boil for Exactly 7 Minutes: This part is key, my friend! Once it hits that rolling boil, set a timer for precisely 7 minutes. Continue to boil and stir continuously for the entire 7 minutes. Don’t walk away! Consistent stirring is important to prevent scorching and ensure even cooking.
- Remove from Heat & Add Flavor: As soon as your timer dings, remove the saucepan from the heat. Now’s the time for that lovely vanilla extract. Stir it in along with your optional chopped nuts, if you’re using them.
- Stir, Stir, Stir!: Don’t stop stirring just yet! This is another crucial step for that smooth, creamy texture. You’re going to stir the mixture continuously for an additional 3 minutes. This helps the fudge cool slightly and encourages the formation of tiny sugar crystals, which gives fudge its characteristic smooth finish.
- Pour and Set: Immediately pour that beautiful, molten chocolate into your prepared baking dish. Work quickly, as it will start to set pretty fast!
- Cool Completely: Patience, my dear! This is the hardest part. Allow the fudge to cool and set completely. You can do this at room temperature, which might take a few hours, or pop it in the refrigerator to speed things up (about 1-2 hours). Once firm, cut it into delicious squares and enjoy!
Substitutions & Additions
This Old Fashioned Fudge is fantastic as is, but it’s also a wonderful canvas for your creative kitchen experiments! Here are some ideas:
- Nutty Variations: While pecans or walnuts are classic, try almonds or even peanuts for a different crunch.
- Extract Excitement: Swap out half of the vanilla for peppermint extract for a festive holiday treat, or try almond extract for a delicate, nutty note. A hint of orange zest can also be delightful!
- Mix-In Mania: Right after step 5, fold in some mini marshmallows, chocolate chips (milk, dark, or white!), sprinkles, or crushed candy canes. If you’re looking for another quick, sweet snack to make that’s perfect for movie night, you might love our Muddy Buddies.
- Flavor Swirls: Before pouring into the dish, swirl in a tablespoon or two of peanut butter or softened caramel sauce for a marbled effect.
Tips for Success
Making fudge from scratch is incredibly rewarding, and a few simple tips can ensure yours turns out perfectly every time.
- Measure Accurately: Baking and candy-making are sciences! Use proper measuring cups and spoons for precise results.
- Stir Continuously: This can’t be stressed enough. Constant stirring prevents the bottom from scorching and helps the sugar dissolve evenly, leading to smooth fudge.
- Don’t Scrape the Sides: After the boiling process, when you’re stirring in the vanilla and nuts, try not to scrape down the sides of the saucepan. Any undissolved sugar crystals on the sides can cause your fudge to become grainy.
- Work Quickly: Once the fudge is off the heat and you’ve added the vanilla, it will start to set relatively fast. Pour it into your prepared dish without delay.
- Patience is a Virtue: Resist the urge to cut into the fudge before it’s completely set. Rushing this step will result in a messy, soft fudge that won’t hold its shape.
- Prep Ahead: This fudge holds up beautifully, making it an excellent candidate for making ahead. It’s perfect for gifting during the holidays, just like these delightful No-Bake Peppermint Bark Snowballs!
How to Store Old Fashioned Fudge
Once your delectable Old Fashioned Fudge has cooled and set, you’ll want to store it properly to keep it fresh and delicious.
- Airtight is Key: Store your fudge in an airtight container at room temperature. It will stay fresh and soft for up to 1-2 weeks.
- Refrigeration: If you prefer your fudge a bit firmer, or if your home is particularly warm, you can store it in an airtight container in the refrigerator for up to 3-4 weeks. Just let it come to room temperature for a few minutes before serving for the best texture.
- Freezing: Fudge freezes wonderfully! Wrap individual pieces or the entire block tightly in plastic wrap, then place it in a freezer-safe bag or container. It will last for up to 3 months in the freezer. Thaw at room temperature when you’re ready to enjoy.
FAQs
Got a question about this old-fashioned favorite? I’ve got answers!
Q: Why is my fudge grainy or crumbly?
A: This is usually due to sugar crystallization. It can happen if the mixture wasn’t stirred enough during boiling, causing sugar crystals to form, or if you scraped the sides of the pan after boiling, reintroducing undissolved crystals. Consistent stirring and not scraping the sides are your best defense!
Q: Can I use regular milk instead of evaporated milk?
A: I don’t recommend it for this particular recipe. Evaporated milk has a specific consistency and fat content that is crucial for achieving the creamy, smooth texture of this old-fashioned fudge. Regular milk contains more water and less fat, which will likely result in a different, less desirable outcome.
Q: How long does it take for the fudge to set?
A: It typically takes at least 2-4 hours at room temperature, or about 1-2 hours if you chill it in the refrigerator. The longer it sets, the firmer it will become.
Q: Can I double this recipe?
A: You can, but you’ll need a much larger saucepan to prevent overflow. Also, keep in mind that the boiling time (the 7 minutes) might need to be slightly adjusted, possibly increased by a minute or two, to reach the correct consistency due to the larger volume. If you love a quick, no-fuss dessert like this fudge, you might also adore our Easy No-Bake Caramel Pretzel Bars.
For even more delicious recipes and kitchen inspiration, be sure to follow us on Pinterest!

Grandma's Best Old Fashioned Fudge
Ingredients
Equipment
Method
- Step 1: Prep Your Dish: First things first, grab your trusty 8x8-inch baking dish. Lightly butter it all over. This tiny step ensures your beautiful fudge won't stick and will pop out perfectly for cutting later.
- Step 2: Combine Wet & Dry: In a medium saucepan, let's get our dry ingredients mingling. Add the granulated sugar and cocoa powder. Give them a quick stir to combine. Then, add in the salted butter and the entire can of evaporated milk.
- Step 3: Bring to a Boil: Place your saucepan over medium heat. Now, this is where your stirring arm gets a little workout! You'll need to stir continuously as the mixture heats up. Keep going until it reaches a full, rolling boil. You'll know it's a "rolling boil" when it continues to bubble vigorously even while you're stirring it.
- Step 4: Boil for Exactly 7 Minutes: This part is key, my friend! Once it hits that rolling boil, set a timer for precisely 7 minutes. Continue to boil and stir continuously for the entire 7 minutes. Don't walk away! Consistent stirring is important to prevent scorching and ensure even cooking.
- Step 5: Remove from Heat & Add Flavor: As soon as your timer dings, remove the saucepan from the heat. Now's the time for that lovely vanilla extract. Stir it in along with your optional chopped nuts, if you're using them.
- Step 6: Stir, Stir, Stir!: Don't stop stirring just yet! This is another crucial step for that smooth, creamy texture. You're going to stir the mixture continuously for an additional 3 minutes. This helps the fudge cool slightly and encourages the formation of tiny sugar crystals, which gives fudge its characteristic smooth finish.
- Step 7: Pour and Set: Immediately pour that beautiful, molten chocolate into your prepared baking dish. Work quickly, as it will start to set pretty fast!
- Step 8: Cool Completely: Patience, my dear! This is the hardest part. Allow the fudge to cool and set completely. You can do this at room temperature, which might take a few hours, or pop it in the refrigerator to speed things up (about 1-2 hours). Once firm, cut it into delicious squares and enjoy!