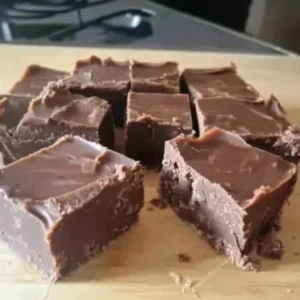
Grandma's Best Old Fashioned Fudge
Experience pure nostalgia with Grandma's ridiculously easy and incredibly creamy old-fashioned chocolate fudge. This simple recipe, requiring no candy thermometer, delivers a rich, velvety texture that melts in your mouth, perfect for gifting, sharing, or a comforting treat.
Equipment
- 8x8 inch baking dish
- Medium saucepan
- Measuring Cups and Spoons
Ingredients
- 2 cups Granulated Sugar Our sweet foundation, ensuring that perfect fudgy texture
- 4 tablespoons Cocoa Powder For that deep, rich chocolate flavor
- 1 stick Salted Butter 8 tablespoons; adds richness and creamy mouthfeel
- 5 ounce Evaporated Milk can; secret weapon for super creamy, smooth fudge
- 1 teaspoon Vanilla Extract rounds out the chocolate flavor beautifully
- 1/2 cup Chopped Nuts Optional; chopped walnuts or pecans are divine
Instructions
- Step 1: Prep Your Dish: First things first, grab your trusty 8x8-inch baking dish. Lightly butter it all over. This tiny step ensures your beautiful fudge won't stick and will pop out perfectly for cutting later.
- Step 2: Combine Wet & Dry: In a medium saucepan, let's get our dry ingredients mingling. Add the granulated sugar and cocoa powder. Give them a quick stir to combine. Then, add in the salted butter and the entire can of evaporated milk.
- Step 3: Bring to a Boil: Place your saucepan over medium heat. Now, this is where your stirring arm gets a little workout! You'll need to stir continuously as the mixture heats up. Keep going until it reaches a full, rolling boil. You'll know it's a "rolling boil" when it continues to bubble vigorously even while you're stirring it.
- Step 4: Boil for Exactly 7 Minutes: This part is key, my friend! Once it hits that rolling boil, set a timer for precisely 7 minutes. Continue to boil and stir continuously for the entire 7 minutes. Don't walk away! Consistent stirring is important to prevent scorching and ensure even cooking.
- Step 5: Remove from Heat & Add Flavor: As soon as your timer dings, remove the saucepan from the heat. Now's the time for that lovely vanilla extract. Stir it in along with your optional chopped nuts, if you're using them.
- Step 6: Stir, Stir, Stir!: Don't stop stirring just yet! This is another crucial step for that smooth, creamy texture. You're going to stir the mixture continuously for an additional 3 minutes. This helps the fudge cool slightly and encourages the formation of tiny sugar crystals, which gives fudge its characteristic smooth finish.
- Step 7: Pour and Set: Immediately pour that beautiful, molten chocolate into your prepared baking dish. Work quickly, as it will start to set pretty fast!
- Step 8: Cool Completely: Patience, my dear! This is the hardest part. Allow the fudge to cool and set completely. You can do this at room temperature, which might take a few hours, or pop it in the refrigerator to speed things up (about 1-2 hours). Once firm, cut it into delicious squares and enjoy!
Notes
Substitutions & Additions: While pecans or walnuts are classic, try almonds or even peanuts for a different crunch. Swap out half of the vanilla for peppermint extract for a festive holiday treat, or try almond extract for a delicate, nutty note. A hint of orange zest can also be delightful! Right after step 5, fold in some mini marshmallows, chocolate chips (milk, dark, or white!), sprinkles, or crushed candy canes. Before pouring into the dish, swirl in a tablespoon or two of peanut butter or softened caramel sauce for a marbled effect.
Tips for Success: Measure accurately using proper measuring cups and spoons for precise results. Stir continuously during the heating and boiling process to prevent scorching and help the sugar dissolve evenly, leading to smooth fudge. After the boiling process, when stirring in the vanilla and nuts, try not to scrape down the sides of the saucepan to prevent undissolved sugar crystals from causing grainy fudge. Work quickly once the fudge is off the heat and vanilla is added, as it will start to set relatively fast. Resist the urge to cut into the fudge before it's completely set, as rushing will result in a messy, soft fudge. This fudge holds up beautifully, making it an excellent candidate for making ahead and gifting.
How to Store: Store your fudge in an airtight container at room temperature for up to 1-2 weeks. If you prefer it firmer or if your home is warm, store it in an airtight container in the refrigerator for up to 3-4 weeks (let it come to room temperature for a few minutes before serving for the best texture). Fudge freezes wonderfully! Wrap individual pieces or the entire block tightly in plastic wrap, then place in a freezer-safe bag or container. It will last for up to 3 months in the freezer. Thaw at room temperature when ready to enjoy.