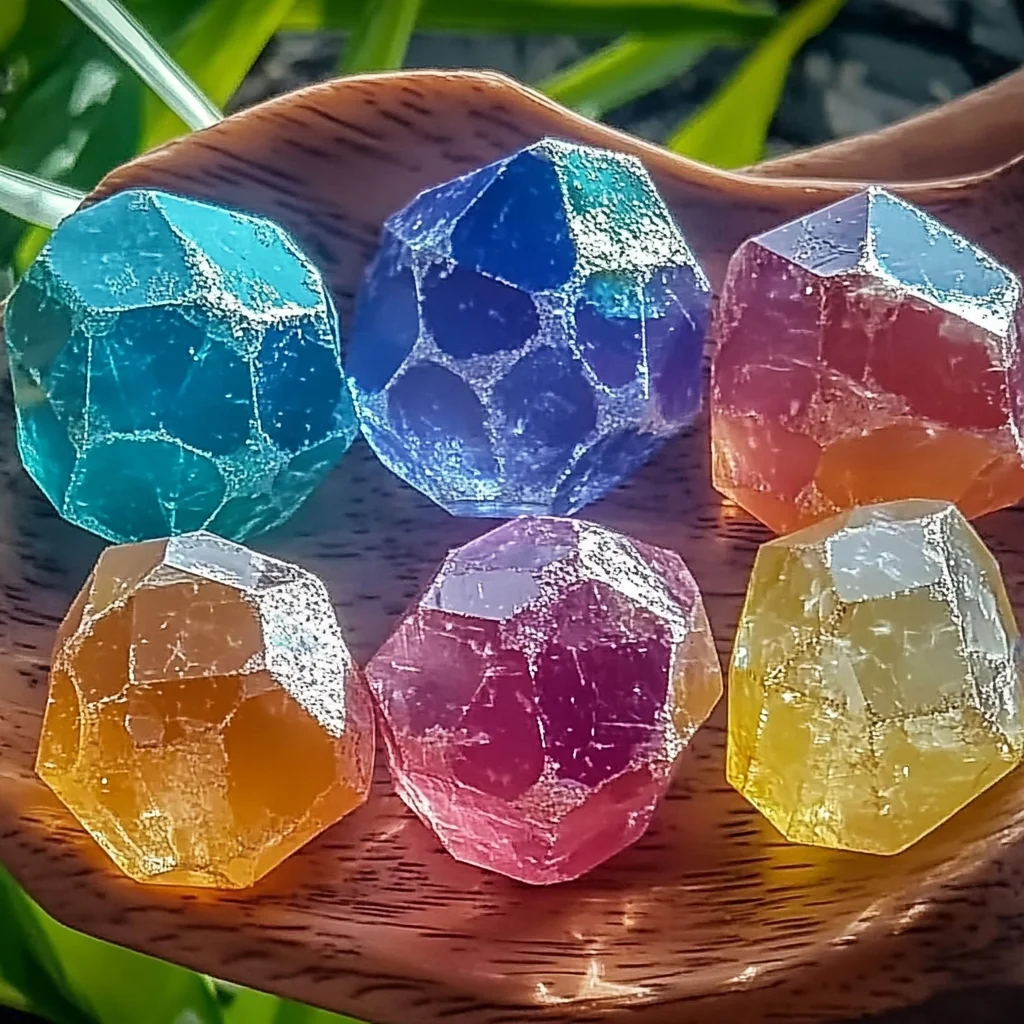
Do you ever get that warm, fuzzy feeling remembering childhood crafts? Those simple projects that sparked so much joy and wonder, often using just a few things from around the house? Well, get ready to dive back into that delightful nostalgia with something truly special: these incredible Color Changing Crystal Treasure Stones! Seriously, I can’t wait for you to try this. It’s one of those super easy, super quick, and incredibly memorable activities that feels like pure magic. Imagine creating your own little sparkling gems that, with just a sprinkle of another everyday ingredient, put on a dazzling fizzing show! It’s perfect for a rainy afternoon, a creative playdate, or even a unique, handmade gift.
Why You’ll Love Color Changing Crystal Treasure Stones
- Fast: You’ll have these whipped up in a flash!
- Easy: Just three simple ingredients and straightforward steps.
- Giftable: Package them up for a unique, enchanting present.
- Crowd-pleasing: Kids and adults alike will be fascinated by the color-changing magic!
Ingredients
Gathering your supplies for these mystical stones is wonderfully simple. You likely have most, if not all, of these in your pantry right now!
- 1/2 cup baking soda: Our humble hero! This common kitchen ingredient is the base for our “stones” and the star of the fizzing reaction.
- 1/4 cup water: Just plain old tap water, ready to help us form our treasure.
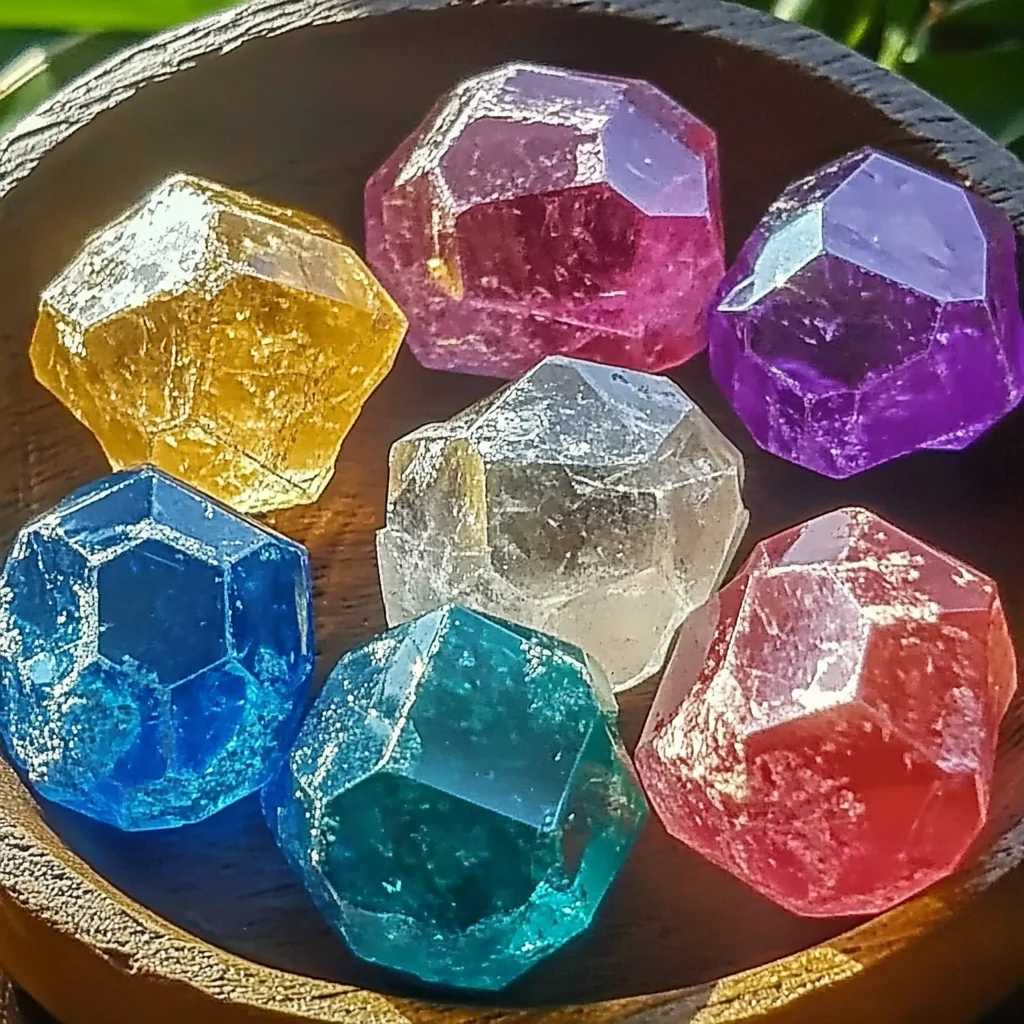
- Food coloring (multiple colors): This is where the real fun begins! Think vibrant blues, sunny yellows, fiery reds, or mystical purples. The more colors, the merrier your treasure trove will be!
How to Make Color Changing Crystal Treasure Stones
Alright, friend, let’s get those hands a little messy and unleash some creativity! Making these crystal treasure stones is as easy as pie, and watching them come to life is just the best.
- First things first, grab a mixing bowl and measure out your 1/2 cup of baking soda. It’s the foundation of our magical gems!
- Next, pour in your 1/4 cup of water. Now, get in there with a spoon or a spatula and mix, mix, mix! You’re aiming for a thick, uniform paste. It should be moldable, almost like dough, but not too sticky. If it feels a little too crumbly, add a tiny splash more water, a few drops at a time, until it comes together.
- This is where the rainbow magic happens! Divide your baking soda paste into separate bowls – one for each color you want to create. I usually go for at least three or four vibrant hues.
- Now, add a few drops of your chosen food coloring to each bowl. Stir it up until the color is beautifully and evenly blended throughout the paste. Don’t be shy; you can add more drops for a deeper, more intense color!
- Time to get creative! Scoop out portions of the colored paste and start shaping them into whatever your heart desires. Think smooth river stones, jagged crystals, or chunky gem-like forms. You can gently press them in your hands or just let them take on organic shapes. As you finish each one, place it carefully on a parchment-lined baking sheet. This makes for easy cleanup and prevents sticking.
- Patience, my friend, is a virtue here. You need to let these beauties air dry completely. This can take several hours, or even overnight, depending on how humid your environment is and how thick your stones are. You’ll know they’re ready when they feel rock-hard and dry to the touch, with no damp spots.
- Voila! Your crystal treasure stones are now ready for action! To unleash their fantastic color-changing, fizzing reaction, simply drizzle a little vinegar over them. Watching them bubble and reveal new colors is truly a treat – it’s like a mini science experiment and a work of art all rolled into one! It reminds me of the fun we had with our baking soda vinegar balloon experiment, but with a sparkling twist.
Substitutions & Additions
Part of the joy of DIY is making it your own! Here are some fun ways to customize your crystal treasure stones:
- Glitter Glam: Before they dry, sprinkle a little eco-friendly glitter over your shaped stones for some extra sparkle. Who doesn’t love a bit of bling on their treasure?
- Essential Oil Aroma: Add a drop or two of kid-safe essential oil (like lavender or orange) to your colored paste for scented stones. Just imagine a treasure chest full of sweet-smelling gems!
- Natural Dyes: For a more natural approach, try using fruit or vegetable juices like beet juice for red or spinach juice for green instead of artificial food coloring. The colors might be a bit more subtle, but still beautiful!
- Molds Mania: Don’t feel limited to hand-shaping! Small silicone molds (like those for candy or ice cubes) can create perfect, uniform shapes. Think tiny hearts, stars, or even mini animal shapes.
- Surprise Inside: For an extra layer of discovery, embed a small, non-toxic toy or bead inside your paste before shaping. When the stones fizz, they’ll reveal a hidden “treasure”!
Tips for Success
Even though this recipe is super easy, a few little pointers can make sure your crystal treasure stones turn out perfectly every time.
- Don’t Rush the Drying: This is probably the most important tip! If your stones aren’t completely dry, they won’t hold their shape as well and the fizzing reaction might be less dramatic. Give them ample time, even if it means overnight.
- Perfect Paste Consistency: Aim for a consistency that’s like firm playdough. If it’s too wet, they’ll be hard to shape and take ages to dry. Too dry, and they’ll crumble. Start with the recommended water, then add tiny amounts if needed.
- Experiment with Shapes: There’s no right or wrong way to shape these! From smooth pebbles to rough-cut gems, let your imagination lead. The unique textures will make each stone special.
- Vinegar Variety: Any white vinegar will work for the fizzing reaction. For a more intense show, try slightly warmer vinegar!
- Clean-Up is Easy: Since we’re mostly working with baking soda and water, cleanup is a breeze! Just wipe down surfaces with a damp cloth. For another fun, simple activity that’s easy to clean up, you might enjoy making Easy DIY Suncatchers!
How to Store Color Changing Crystal Treasure Stones
Once your magical treasure stones are completely dry and hardened, storage is a cinch! The key is to keep them away from moisture. Store them in an airtight container or a sealed bag at room temperature. A cool, dry cupboard is ideal. As long as they stay dry, these little gems will keep indefinitely, ready for their next fizzing adventure whenever you are! Just remember, once they’ve had their vinegar bath and fizzed, they won’t quite be the same for a second round of color-changing magic, as the baking soda will have reacted. So, enjoy the show!
FAQs
Q: Are these crystal treasure stones safe for children?
A: Absolutely! This project uses non-toxic, food-grade ingredients, making it perfectly safe for kids to handle and play with. Always supervise little ones, especially when adding the food coloring and vinegar.
Q: How do they change color?
A: The magic happens thanks to a classic acid-base reaction! Baking soda is a base, and when you drizzle vinegar (an acid) over it, they react to produce carbon dioxide gas, which creates the fizzing. The food coloring, initially concentrated in the dry baking soda, spreads out and appears to “change” or intensify in color as the bubbles form and dissolve the stone.
Q: Can I use different liquids besides vinegar to make them fizz?
A: To get the full fizzing effect, you need an acid. Lemon juice or lime juice would also work, giving a similar reaction, though vinegar is usually the most cost-effective and readily available option for a strong fizz. For more fizzy fun, explore our guide on Easy 3-Ingredient Slime!
Q: What if my stones don’t fizz or change color much?
A: The most common reason for a weak reaction is that the stones weren’t completely dry. Ensure they are rock-hard before testing. Also, make sure you’re using fresh vinegar. If the baking soda is old, it might have lost some of its potency, so consider trying new baking soda.
For more delicious recipes and creative ideas, make sure to follow us on Pinterest!

Magical Color Changing Crystal Treasure Stones
Ingredients
Equipment
Method
- Step 1: Grab a mixing bowl and measure out 1/2 cup of baking soda. This is the foundation of your magical gems!
- Step 2: Pour in 1/4 cup of water. Mix with a spoon or spatula until you achieve a thick, uniform paste that is moldable, almost like dough, but not too sticky. If too crumbly, add a tiny splash more water, a few drops at a time.
- Step 3: Divide your baking soda paste into separate bowls – one for each color you want to create (at least three or four vibrant hues are recommended).
- Step 4: Add a few drops of your chosen food coloring to each bowl. Stir until the color is beautifully and evenly blended throughout the paste. Add more drops for a deeper, more intense color if desired.
- Step 5: Scoop out portions of the colored paste and start shaping them into smooth river stones, jagged crystals, or chunky gem-like forms. Place each finished stone carefully on a parchment-lined baking sheet.
- Step 6: Let these beauties air dry completely. This can take several hours, or even overnight, depending on humidity and stone thickness. They are ready when they feel rock-hard and dry to the touch, with no damp spots.
- Step 7: To unleash their fantastic color-changing, fizzing reaction, simply drizzle a little vinegar over them. Watch them bubble and reveal new colors!