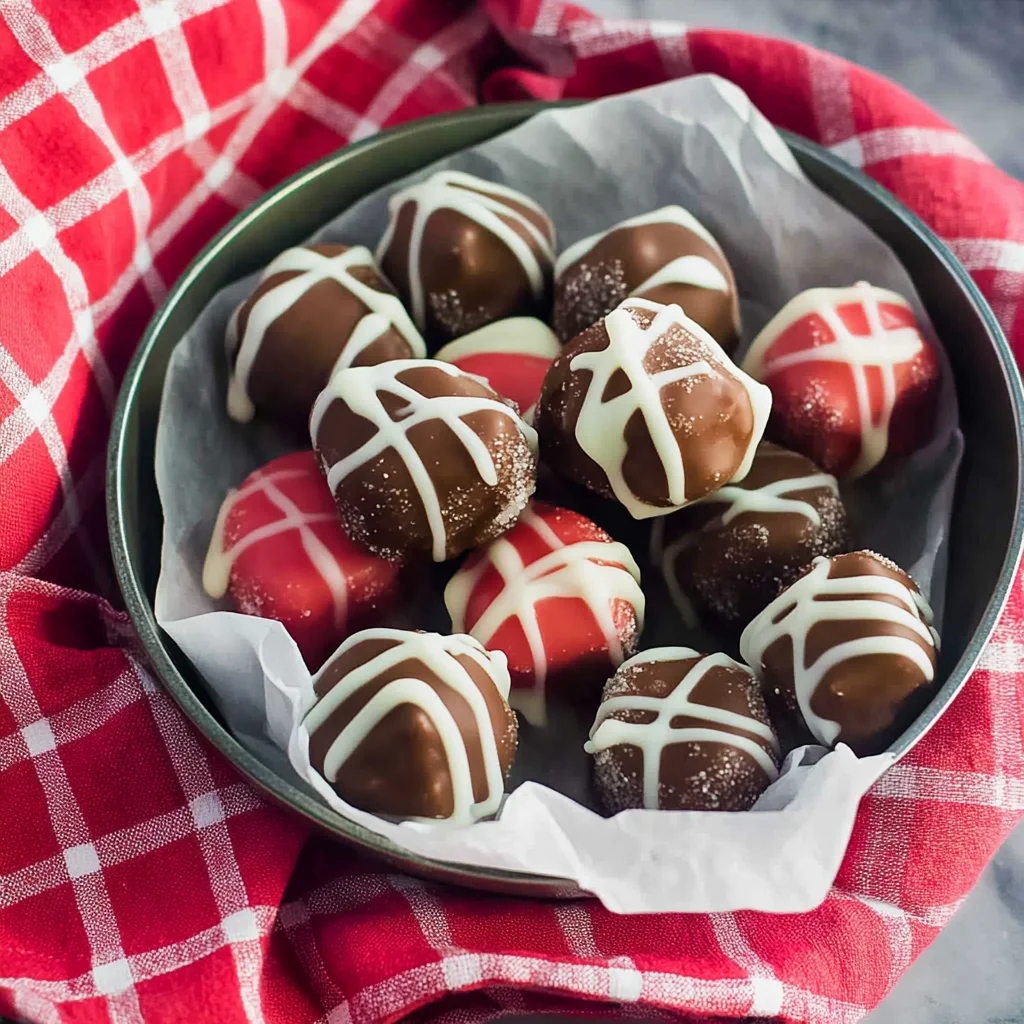
Hey there, sweet friends! Do you ever get a craving for a treat that just feels like home? Something that reminds you of cozy holidays, family gatherings, or just a simple, delightful moment? Well, if you’re anything like me, then you’re going to absolutely adore Martha Washington Candy. This isn’t just any candy; it’s a little bite of pure, old-fashioned Americana, packed with creamy, coconut-pecan goodness, all enrobed in a luscious chocolate shell.
I remember my grandma making these little beauties, her kitchen filled with that distinct sweet aroma. She’d always have a plate ready for us, a true labor of love that tasted like pure magic. The best part? Despite their fancy name and impressive looks, they are shockingly easy to make – seriously, no baking required! If you love simple, yet utterly satisfying, easy no-bake treats, or are a fan of classic comfort desserts that bring back warm memories, then this recipe is about to become your new favorite. Let’s get you started on creating these memorable morsels!
Why You’ll Love Martha Washington Candy
- Fast: Minimal hands-on time means more time for enjoying!
- Easy: No baking, no tricky steps, just simple mixing and chilling.
- Giftable: These beauties make stunning homemade gifts for friends, neighbors, or teachers.
- Crowd-pleasing: A unique flavor profile that everyone from kids to grandparents will adore.
Ingredients

Gather ’round your kitchen counter, because these ingredients are simple staples you might already have on hand, ready to transform into something truly special!
- 1 cup butter, room temperature: The base of our creamy filling. Make sure it’s nice and soft so it blends beautifully.
- 4 cups confectioners’ sugar: Also known as powdered sugar, this gives our candy its melt-in-your-mouth texture.
- 1 (14-ounce) can sweetened condensed milk: This is the secret ingredient that binds everything together and adds that glorious sweetness and creamy richness.
- 1 teaspoon vanilla extract: A classic flavor enhancer that brings out all the best notes in our candy.
- 3 cups sweetened shredded coconut: Fluffy, sweet, and essential for that signature Martha Washington texture.
- 2 cups chopped pecans: Adds a delightful crunch and nutty flavor. I always opt for fresh pecans; they make all the difference!
- 20 maraschino cherries, drained, chopped, and blotted dry: These vibrant red gems add a lovely chewiness and a pop of fruity flavor. Blotting them dry is key to prevent your mixture from getting watery.
- 1 pound chocolate almond bark: This is your melting chocolate for dipping. It melts smoothly and sets up perfectly firm, giving your candy a professional finish.
- 1 cup white candy melts or white almond bark: For that beautiful drizzle on top, adding an extra touch of elegance.
How to Make Martha Washington Candy
Get ready for some serious kitchen fun! This process is so straightforward, you’ll be wondering why you haven’t made these sooner.
- First things first, let’s get that base mixture going! In a really big bowl, toss in your room temperature butter. Now, add the confectioners’ sugar, sweetened condensed milk, and that lovely vanilla extract. Grab your electric mixer (or a strong spoon and some elbow grease!) and beat it all together until it’s super well combined and wonderfully smooth. It’s going to look like a thick, sweet frosting, and trust me, you’ll want to sneak a taste!
- Now for the good stuff! Stir in the sweetened shredded coconut, the chopped pecans, and those beautifully blotted maraschino cherries. Make sure everything is evenly distributed – you want that amazing flavor in every single bite. Once mixed, cover your bowl and pop it into the fridge for about 30 minutes. This chill time is super important; it helps the mixture firm up just enough to make handling it a breeze.
- While your mixture is chilling, let’s get prepped. Line two baking sheets with parchment paper or wax paper. This is going to be your landing pad for all those delicious little candy balls and will make cleanup a cinch!
- Time to roll! Once your mixture is firm enough, take it out of the fridge. Scoop out about 1-inch portions of the mixture. Roll them gently between your palms into neat little balls. Don’t worry if they’re not perfectly uniform; homemade is charming! Place each rolled ball onto your prepared baking sheets, leaving a little space between them.
- Another chill session! Once you’ve rolled all your delightful candies, slide those baking sheets back into the refrigerator. Let them chill for at least 2 hours, or until they’re really firm. This step is crucial for ensuring they hold their shape and are easy to dip in chocolate without falling apart.
- Chocolate time! Grab half of your chocolate almond bark and break it into pieces. Place it in a microwave-safe bowl. Heat it in 30-second intervals, stirring well after each, until it’s completely smooth and wonderfully melted. Be careful not to overheat it, or it might seize up.
- Dip ’em! This is where the magic happens! Take one of your firm candy balls, stick a toothpick or use a proper dipping tool into it, and dip it into the melted chocolate. Make sure it’s fully coated. Gently tap off any excess chocolate against the side of the bowl. Place the dipped candy back onto your lined baking sheet.
- Repeat and repeat again! Once you’ve dipped all the candies from your first baking sheet, pop that sheet back into the fridge to help the chocolate set quickly. While that batch is setting, melt the remaining half of your chocolate almond bark and repeat the dipping process with your second batch of chilled candies.
- Fancy drizzle, anyone? Once all your chocolate-dipped candies are set, it’s time for the final flourish! Melt your white candy melts or white almond bark in a separate microwave-safe bowl, using the same gentle heating method. Once smooth, use a spoon or a piping bag with a tiny snipped corner to drizzle pretty lines and zigzags over the top of each candy. This isn’t just for looks; it adds another layer of sweet, creamy goodness!
- The hardest part: waiting! Let the chocolate drizzle set completely before you start sampling (I know, it’s tough!). You can place them back in the fridge briefly to speed this up. Once set, these delectable Martha Washington Candies are ready to be devoured!
Substitutions & Additions
Part of the fun of baking (or no-baking!) is making a recipe your own. Here are some ideas to shake things up:
- Nut Swap: Not a pecan person? No problem! Walnuts, almonds, or even a mix of your favorite chopped nuts would be delicious.
- Chocolate Choices: While almond bark is fantastic for easy melting, you can absolutely use good quality melting chocolate, semi-sweet chocolate, milk chocolate, or dark chocolate chips (you’ll just need to temper them or add a bit of coconut oil for smoother dipping).
- Fruity Fun: Instead of maraschino cherries, try finely chopped dried cranberries, golden raisins, or even candied orange peel for a different twist.
- Extra Flavor Boost: A tiny pinch of salt in the filling can really make the flavors pop. You could also add a drop or two of almond extract for an extra layer of nutty aroma.
- Spice it Up: A whisper of cinnamon or nutmeg would be lovely, especially around the holidays.
- Make it a Bar: Don’t feel like rolling balls? Press the mixture into a parchment-lined 9×13 inch pan, chill, then pour melted chocolate over the top. Once set, cut into squares for a no-fuss bar version. It’s just as delicious as any delightful no-bake desserts.
Tips for Success
Even though this recipe is super simple, a few little pointers can make it absolutely perfect every time!
- Room Temperature Butter: This is a non-negotiable! Soft butter will blend seamlessly with the other ingredients, giving you a smooth, lump-free base for your candy.
- Blot Those Cherries: Seriously, don’t skip blotting the maraschino cherries dry with paper towels. Excess moisture can make your candy mixture too sticky and difficult to roll.
- Chilling is Key: The two chilling steps are vital. The first chill makes the mixture pliable enough to roll, and the second chill ensures the balls are firm enough for dipping without losing their shape or melting in the warm chocolate.
- Don’t Overheat Chocolate: When melting your almond bark or candy melts, go slow and steady with 30-second intervals in the microwave. Overheated chocolate can become thick and clumpy, making it impossible to dip.
- Use a Dipping Tool: A candy dipping tool or even a simple toothpick can make dipping much easier and less messy than using a fork or your fingers.
- Work in Batches: Keep the candy balls you’re not dipping in the fridge to stay firm. This helps maintain their shape and prevents them from getting too soft while you’re working.
How to Store Martha Washington Candy
These candies are so good, they might not last long, but here’s how to keep them fresh!
- At Room Temperature: If your home is cool (below 70°F/21°C), you can store Martha Washington Candies in an airtight container for up to 3-4 days. Just make sure they’re not exposed to direct sunlight or heat, as the chocolate can melt.
- In the Refrigerator: For longer storage, keep them in an airtight container in the refrigerator for up to 2 weeks. They might be a little firmer straight from the fridge, but they’re still delightful. Let them sit at room temperature for 10-15 minutes before serving for optimal texture.
- Freezing: Yes, you can freeze them! Place the set candies in a single layer on a baking sheet and freeze until solid. Once frozen, transfer them to a freezer-safe airtight container or freezer bag, separating layers with parchment paper. They’ll keep in the freezer for up to 2-3 months. Thaw them in the refrigerator overnight or at room temperature for a few hours before serving.
FAQs
Got questions? I’ve got answers!
Q: Can I use different nuts or dried fruits?
A: Absolutely! Feel free to experiment with your favorite chopped nuts like walnuts or almonds. For dried fruit, cranberries or chopped dates would also work wonderfully. Just remember to blot any moist fruits dry!
Q: My mixture is too sticky to roll. What can I do?
A: This usually means it needs more chill time. Pop it back in the fridge for another 15-30 minutes. If it’s still too sticky, you can try adding a tablespoon or two more of confectioners’ sugar until it’s easier to handle.
Q: My chocolate seized up when melting. Can I fix it?
A: Unfortunately, seized chocolate is hard to fully recover. It usually happens from overheating or getting even a tiny drop of water in it. To prevent this, melt slowly in short intervals, stirring often, and make sure your bowl and utensils are completely dry. If it seizes, it’s best to start with a fresh batch of chocolate.
Q: Can I make these ahead for a party?
A: Yes, these are perfect for making ahead! You can prepare the candy up to a week in advance and store them in the refrigerator, or even freeze them for longer storage as outlined above. They’re a fantastic, stress-free dessert for any gathering!
For more delicious recipes and kitchen inspiration, be sure to follow us on Pinterest!

Grandma's Easy No-Bake Martha Washington Candy: A Sweet Taste of Southern Charm!
Ingredients
Equipment
Method
- Step 1: In a large bowl, beat room temperature butter, confectioners' sugar, sweetened condensed milk, and vanilla extract with an electric mixer until smooth and well combined.
- Step 2: Stir in sweetened shredded coconut, chopped pecans, and blotted maraschino cherries until evenly distributed. Cover the bowl and refrigerate for about 30 minutes to firm up the mixture.
- Step 3: While the mixture chills, line two baking sheets with parchment paper or wax paper.
- Step 4: Once the mixture is firm, scoop out about 1-inch portions and roll them gently between your palms into neat little balls. Place each rolled ball onto your prepared baking sheets, leaving a little space between them.
- Step 5: Slide the baking sheets with the rolled candies back into the refrigerator. Let them chill for at least 2 hours, or until they are really firm. This step is crucial for ensuring they hold their shape for dipping.
- Step 6: Grab half of your chocolate almond bark and break it into pieces. Place it in a microwave-safe bowl. Heat it in 30-second intervals, stirring well after each, until it's completely smooth and wonderfully melted. Be careful not to overheat it.
- Step 7: Take one of your firm candy balls, stick a toothpick or use a proper dipping tool into it, and dip it into the melted chocolate. Make sure it's fully coated. Gently tap off any excess chocolate against the side of the bowl. Place the dipped candy back onto your lined baking sheet.
- Step 8: Once you've dipped all the candies from your first baking sheet, pop that sheet back into the fridge to help the chocolate set quickly. While that batch is setting, melt the remaining half of your chocolate almond bark and repeat the dipping process with your second batch of chilled candies.
- Step 9: Once all your chocolate-dipped candies are set, melt your white candy melts or white almond bark in a separate microwave-safe bowl, using the same gentle heating method. Once smooth, use a spoon or a piping bag with a tiny snipped corner to drizzle pretty lines and zigzags over the top of each candy.
- Step 10: Let the chocolate drizzle set completely before sampling. You can place them back in the fridge briefly to speed this up. Once set, these delectable Martha Washington Candies are ready to be devoured!