Hey there, baking buddies! Get ready for a recipe that feels like a warm hug and tastes like pure holiday magic, even if it’s not the holidays! These Sweetened Condensed Milk Snowball Cookies are the kind of treat that instantly transports you back to grandma’s kitchen or a cozy afternoon curled up with a good book and a cup of tea. They’re incredibly simple, use just a handful of pantry staples, and practically melt in your mouth like little sugary snowflakes. Seriously, if you’re looking for a quick win in the kitchen that yields impressive results, you found it. Let’s bake!
Why You’ll Love This Recipe
Oh, where do I even begin? These cookies are just the best for so many reasons:
- Fast: No chilling required! You can mix, roll, and bake these beauties in under 30 minutes. Perfect for a spontaneous baking session.
- Easy: Seriously, if you can use a mixer, you can make these. The condensed milk does most of the heavy lifting, making the dough super forgiving.
- Giftable: Packaged up in a cute tin or bag, these look absolutely stunning dusted in sugar. They make a perfect homemade gift that everyone will adore.
- Crowd-Pleasing: Their simple, sweet flavor and delicate texture appeal to just about everyone. Watch them disappear from the cookie plate!
Ingredients
You probably have most of these hanging out in your pantry and fridge right now!
- 1 cup (2 sticks) unsalted butter, softened: Make sure it’s really soft, but not melted! Leave it out on the counter for an hour or two. This is key for creaming properly.
- 1 (14-ounce) can sweetened condensed milk: This is the star! It adds sweetness, moisture, and helps create that wonderfully tender texture. Make sure it’s sweetened condensed milk, not evaporated milk!
- 2 cups all-purpose flour: Just your standard flour works perfectly here.
- 1 teaspoon baking powder: A little leavening to give them just the right amount of puffiness.
- 1 cup confectioners’ sugar, for dusting: Also known as powdered sugar! This gives them their signature “snowball” look and extra sweetness. You might need a little more or less depending on how generous you are with the dusting.
How to Make It
Let’s get those hands (or mixers!) working! Follow along, and you’ll have a batch of these delightful cookies in no time.
Step 1: Cream the Butter. Grab a large mixing bowl and your softened butter. Use an electric mixer to beat the butter until it’s lovely and light and fluffy. This incorporates air, which helps with the cookie’s texture. Scrape down the sides of the bowl as needed.
Step 2: Add the Sweet Stuff. With your mixer on low speed, gradually pour in that can of sweetened condensed milk. Keep mixing until it’s fully combined with the butter mixture. Don’t worry if it looks a little strange at first; just keep mixing until it’s smooth.
Step 3: Combine Dry and Wet. In a separate medium bowl, give your all-purpose flour and baking powder a quick whisk together. This helps distribute the baking powder evenly. Now, with the mixer still on low speed, gradually add the dry ingredients to the wet ingredients. Mix just until everything comes together and a soft dough forms. Don’t overmix!
Step 4: Prep for Baking. Time to get ready for cookie action! Preheat your oven to 350°F (175°C). Grab a baking sheet and line it with parchment paper. This makes cleanup a breeze and prevents sticking.
Step 5: Scoop and Roll. Using a tablespoon or a small cookie scoop, scoop out portions of the dough. The dough will be soft! Gently roll each portion between your palms to form about 1-inch balls. Place the dough balls onto your prepared baking sheet, leaving a little space between each one because they will spread just a tiny bit.
Step 6: Bake ‘Em Up. Pop the baking sheet into your preheated oven. Bake for 10-12 minutes. You’re looking for the edges to be just lightly golden brown. The centers might still look a little pale, and that’s okay! They will continue to set as they cool.
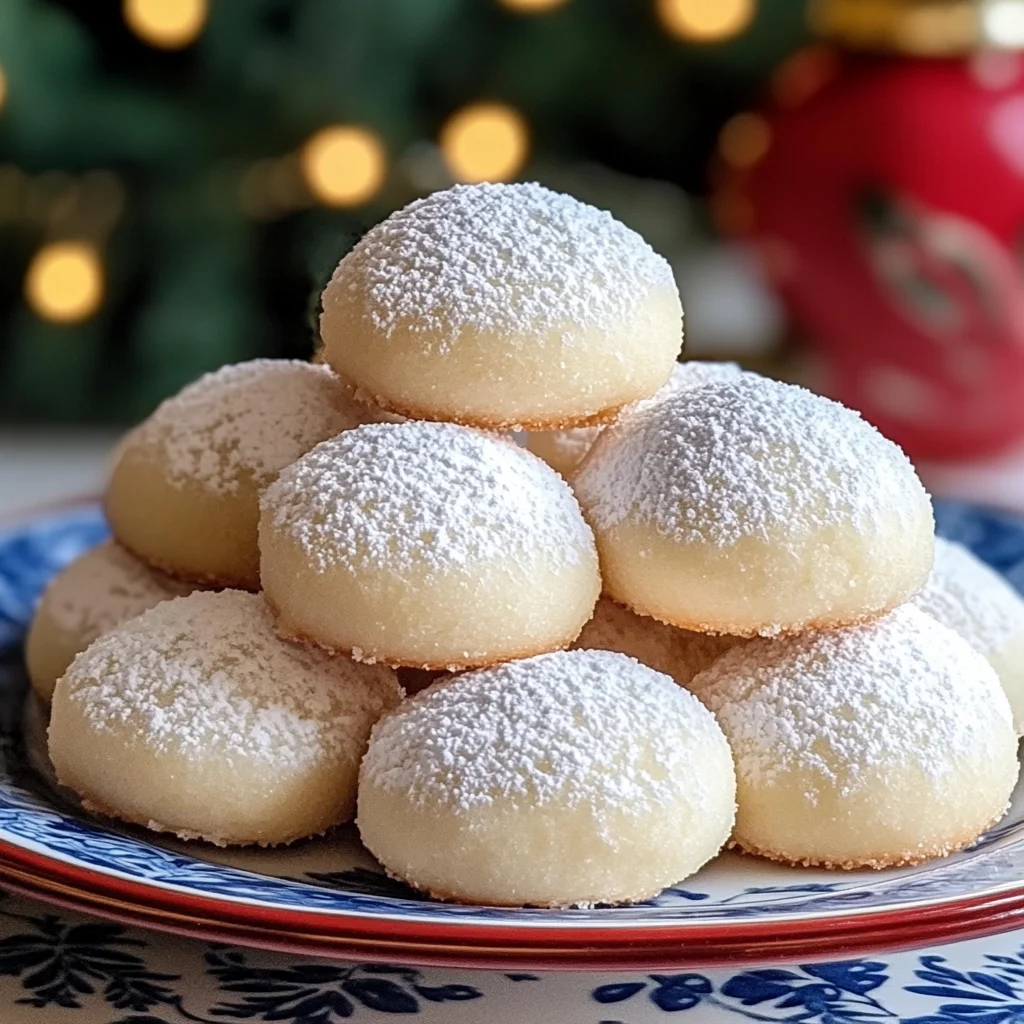
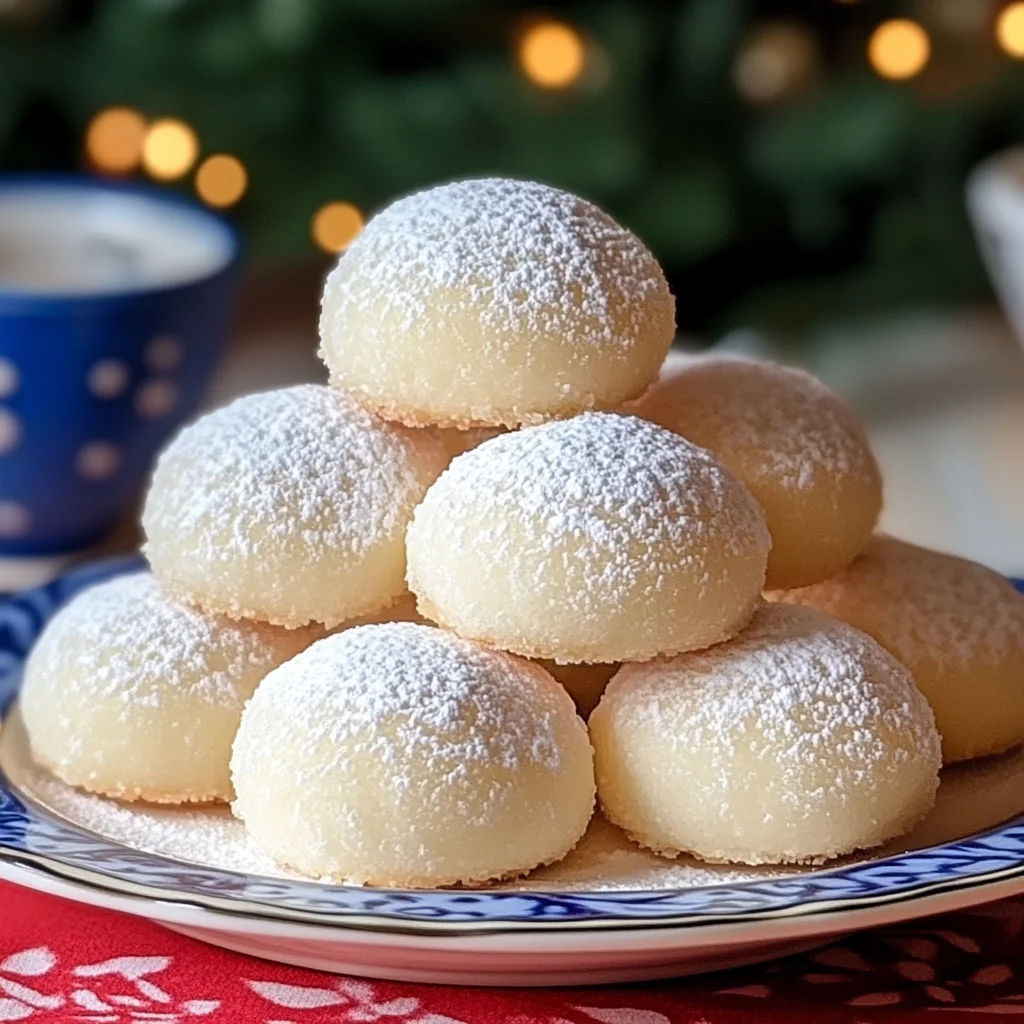
Step 7: Cool and Dust! Let the cookies hang out on the baking sheet for just a few minutes after they come out of the oven – maybe 5-10 minutes. They’re delicate when hot! Then, carefully transfer them to a wire rack using a spatula to cool completely. Once they are completely cool (this is important!), place the confectioners’ sugar in a shallow bowl or plate and generously roll or dust each cookie in the sugar until it looks like a perfect little snowball. I like to use a sieve for dusting over the top for an extra pretty finish!
Substitutions & Additions
Want to play around a bit? These cookies are a great base for simple variations!
- Nuts: Chopped pecans or walnuts are a classic addition to snowball-style cookies. Fold about 1/2 cup of finely chopped nuts into the dough with the dry ingredients.
- Extracts: A teaspoon of vanilla extract is always welcome, but you could also try almond extract for a different flavor profile, or even a touch of peppermint extract for a holiday twist.
- Spices: A pinch of cinnamon or nutmeg folded into the dough could add a cozy warmth.
- Rolling Variations: Instead of (or in addition to!) confectioners’ sugar, you could roll them in finely chopped nuts, cocoa powder mixed with a little sugar, or even festive sprinkles once they’ve cooled slightly but before the main sugar dusting.
Tips for Success
A few little pointers to make sure your Snowball Cookies turn out perfectly every time:
- Use Softened Butter: I mentioned this in the ingredients, but it’s worth repeating! Cold butter won’t cream properly, and melted butter will make the dough greasy. Room temperature is key.
- Don’t Overmix: Once you add the flour, mix only until the dough comes together. Overmixing can develop the gluten in the flour, resulting in tougher cookies.
- Cool Completely Before Dusting: If you try to dust the cookies while they are still warm, the confectioners’ sugar will melt and disappear, leaving a sticky mess instead of a snowy finish. Patience, my friend!
- Prep Ahead: You can make the dough ahead of time and keep it covered in the refrigerator for 1-2 days. Let it sit at room temperature for about 15-20 minutes before rolling, as it will be firmer when cold.
How to Store It
Once your beautiful Snowball Cookies are baked and dusted, you’ll want to keep them fresh!
Store cooled cookies in an airtight container at room temperature. They should stay fresh and delicious for about 5-7 days. If you layered them in the container, you might want to put a small piece of parchment or wax paper between layers to prevent the sugar from sticking.
You can also freeze these cookies! Once baked, cooled, and dusted, place them in a single layer on a baking sheet and freeze until solid. Then, transfer them to a freezer-safe container or bag for up to 2-3 months. Thaw at room temperature before serving.
FAQs
Got questions? I’ve got answers!
Q: Why did my cookies spread too much?
A: This can happen if your butter was too soft (or slightly melted) or if your oven temperature is off. Ensure your butter is just softened, not greasy, and maybe double-check your oven temp with an oven thermometer if this happens often.
Q: Can I use evaporated milk instead of sweetened condensed milk?
A: No, please don’t! They are very different products. Sweetened condensed milk is thick and sweet, while evaporated milk is unsweetened and thinner. Using evaporated milk will not work in this recipe.
Q: Do I need to chill the dough before rolling?
A: Nope! That’s one of the beauties of this recipe. The dough is soft but usually firm enough to roll right away. If your kitchen is super warm, you could pop it in the fridge for 10-15 minutes if needed, but it’s typically not necessary.
Q: Can I add nuts?
A: Absolutely! Finely chopped pecans or walnuts are traditional and delicious in snowball cookies. Fold them into the dough with the flour mixture.

Easy Melt-in-Your-Mouth Sweetened Condensed Milk Snowball Cookies
Ingredients
Equipment
Method
- Step 1: Cream the softened butter in a large mixing bowl using an electric mixer until lovely, light, and fluffy. Scrape down the sides of the bowl as needed.
- Step 2: With your mixer on low speed, gradually pour in the can of sweetened condensed milk. Keep mixing until it's fully combined and smooth with the butter mixture.
- Step 3: In a separate medium bowl, whisk together the all-purpose flour and baking powder. With the mixer still on low speed, gradually add the dry ingredients to the wet ingredients. Mix just until everything comes together and a soft dough forms. Don't overmix!
- Step 4: Preheat your oven to 350°F (175°C). Line a baking sheet with parchment paper.
- Step 5: Using a tablespoon or a small cookie scoop, scoop out portions of the dough. Roll each portion gently between your palms to form about 1-inch balls. Place the dough balls onto your prepared baking sheet, leaving a little space between each one.
- Step 6: Bake for 10-12 minutes, until the edges are just lightly golden brown. The centers might still look a little pale, and that's okay! They will continue to set as they cool.
- Step 7: Let the cookies cool on the baking sheet for 5-10 minutes, then carefully transfer them to a wire rack using a spatula to cool completely. Once they are completely cool, place the confectioners' sugar in a shallow bowl or plate and generously roll or dust each cookie in the sugar until it looks like a perfect little snowball. (Optional: Use a sieve for dusting over the top for an extra pretty finish).