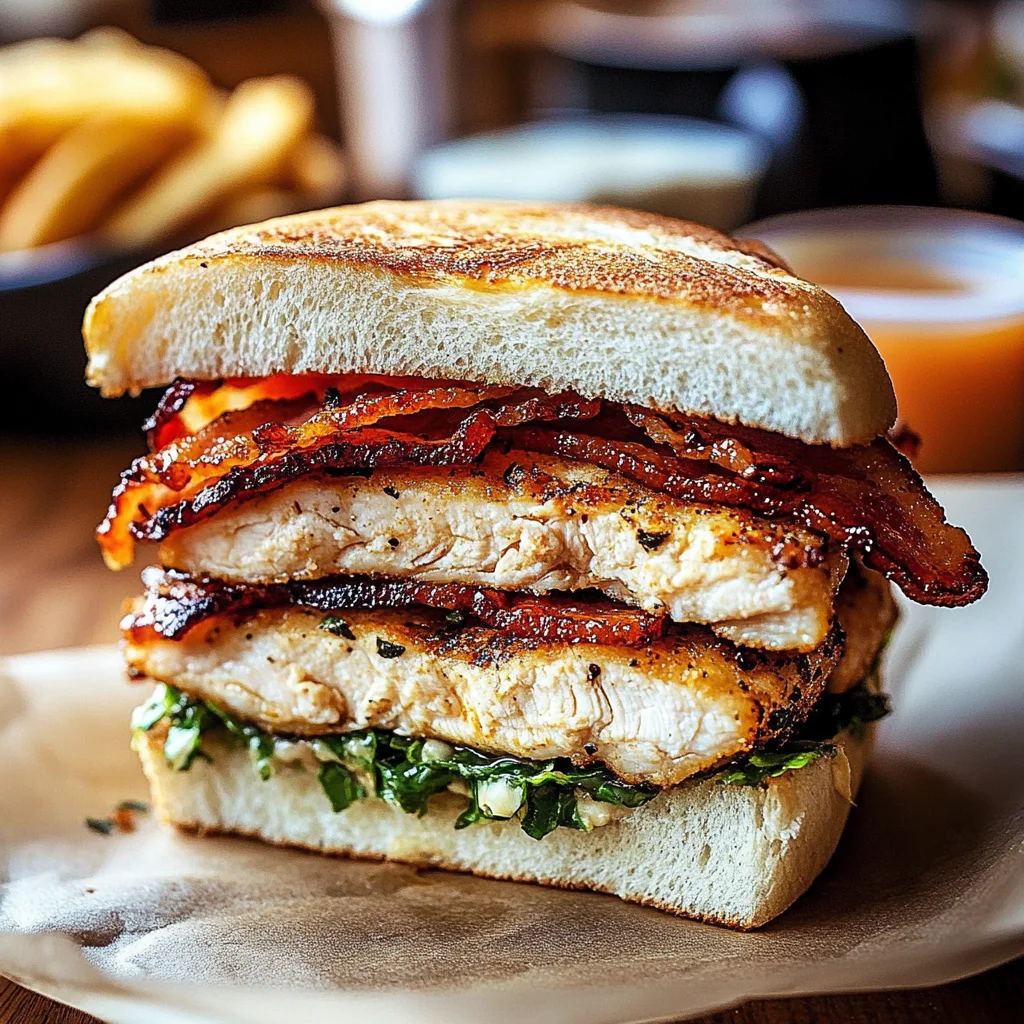
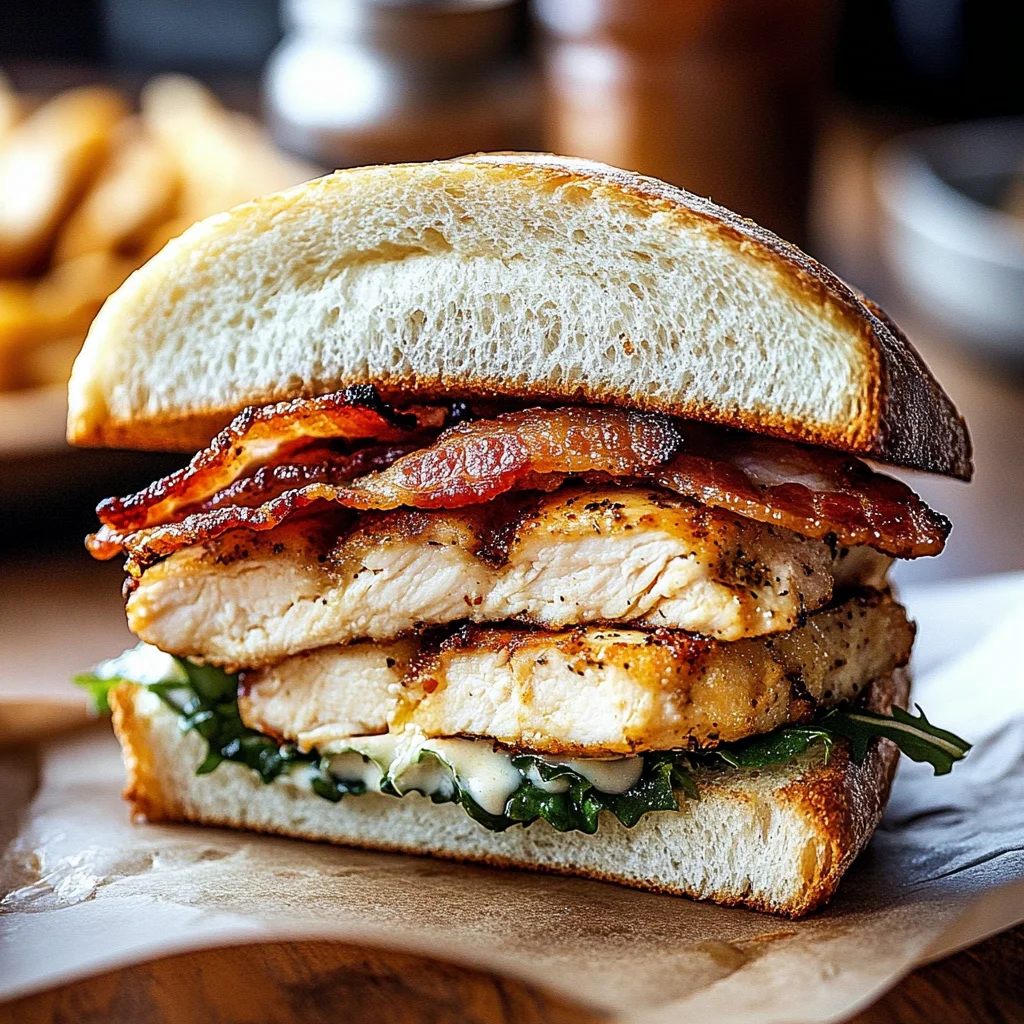
Oh boy, get ready for a serious comfort food hug in sandwich form! Do you remember those days, maybe after school or on a lazy Saturday, when all you wanted was something warm, cheesy, and utterly satisfying? Something that just hit the spot? Well, my friend, this Crispy Bacon Ranch Chicken Melt is exactly that kind of magic. It takes all the best parts of crispy fried chicken, salty bacon, gooey melted cheddar, and creamy ranch, and smashes them together between two perfectly grilled slices of bread. It’s surprisingly easy to pull off, doesn’t take forever, and trust me, everyone who takes a bite will be asking for the recipe. It’s the perfect weeknight dinner surprise or a showstopper lunch!
Why You’ll Love This Recipe
- Fast: Ready in under 30 minutes!
- Easy: Simple steps, perfect for beginners.
- Giftable: Okay, maybe not giftable raw, but bring a batch to a potluck and watch them disappear!
- Crowd-pleasing: Who doesn’t love chicken, bacon, cheese, and ranch?!
- So Satisfying: Seriously, this sandwich is pure comfort.
Ingredients
Gather ’round, here’s what you’ll need to create this masterpiece. Most of these are probably already hanging out in your pantry and fridge!
- 2 boneless, skinless chicken breasts: The main event! We’ll slice them thin so they cook fast and evenly.
- 1/2 cup all-purpose flour: Our first step in getting that crispy coating.
- 1 egg, beaten: The “glue” for our breadcrumbs.
- 1 cup seasoned breadcrumbs: The key to the crispy part! Store-bought is great, or you can season your own plain ones with a little extra Italian seasoning or garlic powder.
- 1/2 teaspoon garlic powder: Adds that essential savory punch to the chicken.
- 1/2 teaspoon paprika: For a little color and a touch of mild pepper flavor.
- Salt, to taste: Gotta season those layers!
- Pepper, to taste: Freshly cracked is always nice.
- 4 slices bacon, cooked crispy: Because bacon makes everything better, right?
- 4 slices cheddar cheese: The melt factor! Use your favorite kind of cheddar – sharp, mild, or even white cheddar works.
- 4 slices thick bread: Sturdy bread is key here so it holds up to all the delicious fillings and gets nice and golden brown when grilled. Texas toast or a hearty country loaf are perfect.
- 2 tablespoons ranch dressing: That creamy, zesty flavor that ties it all together. Feel free to use your favorite bottled kind or even homemade!
- 2 tablespoons butter: For grilling the sandwiches to golden, buttery perfection.
How to Make It
Alright, let’s get cooking! Follow these steps and you’ll have a delicious chicken melt in no time.
- Prep the Chicken: Take your chicken breasts and carefully slice them horizontally through the middle. You’re aiming for two thinner cutlets from each breast, so you’ll end up with four pieces total. Pat them dry with a paper towel. Now, sprinkle both sides generously with salt, pepper, garlic powder, and paprika.
- Set up Dredging Stations: Grab three shallow dishes or plates. Put the flour in the first, the beaten egg in the second, and the seasoned breadcrumbs in the third. This is like an assembly line for that crispy coating!
- Coat the Chicken: Take each seasoned chicken cutlet and first dredge it in the flour, shaking off any excess. Then, dip it into the beaten egg, letting any extra drip off. Finally, press it into the seasoned breadcrumbs, making sure to coat both sides completely. Give it a gentle press with your hand to help the breadcrumbs really stick.
- Fry the Chicken: Heat about 1/4 inch of oil (like vegetable or canola) in a large skillet over medium heat. Once the oil is hot (you can test a little breadcrumb; if it sizzles, it’s ready!), carefully place the breaded chicken cutlets in the skillet. Don’t overcrowd the pan; you might need to cook them in batches. Fry for about 4–5 minutes per side. You’re looking for a beautiful golden brown crust and for the chicken to be cooked all the way through (the internal temperature should reach 165°F). Remove the cooked chicken from the skillet and set it aside on a plate.
- Assemble the Sandwiches: Lay out your four slices of bread. Spread about 1/2 tablespoon of ranch dressing on one side of each slice. Now, for building! Take two slices of bread and place them ranch-side UP. On one of those slices, layer one of your crispy chicken cutlets, a slice of crispy bacon (break it to fit if needed), and a slice of cheddar cheese. Top with the second slice of bread, ranch-side DOWN. Repeat with the remaining ingredients to make two sandwiches.
- Grill the Melts: Wipe out the skillet you used for the chicken (or grab a clean one). Add the butter and melt it over medium heat. Once the butter is bubbly, carefully place the assembled sandwiches in the skillet. Grill for 2–3 minutes per side, or until the bread is golden brown and toasted, and the cheese is beautifully melted and gooey. You might need to press down gently with a spatula.
- Serve it Up: Remove the melts from the skillet. Carefully slice each sandwich in half, either straight down or diagonally (diagonal is always more fun!). Serve immediately while they’re hot and the cheese is melty!
Substitutions & Additions
Want to mix things up? Go for it! This recipe is pretty forgiving and totally customizable.
- Cheese: Swiss, provolone, Monterey Jack, or even a spicy pepper jack would be delicious instead of cheddar.
- Ranch: Don’t love ranch? Try blue cheese dressing, a smoky BBQ sauce, or even just a smear of mayo.
- Chicken: Use leftover rotisserie chicken (skip the breading/frying step) or even breaded chicken tenders from the freezer aisle for a super-fast option.
- Bread: Any sturdy loaf works! Sourdough, challah, or even ciabatta rolls cut in half could be great.
- Make it Spicy: Add a pinch of cayenne to the breadcrumbs, use pepper jack cheese, or drizzle with hot sauce before serving.
- Add Veggies: Sautéed onions, mushrooms, or even a few spinach leaves could be layered inside.
Tips for Success
A few little pointers to make sure your chicken melts turn out perfect every time!
- Thin Cutlets are Key: Slicing the chicken breasts thin ensures they cook quickly and evenly without burning the breading.
- Season Every Layer: Don’t just season the chicken! Make sure your breadcrumbs are well-seasoned, and consider a pinch of salt and pepper on the cheese or bacon if you like.
- Don’t Skimp on the Fat: Using enough oil to fry the chicken and enough butter to grill the sandwich is crucial for that golden, crispy exterior.
- Watch the Heat: Medium heat is your friend. Too high and the outside will burn before the inside is cooked; too low and you won’t get that beautiful crispness.
- Don’t Overcrowd: Cook the chicken and grill the sandwiches in batches if necessary so they have enough space in the pan to brown properly. I find cooking two sandwiches at a time usually works best in a standard large skillet.
- Prep Ahead: You can cook the bacon and bread the chicken cutlets a day in advance. Store them separately in the fridge, then just fry the chicken and assemble/grill the sandwiches when you’re ready to eat!
How to Store It
Honestly, these are best eaten hot and fresh right off the skillet! The crispy bread and gooey cheese are at their peak. However, if you do have leftovers:
- Store any leftover sandwiches in an airtight container in the refrigerator for up to 2 days.
- To reheat, the best way is in a skillet over medium heat, covered, or in a toaster oven or air fryer until warmed through and crispy again. Microwaving will make it soft and less appealing.
- Leftover cooked chicken can be stored separately for 3-4 days in the fridge and used for other meals or sandwiches.
FAQs
Got questions? I’ve got answers!
Q: Can I bake the chicken instead of frying?
A: Yes! To bake, place the breaded chicken on a wire rack set over a baking sheet. Bake at 400°F (200°C) for 20-25 minutes, flipping halfway through, until golden and cooked through. It won’t be quite as crispy as fried, but it’s a healthier option!
Q: What should I serve with these melts?
A: They’re fantastic with a side of potato chips (extra crunch!), a simple green salad, coleslaw, or even some tomato soup for dipping.
Q: My cheese isn’t melting properly, what’s wrong?
A: Make sure your skillet isn’t too hot (which might burn the bread before the cheese melts) or too low (not enough heat to melt). Covering the skillet while grilling the sandwich can help trap heat and encourage the cheese to melt faster and more evenly.

Crispy Bacon Ranch Chicken Melt
Ingredients
Equipment
Method
- Step 1: Prep the Chicken: Take your chicken breasts and carefully slice them horizontally through the middle to create four thinner cutlets. Pat them dry with a paper towel. Sprinkle both sides generously with salt, pepper, garlic powder, and paprika.
- Step 2: Set up Dredging Stations: Grab three shallow dishes or plates. Put the flour in the first, the beaten egg in the second, and the seasoned breadcrumbs in the third.
- Step 3: Coat the Chicken: Take each seasoned chicken cutlet and first dredge it in the flour, shaking off any excess. Then, dip it into the beaten egg, letting any extra drip off. Finally, press it into the seasoned breadcrumbs, making sure to coat both sides completely. Give it a gentle press.
- Step 4: Fry the Chicken: Heat about 1/4 inch of oil in a large skillet over medium heat. Once the oil is hot, carefully place the breaded chicken cutlets in the skillet. Don't overcrowd the pan; cook in batches if needed. Fry for about 4–5 minutes per side until golden brown and cooked through (internal temperature 165°F). Remove the cooked chicken from the skillet and set it aside on a plate.
- Step 5: Assemble the Sandwiches: Lay out your four slices of bread. Spread about 1/2 tablespoon of ranch dressing on one side of each slice. On one slice of bread (ranch-side UP), layer a crispy chicken cutlet, a slice of crispy bacon, and a slice of cheddar cheese. Top with a second slice of bread (ranch-side DOWN). Repeat with the remaining ingredients to make two sandwiches.
- Step 6: Grill the Melts: Wipe out the skillet or use a clean one. Add the butter and melt it over medium heat. Once the butter is bubbly, carefully place the assembled sandwiches in the skillet. Grill for 2–3 minutes per side, or until the bread is golden brown and toasted and the cheese is beautifully melted and gooey. Press down gently with a spatula if needed.
- Step 7: Serve it Up: Remove the melts from the skillet. Carefully slice each sandwich in half and serve immediately while hot and melty.