There’s something uniquely nostalgic about fudge, isn’t there? Maybe it’s the way it melts in your mouth or the memories it sparks from childhood holidays and family gatherings. Now, imagine that classic, creamy indulgence infused with the warm, comforting flavor of banana. That’s exactly what this Banana Fudge recipe brings to your kitchen—a sweet twist on a timeless favorite that’s surprisingly easy to make and utterly unforgettable. Whether you’re craving a quick homemade gift or a crowd-pleasing dessert to wow your guests, this banana-flavored fudge is a cozy delight you’ll love sharing (or sneaking bites of when no one’s looking!).
What I adore about this recipe is how it combines simple ingredients to create something that tastes like a candy shop masterpiece but without the fuss. Plus, it’s a fun way to use up your banana flavoring stash and add a sunny pop of yellow to your dessert tray. If you’re a fan of rich, creamy sweets with a hint of fruity charm, keep reading—I’m about to walk you through every step, along with my best tips and some creative ideas to make this fudge your own.
Why You’ll Love Banana Fudge
- Fast: From start to finish, this recipe takes under an hour of active time, plus a little chill time.
- Easy: No complicated techniques or hard-to-find ingredients—perfect for fudge beginners.
- Giftable: Wrapped up in parchment, this fudge makes a thoughtful homemade gift for friends and family.
- Crowd-pleasing: Its creamy texture and unique banana flavor always get rave reviews at parties and potlucks.
Ingredients
Before you start, let’s talk about the ingredients that make this Banana Fudge so special. Each one plays an important role in achieving that perfect creamy texture and rich flavor:
- Banana flavoring (2 teaspoons): This clear, concentrated essence brings the unmistakable banana taste without adding any mushiness or extra moisture.
- Yellow food color gel (½ teaspoon): Just a tiny bit adds that cheerful, sunny hue that makes the fudge as pretty as it tastes.
- Salted sweet cream butter (¾ cup): Butter adds richness and smoothness; salted butter balances the sweetness perfectly.
- Half and half (½ cup): Provides creaminess without being too heavy, essential for that melt-in-your-mouth feel.
- Heavy cream (⅓ cup): Adds extra decadence and helps the fudge set just right.
- Clear vanilla flavoring (1 teaspoon): Enhances all the flavors without adding any color or interfering with the banana note.
- Granulated sugar (3 cups plus 2 tablespoons): The backbone of fudge, it creates that classic sweet texture.
- White baking chips (1¾ cups): I highly recommend Ghirardelli for their smooth melt and rich flavor, giving the fudge a creamy base.
- Marshmallow fluff (7 ounces): This ingredient adds an irresistible lightness and chewiness that sets this fudge apart from traditional recipes.
- Crushed Nilla wafers (2 tablespoons, optional): A delightful garnish that adds a little crunch and a subtle vanilla note on top.
How to Make Banana Fudge
Ready to make some magic? Follow along step-by-step, and I’ll share tips to ensure your fudge turns out perfectly smooth and bursting with banana flavor.
Step 1: Prep Your Pan
Line a 9×9-inch baking dish with parchment paper, making sure to extend it up all the sides for easy fudge removal later. Lightly spray the parchment with nonstick cooking spray. This simple prep step saves you from sticky fingers and helps the fudge come out in perfect squares.
Step 2: Mix Banana Flavor and Color
In a small bowl, combine your banana flavoring and yellow food color gel. Stir gently to blend and set this aside for the final mixing. This keeps your banana flavor concentrated and ensures even coloring throughout your fudge.
Step 3: Melt Butter and Creams
Using a heavy-bottomed saucepan over medium heat, melt the salted sweet cream butter together with the half and half, heavy cream, and clear vanilla flavoring. Stir continuously until everything is fully melted and combined. This step is crucial to prevent scorching and to create a smooth base for your fudge.
Step 4: Add Sugar and Simmer
Gradually add the granulated sugar and stir constantly as the mixture heats. Bring it to a simmer, which should take about 6–7 minutes. Keep stirring and allow it to simmer for an additional 3 minutes. This sugar-cooking step is what gives your fudge structure and that melt-in-your-mouth texture. Trust me, patience here pays off!
Step 5: Incorporate White Baking Chips
Remove the saucepan from heat and immediately add your white baking chips. Cover the pot and let it sit for 3–4 minutes. The residual heat will gently melt the chips without burning them, resulting in a luxuriously creamy mixture. After resting, stir until the chips are completely melted and fully incorporated.
Step 6: Stir in Marshmallow Fluff
Next, add the marshmallow fluff to the mixture. Stir vigorously until the fudge is smooth, creamy, and slightly glossy. This step gives the fudge a unique lightness and chew you don’t get with classic fudge recipes.
Step 7: Add Banana Flavor and Color
Pour in the banana flavoring and yellow food color mixture you prepared earlier. Stir thoroughly until the color is even and your fudge has that beautiful banana glow. This is the moment your fudge really comes to life with flavor.
Step 8: Spread and Garnish
Transfer the fudge into your prepared baking dish, spreading it evenly with a spatula. If you want to add a little extra texture and vanilla crunch, sprinkle the top with crushed Nilla wafers. Then, cover the dish with aluminum foil to protect it while it sets.
Step 9: Let It Set
Allow the fudge to rest at room temperature for 30 minutes. After this, pop it into the refrigerator for at least 4 hours until it’s nicely set and firm enough to cut. Once chilled, lift the fudge out using the parchment paper and slice into 25 pieces (5 by 5). Store your fudge in the refrigerator until it’s time to serve.
Substitutions & Additions
Feel free to get creative or adjust the recipe to suit your taste and pantry. Here are some ideas to make this banana fudge uniquely yours:
- Dairy substitutions: Use coconut cream or almond milk creamers if you want a dairy-free version. The texture will be slightly different but still delicious!
- Flavor twists: Add a tablespoon of cream cheese for tangy richness or a splash of rum or bourbon for an adult-friendly treat.
- Chocolate variations: Swap white baking chips for banana-flavored or vanilla-flavored white chocolate chips for an extra layer of flavor.
- Nutty upgrades: Toss in chopped toasted walnuts or macadamia nuts for crunch and contrast.
- Fruit infusions: Mix in freeze-dried banana pieces or swirl in some raspberry jam to complement the banana flavor.
- Garnishes: Instead of crushed Nilla wafers, try toasting coconut flakes or sprinkling mini chocolate chips on top for a fun twist.
If you’re a fan of banana-inspired desserts, you might also enjoy the comforting flavors in my Pumpkin Banana Loaf—a moist and spiced bread that pairs beautifully with a cup of coffee or tea.
Tips for Success
Making fudge is easier than it seems, but a few little tricks can make all the difference between dreamy and disappointing. Here’s what I’ve learned over the years:
- Use a heavy-bottomed saucepan: This prevents hot spots that can burn your sugar mixture.
- Don’t rush the simmering: Stir constantly and watch for a gentle simmer, not a rolling boil, to get the perfect texture.
- Be patient when melting chips: Letting the white chocolate chips sit covered allows them to melt gently, so your fudge stays silky without lumps.
- Use clear vanilla flavoring: It won’t affect the fudge’s color like regular vanilla extract would.
- Measure precisely: Too much liquid or sugar can throw off the fudge’s consistency.
- Prep your pan well: Lining with parchment and spraying ensures easy removal and clean cuts.
- Store leftovers properly: Keep your fudge refrigerated to maintain its creamy texture and prevent it from drying out.
If you’re pressed for time, you can prepare the fudge base ahead and refrigerate it before spreading into the pan, but I recommend finishing the recipe in one go for best results. For more sweet indulgences that come together with ease, check out my recipe for Easy No-Bake Caramel Pretzel Bars, a fantastic crunchy-salty-sweet combo.
How to Store Banana Fudge
Proper storage is key to keeping your banana fudge fresh, creamy, and ready to enjoy. Here’s what I do:
- Refrigerate: Store fudge in an airtight container or cover tightly with plastic wrap. This keeps it fresh for up to 1 week.
- Freeze for longer storage: If you want to keep your fudge longer, wrap individual pieces in wax paper and place them in a freezer-safe bag or container. Freeze for up to 3 months. Thaw in the fridge overnight before serving.
- Room temperature: I don’t recommend leaving fudge out for more than a day, especially with dairy ingredients, as it can soften and lose texture.
When serving, take the fudge out of the fridge about 10 minutes ahead of time to take the chill off and let its banana flavors shine.
FAQs
Can I use real mashed bananas instead of banana flavoring?
While fresh bananas add natural flavor, they also add moisture that can change the fudge’s texture and shelf life. Banana flavoring is preferred for a smooth, stable fudge, but if you want to try real bananas, reduce other liquids slightly and prepare for a softer fudge.
Why do I need both half and half and heavy cream?
Using both balances richness and lightness. Half and half keeps the fudge creamy but not too heavy, while heavy cream adds that luscious mouthfeel essential to fudge’s signature texture.
What if I don’t have marshmallow fluff?
Marshmallow fluff adds smoothness and a slight chewiness. If you don’t have it, you can try mini marshmallows melted into the mixture, but the texture might be a little different. Alternatively, some recipes work with just white chocolate, but the fluff elevates the fudge’s creaminess.
Can I make this fudge without the yellow food color?
Absolutely! The color gel just gives it that classic banana yellow look, but the flavor will be just as delicious without it. It’s a fun visual touch, especially if you’re gifting or serving at a party.
For a fudge adventure that’s equally nostalgic but with a different flavor profile, you might enjoy my take on classic Chocolate Peanut Butter Bars, a no-bake delight perfect for any season.
Making Banana Fudge is such a rewarding experience—you get to create a candy that looks charming, tastes incredible, and brings smiles to everyone who tries it. Remember, the kitchen is your playground, so don’t hesitate to experiment a little and make this recipe your own.
Thanks for hanging out with me today! If you love this recipe and want even more sweet ideas, be sure to check out my other favorites linked throughout the post, and don’t forget to follow my Pinterest for daily inspiration and mouthwatering recipes.
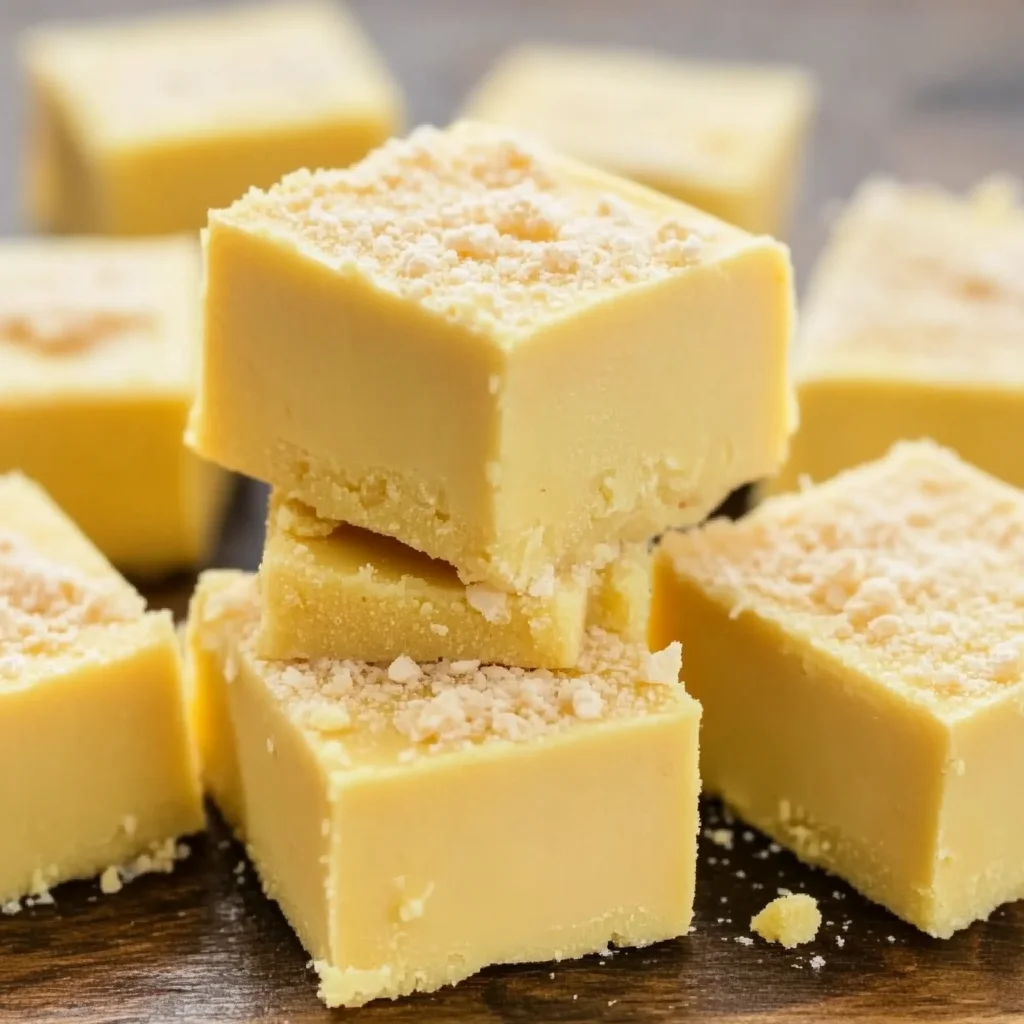
Delightfully Creamy Banana Fudge
Ingredients
Equipment
Method
- Step 1: Line a 9×9-inch baking dish with parchment paper extending up the sides. Lightly spray with nonstick cooking spray.
- Step 2: In a small bowl, combine banana flavoring and yellow food color gel. Stir gently and set aside.
- Step 3: In a heavy-bottomed saucepan over medium heat, melt salted sweet cream butter with half and half, heavy cream, and clear vanilla flavoring. Stir continuously until fully melted and combined.
- Step 4: Gradually add granulated sugar, stirring constantly as mixture heats. Bring to a simmer (~6–7 minutes), then continue stirring and simmer for an additional 3 minutes.
- Step 5: Remove saucepan from heat. Immediately add white baking chips, cover, and let sit for 3–4 minutes. Stir until chips are fully melted and incorporated.
- Step 6: Stir in marshmallow fluff vigorously until fudge is smooth, creamy, and slightly glossy.
- Step 7: Add banana flavoring and color mixture. Stir thoroughly until color is even and fudge glows banana yellow.
- Step 8: Transfer fudge to prepared baking dish, spreading evenly. Sprinkle crushed Nilla wafers on top if desired. Cover with aluminum foil.
- Step 9: Let fudge rest at room temperature for 30 minutes. Refrigerate for at least 4 hours until firm enough to cut.
- Step 10: Lift fudge out using parchment paper and slice into 25 pieces. Store refrigerated until serving.