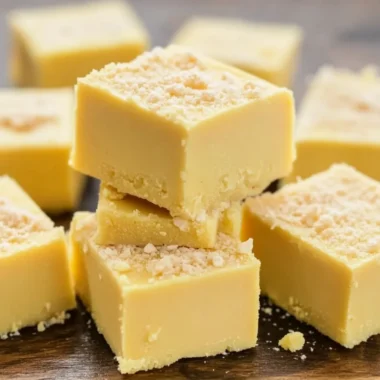
Do you remember the first time you tasted a smooth, creamy Boston Cream Pie? That perfect blend of vanilla custard and rich chocolate glaze sandwiched between soft cake layers has a way of taking us right back to cozy family gatherings and sweet celebrations. Well, what if I told you that you could capture all those classic flavors in a decadent fudge form? This Boston Cream Pie Fudge is a delightful twist on the traditional dessert, turning it into a rich, creamy candy that’s just as memorable but so much easier and quicker to make!
This recipe is perfect for when you want to whip up something special without spending hours in the kitchen, and trust me—it’s absolutely crowd-pleasing. Whether you’re making it for a holiday gift, a potluck, or just a treat to enjoy with a cup of coffee, it’s bound to become a favorite. Let’s dive into why this fudge recipe deserves a spot in your go-to dessert collection.
Why You’ll Love Boston Cream Pie Fudge
- Fast: From start to finish, this fudge comes together in just a couple of hours, including cooling time.
- Easy: No complicated baking skills required, just a little stirring and swirling magic.
- Giftable: Wrapped up in a pretty box or bag, these fudge squares make an irresistible homemade gift.
- Crowd-pleasing: The classic combination of vanilla and chocolate is a guaranteed hit with all ages.
Ingredients
Before you start, let’s take a look at what you’ll need. The ingredients are pretty straightforward, and many you might already have in your pantry or fridge.
- Granulated sugar: The base sweetener that helps give the fudge its classic texture.
- Heavy cream: This adds richness and creaminess to the fudge. Avoid using a lighter cream to keep that perfect texture.
- Unsalted butter: Adds a silky smoothness and helps with the fudge’s melt-in-your-mouth feel.
- White chocolate chips: These provide the sweet vanilla flavor and smooth texture for the vanilla fudge base.
- Marshmallow creme: This is a secret weapon for fudge that’s creamy and keeps it from crystallizing.
- Instant vanilla pudding mix (dry): Adds flavor and thickens the fudge to the perfect consistency.
- Vanilla extract: For that warm, comforting vanilla aroma and taste.
- Unsweetened cocoa powder: Mixed into some of the vanilla fudge to create the chocolate swirl.
- Semisweet chocolate chips: For the rich chocolate glaze that tops each fudge square.
- Vegetable oil: Helps the chocolate glaze stay glossy and smooth for dipping.
Each of these ingredients works together to mimic the classic Boston Cream Pie flavors in a fudge form, balancing creamy vanilla with luscious chocolate swirls and a glossy chocolate coat.
How to Make Boston Cream Pie Fudge
Ready to create your own batch of this dreamy fudge? Follow along step-by-step, and I’ll share some little tips to make it foolproof.
- Prepare your pan: Line an 8×8-inch square baking pan with parchment paper, leaving a 2-inch overhang on two opposite sides. This helps you lift the fudge out easily once it’s set.
- Cook the sugar mixture: In a large, heavy-bottomed saucepan, combine the granulated sugar, heavy cream, and butter. Stir constantly over medium heat until the butter melts and the mixture reaches a full boil. This step is crucial—keep stirring to prevent the sugar from burning on the bottom.
- Simmer and test the fudge stage: Lower the heat to medium-low and keep stirring for 7 minutes. You’ll want to test the doneness by dropping a small spoonful into a bowl of ice water; it should form a soft ball that you can pick up and shape with your fingers. If you have a candy thermometer, heat the mixture to 237-239°F for perfect results. This part might feel a little like a science experiment, but it’s worth the precision!
- Add white chocolate: Remove the pan from heat and immediately stir in the white chocolate chips. Stir vigorously until the chocolate is fully melted and the mixture is smooth. You’ll see the fudge base start to thicken slightly here.
- Mix in marshmallow creme and pudding: Add the marshmallow creme and stir until fully incorporated. Then add the dry vanilla pudding mix and vanilla extract, mixing everything until the fudge is thick and glossy.
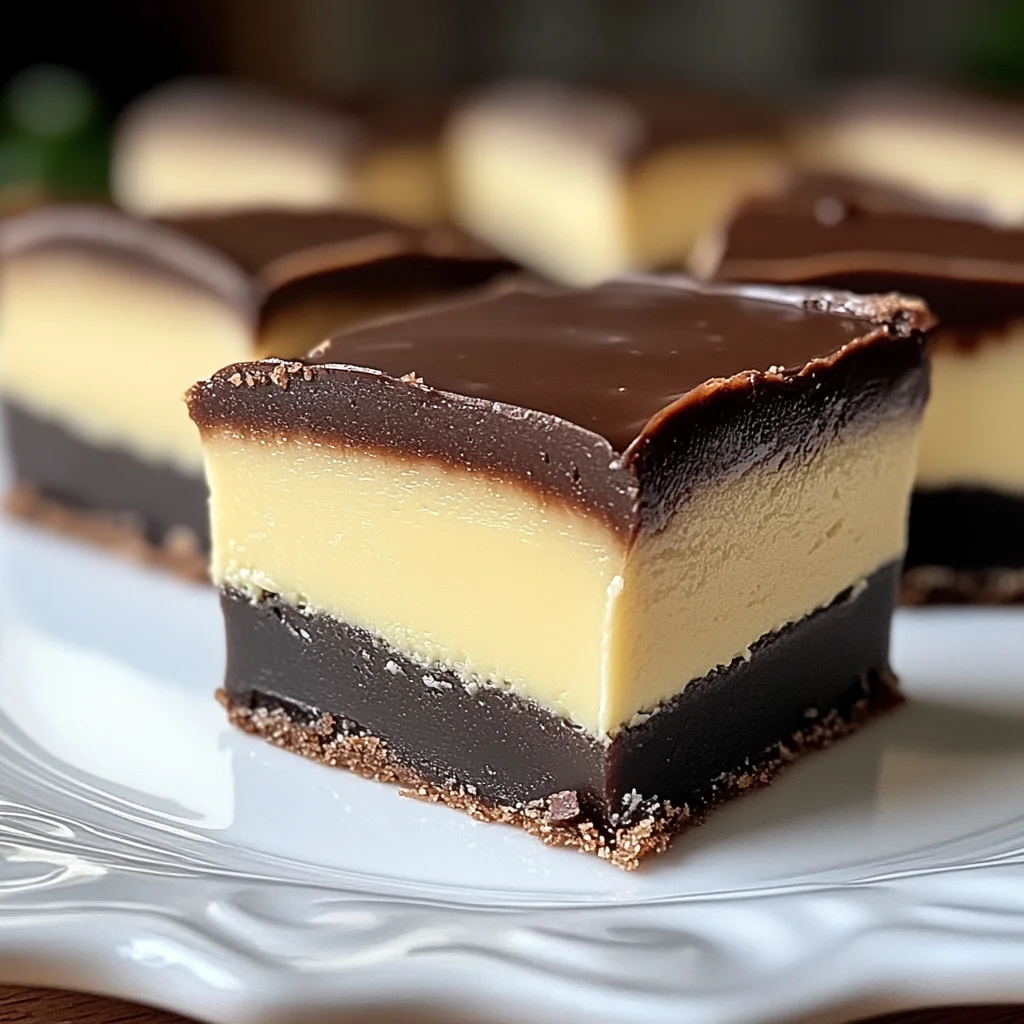
- Create the two layers: Pour two-thirds of the vanilla fudge into your prepared pan and spread it out evenly. To the remaining fudge left in the saucepan, whisk in the unsweetened cocoa powder until the mixture is fully combined and rich chocolate color.
- Add the chocolate swirl: Drop spoonfuls of the chocolate fudge on top of the vanilla layer. Using a knife or a skewer, gently swirl the two layers together to create a beautiful marble pattern. This not only looks pretty but also gives every bite a perfect blend of chocolate and vanilla.
- Let it cool: Leave the fudge at room temperature for about 2 hours, or until it firms up enough to cut. I like to cover it lightly with a clean kitchen towel to keep dust away while it sets.
- Cut the fudge: Use the parchment paper overhang to lift the fudge out of the pan. Cut it into 16 equal squares (4×4). This is the perfect size for sharing or gifting!
- Make the chocolate glaze: In a microwave-safe bowl, combine the semisweet chocolate chips and vegetable oil. Microwave in 30-second intervals, stirring well each time, until the mixture is melted and smooth. Let it cool for about 15 minutes until slightly thickened but still pourable.
- Dip the fudge: Dip the top of each fudge square into the chocolate glaze, letting any excess drip off. Place them chocolate-side up on parchment paper or a wire rack. Repeat with all the pieces.
- Set the glaze: Let the glaze harden at room temperature for about 1 hour before serving or storing.
And voilà! You now have a batch of luscious Boston Cream Pie Fudge that’s ready to enjoy. I love how this recipe comes together with classic flavors but in a no-fuss, no-bake style that’s perfect for any occasion.
Substitutions & Additions
Feel free to get creative or swap out a few ingredients depending on what you have on hand or your personal preferences.
- Milk chocolate chips: Swap out the semisweet chocolate chips in the glaze for milk chocolate for a sweeter, creamier finish.
- Almond or coconut extract: Add a teaspoon of almond or coconut extract along with the vanilla extract for a subtle twist on the classic flavor.
- White chocolate drizzle: For extra flair, melt some white chocolate and drizzle it over the chocolate-glazed fudge squares once set.
- Chopped nuts: If you like a bit of crunch, sprinkle chopped toasted pecans or walnuts in the vanilla fudge layer before swirling.
- Mini chocolate chips or chocolate chunks: Stir some mini chips into the vanilla fudge base for added texture.
- Use a different pudding mix: Try chocolate or butterscotch instant pudding mix for a unique flavor profile.
These little changes can make each batch your own and keep the recipe fresh and exciting. If you enjoy homemade treats like this, you might also want to try the easy no-bake caramel pretzel bars for another quick and delicious dessert option.
Tips for Success
Making fudge can feel intimidating if you’re new to candy-making, but here are some tips that have helped me get perfect results every time:
- Use a heavy-bottomed saucepan: This helps distribute heat evenly and prevents burning the sugar mixture.
- Stir constantly: Especially when heating the sugar and cream, continuous stirring helps avoid scorching and ensures a smooth texture.
- Test the fudge stage carefully: The soft ball stage is key for fudge. If you cook it too little, the fudge won’t set properly; too much and it becomes hard and crumbly.
- Don’t rush the cooling: Let the fudge cool and set fully at room temperature for the best texture. Avoid the fridge, as it can cause the fudge to become grainy.
- Prepare your pan well: The parchment paper overhang makes removing the fudge a breeze, so don’t skip this step.
- Let glaze cool before dipping: If you dip the fudge while the glaze is too hot, it may melt the fudge or not set correctly.
- Make ahead: This fudge keeps well for several days, so it’s a great make-ahead treat for parties or gifts. Store it in an airtight container at room temperature.
If you’re a fan of cozy, nostalgic desserts, you might also appreciate the comforting flavors in recipes like these pumpkin banana loaf or the creamy richness of Boston Cream Pie cheesecake for a twist on the classic flavors.
How to Store Boston Cream Pie Fudge
Proper storage is key to keeping your fudge fresh, creamy, and delicious for as long as possible.
- Room Temperature: Store your fudge in an airtight container at room temperature for up to 1 week. Make sure to keep it away from direct sunlight or heat sources.
- Refrigeration: If you prefer, you can refrigerate fudge for up to 2 weeks. Allow it to come to room temperature before serving for the best texture and flavor.
- Freezing: Fudge freezes well! Wrap the pieces tightly in plastic wrap and place in a freezer-safe container or zip-top bag for up to 3 months. Thaw in the refrigerator or at room temperature before enjoying.
With these tips, you can make batches ahead of time to have on hand for last-minute guests or holiday gifting.
FAQs
Can I use a different size pan?
Yes! You can use a slightly larger or smaller pan, but the fudge thickness will vary. If using a larger pan, expect thinner fudge; for smaller pans, fudge will be thicker and may require a longer setting time.
What if I don’t have marshmallow creme?
You can substitute with an equal amount of marshmallow fluff or even mini marshmallows melted into the fudge. This ingredient helps with texture and prevents sugar crystallization.
Is it necessary to use instant pudding mix?
Yes, the dry pudding mix is important to achieve the signature creamy texture and added vanilla flavor of Boston Cream Pie fudge. It thickens the fudge and keeps it from becoming grainy.
Can I make this fudge dairy-free?
This recipe relies on dairy for its creamy texture, but you could try substituting coconut cream for heavy cream and a dairy-free butter alternative. Keep in mind the texture and flavor will be different, so experiment with small batches first.
Making fudge at home is such a joyful experience, especially when it’s a nostalgic favorite like this Boston Cream Pie Fudge. I hope this recipe brings a little extra sweetness and warmth to your kitchen. And if you love exploring cozy and indulgent desserts, don’t miss out on the easy no-bake caramel pretzel bars or the delightful Boston Cream Pie cheesecake for more ways to satisfy your sweet tooth.
Happy fudge-making, friend!
For more inspiring recipes and kitchen ideas, be sure to follow us on Pinterest!

Boston Cream Pie Fudge
Ingredients
Equipment
Method
- Step 1: Line an 8x8-inch square baking pan with parchment paper, leaving a 2-inch overhang on two opposite sides for easy removal.
- Step 2: In a large heavy-bottomed saucepan, combine granulated sugar, heavy cream, and butter. Stir constantly over medium heat until butter melts and mixture reaches a full boil.
- Step 3: Lower heat to medium-low and continue stirring for 7 minutes. Test doneness by dropping spoonful into ice water; it should form a soft ball. Alternatively, heat to 237-239°F with a candy thermometer.
- Step 4: Remove from heat and stir in white chocolate chips until melted and smooth.
- Step 5: Mix in marshmallow creme until incorporated, then add dry vanilla pudding mix and vanilla extract. Stir until fudge is thick and glossy.
- Step 6: Pour two-thirds of the vanilla fudge into the prepared pan and spread evenly. Whisk unsweetened cocoa powder into the remaining fudge in the saucepan to create the chocolate layer.
- Step 7: Drop spoonfuls of chocolate fudge over the vanilla layer. Use a knife or skewer to gently swirl layers for a marble pattern.
- Step 8: Let fudge cool at room temperature for about 2 hours until firm. Cover lightly with a clean kitchen towel while setting.
- Step 9: Use parchment overhang to lift fudge from pan. Cut into 16 equal squares (4x4).
- Step 10: In a microwave-safe bowl, combine semisweet chocolate chips and vegetable oil. Microwave in 30-second intervals, stirring until melted and smooth. Let cool about 15 minutes until slightly thickened but pourable.
- Step 11: Dip the top of each fudge square into the chocolate glaze, letting excess drip off. Place chocolate-side up on parchment paper or wire rack. Repeat for all pieces.
- Step 12: Let glaze harden at room temperature for about 1 hour before serving or storing.