There’s something magical about baking in the springtime, especially when Easter is just around the corner. Maybe it’s the pastel colors, the sweet smell of cookies in the oven, or the simple joy of gathering around the kitchen table with people you love. These Easter Crinkle Cookies bring all of that cozy nostalgia into one incredibly easy recipe that anyone can make.
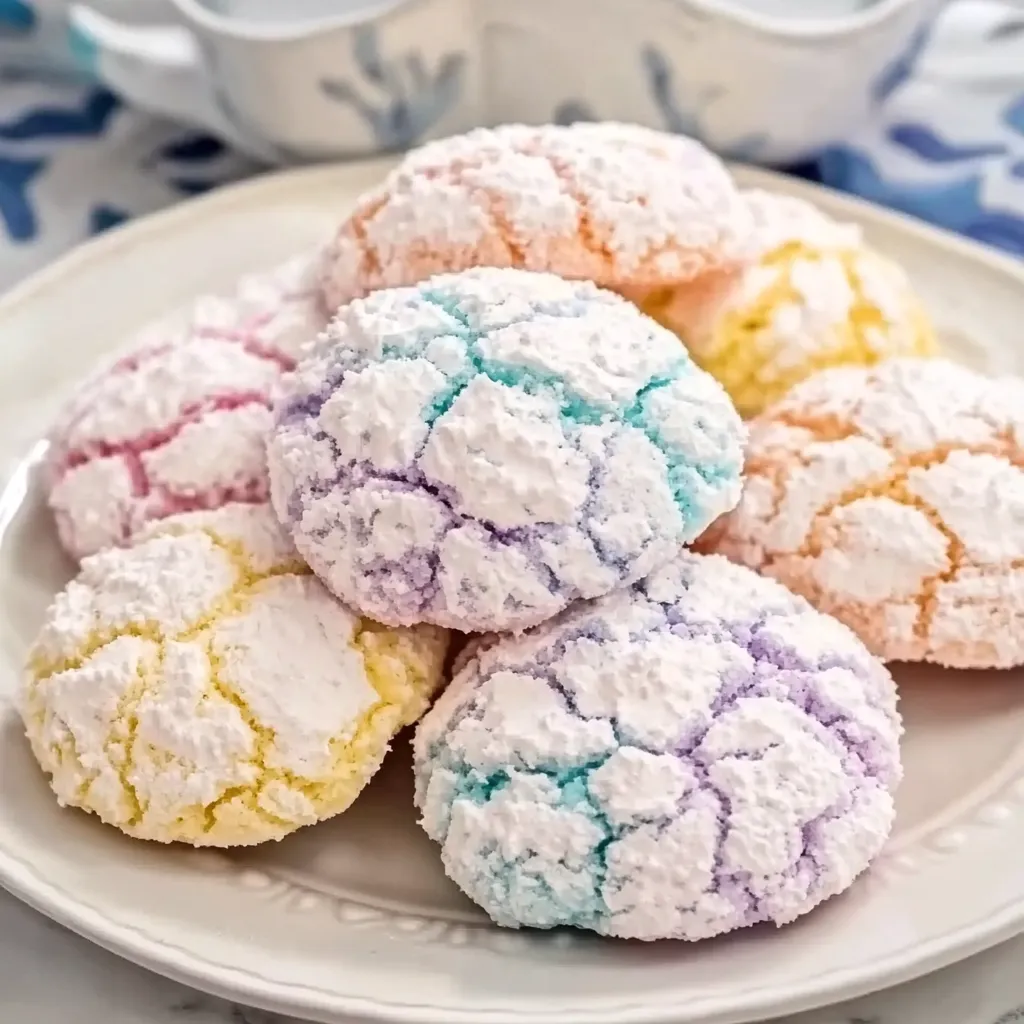
If you’ve ever wanted a cheerful dessert that looks impressive but requires very little effort, this recipe is exactly what you need. The secret is a humble box of cake mix that transforms into soft, chewy cookies with beautiful crackled tops dusted in powdered sugar. When baked, the colorful dough peeks through the snowy coating, creating that classic crinkle effect that looks like little bursts of spring.
I love making these cookies because they remind me that baking doesn’t always have to be complicated to be special. Sometimes the simplest recipes become the most memorable ones. Whether you’re baking with kids, preparing treats for an Easter brunch, or just craving something sweet and cheerful, these cookies come together quickly and deliver big smiles every time.
They also pair beautifully with other festive desserts. If you’re planning a full dessert table, you might enjoy serving them alongside soft classics like a moist old-fashioned carrot cake or bright spring treats such as lemon glazed pound cake. Together, they create the kind of dessert spread that instantly feels like a holiday celebration.
Why You’ll Love Easter Crinkle Cookies
- Fast: With just a handful of ingredients and simple steps, you can have fresh cookies ready in about 30 minutes. Perfect for last-minute baking.
- Easy: This recipe uses cake mix, which means you skip measuring flour, sugar, and leavening. It’s almost foolproof.
- Giftable: Their colorful pastel look makes them perfect for Easter baskets, spring parties, or homemade gifts.
- Crowd-pleasing: Soft, chewy, and lightly sweet, these cookies are loved by kids and adults alike.
Another reason these cookies are so popular is that they’re incredibly fun to make. Rolling the dough in powdered sugar and watching the crinkles form as they bake never gets old. It feels almost like a little baking magic trick happening right in your oven.
Ingredients
One of the best parts about this recipe is how short and simple the ingredient list is. Each component plays an important role in creating soft cookies with that classic crinkle texture.
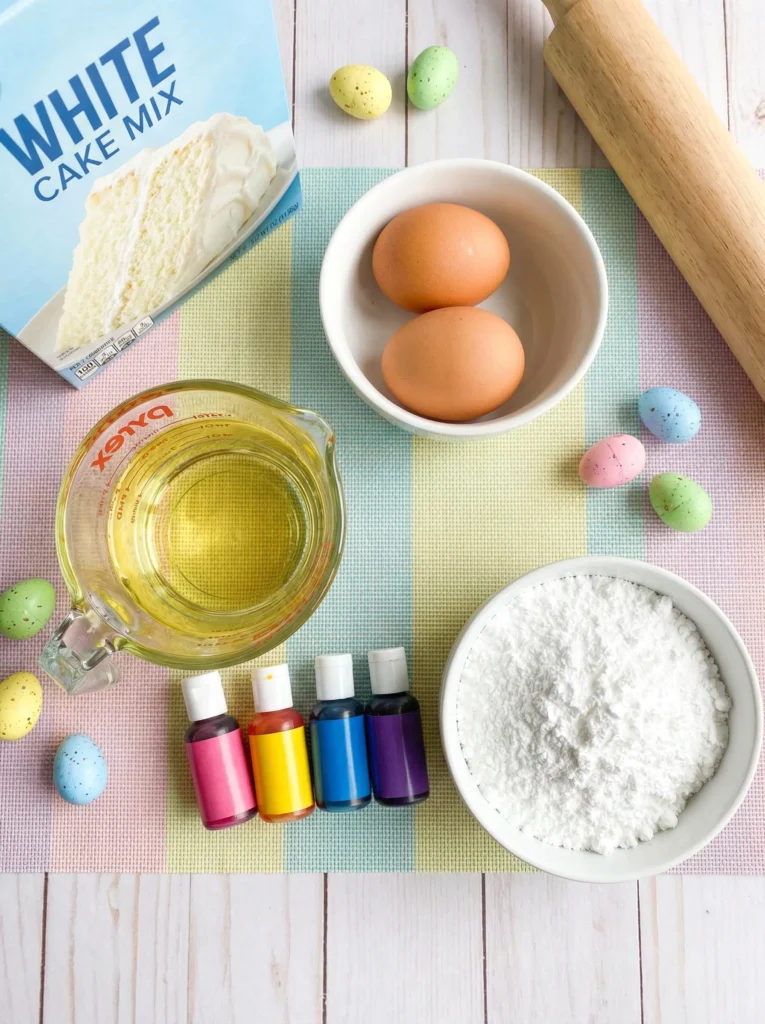
- 1 box white cake mix (15.25 oz): The base of the recipe. It provides sweetness, structure, and the perfect soft texture without needing multiple dry ingredients.
- 2 large eggs: Eggs bind the dough together and help give the cookies their soft, chewy interior.
- 1/3 cup vegetable oil: Oil keeps the cookies moist and tender. It also helps create that slightly chewy bite.
- Food coloring (pink, yellow, blue, purple): These pastel colors are what make the cookies look so festive and Easter-ready.
- 1 cup powdered sugar: Rolling the dough in powdered sugar creates the iconic crinkle effect when the cookies bake.
I personally love using gel food coloring because it gives stronger pastel shades without thinning the dough. But regular liquid food coloring works perfectly fine if that’s what you have in your pantry.
How to Make Easter Crinkle Cookies
This recipe is wonderfully straightforward, making it perfect for beginner bakers or for baking with kids. Once you’ve made them once, you’ll probably find yourself coming back to this recipe every spring.
1. Prepare the Oven
Start by preheating your oven to 350°F (175°C). Line a baking sheet with parchment paper so the cookies don’t stick and cleanup is easy. This also helps them bake evenly without browning too much on the bottom.
2. Mix the Dough
In a large mixing bowl, combine the white cake mix, eggs, and vegetable oil. Stir everything together until a soft dough forms. At first the mixture might look a little thick and sticky, but keep mixing and it will come together nicely.
This is one of those moments where I always smile because it reminds me how convenient cake mix recipes can be. You get a perfectly balanced dough without measuring multiple ingredients.
3. Divide and Color the Dough
Divide the dough evenly into four bowls. Add a few drops of food coloring to each bowl and mix until the dough becomes soft pastel shades. Think springtime colors—light pink, soft yellow, baby blue, and lavender purple.
If you want even brighter colors, simply add another drop or two of food coloring and mix again. The goal is cheerful pastel tones that pop against the powdered sugar coating.
4. Chill the Dough
Place the bowls of dough in the refrigerator for about 30 minutes. This step is important because it firms up the dough and makes it much easier to roll into balls.
Skipping the chilling step can make the dough too sticky to handle, so I always recommend being patient here. Use the time to prepare your baking trays or make a cup of tea.
5. Roll and Coat
Place the powdered sugar in a small bowl. Scoop about one tablespoon of dough and roll it between your palms to form a ball. Then roll the dough ball generously in powdered sugar until it is fully coated.
The thicker the coating, the more dramatic the crinkle effect will be once the cookies bake.
6. Arrange on Baking Sheet
Place the coated dough balls about two inches apart on the prepared baking sheet. The cookies will spread slightly as they bake, so giving them space ensures they keep their round shape.
7. Bake the Cookies
Bake for 9 to 11 minutes, just until the tops crack and the colorful dough shows through the powdered sugar. The centers should remain soft. Don’t overbake them, or they’ll lose that wonderful chewy texture.
8. Cool and Enjoy
Allow the cookies to cool on the baking sheet for about five minutes before transferring them to a wire rack. This helps them set without breaking apart.
Once cooled, you’ll have a tray of soft, colorful cookies that look like tiny pieces of edible springtime.
Substitutions & Additions
One of the best things about this recipe is how flexible it is. Once you know the basic method, you can easily customize the cookies to match different occasions or flavors.
If you want to experiment with flavor, try using lemon or vanilla cake mix instead of plain white cake mix. Lemon cake mix adds a bright citrus note that feels perfect for spring celebrations.
You can also add mix-ins to the dough. White chocolate chips, pastel candy pieces, or even shredded coconut work beautifully. These little additions create extra texture and make the cookies feel even more festive.
For an extra holiday dessert spread, I often serve these cookies with other soft treats like no-bake Funfetti Oreo icebox cake. The colorful sprinkles and creamy layers complement the pastel cookies perfectly.
Another fun twist is marbling two dough colors together before rolling them into balls. When baked, the cookies create swirled pastel patterns that look almost like watercolor.
Tips for Success
Even though this recipe is simple, a few small tips can help ensure your cookies turn out perfect every single time.
- Chill the dough: This keeps it from sticking to your hands and helps the cookies keep their shape.
- Use plenty of powdered sugar: A generous coating creates the signature crinkle pattern.
- Don’t overbake: The cookies should look slightly soft in the center when removed from the oven.
- Use parchment paper: This prevents sticking and ensures even baking.
- Roll evenly sized balls: This helps all the cookies bake at the same rate.
One personal trick I like is double-rolling the dough balls in powdered sugar. First roll them lightly, then roll them again before placing them on the baking sheet. This creates extra bright white cracks when they bake.
How to Store Easter Crinkle Cookies
These cookies store surprisingly well, which makes them perfect for making ahead of time if you’re planning a holiday gathering.
Once completely cooled, store the cookies in an airtight container at room temperature. They will stay soft and delicious for about four days.
If you want to keep them longer, you can freeze them. Place the baked cookies in a freezer-safe container or bag and freeze for up to two months. When you’re ready to enjoy them, simply thaw at room temperature.
You can even freeze the dough balls before baking. Roll them in powdered sugar first, freeze them on a tray, then store them in a freezer bag. When ready to bake, place them directly in the oven and add an extra minute or two to the baking time.
FAQs
Why didn’t my cookies crinkle?
If your cookies didn’t crack on top, they may not have had enough powdered sugar coating. Make sure the dough balls are heavily coated before baking.
Can I make these cookies ahead of time?
Yes! You can prepare the dough up to 24 hours in advance and keep it refrigerated until ready to bake.
Can kids help make this recipe?
Absolutely. Rolling the dough balls and coating them in powdered sugar is a fun and easy step that kids love helping with.
Can I use different colors?
Of course. While pastel shades are perfect for Easter, you can use any colors you like for birthdays, holidays, or themed parties.
If you love discovering cheerful, easy dessert ideas like this one, make sure to follow us on Pinterest for more baking inspiration and cozy kitchen recipes.
Easter Crinkle Cookies
Ingredients
Equipment
Method
- Step 1: Preheat the oven to 350°F (175°C) and line a baking sheet with parchment paper.
- Step 2: In a large mixing bowl, combine the white cake mix, eggs, and vegetable oil. Mix until a soft dough forms.
- Step 3: Divide the dough evenly into four bowls. Add a few drops of food coloring to each bowl and mix until pastel colored.
- Step 4: Refrigerate the dough for 30 minutes to make it easier to handle.
- Step 5: Place powdered sugar in a small bowl. Scoop about one tablespoon of dough, roll into balls, and coat generously in powdered sugar.
- Step 6: Place the coated dough balls about 2 inches apart on the prepared baking sheet.
- Step 7: Bake for 9–11 minutes until the tops crack and the centers remain soft.
- Step 8: Let the cookies cool on the baking sheet for 5 minutes, then transfer to a wire rack to cool completely.