Do you ever get that craving for something sweet, something nostalgic, something that just melts in your mouth and brings back all those happy childhood memories? For me, it’s often anything cookies and cream. That delightful blend of rich chocolatey cookies and sweet, creamy goodness is pure bliss. And guess what? I’ve got a recipe that captures all that magic in individual, adorable cups, without even needing to turn on your oven! These No-Bake Cookies and Cream Dessert Cups are seriously one of the easiest, quickest, and most crowd-pleasing treats you’ll ever make. They’re perfect for impromptu gatherings, a special weeknight dessert, or when you just need a little sweet pick-me-up.
Why You’ll Love Cookies and Cream Dessert Cups
- Fast
- Easy
- Giftable
- Crowd-pleasing
Ingredients
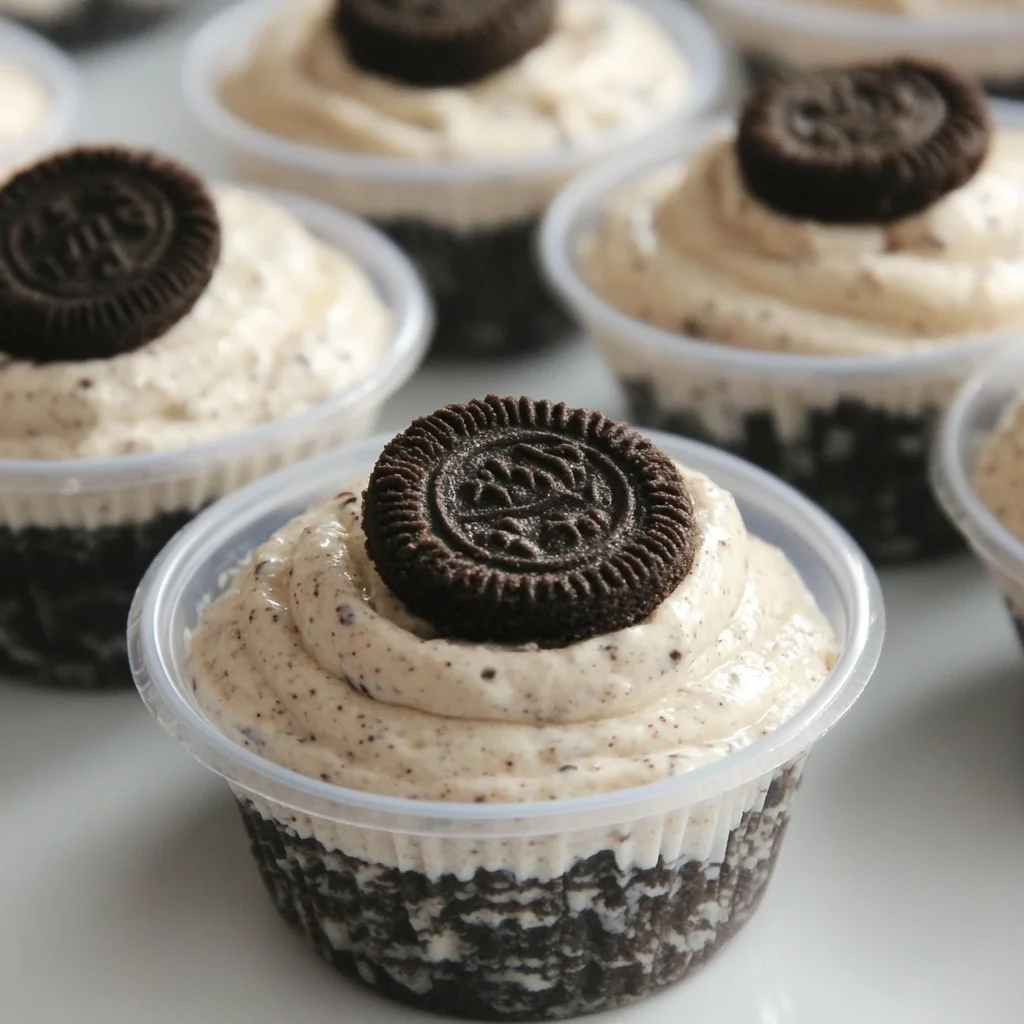
Gathering your ingredients for these little cups of joy is super simple. You likely have most of these on hand already!
- 2 cups (320 g) crushed chocolate sandwich cookies: You know the ones! Think classic, dark chocolatey goodness. These form the perfect base.
- ¼ cup (56 g) butter, melted: This binds our cookie crumbs together to create a delightful, firm crust.
- 8 oz (227 g) cream cheese, room temperature: The heart of our creamy filling! Make sure it’s at room temperature for a super smooth, lump-free mixture.
- ¾ cup (150 g) granulated sugar: Just the right amount of sweetness to balance the tang of the cream cheese.
- 2 tsp vanilla extract: A classic flavor enhancer that truly brings out the sweetness in our cream.
- 1 ½ cups (357 g) heavy cream: This is where the magic happens, transforming our filling into a light, airy, whipped dream.
- ½ cup (80 g) crushed chocolate sandwich cookies: More cookies! These get folded into the filling for that iconic cookies and cream texture.
- 28 mini chocolate sandwich cookies: For the cutest little garnish on top!
How to Make Cookies and Cream Dessert Cups
Alright, friends, let’s get these dreamy dessert cups assembled! You’re going to be amazed at how quickly this comes together.
- First things first, let’s get that yummy chocolate cookie crust ready. In a small bowl, you’ll want to combine your 2 cups of crushed chocolate sandwich cookie crumbs with the melted butter. Give it a good stir until all the crumbs are evenly coated and look like wet sand.
- Now, grab your 2-ounce plastic cups. I find a small cookie scoop or even just a regular spoon works perfectly for portioning out the crumb mixture into the bottom of each cup. Once you’ve got the crumbs in, take another one of your empty plastic cups and use it to firmly press the crumbs into a nice, even layer at the bottom. This is key for a sturdy crust!
- Next up, the star of the show: our cookies and cream filling! In a separate mixing bowl, add your room-temperature cream cheese and granulated sugar. Using an electric hand mixer on medium speed, cream these two together until the mixture is beautifully combined and smooth. No lumps allowed here!
- Now, pour in your heavy cream and vanilla extract. Turn that mixer up to medium-high speed and whip the mixture until it’s light, fluffy, and holds soft peaks. This is going to give us that dreamy, cloud-like texture we’re after.
- Gently, oh so gently, fold in that ½ cup of extra crushed chocolate sandwich cookie crumbs. We want to keep that whipped texture, so don’t overmix! Just enough to evenly distribute those delicious cookie bits.
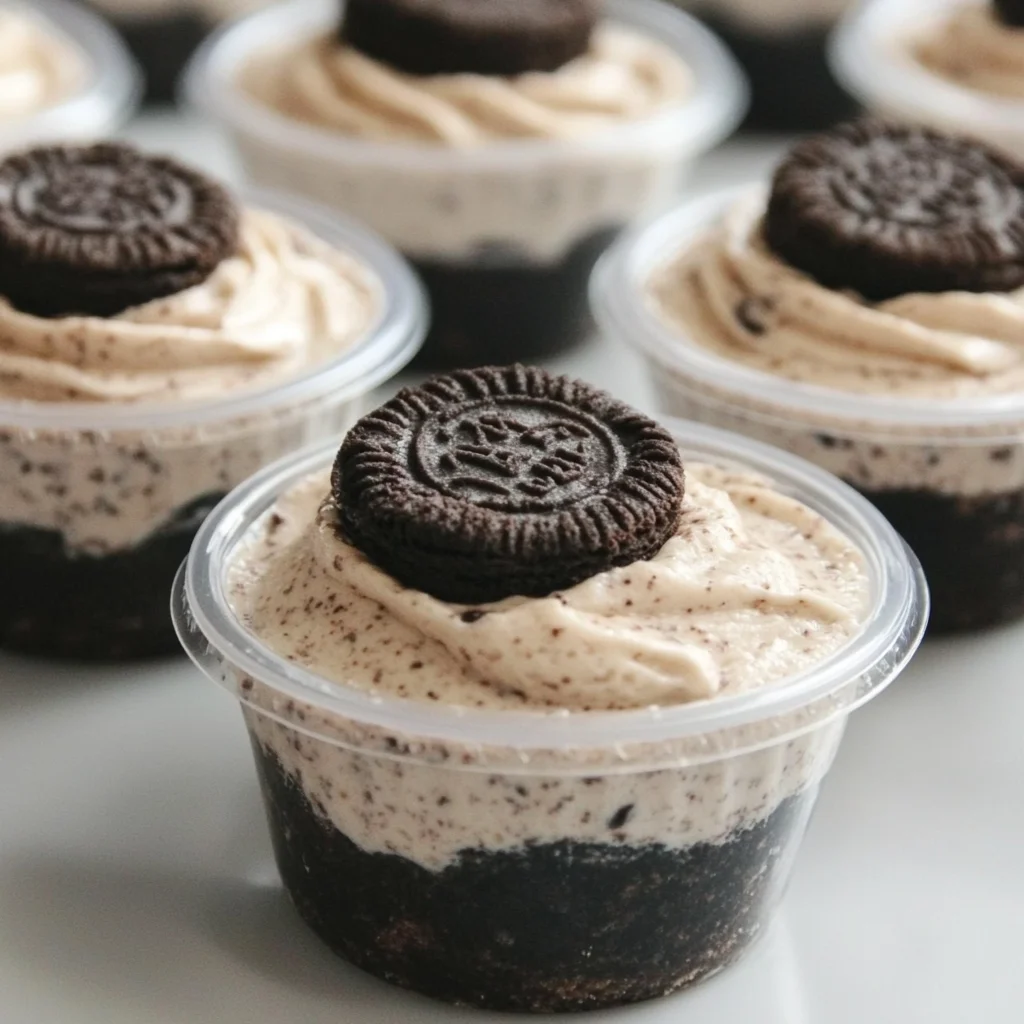
- Time to fill those cups! If you have a piping bag, now’s the time to use it. It makes filling the cups super neat and easy. If not, a spoon will work just fine! Pipe or spoon the cookies and cream mixture into each prepared cup until it’s approximately three-quarters full.
- For the final flourish, top each dessert cup with a cute mini chocolate sandwich cookie. If you prefer, you can sprinkle a few more cookie crumbs on top instead. Whatever makes your heart happy!
- Finally, seal your cups with a lid if they came with one, or cover them tightly with plastic wrap. Pop them in the fridge to chill. You can absolutely serve them immediately if you just can’t wait (I wouldn’t blame you!), but they firm up beautifully and taste even better after a good chill. They’ll store well in the refrigerator for 2-3 days.
Substitutions & Additions
Part of the fun of baking (or no-baking!) is getting creative! These cookies and cream dessert cups are super versatile, so feel free to play around.
- Cookie Swaps: Not a chocolate sandwich cookie fan? (Gasp! Just kidding!) You could use graham cracker crumbs, vanilla wafers, or even shortbread cookies for the crust. For the filling, try crushing up other favorite cookies like peanut butter cookies or even caramel pretzel bars if you want a sweet and salty crunch!
- Flavor Boosts: A tiny pinch of instant espresso powder in the cream cheese mixture can deepen the chocolate flavor. A swirl of caramel or hot fudge sauce layered in the cups would also be divine.
- Fruit Fun: While maybe not traditional, a few fresh raspberries or sliced strawberries layered in could add a lovely tart contrast.
- Adult Version: For a grown-up treat, a splash of Kahlua or Irish cream liqueur in the cream cheese mixture would be a tasty addition.
- Garnish Galore: Beyond the mini cookies, consider chocolate shavings, a drizzle of chocolate syrup, whipped cream, or even some sprinkles!
Tips for Success
Making these dessert cups is pretty foolproof, but here are a few tips to ensure they turn out absolutely perfect every time!
- Room Temperature Cream Cheese is a Must: Seriously, don’t skip this! Cold cream cheese will result in a lumpy filling, and no one wants that. Pull it out of the fridge at least 30 minutes to an hour before you start.
- Don’t Overmix the Cream: Once you add the heavy cream and vanilla, whip until it’s fluffy but stop as soon as it holds soft peaks. Over-whipping can make the mixture grainy or too stiff.
- Press That Crust Firmly: Using the bottom of another cup or a flat-bottomed glass really helps compress the crust so it doesn’t crumble when you’re eating it.
- Chill Time is Your Friend: While you can eat them right away, a good chill (at least an hour) allows the flavors to meld and the filling to firm up, making them even more delicious and easier to eat.
- Prep Ahead: The beauty of these is they are fantastic for making ahead! You can even prepare the cookie crusts the day before and store them in the cups. Then, whip up the filling just before your event. If you love no-bake desserts as much as I do, you might also want to check out my recipe for no-bake Oreo bars or even a decadent no-bake chocolate lasagna!
How to Store Cookies and Cream Dessert Cups
These little beauties are best enjoyed fresh, but they store well too!
- In the Fridge: Keep your dessert cups sealed with their lids or tightly covered with plastic wrap. Store them in the refrigerator for up to 2-3 days for optimal freshness and texture.
- Freezing? Not Recommended: While you could technically freeze them, the texture of the cream cheese filling might change a bit after thawing, becoming less smooth and potentially watery. I recommend sticking to fresh or just a couple of days in the fridge.
FAQs
Got questions? I’ve got answers!
Q: Can I use low-fat cream cheese or light whipped topping?
A: I highly recommend using full-fat cream cheese and heavy cream for the best results. Low-fat versions might not set up as well and won’t give you that rich, creamy texture you’re looking for.
Q: Do I need a piping bag to fill the cups?
A: No, not at all! A large spoon will work just fine. A piping bag just makes for a slightly neater presentation, but it’s purely optional.
Q: Can I make these in a larger dish instead of individual cups?
A: Absolutely! You can press the cookie crust into the bottom of an 8×8 or 9×9 inch square dish, then spread the filling over it. Just note that the serving size will change, and it might need a bit longer to chill and set up firmly.
I hope you love these Cookies and Cream Dessert Cups as much as I do! They’re such a delightful, easy treat that’s perfect for any occasion. Happy no-baking!
For more delicious recipes and kitchen inspiration, be sure to follow us on Pinterest!
Dreamy No-Bake Cookies and Cream Dessert Cups
Ingredients
Equipment
Method
- Step 1: In a small bowl, combine 2 cups of crushed chocolate sandwich cookie crumbs with the melted butter. Stir until all crumbs are evenly coated and look like wet sand.
- Step 2: Portion the crumb mixture into the bottom of 2-ounce plastic cups using a small cookie scoop or spoon. Use another empty plastic cup to firmly press the crumbs into a nice, even layer at the bottom for a sturdy crust.
- Step 3: In a separate mixing bowl, add room-temperature cream cheese and granulated sugar. Using an electric hand mixer on medium speed, cream them together until beautifully combined and smooth.
- Step 4: Pour in heavy cream and vanilla extract. Turn the mixer up to medium-high speed and whip the mixture until it’s light, fluffy, and holds soft peaks.
- Step 5: Gently fold in the ½ cup of extra crushed chocolate sandwich cookie crumbs, just enough to evenly distribute them without overmixing.
- Step 6: Pipe or spoon the cookies and cream mixture into each prepared cup until it’s approximately three-quarters full.
- Step 7: Top each dessert cup with a mini chocolate sandwich cookie, or sprinkle with a few more cookie crumbs if preferred.
- Step 8: Seal cups with a lid or cover tightly with plastic wrap. Pop them in the fridge to chill. They firm up beautifully and taste even better after a good chill (at least an hour). They’ll store well in the refrigerator for 2-3 days.