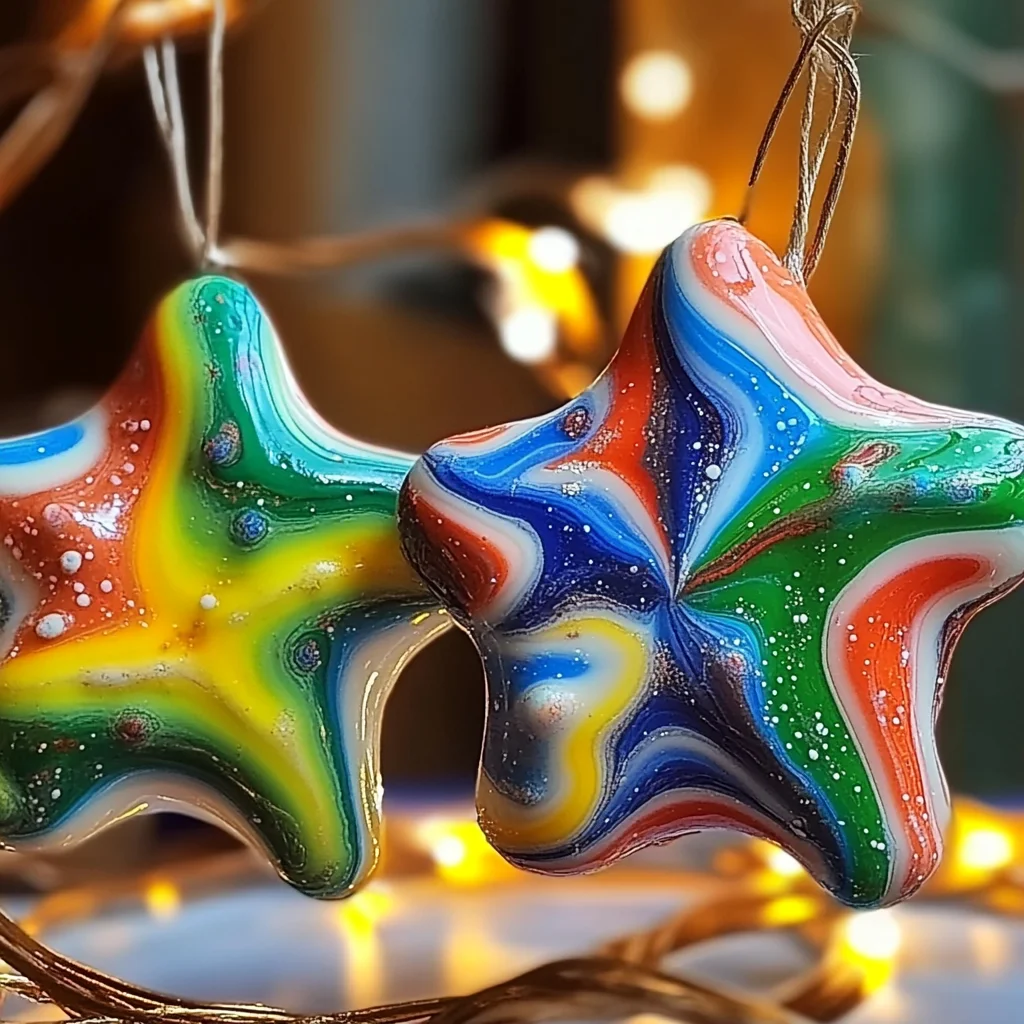
Hey there, friend! Do you ever find yourself looking for a little burst of color, a sprinkle of joy, or just a simple, satisfying project to brighten your home (and your spirits)? I know I do! There’s something so wonderfully nostalgic about crayons, isn’t there? They instantly take me back to childhood days, sitting at the kitchen table, drawing masterpieces that, in my young mind, were museum-worthy. Well, today, we’re tapping into that pure, unadulterated creativity to make something truly special, utterly charming, and surprisingly simple: Melted Crayon Star Decorations!
This isn’t just a craft; it’s an experience! Imagine transforming those broken, forgotten crayon stubs into vibrant, stained-glass-like stars that catch the light beautifully. Whether you’re looking for a fun activity with the kids on a rainy afternoon, a unique gift idea, or just a little something to add a handmade touch to your decor, these stars are an absolute winner. Trust me, the smiles they bring are worth every bit of the minimal effort!
Why You’ll Love Melted Crayon Star Decorations
- Fast: From start to finish, you’ll be amazed at how quickly these come together.
- Easy: No complicated steps or fancy tools required, just pure, simple fun!
- Giftable: Hand-making gifts always adds that extra touch of love.
- Crowd-pleasing: Kids and adults alike will adore making (and admiring!) these colorful creations.
- Eco-friendly: A fantastic way to repurpose those old, broken crayons instead of tossing them.
Ingredients
Gathering your supplies for this project is almost as fun as making the stars themselves! Most of these you probably already have lying around.
- Crayons: Your collection of old, broken, or well-loved crayons is perfect for this. The more colors, the merrier!
- Wax Paper: This is our base for melting all that lovely wax.
- Parchment Paper: Crucial for protecting your iron from crayon residue.
- Baker’s Twine: For hanging your beautiful creations. Any string or ribbon will do!
- Scissors: For cutting out your star shapes.
- Crayon Sharpener or Knife: To get those crayons into tiny, meltable bits. (Always supervise closely if kids are using a knife!)
- Iron (with adult supervision): Our magic wand for melting. Make sure it’s on a low setting.
- Star Stencil or Cookie Cutter: For perfectly shaped stars, but freehand is totally fine too!
- Hole Punch: To make a neat little spot for your twine.
How to Make Melted Crayon Star Decorations
Alright, grab your apron (just kidding, this isn’t that messy, but a little creative chaos is always fun!) and let’s get crafting! You’re going to be amazed at how simple and satisfying this process is.
- Unwrap Those Crayons: First things first, peel off all the paper wrappers from your chosen crayons. This can be a fun task for little hands, or a meditative one for you!
- Shave ‘Em Down: Now, for the magic! Use a crayon sharpener or a knife to shave your crayons into small bits. Think of it like making colorful sprinkles. The smaller the bits, the smoother and more evenly they’ll melt. I sometimes like to use a vegetable peeler for broader shavings that create cool swirls!
- Spread the Color: Lay out a sheet of wax paper on a flat, protected surface (like an ironing board with an old towel). Sprinkle your crayon shavings evenly onto one half of the wax paper. This is where you get to be an artist! Mix colors, create gradients, or stick to a single hue. If you’re looking for another fun activity after craft time, or maybe something to bake while the stars cool, you might love making some Muddy Buddies – another family-friendly favorite!
- Fold and Seal: Carefully fold the other half of the wax paper over your crayon shavings, creating an enclosed packet. Press down firmly around the edges to seal them, making sure no shavings can escape.
- Parchment Paper Protection: Place your wax paper packet between two sheets of parchment paper. This is super important! It protects your iron and ironing board from any stray crayon wax.
- Iron Away the Meltdown: With adult supervision (this step is key!), set your iron to a low heat setting – no steam! Gently glide the iron over the top sheet of parchment paper. You’ll see the crayon shavings start to melt and blend together like magic. Keep the iron moving to avoid scorching the wax. Once everything looks nicely melted and combined, lift the iron.
- Cool Down: Let the melted crayon wax cool and harden completely. This usually only takes a few minutes, but resist the urge to peek too soon!
- Starry, Starry Night: Once cool, carefully peel back the parchment paper and then the wax paper. Now for the fun part: using your star stencil or cookie cutter, trace and carefully cut out your star shapes from the hardened crayon wax. If you’re feeling extra creative, you can even freehand cut other shapes!
- Punch a Hole: Grab your hole punch and make a small hole at the top of each star. This is where your hanging twine will go.
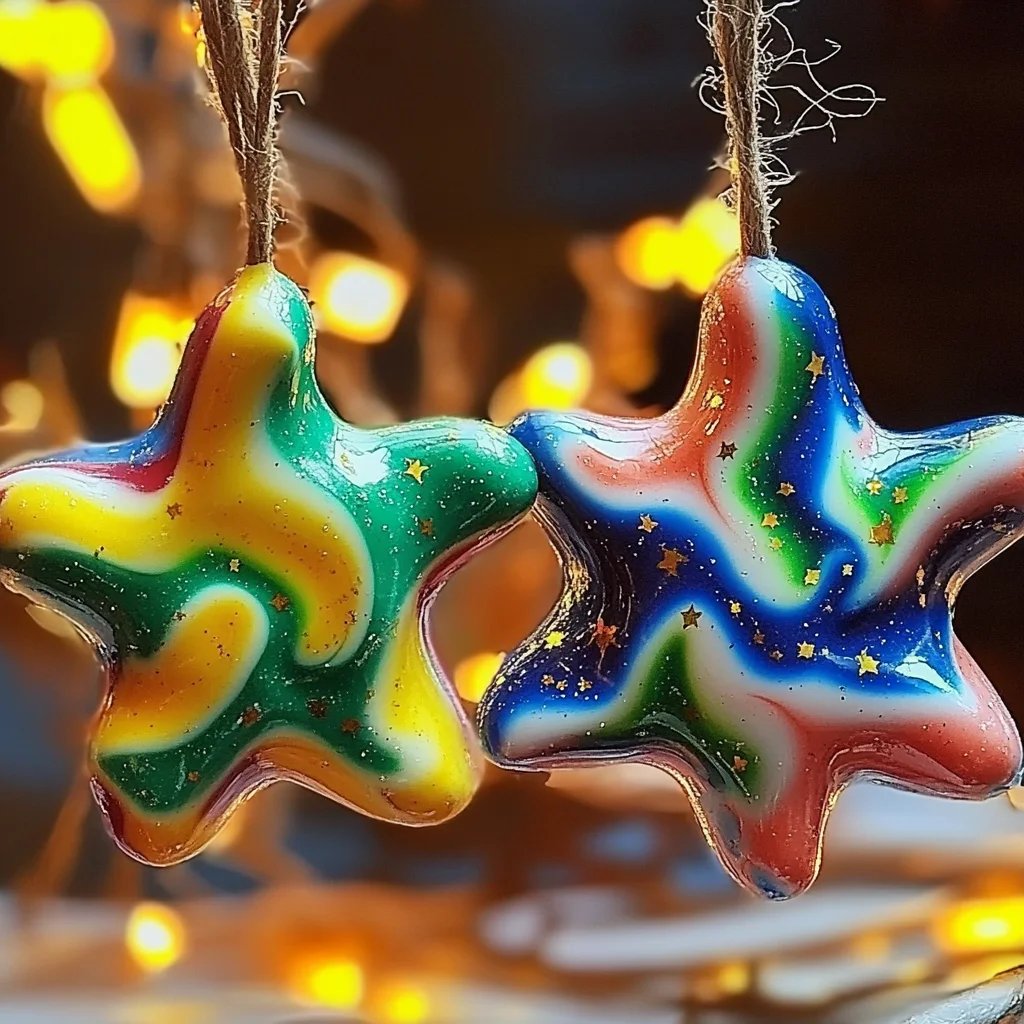
- Hang and Admire: Finally, thread a piece of baker’s twine through the hole in each star, tie a loop, and hang your beautiful, vibrant decorations! They look stunning in a window, catching the light, or as festive ornaments.
Substitutions & Additions
This is a craft that welcomes experimentation! Here are a few ideas to get your creative juices flowing:
- Shape Shifters: Don’t limit yourself to stars! Cookie cutters come in all sorts of shapes – hearts, circles, animals, or even holiday-themed designs.
- Glitter Bomb: Before folding your wax paper, sprinkle a tiny bit of fine glitter over the crayon shavings for an extra sparkly effect.
- Layered Look: Instead of mixing colors all at once, try melting one thin layer of color, letting it cool slightly, then adding another layer of a different color for a striped effect.
- Pressed Flowers/Leaves: For a nature-inspired touch, very carefully place tiny, dried pressed flowers or leaves amongst the crayon shavings before melting. The wax will encapsulate them beautifully.
- Essential Oils: A drop or two of a heat-safe essential oil (like lavender or orange) can add a subtle scent. Just be sure to add it before ironing, and test a small area first.
Tips for Success
To make sure your crayon star crafting goes smoothly, here are a few pointers I’ve picked up along the way:
- Low Heat is Key: Seriously, don’t crank up the iron. Low and slow prevents the wax from becoming too runny or burning, which can give it a brownish tint.
- Even Spreading: Try to spread your crayon shavings as evenly as possible. This helps them melt uniformly and prevents thick, lumpy spots.
- Protect Your Surfaces: Always, always use parchment paper to protect your iron and ironing board. A forgotten crayon bit on your iron is no fun to clean!
- Cool Completely: Patience, my friend! Let the wax cool entirely before attempting to cut. If it’s still warm, it’ll be gummy and hard to get clean cuts.
- Practice Makes Perfect: Don’t worry if your first star isn’t absolutely perfect. This is about having fun and creating something unique! You might even find yourself wanting to whip up a batch of homemade strawberry sorbet to celebrate your crafting success!
- Prep Ahead: You can shave all your crayons in advance and store the shavings in separate small containers. This makes assembly even quicker when you’re ready to create.
How to Store Melted Crayon Star Decorations
These little beauties are pretty durable, but a little care goes a long way to keep them looking their best. Store them flat between sheets of wax paper or parchment paper in a cool, dry place. Avoid direct sunlight or very warm areas, as they are, after all, made of melted crayon wax and can soften or stick together. They’ll last indefinitely if stored properly, ready to bring cheer year after year!
FAQs
Got a few questions buzzing in your head? Let’s clear them up!
Q: Can I use old, broken crayons?
A: Absolutely! This is the perfect project for all those crayon bits that are too small to color with but too good to throw away. It’s a fantastic way to recycle them!
Q: What if my crayon wax doesn’t melt evenly?
A: Make sure your crayon shavings are small and spread out. Also, ensure your iron is on a consistent low heat and you’re moving it gently over the entire surface. You might need to iron for a little longer, but remember to keep it moving.
Q: Can kids do this project by themselves?
A: Kids can definitely help with peeling and shaving crayons (with supervision for knives!), and sprinkling the shavings. The ironing step should always be done by an adult for safety. Cutting out the shapes and punching holes can be kid-friendly tasks too!
Q: How can I make my stars extra shiny?
A: The wax paper naturally gives them a slight sheen. For a super glossy finish, you could try pressing them lightly with a warm iron (again, using parchment paper) after they’ve completely cooled and you’ve cut them out. Just a quick press!
I hope you have the most wonderful time making these vibrant melted crayon stars. They truly add a touch of handmade charm and color to any space, and it’s such a joyful process from start to finish. Happy crafting, my friend!
For more effortlessly delicious recipes and creative ideas, be sure to follow us on Pinterest!

Melted Crayon Star Decorations
Ingredients
Equipment
Method
- Step 1: Unwrap Those Crayons: First things first, peel off all the paper wrappers from your chosen crayons. This can be a fun task for little hands, or a meditative one for you!
- Step 2: Shave 'Em Down: Now, for the magic! Use a crayon sharpener or a knife to shave your crayons into small bits. Think of it like making colorful sprinkles. The smaller the bits, the smoother and more evenly they'll melt. A vegetable peeler can create broader shavings for cool swirls!
- Step 3: Spread the Color: Lay out a sheet of wax paper on a flat, protected surface (like an ironing board with an old towel). Sprinkle your crayon shavings evenly onto one half of the wax paper. This is where you get to be an artist! Mix colors, create gradients, or stick to a single hue.
- Step 4: Fold and Seal: Carefully fold the other half of the wax paper over your crayon shavings, creating an enclosed packet. Press down firmly around the edges to seal them, making sure no shavings can escape.
- Step 5: Parchment Paper Protection: Place your wax paper packet between two sheets of parchment paper. This is super important! It protects your iron and ironing board from any stray crayon wax.
- Step 6: Iron Away the Meltdown: With adult supervision, set your iron to a low heat setting – no steam! Gently glide the iron over the top sheet of parchment paper. You'll see the crayon shavings start to melt and blend together like magic. Keep the iron moving to avoid scorching the wax. Once everything looks nicely melted and combined, lift the iron.
- Step 7: Cool Down: Let the melted crayon wax cool and harden completely. This usually only takes a few minutes, but resist the urge to peek too soon!
- Step 8: Starry, Starry Night: Once cool, carefully peel back the parchment paper and then the wax paper. Now for the fun part: using your star stencil or cookie cutter, trace and carefully cut out your star shapes from the hardened crayon wax. If you’re feeling extra creative, you can even freehand cut other shapes!
- Step 9: Punch a Hole: Grab your hole punch and make a small hole at the top of each star. This is where your hanging twine will go.
- Step 10: Hang and Admire: Finally, thread a piece of baker's twine through the hole in each star, tie a loop, and hang your beautiful, vibrant decorations! They look stunning in a window, catching the light, or as festive ornaments.