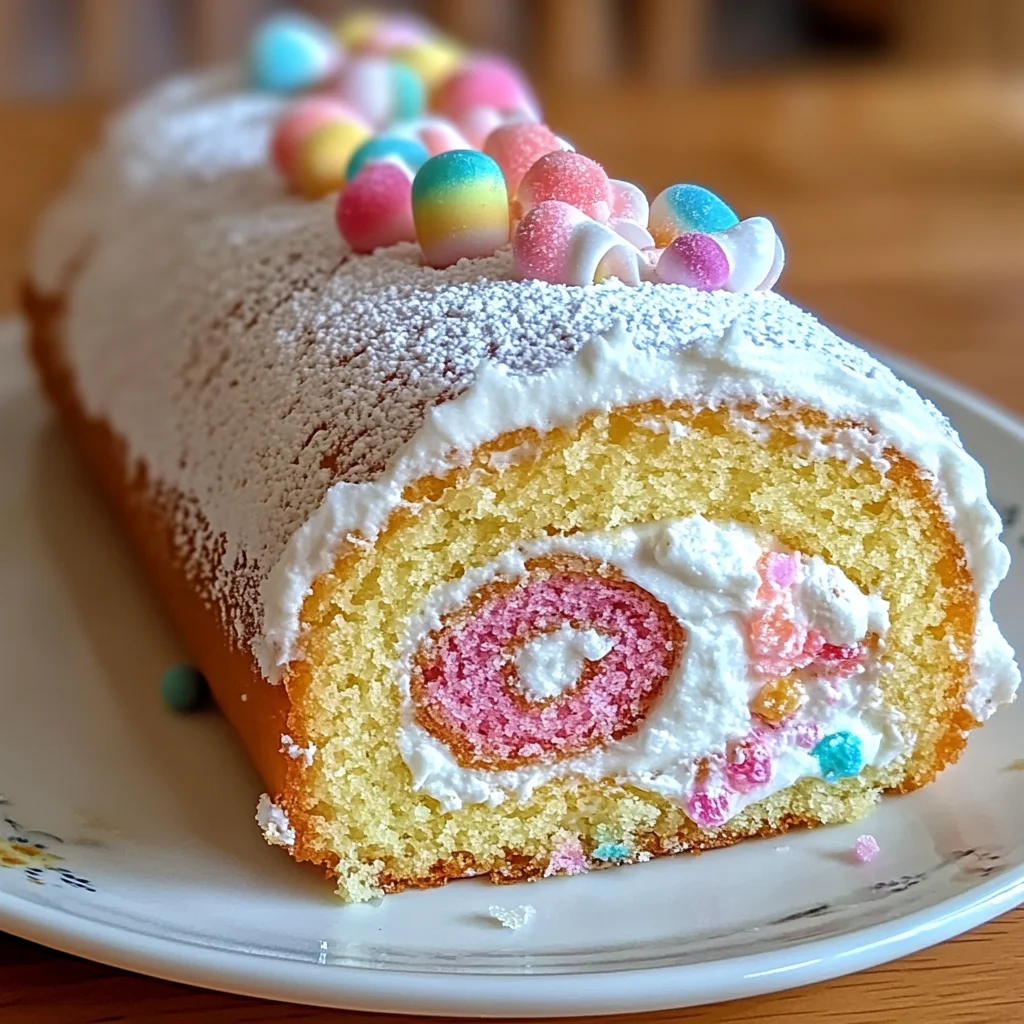
Oh, friends! Do you remember that feeling of pure magic you got as a kid when you saw that big, fluffy cloud of cotton candy at the fair or carnival? That sweet, melt-in-your-mouth goodness that felt almost too good to be true? Well, what if I told you you could capture a little bit of that whimsical joy right in your own kitchen? This Japanese Cotton Candy Swiss Cake Roll does just that!
Imagine a cake so light and airy it feels like biting into a cloud, filled with a dreamy, sweet whipped cream that whispers hints of that classic cotton candy flavor. It looks fancy, sure, but I promise you, it’s one of those recipes that’s much easier than it looks. It’s perfect for birthdays, special occasions, or just when you need a little sprinkle of magic on a Tuesday. Let’s bake some joy!
Why You’ll Love This Recipe
- Fast: From mixing bowl to rolling takes less than an hour!
- Easy: Don’t be intimidated by the roll! I’ll walk you through it step-by-step.
- Giftable: Wrap up slices or a whole roll for a truly unique homemade gift.
- Crowd-pleasing: Who can resist a slice of cloud-like cake with whimsical flavor?
Ingredients
Gather up these simple goodies. Most are pantry staples, but a couple might need a quick trip to the store!
- For the Cake Roll:
- 4 large eggs, separated: Make sure they’re at room temperature! It helps everything mix better.
- 1/4 cup whole milk: Just regular milk is perfect.
- 1/4 cup vegetable oil: Any neutral oil works here.
- 1/2 cup cake flour, sifted: Sifting makes it extra light! Don’t substitute with all-purpose unless you absolutely have to, cake flour makes a big difference here.
- 1/4 teaspoon salt: Just a pinch to balance the sweetness.
- 1/4 teaspoon cream of tartar: This helps stabilize those egg whites and gives your cake lift!
- 1/2 cup granulated sugar: Sweetness for structure and flavor.
- For the Whipped Cream Filling:
- 1 cup heavy whipping cream: Needs to be nice and cold to whip up beautifully.
- 2 tablespoons powdered sugar: Sweetens and slightly thickens the cream.
- 1/2 teaspoon vanilla extract: Classic, cozy flavor.
- A few drops cotton candy flavoring (optional): This is where the magic happens! Find it at most craft stores or online baking supply shops.
- Pink or blue gel food coloring (optional): For that classic cotton candy look! Gel works best as it won’t thin out the cream.
- Optional Decoration:
- Powdered sugar: For a lovely dusting on top.
- Cotton candy pieces: For an extra touch of whimsy just before serving!
How to Make It
Okay, deep breaths! Making a cake roll is totally doable, and I’ll guide you through each step. You got this!
- Prep Your Station: Preheat your oven to 325°F (160°C). This lower temperature helps the cake bake evenly without drying out. Line a 10×15 inch jelly roll pan (that’s your standard size!) with parchment paper. Make sure the paper comes up the sides a bit – it helps lift the cake out later.
- Mix the Yolks: In a medium bowl, gently whisk together the egg yolks, milk, and vegetable oil until everything is smooth and combined. Sift your cake flour and salt right into this mixture. Mix again just until it’s smooth – don’t overmix! You don’t want to develop too much gluten.
- Whip the Whites: Get out a separate, large, super clean bowl (fat is the enemy of whipped egg whites!). Beat the egg whites and cream of tartar until they get nice and foamy, like bubble bath. Gradually add the granulated sugar, a little bit at a time, while you continue beating. Keep going until you have stiff, glossy peaks. When you lift the whisk, the peaks should stand straight up!
- Combine Gently: This is a key step! Take about a third of your whipped egg whites and gently fold them into the yolk batter. Use a spatula and a motion like you’re cutting through the middle and scooping under to bring the batter up and over. Once that’s mostly combined, gently fold in the remaining egg whites in two more additions. The goal is to keep as much air in that batter as possible! Don’t stir or beat vigorously.
- Pour and Smooth: Pour your beautiful, airy batter into the prepared pan. Use an offset spatula or the back of a spoon to gently smooth the surface evenly. Give the pan a couple of gentle taps on the counter – this helps release any big air bubbles.
- Bake Time! Pop the pan into your preheated oven. Bake for 25-30 minutes. You’ll know it’s done when the top is lightly golden and if you gently touch it, it springs back. Don’t overbake, or it might crack when you roll it!
- Cooling Prep: As soon as it comes out of the oven, let it sit in the pan for just 5 minutes. While it’s resting, get another piece of parchment paper ready on your counter or a cooling rack.
- The Big Flip & Roll: Here’s the moment of truth! Carefully invert the cake onto the new piece of parchment paper. Gently peel off the parchment paper that was on the bottom (it’s now on top!). Now, while the cake is still warm and pliable, gently roll it up from the short end, using the parchment paper underneath to help you. Roll it into a tight spiral. Leave it rolled up like this and let it cool completely on a wire rack. This “sets” the roll shape and helps prevent cracking later.
- Whip the Filling: While the cake cools, make your filling! In a cold bowl (you can chill it in the freezer for a few minutes!), whip the cold heavy cream, powdered sugar, and vanilla extract until stiff peaks form. If you’re using cotton candy flavoring and food coloring, add them now and whip briefly to combine.
- Unroll & Fill: Once the cake is totally, completely cool (this is important!), carefully unroll it. Spread the whipped cream filling evenly over the inside surface, leaving about a 1/2-inch border around the edges. Gently re-roll the cake (this time without the parchment paper inside!).
- Chill Out: Carefully wrap the cake roll tightly in plastic wrap. Pop it in the refrigerator for at least 1 hour. This time in the fridge allows the cake to set around the filling, making it much easier to slice neatly. I often let mine chill for a few hours or even overnight!
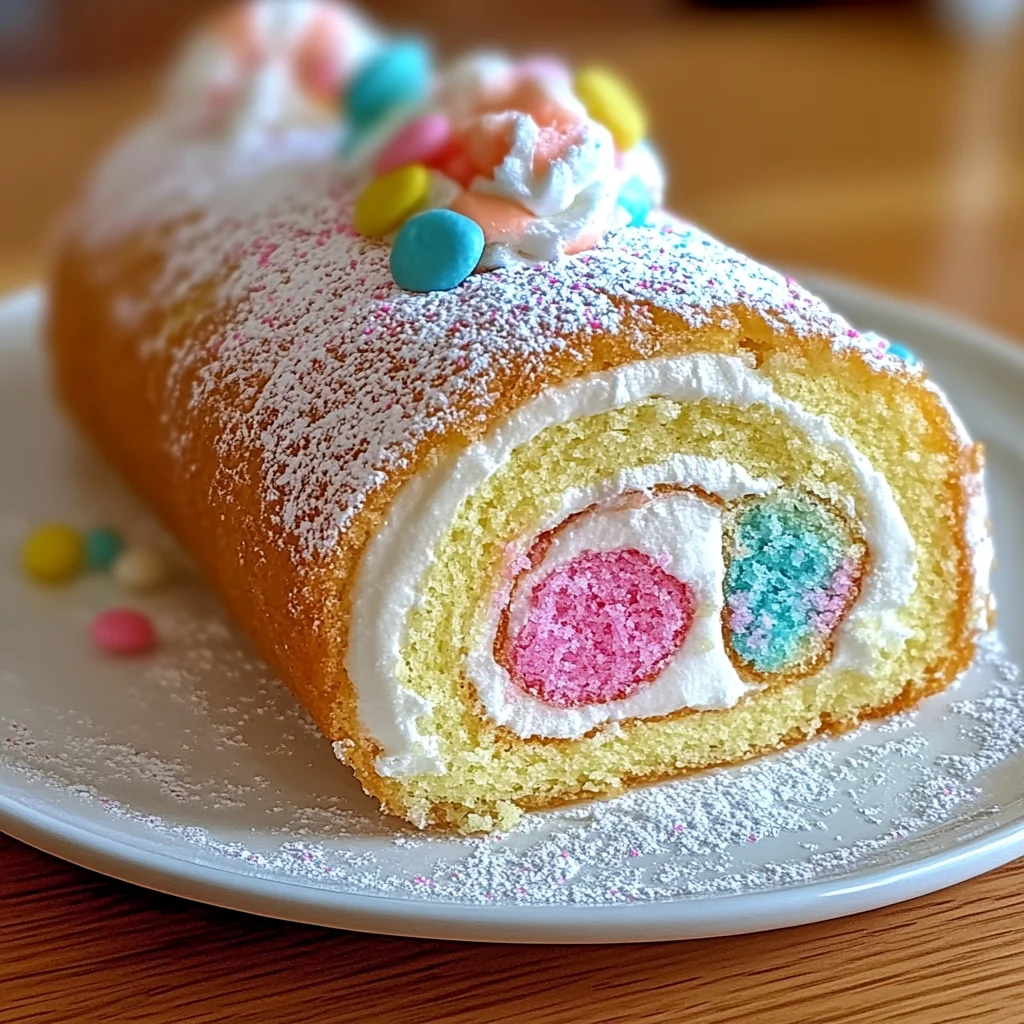
- Decorate and Serve: When you’re ready to serve, unwrap the cake roll. Dust the top with powdered sugar using a sieve or small sifter. If you’re feeling extra festive, add a few wisps of actual cotton candy on top right before bringing it to the table. Slice with a sharp knife and enjoy that magical bite!
Substitutions & Additions
Want to put your own spin on this dreamy cake? Here are a few ideas:
- Flavor Swaps: Instead of cotton candy, try almond extract, lemon extract, or even a little bit of instant coffee powder dissolved in the milk for a coffee roll!
- Different Fillings: While whipped cream is classic here, you could try a cream cheese frosting (lightened up!), a simple buttercream, or even add some finely chopped fresh fruit to the whipped cream.
- Add Texture: Fold some sprinkles into the whipped cream for a fun surprise inside, or press some finely chopped nuts or toasted coconut onto the whipped cream before rolling (just be mindful this might make rolling slightly trickier).
- Chocolate Version: Replace a tablespoon or two of the cake flour with unsweetened cocoa powder for a chocolate cake roll base.
Tips for Success
Don’t let the idea of rolling a cake scare you! Keep these tips in mind for a smooth (and crack-free!) experience:
- Room Temperature Eggs are Key: Seriously, they make a difference in how the batter emulsifies and how the egg whites whip up.
- Don’t Overmix: Gentle folding of the egg whites is crucial for that cloud-like texture.
- Bake Just Right: An overbaked cake will be dry and brittle, making it much more likely to crack when rolled. Keep an eye on the time and look for that spring-back test.
- Roll While Warm: The cake is most flexible when it’s warm. Rolling it with the parchment right after that initial cool-down sets the shape.
- Cool Completely Before Unrolling: Patience, my friend! Unrolling a warm cake can cause it to tear. Let it cool completely in its rolled shape first.
- Chill Time is Your Friend: Don’t skip the refrigeration step! It firms up the filling and the cake, making slicing a breeze and preventing the dreaded “squish.”
- Prep Ahead: You can bake the cake a day in advance, roll it, let it cool, wrap it tightly, and store it at room temperature. Make the filling the next day, unroll, fill, and chill.
How to Store It
This cake roll is best enjoyed fresh, but it stores well too! Keep the finished, wrapped cake roll in the refrigerator for up to 3-4 days. The cake will remain moist and the filling will hold up beautifully.
Can you freeze it? Yes! You can freeze the unfilled, baked cake roll (wrapped tightly) for up to a month. Thaw it in the refrigerator before unrolling and filling. You can also freeze the filled and rolled cake (wrapped tightly, then perhaps in foil or a freezer bag) for a couple of weeks, though the texture of the whipped cream might change slightly. Thaw overnight in the fridge.
FAQs
Got questions? I’ve got answers!
Why did my cake crack when I rolled it?
This is the most common issue! It’s usually because the cake was either slightly overbaked (making it dry) or you waited too long to roll it. Remember to roll it gently while it’s still warm!
Can I use all-purpose flour instead of cake flour?
You can, but your cake won’t be quite as light and fluffy. Cake flour has a lower protein content, which is key for that delicate crumb. If you must use all-purpose, remove 2 tablespoons of flour from the 1/2 cup measurement and replace it with 2 tablespoons of cornstarch, then sift it very well.
My egg whites aren’t whipping to stiff peaks! What happened?
Make sure your bowl and whisk are perfectly clean and dry – even a tiny bit of grease or egg yolk can prevent the whites from whipping properly. Also, ensure your eggs are at room temperature.
Can I make this without the cotton candy flavoring?
Absolutely! It will still be a delicious, light Japanese-style Swiss roll with vanilla whipped cream. The cotton candy flavoring just adds that extra touch of whimsy that matches the theme.

Dreamy Japanese Cotton Candy Swiss Cake Roll
Ingredients
Equipment
Method
- Step 1: Prep Your Station: Preheat your oven to 325°F (160°C). Line a 10x15 inch jelly roll pan with parchment paper, letting it come up the sides.
- Step 2: Mix the Yolks: In a medium bowl, gently whisk together the egg yolks, milk, and vegetable oil until smooth. Sift the cake flour and salt into this mixture. Mix again just until smooth – don't overmix!
- Step 3: Whip the Whites: In a separate, large, super clean bowl, beat the egg whites and cream of tartar until foamy. Gradually add the granulated sugar while beating until you have stiff, glossy peaks.
- Step 4: Combine Gently: Take about a third of your whipped egg whites and gently fold them into the yolk batter using a spatula. Gently fold in the remaining egg whites in two more additions. Don't stir or beat vigorously.
- Step 5: Pour and Smooth: Pour the batter into the prepared pan. Use an offset spatula or the back of a spoon to gently smooth the surface evenly. Give the pan a couple of gentle taps on the counter.
- Step 6: Bake Time! Pop the pan into your preheated oven. Bake for 25-30 minutes until the top is lightly golden and springs back when gently touched.
- Step 7: Cooling Prep: As soon as it comes out of the oven, let it sit in the pan for just 5 minutes. While it's resting, get another piece of parchment paper ready on your counter or a cooling rack.
- Step 8: The Big Flip & Roll: Carefully invert the cake onto the new piece of parchment paper. Gently peel off the parchment paper that was on the bottom. While the cake is still warm, gently roll it up from the short end, using the parchment paper underneath to help. Leave it rolled up and let it cool completely on a wire rack.
- Step 9: Whip the Filling: While the cake cools, make your filling! In a cold bowl, whip the cold heavy cream, powdered sugar, and vanilla extract until stiff peaks form. If using, add cotton candy flavoring and food coloring and whip briefly to combine.
- Step 10: Unroll & Fill: Once the cake is totally, completely cool, carefully unroll it. Spread the whipped cream filling evenly over the inside surface, leaving about a 1/2-inch border. Gently re-roll the cake (this time without the parchment paper inside!).
- Step 11: Chill Out: Carefully wrap the cake roll tightly in plastic wrap. Pop it in the refrigerator for at least 1 hour. This allows the cake to set around the filling, making it easier to slice neatly.
- Step 12: Decorate and Serve: When ready to serve, unwrap the cake roll. Dust the top with powdered sugar using a sieve or small sifter. Add cotton candy pieces on top just before serving. Slice with a sharp knife and enjoy!