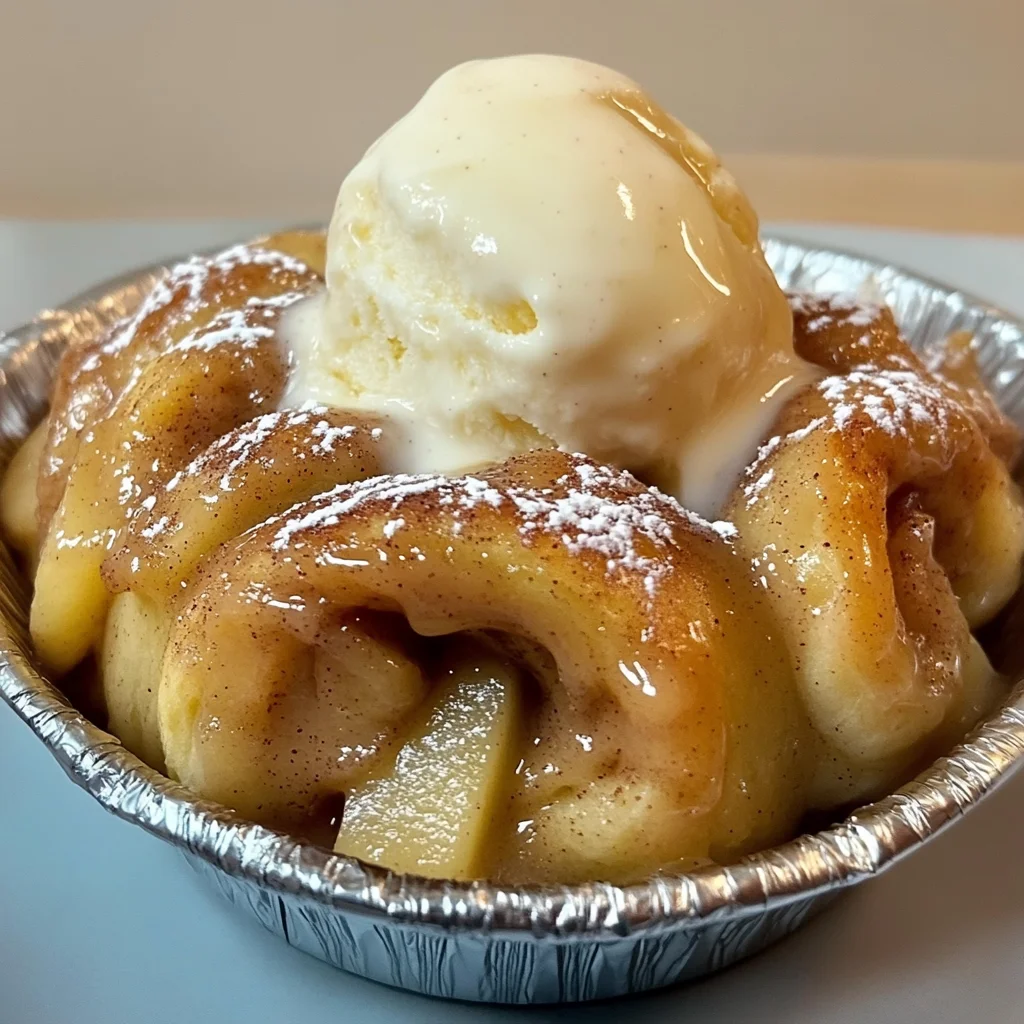
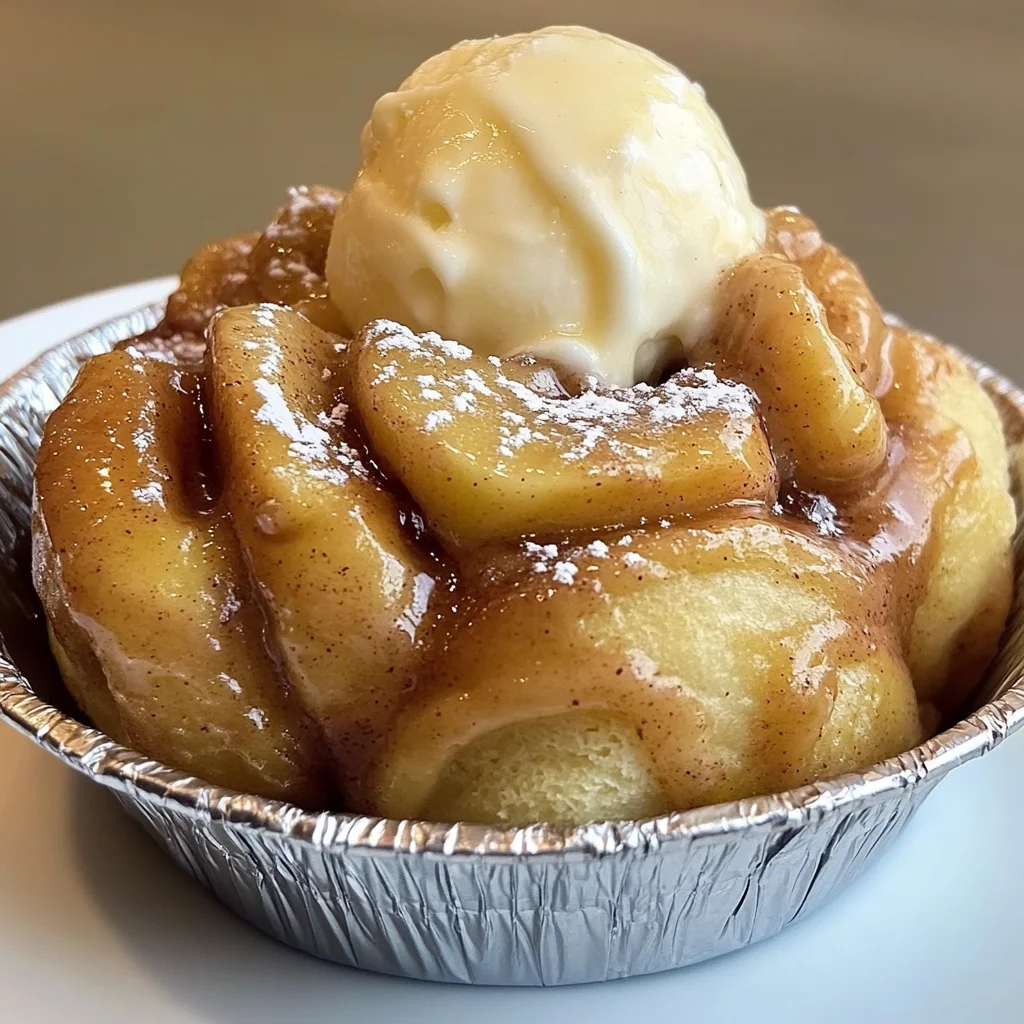
Oh my goodness, is there anything more comforting than the smell of cinnamon rolls baking in your kitchen? It instantly takes me back to lazy weekend mornings and cozy family gatherings. And these aren’t just any cinnamon rolls, friends. We’re adding warm, tender apples and topping it all off with a scoop of melting vanilla ice cream. Pure bliss, I tell you!
This recipe is surprisingly easy to tackle, even if you’re new to working with yeast. We’re keeping things simple, focusing on that incredible flavor combination that just screams comfort. They’re perfect for a special breakfast, a decadent dessert, or even a thoughtful gift for someone who needs a little warmth in their day. Ready to make some magic?
Why You’ll Love This Recipe
- Fast-ish: Okay, “fast” for cinnamon rolls! The hands-on time is surprisingly quick, and the waiting (rising!) is totally worth it.
- Easy: Don’t let yeast scare you! We walk through it step-by-step, and it’s much simpler than you think.
- Giftable: Bake a batch and share the love! Warm rolls wrapped up make the best surprise.
- Crowd-pleasing: Seriously, who doesn’t love warm cinnamon rolls? Adding apple and ice cream takes them over the top!
Ingredients
Gathering your ingredients is step one to deliciousness! Most of these are probably already in your pantry.
- All-purpose flour: The backbone of our soft dough. Make sure you have enough!
- Granulated sugar: Just a little sweetness for the dough.
- Active dry yeast: Our magical friend that makes the rolls puffy and light. Check the expiration date to make sure it’s active!
- Salt: Balances out all the sweet flavors.
- Ground cinnamon: Essential for that classic cinnamon roll aroma and taste in the dough.
- Milk, warmed: Just warm enough (like a warm bath, not hot!) to wake up that yeast.
- Unsalted butter, melted: Adds richness and tenderness to the dough.
- Large eggs: Help bind everything together and add richness.
- Apples, peeled and diced: Granny Smiths are fantastic here because their tartness balances the sweetness, but use your favorite baking apple! Make sure they’re diced pretty small so they cook tender inside the rolls.
- Packed brown sugar: For that gooey, caramel-like filling. Yum!
- Ground cinnamon (for filling): Can you ever have too much cinnamon? I think not.
- Lemon juice: Brightens up the apple flavor and keeps the apples from browning.
- Cornstarch: This is our secret weapon to thicken the apple filling just enough so it doesn’t make the rolls soggy.
- Powdered sugar: For that classic, sweet drizzle.
- Milk (for icing): Just a splash to get the right drizzly consistency.
- Vanilla extract: Elevates the simple icing.
- Vanilla ice cream: The ultimate warm-meets-cold topping. Get a good quality one!
How to Make It
Alright, let’s get baking! Follow these steps, and you’ll have warm, gooey rolls in no time.
Step 1: Get the Dough Started. Grab your biggest bowl. Whisk together 2 cups of the flour, the granulated sugar, yeast, salt, and the cinnamon for the dough. In a separate bowl, gently whisk together your warmed milk (make sure it’s not too hot, just comfortably warm to the touch), melted butter, and eggs. Pour the wet ingredients into the dry ingredients and stir until everything is just combined. Now, gradually add the rest of the flour, mixing it in until a soft dough starts to form. It might be a little sticky – that’s okay!
Step 2: Knead That Dough. Turn the dough out onto a lightly floured counter. Time to work those arm muscles! Knead the dough for about 5 to 7 minutes. You’ll feel it transform from a shaggy mess into a smooth, elastic ball. Place the dough in a bowl that you’ve lightly greased (a little cooking spray works great!), cover it tightly with plastic wrap, and find a nice warm spot for it to hang out. Let it rise for about 1 hour, or until it’s doubled in size. Patience is a virtue here!
Step 3: Prep the Apple Goodness. While your dough is rising, let’s make the filling! In a medium bowl, combine your diced apples, brown sugar, cinnamon (for the filling!), lemon juice, and cornstarch. Give it a good stir until the apples are all coated in that sweet, spiced mixture.
Step 4: Roll and Fill! Your dough should be looking nice and puffy now! Punch it down gently – this releases the air. Turn it out onto a lightly floured surface and roll it into a large rectangle, about 1/4 inch thick. Try to make the edges as straight as you can, but don’t stress too much! Now, spread that delicious apple filling evenly over the rolled-out dough, leaving a small border on one long edge.
Step 5: Shape and Rise Again. Starting from one of the long edges with the filling all the way to the edge, tightly roll the dough up into a log. Once you get to the end, pinch the seam together really well to seal it. Now, grab a sharp knife or even some dental floss (unflavored works best!) and cut the log into 12 equal slices. Arrange these beautiful little rolls cut-side up in a greased 9×13 inch baking pan. Cover the pan again (plastic wrap or a clean kitchen towel) and let them rise for another 30-45 minutes. They should look puffy and snug in the pan.
Step 6: Time to Bake! While the rolls are having their second rise, preheat your oven to 350°F (175°C). Pop the pan in the oven and bake for 25-30 minutes. You’re looking for them to be golden brown and baked through. The apples should be tender.
Step 7: Whip Up the Icing. While the rolls are still warm (but maybe not screaming hot out of the oven), whisk together the powdered sugar, milk, and vanilla extract in a small bowl until it’s smooth and drizzle-able. If it’s too thick, add a tiny splash more milk; too thin, add a little more powdered sugar.
Step 8: Serve and Enjoy! As soon as the rolls come out of the oven, drizzle that lovely icing all over them. Don’t be shy! The warmth of the rolls will let the icing melt into all the nooks and crannies. And for the grand finale? Scoop that cold vanilla ice cream right on top of a warm roll. Get a little bit of everything in one bite. Pure heaven!
Substitutions & Additions
Want to play around a bit? Go for it! Recipes are just a starting point.
Try swapping out the apples: Pears would be lovely, or even a mix of apple varieties. Just make sure they’re fruits that soften nicely when baked.
Add some nuts! Chopped walnuts or pecans would be fantastic sprinkled over the apple filling before you roll up the dough.
Mix up the spices: A pinch of nutmeg or a tiny bit of ground ginger could add another layer of warmth to the apple filling.
Elevate the icing: Add a pinch of cinnamon to the icing, or even a tiny bit of maple extract for a different flavor profile. A drizzle of caramel sauce over the top with the ice cream? Divine!
Tips for Success
A few little pointers to make sure your rolls turn out perfectly every time!
- Check your yeast: Make sure your active dry yeast isn’t expired. You can proof it first by dissolving it in a little warm milk (from the recipe amount) with a pinch of sugar. If it gets foamy after 5-10 minutes, it’s good to go!
- Don’t overheat the milk/butter: Liquids that are too hot will kill the yeast. Aim for bathwater warm, around 105-115°F (40-46°C).
- Knead properly: Developing the gluten through kneading is key to soft, fluffy rolls. If you have a stand mixer with a dough hook, you can use that too! Knead on medium speed for about the same amount of time until the dough pulls away from the sides of the bowl.
- Warm spot for rising: Yeast loves warmth! A slightly warm oven (turned off!), a microwave with a cup of hot water inside, or just a draft-free counter spot can work.
- Don’t overfill: While you want plenty of apple goodness, don’t overload the dough, or it will be hard to roll and cut.
- Cutting the rolls: For clean cuts, especially with filling, dental floss slid under the log and crossed over the top is a great trick!
- Don’t overbake: Keep an eye on them! You want them golden, not dark brown and dry.
How to Store It
If (and that’s a big if) you happen to have any leftovers, here’s how to keep them fresh.
Baked rolls are best enjoyed warm and fresh, especially with that ice cream! If you have leftovers, store them in an airtight container at room temperature for 1-2 days, or in the refrigerator for up to 5 days. Reheat gently in the microwave or a low oven.
You can also prepare the rolls up to the second rise (Step 5), cover them tightly, and refrigerate overnight. The next morning, let them sit at room temperature for about 30-60 minutes while your oven preheats before baking as usual. This is a great make-ahead option!
FAQs
Got questions? I’ve got (brief!) answers!
Q: Can I use instant yeast?
A: Yes! If using instant yeast, you can mix it directly with the dry ingredients (skip proofing) and the first rise might be slightly shorter (around 45 minutes).
Q: My dough didn’t rise, what happened?
A: This is usually because the yeast was old/inactive, or the liquid (milk/butter) was too hot and killed it. Make sure your yeast is fresh and your liquids are warm, not hot!
Q: Can I use canned apple pie filling?
A: While convenient, canned filling can be very wet and sugary, potentially making the rolls soggy. This recipe’s filling is designed to be just the right consistency, so I highly recommend sticking to fresh apples for the best result!
Q: Can I freeze the baked rolls?
A: Yes! Let them cool completely, then wrap individually or place in a freezer-safe container for up to 2-3 months. Reheat gently in the oven from frozen (might take a little longer) or thaw first.
Cozy Homemade Apple Cinnamon Rolls with Vanilla Ice Cream
Ingredients
Equipment
Method
- Step 1: Get the Dough Started. Grab your biggest bowl. Whisk together 2 cups of the flour, the granulated sugar, yeast, salt, and the cinnamon for the dough. In a separate bowl, gently whisk together your warmed milk (make sure it's not too hot, just comfortably warm to the touch), melted butter, and eggs. Pour the wet ingredients into the dry ingredients and stir until everything is just combined. Now, gradually add the rest of the flour, mixing it in until a soft dough starts to form. It might be a little sticky – that's okay!
- Step 2: Knead That Dough. Turn the dough out onto a lightly floured counter. Knead the dough for about 5 to 7 minutes. You'll feel it transform from a shaggy mess into a smooth, elastic ball. Place the dough in a bowl that you've lightly greased (a little cooking spray works great!), cover it tightly with plastic wrap, and find a nice warm spot for it to hang out. Let it rise for about 1 hour, or until it’s doubled in size. Patience is a virtue here!
- Step 3: Prep the Apple Goodness. While your dough is rising, let's make the filling! In a medium bowl, combine your diced apples, brown sugar, cinnamon (for the filling!), lemon juice, and cornstarch. Give it a good stir until the apples are all coated in that sweet, spiced mixture.
- Step 4: Roll and Fill! Your dough should be looking nice and puffy now! Punch it down gently – this releases the air. Turn it out onto a lightly floured surface and roll it into a large rectangle, about 1/4 inch thick. Try to make the edges as straight as you can, but don't stress too much! Now, spread that delicious apple filling evenly over the rolled-out dough, leaving a small border on one long edge.
- Step 5: Shape and Rise Again. Starting from one of the long edges with the filling all the way to the edge, tightly roll the dough up into a log. Once you get to the end, pinch the seam together really well to seal it. Now, grab a sharp knife or even some dental floss (unflavored works best!) and cut the log into 12 equal slices. Arrange these beautiful little rolls cut-side up in a greased 9x13 inch baking pan. Cover the pan again (plastic wrap or a clean kitchen towel) and let them rise for another 30-45 minutes. They should look puffy and snug in the pan.
- Step 6: Time to Bake! While the rolls are having their second rise, preheat your oven to 350°F (175°C). Pop the pan in the oven and bake for 25-30 minutes. You're looking for them to be golden brown and baked through. The apples should be tender.
- Step 7: Whip Up the Icing. While the rolls are still warm (but maybe not screaming hot out of the oven), whisk together the powdered sugar, milk, and vanilla extract in a small bowl until it's smooth and drizzle-able. If it's too thick, add a tiny splash more milk; too thin, add a little more powdered sugar.
- Step 8: Serve and Enjoy! As soon as the rolls come out of the oven, drizzle that lovely icing all over them. Don't be shy! The warmth of the rolls will let the icing melt into all the nooks and crannies. And for the grand finale? Scoop that cold vanilla ice cream right on top of a warm roll. Get a little bit of everything in one bite. Pure heaven!