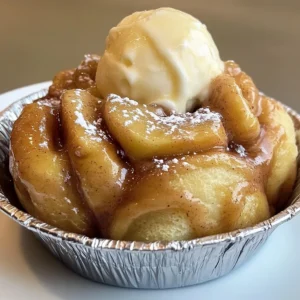
Cozy Homemade Apple Cinnamon Rolls with Vanilla Ice Cream
Nothing says comfort like warm cinnamon rolls, and these take it to the next level with tender apple filling and a scoop of melting vanilla ice cream. Surprisingly easy to make, even for yeast beginners, they're perfect for a special breakfast, decadent dessert, or a thoughtful gift. Get ready for pure bliss!
Equipment
- Large mixing bowl
- 9x13 inch baking pan
- Sharp Knife or Dental Floss
Ingredients
For the Dough
- All-purpose flour
- Granulated sugar
- Active dry yeast Check the expiration date to make sure it's active!
- Salt
- Ground cinnamon for the dough
- Milk, warmed warm enough (like a warm bath, not hot!)
- Unsalted butter, melted for the dough
- Large eggs
For the Apple Filling
- Apples, peeled and diced Granny Smiths are fantastic here; diced pretty small
- Packed brown sugar
- Ground cinnamon for the filling
- Lemon juice
- Cornstarch
For the Icing and Serving
- Powdered sugar For the icing
- Milk for icing; just a splash to get the right drizzly consistency
- Vanilla extract for the icing
- Vanilla ice cream for serving
Instructions
- Step 1: Get the Dough Started. Grab your biggest bowl. Whisk together 2 cups of the flour, the granulated sugar, yeast, salt, and the cinnamon for the dough. In a separate bowl, gently whisk together your warmed milk (make sure it's not too hot, just comfortably warm to the touch), melted butter, and eggs. Pour the wet ingredients into the dry ingredients and stir until everything is just combined. Now, gradually add the rest of the flour, mixing it in until a soft dough starts to form. It might be a little sticky – that's okay!
- Step 2: Knead That Dough. Turn the dough out onto a lightly floured counter. Knead the dough for about 5 to 7 minutes. You'll feel it transform from a shaggy mess into a smooth, elastic ball. Place the dough in a bowl that you've lightly greased (a little cooking spray works great!), cover it tightly with plastic wrap, and find a nice warm spot for it to hang out. Let it rise for about 1 hour, or until it’s doubled in size. Patience is a virtue here!
- Step 3: Prep the Apple Goodness. While your dough is rising, let's make the filling! In a medium bowl, combine your diced apples, brown sugar, cinnamon (for the filling!), lemon juice, and cornstarch. Give it a good stir until the apples are all coated in that sweet, spiced mixture.
- Step 4: Roll and Fill! Your dough should be looking nice and puffy now! Punch it down gently – this releases the air. Turn it out onto a lightly floured surface and roll it into a large rectangle, about 1/4 inch thick. Try to make the edges as straight as you can, but don't stress too much! Now, spread that delicious apple filling evenly over the rolled-out dough, leaving a small border on one long edge.
- Step 5: Shape and Rise Again. Starting from one of the long edges with the filling all the way to the edge, tightly roll the dough up into a log. Once you get to the end, pinch the seam together really well to seal it. Now, grab a sharp knife or even some dental floss (unflavored works best!) and cut the log into 12 equal slices. Arrange these beautiful little rolls cut-side up in a greased 9x13 inch baking pan. Cover the pan again (plastic wrap or a clean kitchen towel) and let them rise for another 30-45 minutes. They should look puffy and snug in the pan.
- Step 6: Time to Bake! While the rolls are having their second rise, preheat your oven to 350°F (175°C). Pop the pan in the oven and bake for 25-30 minutes. You're looking for them to be golden brown and baked through. The apples should be tender.
- Step 7: Whip Up the Icing. While the rolls are still warm (but maybe not screaming hot out of the oven), whisk together the powdered sugar, milk, and vanilla extract in a small bowl until it's smooth and drizzle-able. If it's too thick, add a tiny splash more milk; too thin, add a little more powdered sugar.
- Step 8: Serve and Enjoy! As soon as the rolls come out of the oven, drizzle that lovely icing all over them. Don't be shy! The warmth of the rolls will let the icing melt into all the nooks and crannies. And for the grand finale? Scoop that cold vanilla ice cream right on top of a warm roll. Get a little bit of everything in one bite. Pure heaven!
Notes
Substitutions & Additions: Try swapping out the apples with pears or a mix of apple varieties. Add chopped walnuts or pecans over the apple filling before rolling. Mix up the spices with a pinch of nutmeg or ground ginger. Add a pinch of cinnamon, maple extract, or a drizzle of caramel sauce to the icing.
Tips for Success: Check your active dry yeast isn't expired (proof it first if unsure). Don't overheat the milk/butter (aim for 105-115°F / 40-46°C). Knead properly for soft, fluffy rolls (about 5-7 mins or use a stand mixer). Find a warm, draft-free spot for rising. Don't overfill the dough. Use dental floss for clean cuts. Don't overbake; they should be golden.
How to Store It: Store leftover baked rolls in an airtight container at room temperature for 1-2 days or in the refrigerator for up to 5 days. Reheat gently. You can also prepare rolls up to the second rise, refrigerate overnight, then bake after letting them sit at room temp for 30-60 mins. Baked rolls can be frozen for up to 2-3 months; reheat from frozen or thawed.