Oh my goodness, y’all. There are some cookies that just transport you, aren’t there? Maybe it’s the smell filling your kitchen, or that first perfect bite. For me, thinking of these giant, gooey Rocky Road cookies immediately brings back memories of those incredible bakery treats – the kind that are almost too big to hold, packed with goodies, and just absolutely irresistible. Well, get ready, because we’re going to bake some magic today!
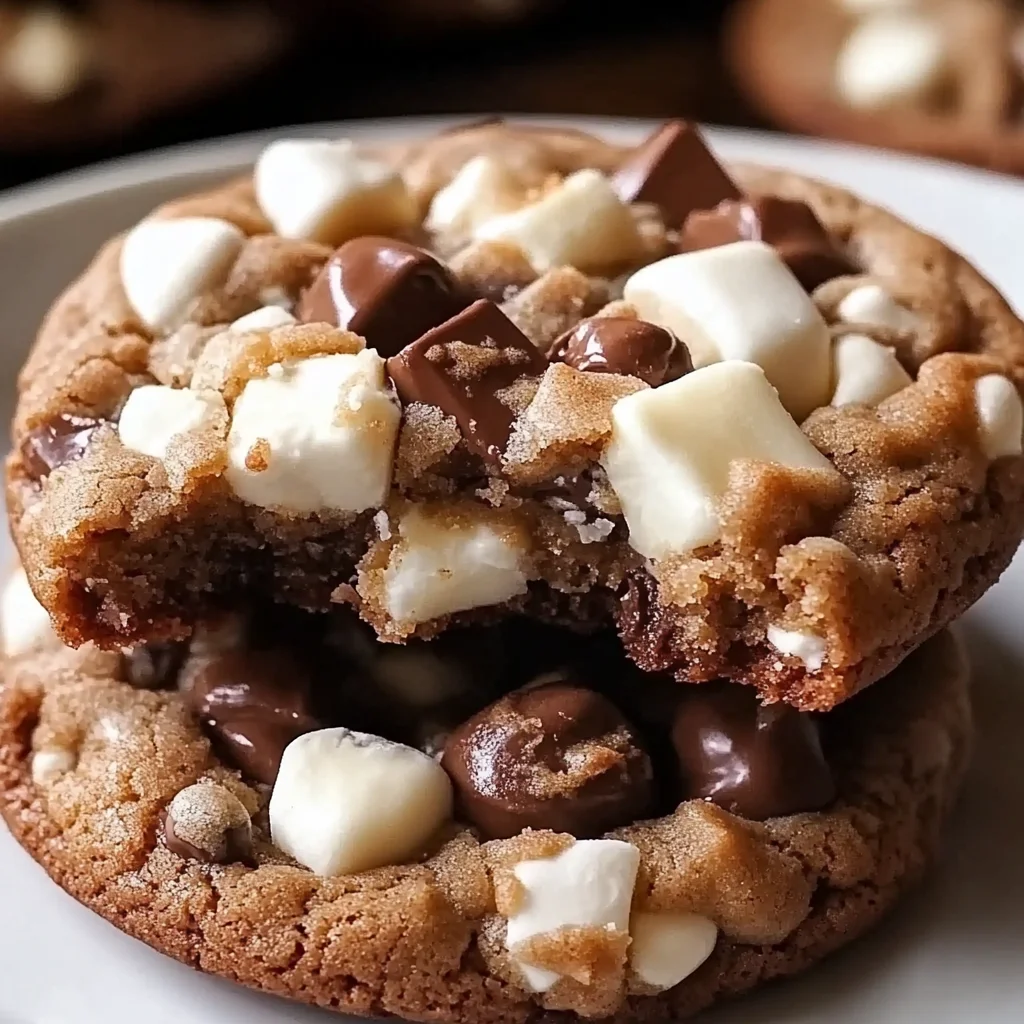
This recipe is my absolute favorite way to capture that famous bakery vibe right at home. They look impressive, taste even better, and surprisingly, they come together quicker than you might think for such showstoppers. We’re talking giant, thick cookies loaded with rich chocolate, chewy marshmallows, and crunchy nuts. Pure bliss in every bite!
Why You’ll Love This Recipe
- Fast (for their size!): While they bake big, the prep isn’t complicated or time-consuming.
- Easy: No fancy techniques needed, just simple cookie baking steps.
- Giftable: These impress everyone! Wrap them up for friends or family.
- Crowd-pleasing: Who doesn’t love a giant cookie packed with all the good stuff?
Ingredients
Let’s gather our goodies. These simple ingredients come together to create something truly special.
- 1 cup (226g) cold unsalted butter, cubed: Using cold butter here is a little bakery secret for texture! Don’t soften it; just cube it straight from the fridge.
- 1 cup (200g) packed light brown sugar: This gives us that lovely chew and deep molasses flavor. Make sure it’s firmly packed in your measuring cup.
- 1/2 cup (100g) granulated sugar: Our classic sweetening partner for a bit of crispness on the edges.
- 2 large eggs, cold: Just like the butter, cold eggs help with the structure of these big cookies.
- 1 teaspoon vanilla extract: Essential for adding warmth and enhancing all those chocolatey flavors.
- 2 1/2 cups (300g) all-purpose flour: The foundation of our cookie dough!
- 1/2 cup (45g) unsweetened cocoa powder: This gives us that gorgeous, deep chocolate base for our rocky road mix-ins.
- 1 teaspoon baking soda: Our leavening friend that helps the cookies puff up just right.
- 1/2 teaspoon salt: Don’t skip the salt! It balances the sweetness and brings out all the flavors.
- 1 cup (170g) semi-sweet chocolate chips: Classic chocolate chips are perfect here, melting into gooey pockets.
- 1 cup (90g) mini marshmallows: These toast up slightly on the outside and get wonderfully chewy inside.
- 1 cup (120g) chopped walnuts or pecans: For that classic Rocky Road crunch! Use whichever nut you love best.
How to Make It
Alright, apron on? Let’s get baking! Follow these steps and you’ll have warm, giant cookies in no time.
Step 1: Get Ready! First things first, preheat your oven to a nice hot 410°F (210°C). This high temperature is part of the secret to getting those perfectly set edges and gooey centers. Line a couple of baking sheets with parchment paper – this makes clean-up a breeze and prevents sticking.
Step 2: Cream the Butter and Sugars. Grab your stand mixer and fit it with the paddle attachment. Toss in those cold, cubed butter pieces, the packed brown sugar, and the granulated sugar. Turn your mixer on medium speed and let it do its magic for about 2 minutes. You’re looking for a texture that resembles wet sand – slightly crumbly but starting to come together.
Step 3: Add the Eggs and Vanilla. With the mixer still going (or just briefly stopped to scrape down the sides), add the cold eggs one at a time. Make sure each egg is fully incorporated before adding the next. Once the eggs are in, mix in that vanilla extract until everything looks smooth and lovely.
Step 4: Whisk the Dry Ingredients. While the wet ingredients are mixing, grab a separate medium bowl. Whisk together the flour, cocoa powder, baking soda, and salt. Give it a good whisk to make sure everything is evenly distributed. This prevents little pockets of baking soda in your cookies!
Step 5: Combine Wet and Dry. Reduce the mixer speed to low. Gradually add the dry ingredients to the wet ingredients, a little bit at a time. Mix until the flour just disappears and the dough comes together. It’s really important not to overmix here – overmixing can lead to tougher cookies. Stop as soon as you don’t see any dry streaks.
Step 6: Fold in the Goodies! Take the bowl off the mixer. Now for the fun part! Add the chocolate chips, mini marshmallows, and chopped nuts to the dough. Grab a rubber spatula and gently fold everything in until the mix-ins are evenly distributed throughout the dough. You want to be gentle so you don’t deflate the dough or crush the marshmallows too much.
Step 7: Shape Those Giants! This is where the magic happens – we’re making BIG cookies! Using a large cookie scoop (like one that holds about 6 ounces or 170g of dough) or your hands, form the dough into large, round balls. Don’t flatten them; keep them tall and round. This helps create that thick, gooey center.
Step 8: Bake! Place the giant dough balls onto your prepared baking sheets. Make sure to leave plenty of space between them, as they will spread quite a bit. I usually only put 4-6 cookies per standard baking sheet.
Step 9: Bake ’em Up! Pop the baking sheets into your preheated 410°F oven. Bake for 9-12 minutes. You’ll know they’re ready when the edges look set and maybe slightly cracked, but the centers still look wonderfully soft, puffy, and even a little underbaked. That gooey center is key!
Step 10: Cool Down. This step is crucial for getting the right texture. Leave the baked cookies on the hot baking sheets for at least 15 minutes after they come out of the oven. They continue to set up and cook slightly as they cool on the sheet. After 15 minutes, you can carefully transfer them to a wire rack to cool completely (if you can wait that long!).

Substitutions & Additions
This recipe is pretty perfect as is, but feel free to get creative! Cookies are meant for fun, right?
- Chocolate: Swap the semi-sweet chips for milk chocolate, dark chocolate, or even chunks from your favorite chocolate bar.
- Nuts: No walnuts or pecans? Almonds or even chopped peanuts would work! If you have a nut allergy, you can omit the nuts entirely or replace them with seeds or crunchy pretzel bits.
- Marshmallows: You can use larger marshmallows cut into pieces, but the mini ones melt and distribute just perfectly.
- Extra Goodies: Feel like adding more? Toffee bits, a swirl of peanut butter, or even some flaky sea salt on top right after baking would be delicious!
Tips for Success
Want your cookies to turn out bakery-perfect every time? Keep these tips in mind:
- Cold Ingredients Matter: Seriously, using cold butter and eggs isn’t just a suggestion, it helps control the spread and contributes to that thick, chewy texture.
- Don’t Overmix: Once you add the dry ingredients, mix just until combined. Overmixing develops gluten, which can make cookies tough.
- Scoop Big: Resisting the urge to make smaller cookies is hard, but the giant size is what makes these special (and helps create that ideal texture contrast). A 6oz scoop is massive, aim for something about the size of a tennis ball!
- Watch the Oven, Not the Clock: Oven temperatures can vary. Start checking around 9 minutes. The edges should look done, but the middle should look soft and puffed.
- Cooling is Key: Letting them cool on the baking sheet is non-negotiable! This allows the centers to finish setting up without becoming dry.
- Prep Ahead: You can prepare the dough balls and freeze them on a baking sheet until solid. Then, transfer them to a freezer bag. Bake from frozen, adding a minute or two to the baking time.
How to Store It
These cookies are best enjoyed warm, but they store beautifully too! Once they’ve cooled completely, store them in an airtight container at room temperature. They’ll stay fresh and delightfully soft for 3-4 days. If they start to firm up a bit, a quick 10-15 second zap in the microwave can bring back some of that gooey magic.
FAQs
Got questions? I’ve got answers!
Q: Why are these cookies so big?
A: Making them large helps achieve that desired texture: crispy edges that hold their shape while the center stays incredibly soft, thick, and gooey, just like famous bakery versions!
Q: Can I make smaller cookies?
A: You can, but they won’t have the same thick, gooey center. If you make smaller cookies (say, standard size), reduce the baking time significantly (maybe 7-9 minutes) and watch them closely.
Q: Why use cold butter and eggs?
A: Using cold ingredients helps control how much the cookies spread in the hot oven. This is key to getting tall, thick cookies rather than flat ones.
Q: My marshmallows melted away! What happened?
A: This usually happens if you overbake the cookies or if the marshmallows were too close to the surface and browned too quickly. Make sure to only bake until the edges are set and the centers are soft, and try to fold the marshmallows into the dough slightly so they’re not all exposed on top.

Giant Gooey Levain-Style Rocky Road Cookies
Ingredients
Equipment
Method
- Step 1: Get Ready! Preheat your oven to 410°F (210°C). Line a couple of baking sheets with parchment paper.
- Step 2: Cream the Butter and Sugars. In a stand mixer with the paddle attachment, cream together the cold cubed butter, packed brown sugar, and granulated sugar on medium speed for about 2 minutes, until the mixture resembles wet sand.
- Step 3: Add the Eggs and Vanilla. Add the cold eggs one at a time, mixing until each is fully incorporated. Mix in the vanilla extract until smooth.
- Step 4: Whisk the Dry Ingredients. In a separate medium bowl, whisk together the flour, cocoa powder, baking soda, and salt until evenly distributed.
- Step 5: Combine Wet and Dry. Reduce the mixer speed to low. Gradually add the dry ingredients to the wet ingredients, mixing just until the flour disappears and the dough comes together. Do not overmix.
- Step 6: Fold in the Goodies! Take the bowl off the mixer. Add the chocolate chips, mini marshmallows, and chopped nuts to the dough. Use a rubber spatula to gently fold everything in until evenly distributed.
- Step 7: Shape Those Giants! Using a large cookie scoop (approx. 6 ounces/170g) or your hands, form the dough into large, tall, round balls. Do not flatten them.
- Step 8: Bake! Place the large dough balls onto your prepared baking sheets, leaving plenty of space between them (4-6 cookies per sheet).
- Step 9: Bake 'em Up! Bake in the preheated 410°F (210°C) oven for 9-12 minutes. The edges should look set and slightly cracked, but the centers should still look soft, puffed, and slightly underbaked.
- Step 10: Cool Down. Leave the baked cookies on the hot baking sheets for at least 15 minutes to continue setting up. Carefully transfer them to a wire rack to cool completely afterwards.