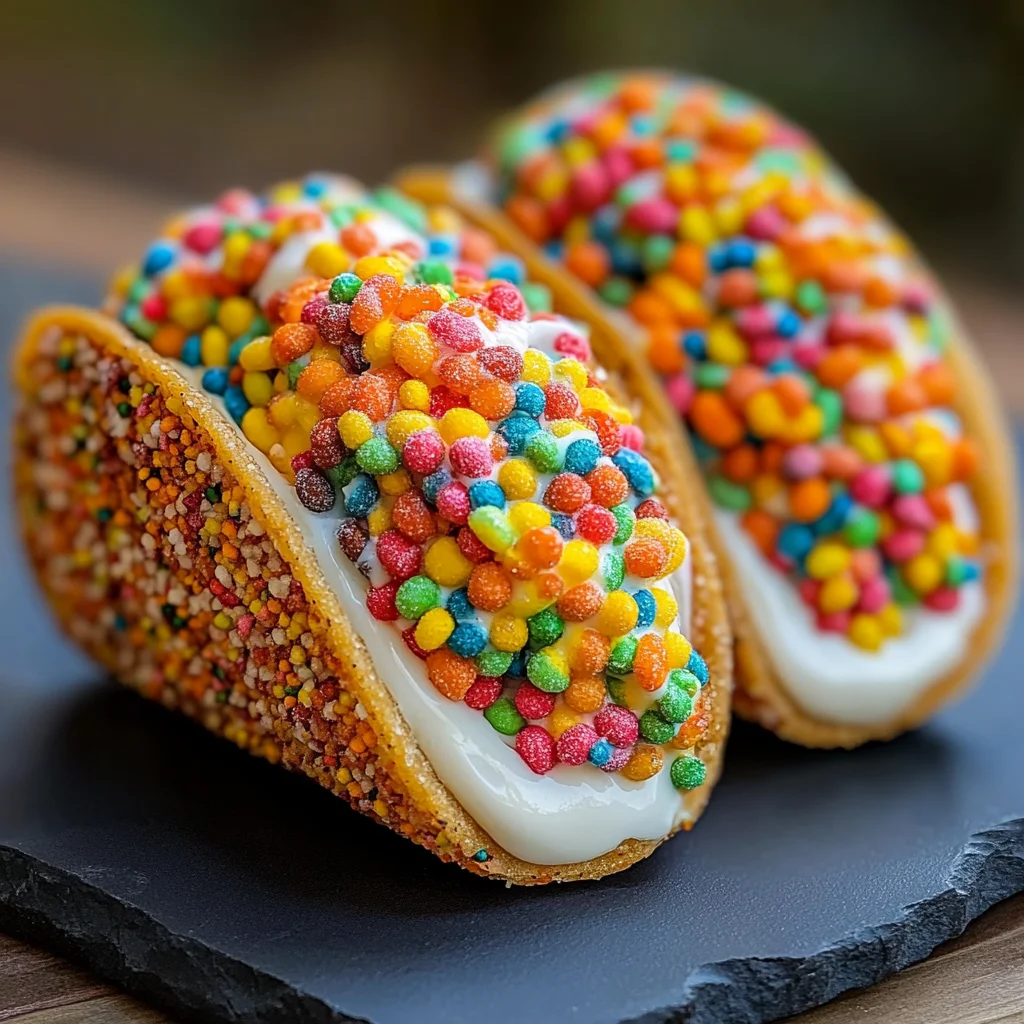
Oh, friend, do you remember those glorious Saturday mornings? The sun streaming in, pajamas still on, and a big bowl of your favorite colorful cereal, milk turning perfectly sweet and speckled? Pure bliss, right? Well, get ready to dive back into that nostalgic joy, but this time, it’s dessert style! I’m talking about the most ridiculously fun, unbelievably easy, and utterly delicious creation: Fruity Pebbles Cheesecake Tacos. These aren’t just a dessert; they’re a little bite of childhood happiness, reimagined!
I stumbled upon this idea one afternoon when I was craving something sweet, something quick, and something that would make me smile. And let me tell you, these little tacos delivered on all fronts. They’re quick enough for a weeknight treat, impressive enough for a party, and so memorable, you’ll find yourself making them again and again. Plus, they’re no-bake, which means less time in a hot kitchen and more time enjoying! Who doesn’t love that?
Why You’ll Love Fruity Pebbles Cheesecake Tacos
- Fast: Seriously, from start to finish, you’ll be enjoying these in under an hour (including chill time!).
- Easy: No fancy baking skills or complicated steps here. If you can mix and press, you’ve got this!
- Giftable: Pack these up in cute little boxes, and you’ve got the most adorable, delicious homemade gift for friends or neighbors.
- Crowd-pleasing: The vibrant colors and fun concept make them an instant hit with kids and adults alike.
Ingredients
Gather your rainbow-colored goodies! Here’s what you’ll need for these delightful cheesecake tacos:
- Shells:
- 3 cups fruity cereal: Of course, Fruity Pebbles is the star, bringing all that vibrant color and sweet, crispy goodness.
- 1/2 cup unsalted butter, melted: This is the glue that holds our fabulous shells together, giving them a rich, buttery flavor.
- Filling:
- 8 oz cream cheese, softened to room temperature: Make sure it’s nice and soft! This is key for a super smooth, lump-free cheesecake filling. Take it out of the fridge about 30 minutes to an hour before you start.
- 1/2 cup powdered sugar, sifted: Sifting prevents any annoying clumps and ensures your filling is perfectly silky.
- 1 tsp pure vanilla extract: A splash of vanilla always elevates any sweet treat, bringing out the creamy flavors.
- 1 cup whipped cream: You can go for store-bought whipped topping for convenience, or whip up some fresh cream for an extra luxurious touch.
- Garnish:
- Additional fruity cereal: For that final flourish of color and crunch!
How to Make Fruity Pebbles Cheesecake Tacos
Let’s get this rainbow party started! You’ll be amazed at how quickly these come together.
- Get Those Shells Ready: In a medium mixing bowl, combine your fruity cereal and the melted butter. Give it a good stir until every piece of cereal is beautifully coated. It’ll look like a colorful, buttery wonderland!
- Shape and Chill: Now for the fun part! If you have specific taco-shaped molds, use those. Otherwise, the back of a muffin tin works wonders. Press the cereal mixture firmly into your chosen molds. You want it packed in there tightly, so your shells hold their shape. Once they’re all pressed, pop them into the refrigerator for at least 30 minutes. This chilling time is crucial for the butter to set and give you nice, sturdy shells.
- Whip Up the Cheesecake Filling: While your shells are chilling, let’s make that dreamy cheesecake filling. In another mixing bowl, grab your softened cream cheese and beat it with a hand mixer until it’s light and fluffy. This usually takes a minute or two.
- Sweeten and Flavor: Gradually add your sifted powdered sugar to the cream cheese, beating until it’s fully incorporated and smooth. Then, stir in the pure vanilla extract. Taste a tiny bit – isn’t it divine?
- Fold in the Whipped Cream: Here’s where the magic happens! Gently fold the whipped cream into the cream cheese mixture using a spatula. Be careful not to deflate it too much; you want to keep that light, airy texture. Keep folding until everything is just combined.
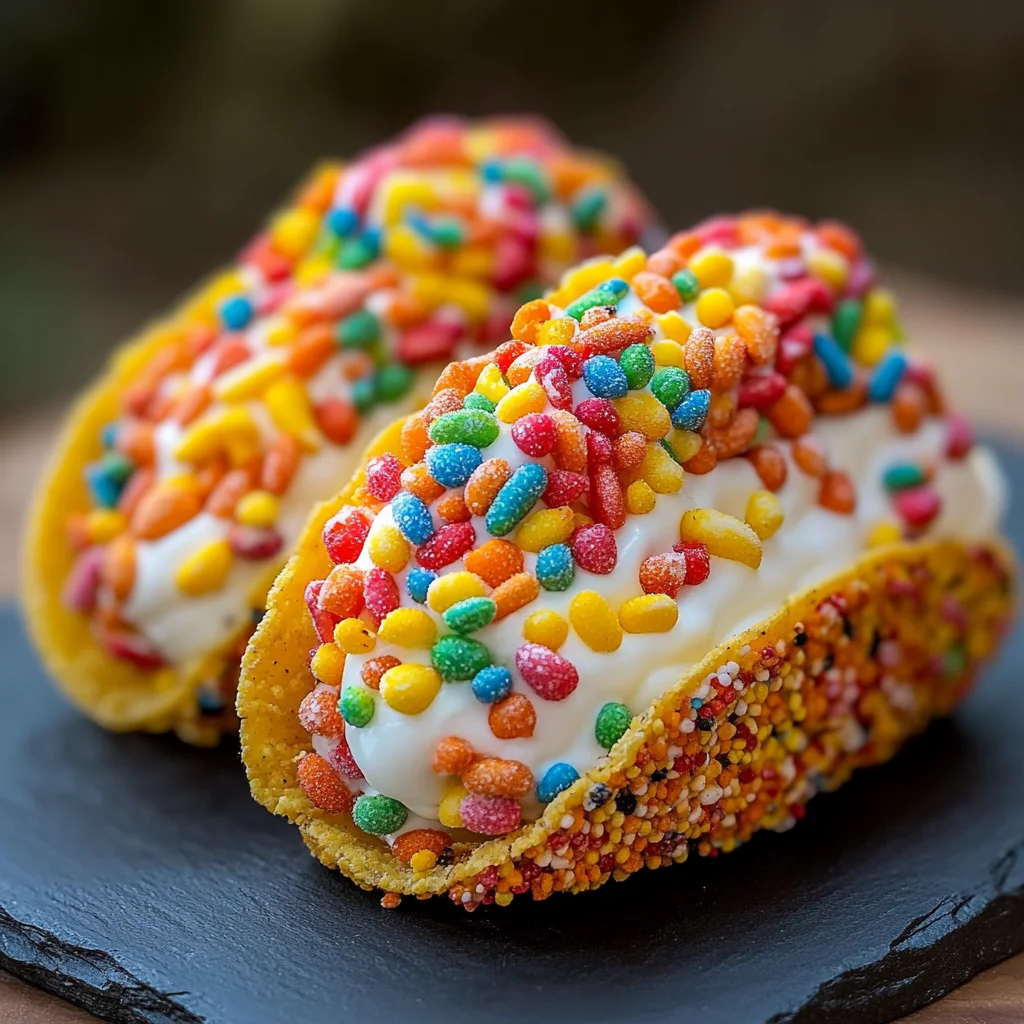
- Assemble Your Tacos: Once your shells are firm and ready, carefully remove them from their molds. Now, spoon that luscious cheesecake filling generously into each cereal taco shell. Don’t be shy!
- Garnish and Serve: For the grand finale, sprinkle some extra fruity cereal over the top of your filled tacos. You can serve them immediately for a slightly softer, more yielding shell, or pop them back in the fridge for a bit if you prefer a firmer crunch. Either way, they’re absolutely delicious!
Substitutions & Additions
This recipe is super versatile! Feel free to get creative and make it your own:
- Different Cereals: Not a Fruity Pebbles fan? No problem! Try Cinnamon Toast Crunch, Cap’n Crunch, Lucky Charms, or even chocolate cereals for a different flavor profile.
- Filling Variations: Instead of classic cheesecake, how about a chocolate mousse filling, a lemon curd cream, or even a simple vanilla pudding? If you’re looking for another no-bake dessert idea, you might love these easy no-bake caramel pretzel bars too!
- Toppings Galore: Drizzle with chocolate sauce, caramel, or white chocolate. Add fresh berries, mini chocolate chips, or even a dollop of extra whipped cream.
- Make it Gluten-Free: Many fruity cereals are gluten-free, but always double-check the label if this is a concern.
Tips for Success
- Room Temperature Cream Cheese: I can’t stress this enough! Soft cream cheese is key to a smooth, lump-free filling. Plan ahead!
- Don’t Overmix the Cream Cheese: Beat it until just light and fluffy. Overmixing can sometimes make it too thin.
- Be Gentle with the Whipped Cream: When folding in the whipped cream, do it carefully. This keeps the filling light and airy, preventing it from becoming dense.
- Press Those Shells Firmly: The tighter you pack the cereal mixture into the molds, the more stable your shells will be once chilled.
- Chill Time is Your Friend: Don’t rush the chilling of the shells. Those 30 minutes are crucial for them to set properly. If they’re not firm enough, they might break when you try to fill them.
How to Store Fruity Pebbles Cheesecake Tacos
If by some miracle you have leftovers (it’s rare, I know!), here’s how to keep them fresh:
- Store your Fruity Pebbles Cheesecake Tacos in an airtight container in the refrigerator.
- They are best enjoyed within 2-3 days. The cereal shells will start to soften slightly over time, but they’ll still be delicious!
- I don’t recommend freezing these, as the texture of the whipped cream and cereal can change upon thawing.
FAQs
Got questions? I’ve got answers!
Q: Can I use regular breakfast cereal?
A: Absolutely! While Fruity Pebbles gives that classic colorful look and fruity flavor, you can certainly experiment with other cereals like Lucky Charms, Cocoa Puffs, or Cinnamon Toast Crunch for a different twist.
Q: Do I need special taco molds?
A: Not at all! The back of a muffin tin works perfectly for shaping the shells. Just press the mixture over the rounded back of the muffin cups to get that iconic taco shape.
Q: Can I make the cheesecake filling ahead of time?
A: Yes, you can! Prepare the filling and keep it covered in the refrigerator for up to 24 hours. Give it a gentle whisk or stir before spooning it into the shells, as it might stiffen slightly.
Q: My cereal shells aren’t holding their shape. What went wrong?
A: This usually means the mixture wasn’t pressed firmly enough into the molds or didn’t chill long enough. Make sure to really compact the cereal, and give it at least 30 minutes, or even an hour, in the fridge to set properly.
For more delicious and easy recipes, be sure to follow us on Pinterest!

Fruity Pebbles Cheesecake Tacos
Ingredients
Equipment
Method
- Step 1: Get Those Shells Ready: In a medium mixing bowl, combine the fruity cereal and the melted butter. Give it a good stir until every piece of cereal is beautifully coated.
- Step 2: Shape and Chill: Press the cereal mixture firmly into taco-shaped molds or over the back of a muffin tin. You want it packed in there tightly. Pop them into the refrigerator for at least 30 minutes to set.
- Step 3: Whip Up the Cheesecake Filling: While your shells are chilling, in another mixing bowl, beat the softened cream cheese with a hand mixer until it's light and fluffy, about 1-2 minutes.
- Step 4: Sweeten and Flavor: Gradually add the sifted powdered sugar to the cream cheese, beating until fully incorporated and smooth. Then, stir in the pure vanilla extract.
- Step 5: Fold in the Whipped Cream: Gently fold the whipped cream into the cream cheese mixture using a spatula, being careful not to deflate it too much. Keep folding until everything is just combined.
- Step 6: Assemble Your Tacos: Once your shells are firm, carefully remove them from their molds. Spoon the luscious cheesecake filling generously into each cereal taco shell.
- Step 7: Garnish and Serve: Sprinkle some extra fruity cereal over the top of your filled tacos. Serve immediately for a slightly softer shell, or pop them back in the fridge for a bit if you prefer a firmer crunch.