Hey there, friend! Grab a comfy seat, because we’re about to talk about one of my absolute favorite dessert combinations: chocolate and raspberry. Isn’t there just something magical about that rich, dark chocolate mingling with bright, slightly tart raspberries? It reminds me of lazy Sunday afternoons and special celebrations, all rolled into one.
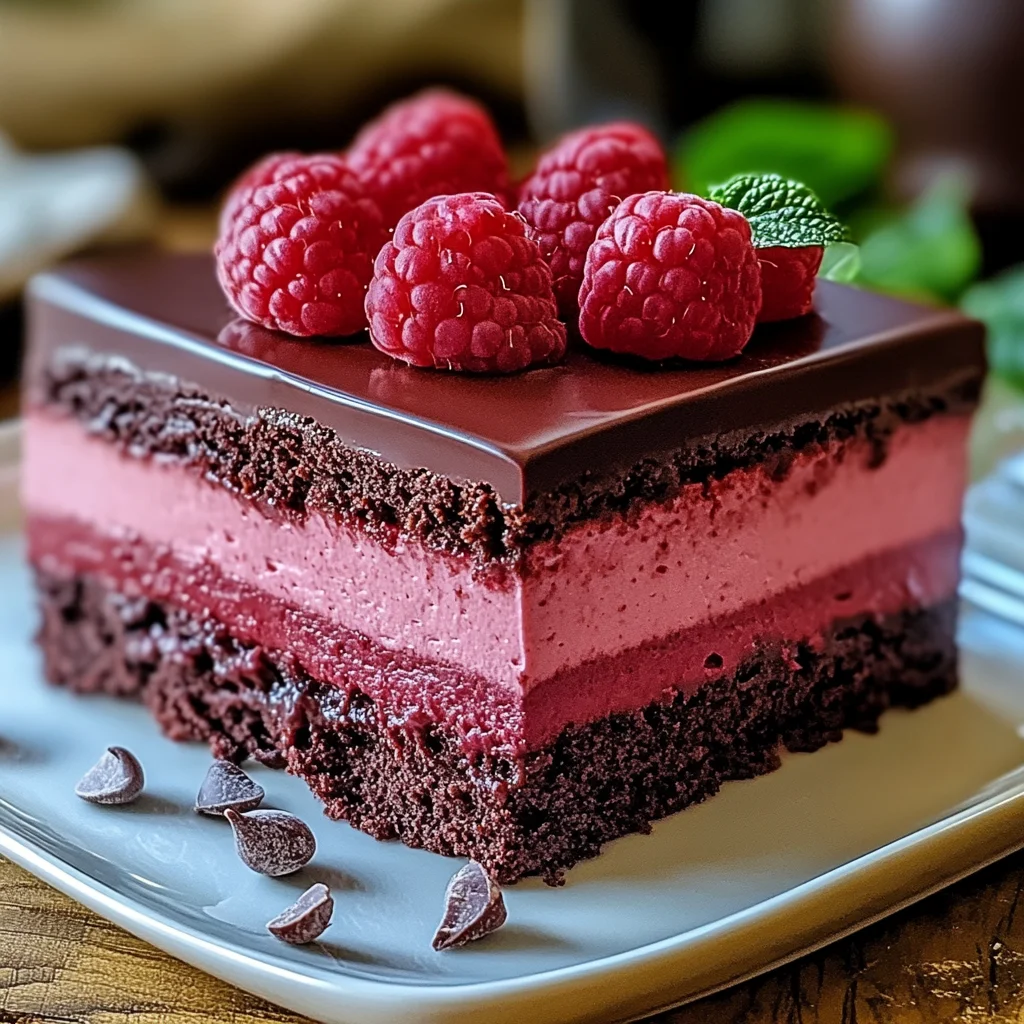
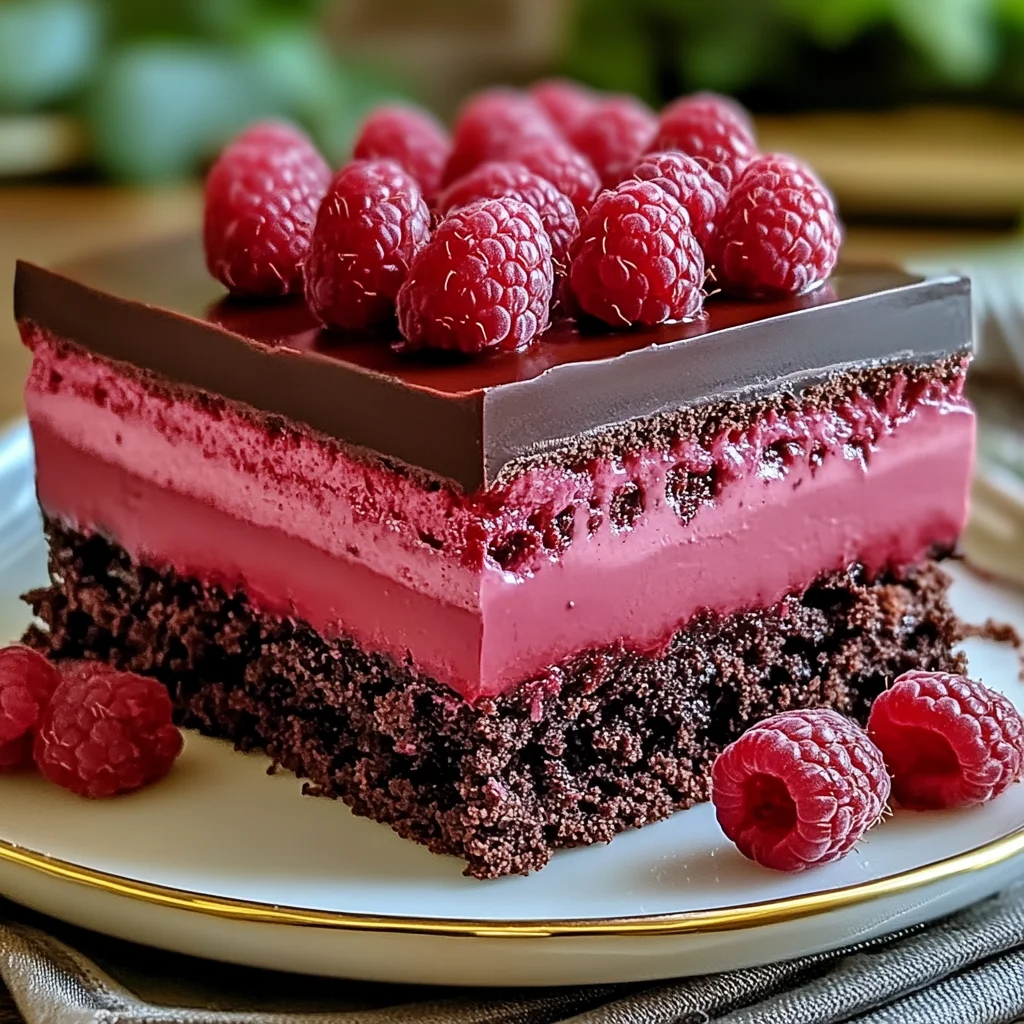
Now, you might think a gorgeous cake like this is complicated, right? Layer cakes with mousse sound fancy and fussy. But guess what? This Heavenly Raspberry Chocolate Mousse Cake? It’s secretly simple. Like, “you-can-totally-bake-this-on-a-weeknight” simple. We’re talking moist chocolate cake layers paired with a dreamy, luscious raspberry chocolate mousse that comes together like a charm. It looks impressive, tastes incredible, and honestly, the hardest part is waiting for it to cool down so you can slice into it!
Why You’ll Love This Recipe
- Fast (for a layer cake!)
- Easy (seriously, no fancy techniques needed)
- Giftable (perfect for birthdays or just because)
- Crowd-pleasing (who doesn’t love chocolate and raspberries?)
Ingredients
Here’s what you’ll need to bake up this little piece of heaven. Most of these are probably hanging out in your pantry and fridge already!
- All-purpose flour: Your standard pantry hero. Gives the cake its structure.
- Unsweetened cocoa powder: Use a good quality one for that deep, rich chocolate flavor we’re after.
- Granulated sugar: Sweetens the cake and helps keep it moist.
- Baking powder: Our leavening agent, makes the cake light and fluffy.
- Large eggs: Bind everything together and add richness. Make sure they’re at room temperature if you can, it helps the batter emulsify better!
- Vegetable oil: Contributes to the cake’s moist texture. You could also use canola or another neutral oil.
- Whole milk: Adds moisture and richness to the batter.
- Fresh raspberries: The star of our mousse show! Their bright flavor cuts through the richness of the chocolate.
- Dark chocolate chips: The foundation of our lovely chocolate mousse. The darker the better in my opinion, but use your favorite!
- Agar-agar powder: Our little magic trick! This plant-based thickener helps the mousse set beautifully without needing gelatin or a ton of chilling time. Find it in the baking aisle or online.
How to Make It
Alright, let’s get baking! Follow these simple steps and you’ll have a stunning cake ready before you know it.
Step 1: Get Your Oven Ready & Pan Prep
First things first, preheat your oven to 350°F (175°C). While it’s warming up, grab two round cake pans. Grease them really well, and if you want extra insurance against sticking (which I always recommend!), line the bottoms with parchment paper, then grease the parchment too. This makes getting the cakes out so much easier!
Step 2: Mix the Dry Ingredients
In a large bowl, whisk together your flour, cocoa powder, granulated sugar, and baking powder. Just a quick whisk to get everything combined and break up any lumps. This is the base of our lovely chocolate cake layers.
Step 3: Combine Wet and Dry Ingredients
In a separate medium bowl, whisk together the eggs, vegetable oil, and milk until they’re nice and frothy. Now, pour the wet ingredients into the bowl with the dry ingredients. Using a spatula or wooden spoon, mix everything together until it’s just combined. Be careful not to overmix! A few small lumps are totally fine – overmixing develops the gluten too much and can make your cake tough.
Step 4: Bake the Cake Layers
Divide the batter evenly between your two prepared cake pans. Pop them into the preheated oven and bake for about 25-30 minutes. You’ll know they’re done when a toothpick inserted into the center comes out clean. Let the cakes cool in the pans for about 10 minutes before inverting them onto a wire rack to cool completely. Seriously, completely cool. Trying to assemble with warm cakes is a recipe for disaster!
Step 5: Make the Raspberry Chocolate Mousse
While the cakes are cooling, let’s make our gorgeous mousse. This is where the magic happens! Gently heat the fresh raspberries in a small saucepan over medium heat. In a separate small bowl, whisk the agar-agar powder with a little bit of water or juice until smooth (check the agar-agar package directions – some dissolve better if bloomed first). Add the dissolved agar-agar to the warmed raspberries and stir until the agar-agar is completely dissolved. You don’t want any grainy bits! Remove from the heat.
Now, add your dark chocolate chips to the warm raspberry mixture. Let it sit for a minute or two to start melting the chocolate, then stir gently until you have a smooth, glossy, beautiful raspberry chocolate mixture. This is your mousse base! Let it sit at room temperature, stirring occasionally, while you wait for the cakes to cool fully. It will thicken as it cools.
Step 6: Assemble Your Masterpiece!
Once the cake layers are totally cool, it’s assembly time! Place one cake layer on your serving plate or stand. Spoon about half of your slightly thickened raspberry chocolate mousse onto this layer and spread it out evenly. Gently place the second cake layer on top. Now, spread the remaining mousse all over the top and down the sides of the cake. You can make it smooth or give it pretty swirls – whatever makes you happy! Pop the cake in the fridge for at least 30 minutes to let that mousse really set up nicely before slicing.
Substitutions & Additions
Want to mix things up? Go for it! This recipe is pretty forgiving. Here are a few ideas:
- No Agar-Agar? You can likely substitute with unflavored gelatin following package directions for setting the same amount of liquid/puree. Agar-agar gives a slightly different texture, though.
- Other Berries? Swap the raspberries for strawberries, blueberries, or a mix! Just make sure you puree or mash them before heating.
- Different Chocolate? Semi-sweet chocolate chips work beautifully too, the mousse will just be a little sweeter. Milk chocolate is also an option if you prefer, but it will be quite a bit sweeter and less intense.
- Amp up the Cake: Add a teaspoon of instant espresso powder to the dry ingredients for a deeper chocolate flavor, or fold in a handful of chocolate chips to the batter! A splash of vanilla extract is always welcome too.
- Mousse Magic: Add a teaspoon of vanilla extract to the mousse, or even a tablespoon of raspberry liqueur (like Chambord) for an extra pop of flavor (reduce the fruit amount slightly if adding liqueur). A pinch of cinnamon or a little orange zest could also be fun!
Tips for Success
Just a couple of little things to keep in mind to make sure your cake turns out perfectly every time:
- Don’t Overmix: I know I said it before, but it’s worth repeating! Mix the wet and dry ingredients until just combined.
- Cool Cakes Completely: Patience is key here! Warm cakes will melt your lovely mousse and you’ll have a slidey mess.
- Agar-Agar Check: Make sure your agar-agar is fully dissolved in the warm liquid before adding the chocolate. Undissolved agar-agar can result in a gritty texture or the mousse not setting properly.
- Mousse Consistency: Let the mousse cool and thicken slightly before spreading, but don’t let it set completely in the pot! If it gets too firm, you can gently reheat it very low to loosen it up.
- Prep Ahead: You can definitely bake the cake layers a day in advance. Let them cool completely, wrap them tightly in plastic wrap, and store at room temperature until you’re ready to make the mousse and assemble.
How to Store It
Once assembled, this cake needs to be stored in the refrigerator because of the fresh fruit and the mousse. Cover it loosely with plastic wrap or store it in an airtight cake carrier. It should keep well for 3-4 days, getting even more delicious as the flavors meld!
FAQs
Here are a couple of questions I get asked about cakes like this:
Q: What exactly is agar-agar?
A: Agar-agar is a gelatinous substance derived from seaweed. It’s a great plant-based alternative to traditional gelatin and is commonly used as a thickener in desserts and jellies. It sets at room temperature but gets firmer when chilled.
Q: Can I use frozen raspberries instead of fresh?
A: Yes, you can! Thaw them first and drain off any excess liquid before heating them for the mousse. The flavor might be slightly less intense than fresh berries, but it will still be delicious.
Q: My mousse isn’t setting! What went wrong?
A: The most common culprits are either the agar-agar didn’t fully dissolve when heated, or not quite enough was used for the amount of liquid. Gently reheating it and ensuring the agar-agar is dissolved, or adding a tiny bit more dissolved agar-agar and heating again, might help. Also, make sure you give it sufficient time to chill in the fridge after assembling the cake.
Seriously, give this Heavenly Raspberry Chocolate Mousse Cake a try. It’s beautiful, delicious, and so much simpler than it looks. It’s guaranteed to make any occasion feel a little more special!

Divine & Easy Raspberry Chocolate Mousse Cake
Ingredients
Equipment
Method
- Step 1: Get Your Oven Ready & Pan Prep First things first, preheat your oven to 350°F (175°C). While it's warming up, grab two round cake pans. Grease them really well, and if you want extra insurance against sticking (which I always recommend!), line the bottoms with parchment paper, then grease the parchment too. This makes getting the cakes out so much easier!
- Step 2: Mix the Dry Ingredients In a large bowl, whisk together your flour, cocoa powder, granulated sugar, and baking powder. Just a quick whisk to get everything combined and break up any lumps. This is the base of our lovely chocolate cake layers.
- Step 3: Combine Wet and Dry Ingredients In a separate medium bowl, whisk together the eggs, vegetable oil, and milk until they're nice and frothy. Now, pour the wet ingredients into the bowl with the dry ingredients. Using a spatula or wooden spoon, mix everything together until it's just combined. Be careful not to overmix! A few small lumps are totally fine – overmixing develops the gluten too much and can make your cake tough.
- Step 4: Bake the Cake Layers Divide the batter evenly between your two prepared cake pans. Pop them into the preheated oven and bake for about 25-30 minutes. You'll know they're done when a toothpick inserted into the center comes out clean. Let the cakes cool in the pans for about 10 minutes before inverting them onto a wire rack to cool completely. Seriously, completely cool. Trying to assemble with warm cakes is a recipe for disaster!
- Step 5: Make the Raspberry Chocolate Mousse While the cakes are cooling, let's make our gorgeous mousse. This is where the magic happens! Gently heat the fresh raspberries in a small saucepan over medium heat. In a separate small bowl, whisk the agar-agar powder with a little bit of water or juice until smooth (check the agar-agar package directions – some dissolve better if bloomed first). Add the dissolved agar-agar to the warmed raspberries and stir until the agar-agar is completely dissolved. You don't want any grainy bits! Remove from the heat.Now, add your dark chocolate chips to the warm raspberry mixture. Let it sit for a minute or two to start melting the chocolate, then stir gently until you have a smooth, glossy, beautiful raspberry chocolate mixture. This is your mousse base! Let it sit at room temperature, stirring occasionally, while you wait for the cakes to cool fully. It will thicken as it cools.
- Step 6: Assemble Your Masterpiece! Once the cake layers are totally cool, it's assembly time! Place one cake layer on your serving plate or stand. Spoon about half of your slightly thickened raspberry chocolate mousse onto this layer and spread it out evenly. Gently place the second cake layer on top. Now, spread the remaining mousse all over the top and down the sides of the cake. You can make it smooth or give it pretty swirls – whatever makes you happy! Pop the cake in the fridge for at least 30 minutes to let that mousse really set up nicely before slicing.