Oh, friend, there’s nothing quite like the magic of the holiday season, is there? The twinkling lights, the cozy sweaters, and that undeniable aroma of something sweet baking (or in this case, setting!) in the kitchen. For me, Christmas fudge isn’t just a dessert; it’s a little square of pure joy, a bite-sized trip down memory lane to childhood holidays filled with laughter and loved ones. This recipe? It’s pure holiday gold – simple, unbelievably quick, and destined to become a beloved tradition in your home, just like it is in mine!
Forget the stress of candy thermometers and elaborate preparations. This Christmas fudge is a true no-fuss wonder, using a clever shortcut that delivers perfectly smooth, rich, and wonderfully festive fudge every single time. Whether you’re whipping up a batch for Santa, gifting to neighbors, or simply treating yourself to a moment of holiday bliss, get ready to fall in love with this easy, memorable recipe.
Why You’ll Love Christmas Fudge
- Fast: Seriously, we’re talking minutes of active prep time!
- Easy: No special skills or fancy equipment needed, just a double boiler (or a microwave!).
- Giftable: It packages beautifully, making it the perfect homemade present.
- Crowd-pleasing: Who doesn’t adore creamy, dreamy fudge?
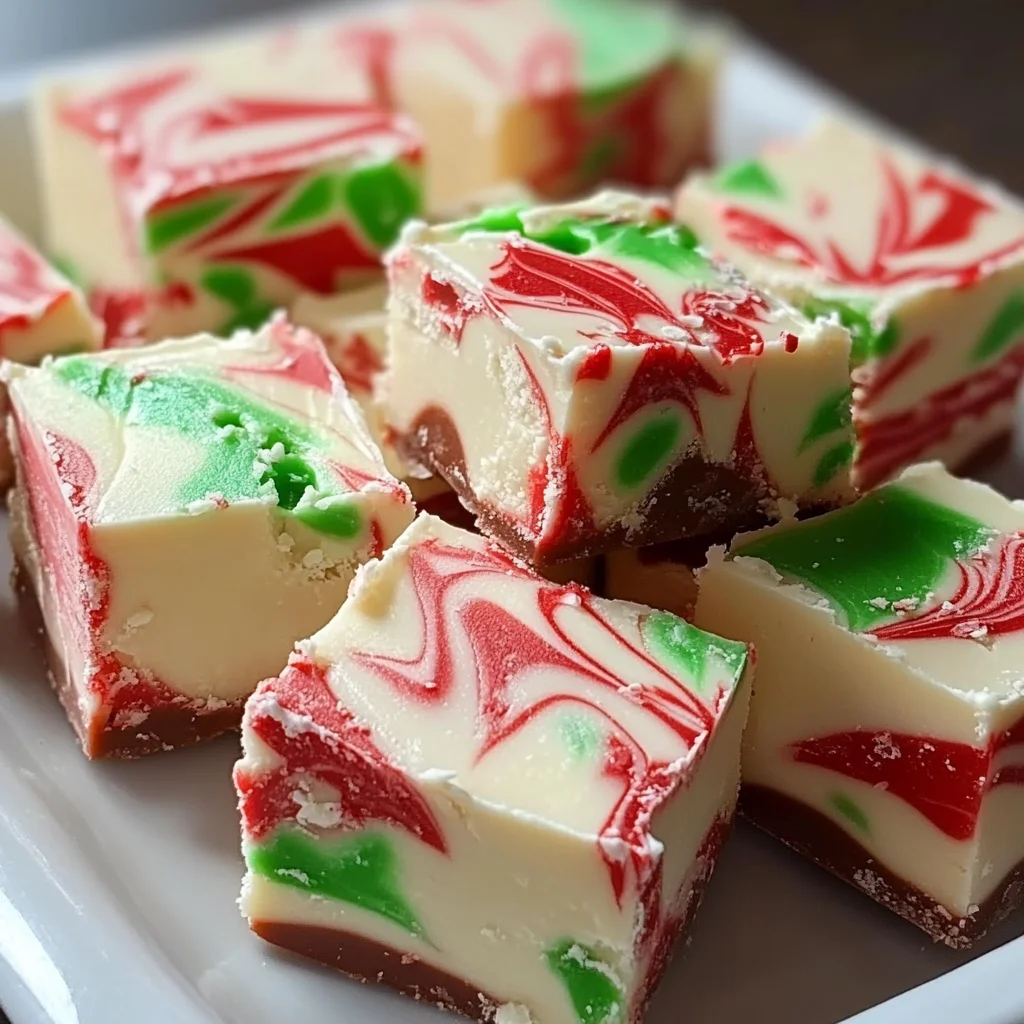
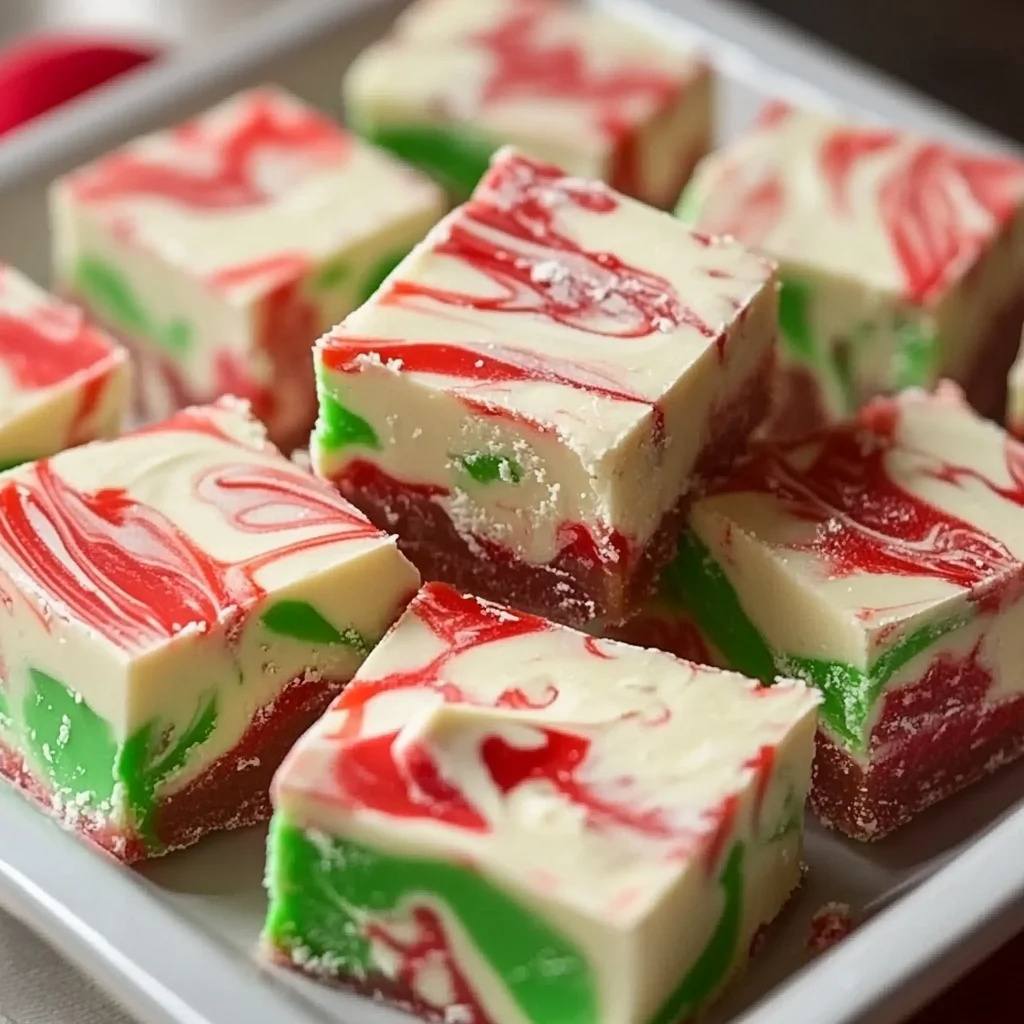
- Festive: The red, green, and white swirl adds instant holiday cheer!
Ingredients
Gather ’round, because these are your secret weapons for fudge greatness!
- 22 ounces (624g) white chocolate chips: Opt for a good quality brand here, as it really makes a difference in the flavor and creaminess of your fudge.
- 1¾ cups (420g) vanilla frosting: Yep, you read that right! Canned vanilla frosting is our genius shortcut, eliminating the need for a candy thermometer and making this fudge incredibly smooth.
- 1 teaspoon red gel food coloring: Gel food coloring gives you vibrant colors without adding too much liquid, which can mess with the fudge’s texture.
- 1 teaspoon green gel food coloring: See above! Go for gel for that true Christmas pop.
How to Make Christmas Fudge
Ready to create some holiday magic? Let’s get started!
- First things first, let’s get your pan ready. Grab an 8×8-inch (20x20cm) square baking pan and line it with parchment paper. Make sure to leave some overhang on the sides – those little “handles” will be your best friend when it’s time to lift the fudge out later!
- Now, for the melting magic. In the top bowl of a double boiler, combine your white chocolate chips and vanilla frosting. Set this over medium-low heat. If you don’t have a double boiler, you can create a makeshift one by placing a heat-safe bowl over a saucepan with an inch or two of simmering water (just make sure the bottom of the bowl doesn’t touch the water).
- Stir, stir, stir! You’ll want to stir constantly for about 8-10 minutes, until your mixture is completely melted and beautifully smooth. Be patient and keep that heat medium-low to ensure the chocolate doesn’t burn. Trust me, slow and steady wins the race for silky-smooth fudge!
- Once it’s all melted and gorgeous, divide this heavenly mixture equally into three separate bowls.
- Into the first bowl, stir in your red gel food coloring until it’s completely blended and you have a lovely festive red.
- Repeat with the second bowl, adding your green gel food coloring and mixing until it’s a perfect Christmas green. That third bowl? It gets to stay pure, pristine white!
- Now for the fun part – creating that signature swirl! Using a large spoon, randomly dollop about 2 tablespoons of each colored fudge mixture into your prepared pan. Don’t overthink it; the randomness is part of the charm!
- Once all your colorful dollops are in the pan, take a butter knife and gently swirl the colors together. You’re not trying to fully mix them, just create a beautiful, marbled pattern that screams “holiday cheer!”
- Time for a little chill-out session! Pop the fudge, uncovered, into the refrigerator for 1-2 hours, or until it’s completely firm and set. Patience is a virtue, especially when delicious fudge is involved!
- Once firm, use those parchment paper overhangs to carefully lift the fudge right out of the pan. Let it sit at room temperature for about 20 minutes before you slice into it. This makes for cleaner cuts and a perfect texture. Slice, serve, and watch those happy faces!
Substitutions & Additions
This recipe is wonderfully versatile, so feel free to play around and make it your own!
- Chocolate Choices: While white chocolate is classic for the festive colors, you could totally experiment with milk chocolate chips or even semi-sweet chocolate for a richer flavor. Just keep in mind your colors will be darker!
- Flavor Frostings: Swap out vanilla frosting for cream cheese frosting (yum!) or even chocolate frosting if you’re going for an all-chocolate base.
- Extracts: A little extra flavor can go a long way! Stir in ½ teaspoon of peppermint extract for a minty twist, almond extract for a subtle nuttiness, or even a dash of rum extract for a grown-up touch.
- Mix-ins: The possibilities are endless! Before chilling, gently fold in festive sprinkles, crushed candy canes (peppermint perfection!), chopped nuts (like pecans or walnuts), mini marshmallows, or even dried cranberries for a tart counterpoint. If you love the simplicity of no-bake desserts, you absolutely have to try our Easy No-Bake Caramel Pretzel Bars for another fantastic sweet and salty crunch!
- Toppings: After swirling, sprinkle some extra festive sprinkles on top before chilling for an extra pop of color and texture.
Tips for Success
Even though this fudge is super easy, a few little pointers will ensure your batch is absolutely perfect:
- Low and Slow is the Way to Go: When melting the chocolate and frosting, keep that heat on medium-low and stir constantly. Burnt chocolate is a sad sight (and taste!), so don’t rush this step.
- Use Gel Food Coloring: I mentioned it in the ingredients, but it bears repeating! Liquid food coloring can thin out your fudge mixture, affecting its texture. Gel is concentrated and delivers vibrant color without the extra moisture.
- Don’t Over-Swirl: For that lovely marbled effect, a few gentle passes with a butter knife are all you need. If you mix too much, your colors will blend entirely, and you’ll end up with a less distinct pattern.
- Parchment Paper is a Must: Seriously, don’t skip this! It makes removing the fudge from the pan incredibly easy and mess-free.
- Room Temp for Slicing: Letting the fudge sit at room temperature for about 20 minutes before slicing helps prevent cracking and gives you beautifully clean cuts.
- Prep Ahead Power: This fudge is an ideal make-ahead treat! You can whip up a batch a few days before your holiday gathering, freeing you up for other festive preparations. If you’re looking to elevate your dessert game even further, another fantastic option for holiday indulgence is a slice of our Ultimate Classic Carrot Cake – it’s always a showstopper!
How to Store Christmas Fudge
You’ll want to keep this deliciousness fresh!
- Countertop (Short Term): If your kitchen is cool, you can store fudge in an airtight container at room temperature for a day or two, though I prefer the fridge.
- Refrigerator (Best Option): For optimal freshness and to keep it firm, store your Christmas fudge in an airtight container in the refrigerator for up to 2 weeks.
- Freezer (Long Term): Fudge freezes beautifully! Wrap individual pieces or the entire block tightly in plastic wrap, then place in a freezer-safe bag or container. It will last for up to 2-3 months. Thaw in the refrigerator or at room temperature before serving.
FAQs
Here are some common questions about making this delightful Christmas fudge:
Q: Can I use different types of chocolate?
Absolutely! While white chocolate is perfect for those bright Christmas colors, you can easily swap it for milk chocolate, semi-sweet chocolate, or even dark chocolate chips. Just remember that darker chocolates will give you a richer, less vibrant color palette.
Q: Do I really need a double boiler?
Not necessarily! A double boiler is the gentlest way to melt chocolate, but you can also use a microwave. If using a microwave, heat the white chocolate chips and vanilla frosting in a microwave-safe bowl in 30-second intervals, stirring well after each, until smooth. Be extra careful not to overheat the chocolate, as it can seize up.
Q: Can I make this fudge ahead of time for holiday gifts?
Yes, please do! This Christmas fudge is perfect for making in advance. It stores wonderfully in the refrigerator for up to two weeks, making it an ideal treat to prepare during your busiest holiday moments. Plus, it gives you one less thing to worry about on the big day. And if you’re a fan of rich, decadent treats that don’t require an oven, then you absolutely must check out our No-Bake Chocolate Lasagna for another fantastic make-ahead dessert!
Q: Why is my fudge crumbly or oily?
If your fudge turns out crumbly, it might be because the chocolate was overheated, or the mixture wasn’t stirred enough to combine fully. If it’s oily, it could be a sign that the chocolate separated due to too high heat. Remember to keep the heat low, stir constantly, and work gently!
For more delicious and easy recipes, be sure to follow us on Pinterest!
Easy No-Bake Christmas Fudge
Ingredients
Equipment
Method
- Step 1: Prepare your pan. Grab an 8x8-inch (20x20cm) square baking pan and line it with parchment paper, leaving some overhang on the sides for easy lifting.
- Step 2: In the top bowl of a double boiler (or a heat-safe bowl over a saucepan with an inch or two of simmering water, ensuring the bowl doesn't touch the water), combine the white chocolate chips and vanilla frosting. Set this over medium-low heat.
- Step 3: Stir constantly for about 8-10 minutes, until the mixture is completely melted and beautifully smooth. Keep the heat medium-low to prevent the chocolate from burning.
- Step 4: Once melted and smooth, divide this mixture equally into three separate bowls.
- Step 5: Into the first bowl, stir in the red gel food coloring until completely blended and you have a vibrant festive red.
- Step 6: Repeat with the second bowl, adding the green gel food coloring and mixing until it’s a perfect Christmas green. Leave the third bowl pure white.
- Step 7: Using a large spoon, randomly dollop about 2 tablespoons of each colored fudge mixture into your prepared pan. Don't overthink the placement.
- Step 8: Once all your colorful dollops are in the pan, take a butter knife and gently swirl the colors together to create a beautiful, marbled pattern. Avoid over-mixing.
- Step 9: Pop the fudge, uncovered, into the refrigerator for 1-2 hours, or until it's completely firm and set.
- Step 10: Once firm, use the parchment paper overhangs to carefully lift the fudge out of the pan. Let it sit at room temperature for about 20 minutes before slicing into pieces. Serve immediately.