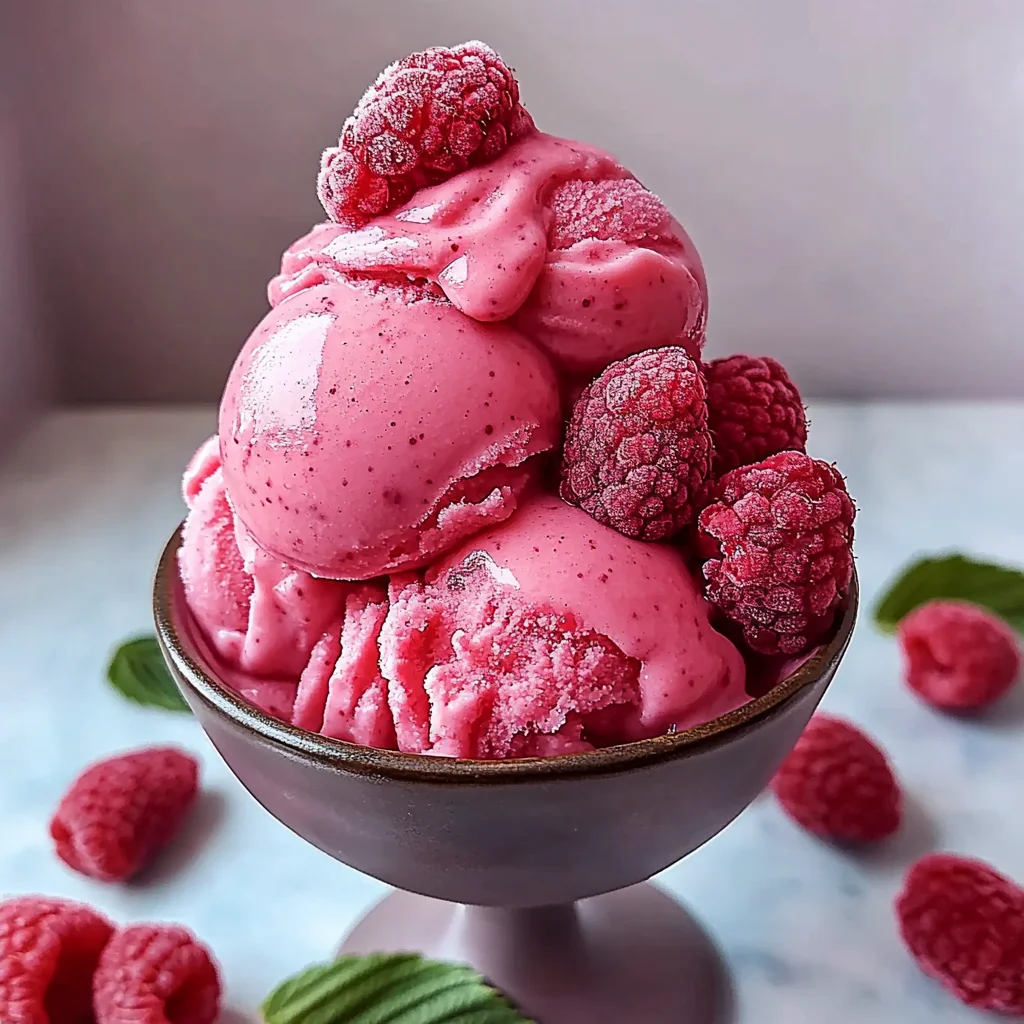
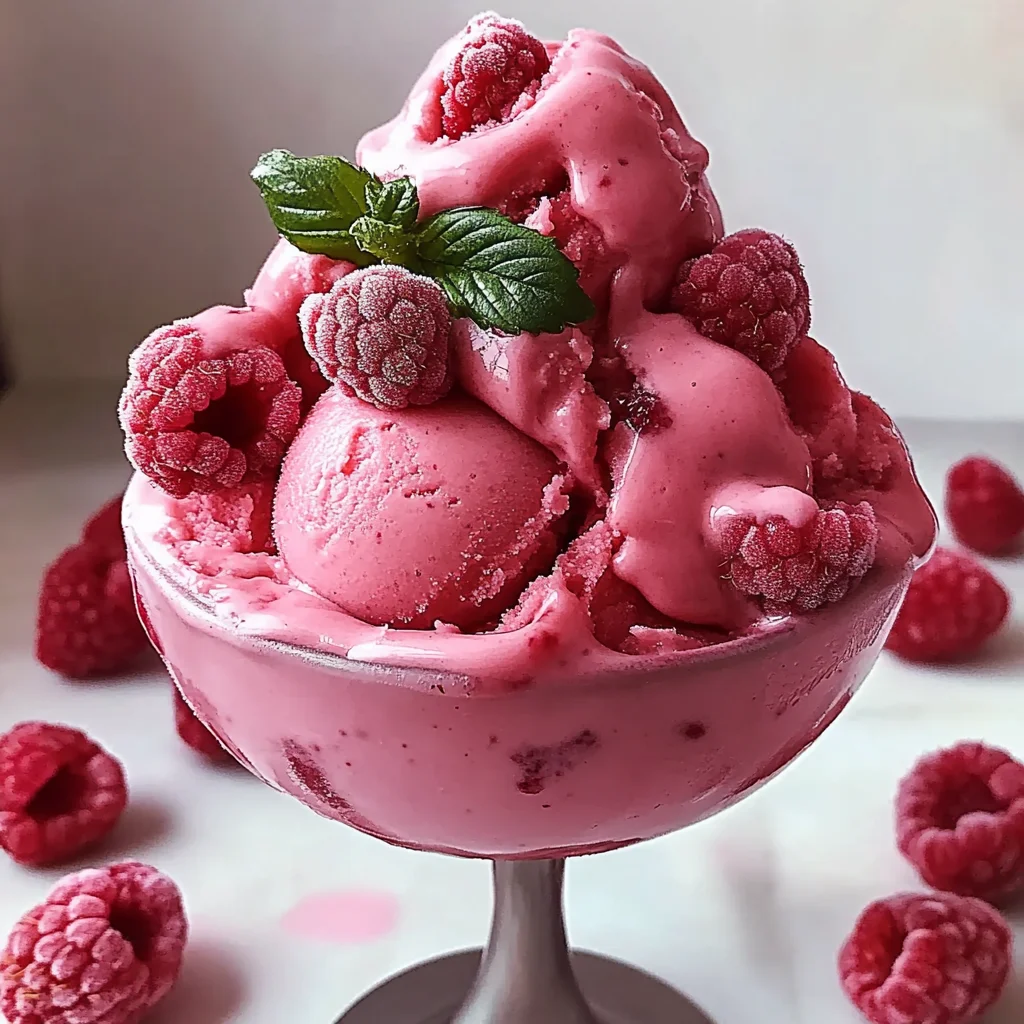
Oh, summer. Or really, anytime you need a burst of sunshine! There’s just something magical about a scoop of intensely fruity, perfectly cold sorbet. It takes me right back to sticky fingers and happy smiles on warm afternoons. While fancy desserts have their place, sometimes you just crave that pure, unadulterated fruit flavor. And guess what? Making sorbet at home is SO much easier than you might think! This Raspberry Sorbet recipe is my go-to when I want something refreshing, vibrant, and completely irresistible. It’s quick, uses simple ingredients, and delivers a flavor punch that store-bought just can’t match. Get ready to churn up some happiness!
Why You’ll Love This Recipe
- Fast: Seriously, the hands-on time is minimal. Most of the wait is just chilling!
- Easy: If you can make simple syrup and press a button on your blender and ice cream maker, you can make this! No complex techniques here.
- Giftable: Okay, maybe not a whole tub (you’ll want to keep that!), but a small container makes a delightful little treat for a neighbor or friend.
- Crowd-pleasing: Who doesn’t love bright, sweet-tart raspberry flavor? It’s naturally dairy-free and vegan too, which is a bonus for guests!
Ingredients
Gather ’round, friends! You only need four simple things to make this vibrant treat. Chances are, you might even have them on hand already!
- 500 g Raspberries: Fresh or frozen work beautifully here! If using frozen, no need to thaw completely, the processor can handle them. Fresh will give you the most intense, bright flavor though, especially when they’re perfectly ripe.
- 200 g Sugar: Just plain granulated sugar. This isn’t just for sweetness; sugar is key to the texture of sorbet, helping to keep it scoopable and preventing it from freezing into a solid block of ice.
- Juice of 1/2 Lemon: A little splash of citrus magic! The lemon juice brightens the flavor of the raspberries and adds just the right touch of tartness to balance the sweetness. Don’t skip it!
- 250 ml Water: The base for our simple syrup.
How to Make It
Alright, let’s get this deliciousness started! You’ve got your ingredients ready, your kitchen is feeling cozy, let’s make some sorbet!
Step 1: Make the Simple Syrup. Grab a small saucepan. Pour in your water and sugar. Place it over low heat. You’ll want to stir it gently until you see every single sugar crystal disappear. This won’t take long! Once it’s perfectly clear, take it off the heat immediately. Now, the important part: let that syrup cool down completely. You can set the pan aside or even pop it in the fridge for a bit to speed things up if you’re impatient (I know I sometimes am!). Make sure it’s good and cool before the next step.
Step 2: Blend the Berry Magic. Once your simple syrup is totally cool (seriously, it needs to be cool!), pour it into your food processor or blender. Add those beautiful raspberries and the squeeze of lemon juice. Process it all together until you have a super smooth, vibrant pink mixture. Now, into the fridge it goes! Pop a lid on or cover it and let it chill for at least 1 hour. Getting the mixture cold before churning helps it freeze faster and creates a smoother texture.
Step 3: Prep Your Ice Cream Maker. This is where the magic really happens! Hopefully, you remembered to put your ice cream maker bowl in the freezer ahead of time. Every machine is a little different, so follow your manufacturer’s instructions, but generally, that bowl needs to be frozen solid – usually for 12-24 hours. A well-frozen bowl is crucial for successful churning.
Step 4: Pour and Churn! Take that beautifully chilled raspberry mixture out of the fridge. Pour it into the frozen bowl of your ice cream maker. Don’t overfill it – give it some room to expand as it freezes!
Step 5: Watch the Magic Happen & Freeze. Turn on your ice cream maker! Let it churn for about 20 minutes. The time can vary based on your machine and how cold your mixture and bowl were, but you’re looking for a consistency similar to soft-serve ice cream. It will be thickened but still a bit soft. Once it hits that point, transfer the sorbet to a freezer-safe container. To prevent dreaded ice crystals, press a piece of plastic wrap directly onto the surface of the sorbet before putting the lid on. Pop it into the freezer for at least 3 hours (or longer!) to let it firm up properly before you scoop and enjoy!
Substitutions & Additions
Want to play around a little? This recipe is a great base! Here are a few ideas:
- Other Berries: Swap the raspberries for strawberries, blackberries, or a mix of your favorite berries. You might need to adjust the sugar slightly depending on how sweet your fruit is.
- Add Some Vanilla: A tiny splash (about 1/2 teaspoon) of pure vanilla extract can add a lovely depth of flavor.
- A Grown-Up Twist: Stir in a tablespoon of raspberry liqueur (like Chambord) or even a good quality vodka after churning, right before transferring to the freezer. The alcohol can help keep it softer and easier to scoop.
- Herb Infusion: Gently heat a few sprigs of fresh mint or basil with your simple syrup, then strain them out before cooling. This adds a subtle, refreshing note.
Tips for Success
Making sorbet is straightforward, but a few little tricks can ensure yours is absolutely perfect every time!
- Cool, Cool, Cool: I mentioned it in the steps, but it’s worth repeating! Make sure your simple syrup is fully cooled, and the raspberry mixture is well-chilled before churning. Warm liquids won’t freeze properly in the ice cream maker.
- Freeze That Bowl Solid: A partially frozen ice cream maker bowl won’t give you good results. Plan ahead and make sure it’s been in the deep freeze for the recommended time (usually 24 hours is best).
- Don’t Skimp on Sugar (Much): While it might seem like a lot, the sugar is crucial for texture. Reducing it too much will result in a harder, icier sorbet.
- Ripeness Matters: Use the most flavorful, ripe raspberries you can find (or frozen ones picked at peak!). Better fruit equals better sorbet flavor.
- Prevent Ice Crystals: Pressing plastic wrap directly onto the surface of the sorbet in the storage container is key to avoiding that icy layer on top.
How to Store It
Your beautiful homemade raspberry sorbet will keep well in the freezer for up to 2-3 weeks. Always store it in an airtight, freezer-safe container. Remember that tip about pressing plastic wrap directly onto the surface before putting the lid on? That’s your best defense against dreaded ice crystals and freezer burn. If it gets very hard after a while, let it sit out on the counter for 5-10 minutes before scooping to soften slightly.
FAQs
Got questions? I’ve got answers!
Can I make this without an ice cream maker?
Yes, you can! It requires a little more effort. After blending the chilled mixture, pour it into a shallow freezer-safe container. Freeze for about 30-45 minutes, then take it out and scrape it with a fork to break up any ice crystals. Repeat this scraping process every 30-45 minutes for about 3-4 hours, or until it’s frozen through but still scoopable. It won’t be quite as smooth as churned sorbet, but it will still be delicious!
Can I use frozen raspberries?
Absolutely! Frozen raspberries work perfectly and are often more economical. There’s no need to fully thaw them before blending; your food processor or blender can handle them just fine. If they are very frozen, you might need to process a little longer.
Why is my sorbet icy?
Common culprits for icy sorbet are not enough sugar, not chilling the mixture long enough before churning, the ice cream maker bowl not being sufficiently frozen, or not covering the sorbet surface directly with plastic wrap during storage. Make sure you’re hitting all these points!

Bright & Easy Homemade Raspberry Sorbet
Ingredients
Equipment
Method
- Step 1: Make the Simple Syrup. In a small saucepan, combine water and sugar. Heat over low heat, stirring gently until all sugar crystals have dissolved and the syrup is perfectly clear. Remove from heat and let the syrup cool down completely. You can set it aside or place it in the fridge to speed up cooling.
- Step 2: Blend the Berry Magic. Once the simple syrup is completely cool, pour it into a food processor or blender. Add the raspberries and the juice of the lemon. Process until you have a super smooth, vibrant mixture. Transfer the mixture to a container, cover, and chill in the fridge for at least 1 hour. Getting the mixture very cold before churning helps create a smoother texture.
- Step 3: Prep Your Ice Cream Maker. Ensure your ice cream maker bowl has been frozen solid according to the manufacturer's instructions (usually 12-24 hours).
- Step 4: Pour and Churn! Take the chilled raspberry mixture out of the fridge. Pour it into the frozen bowl of your ice cream maker. Do not overfill, leaving room for expansion.
- Step 5: Watch the Magic Happen & Freeze. Turn on your ice cream maker and let it churn for about 20 minutes, or until it reaches a consistency similar to soft-serve ice cream. It will be thickened but still soft. Transfer the sorbet to a freezer-safe container. To prevent ice crystals, press a piece of plastic wrap directly onto the surface of the sorbet before putting the lid on. Place the container in the freezer for at least 3 hours (or longer) to firm up properly before serving.