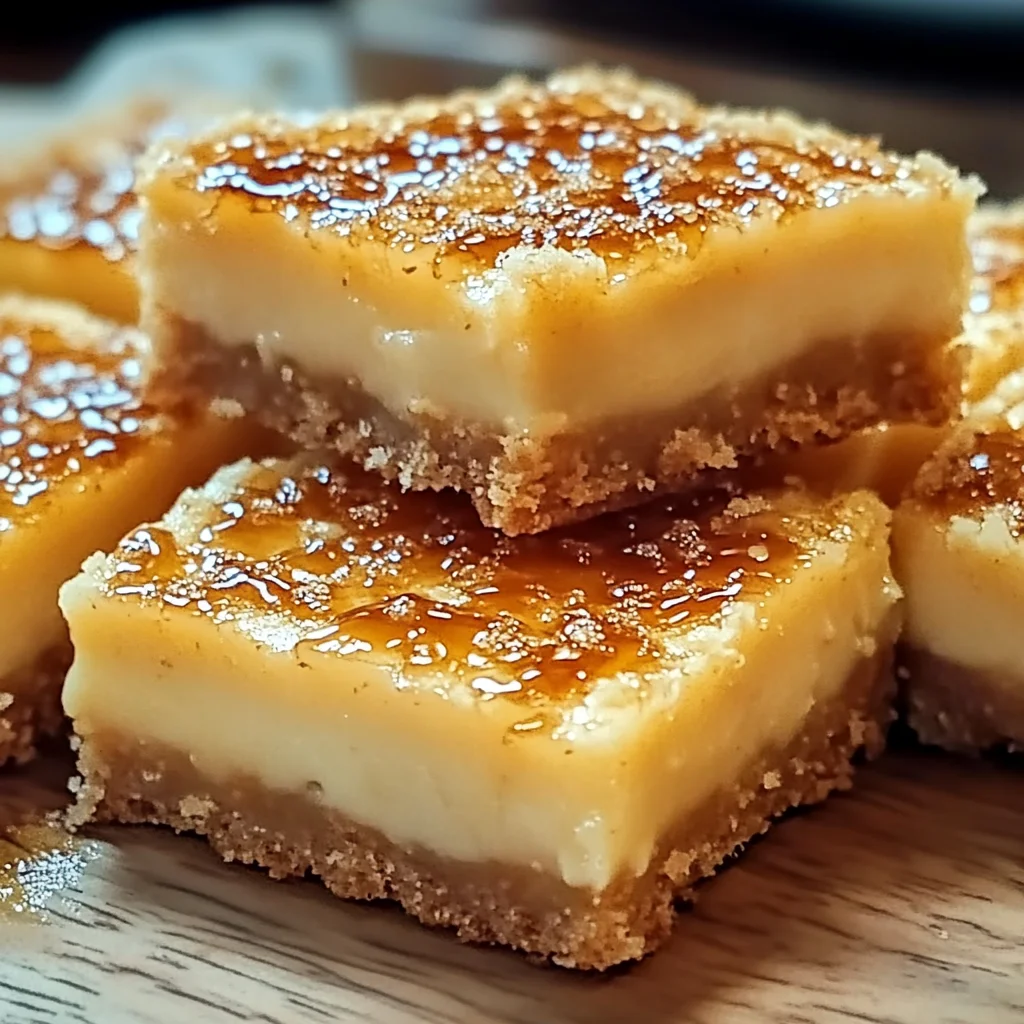
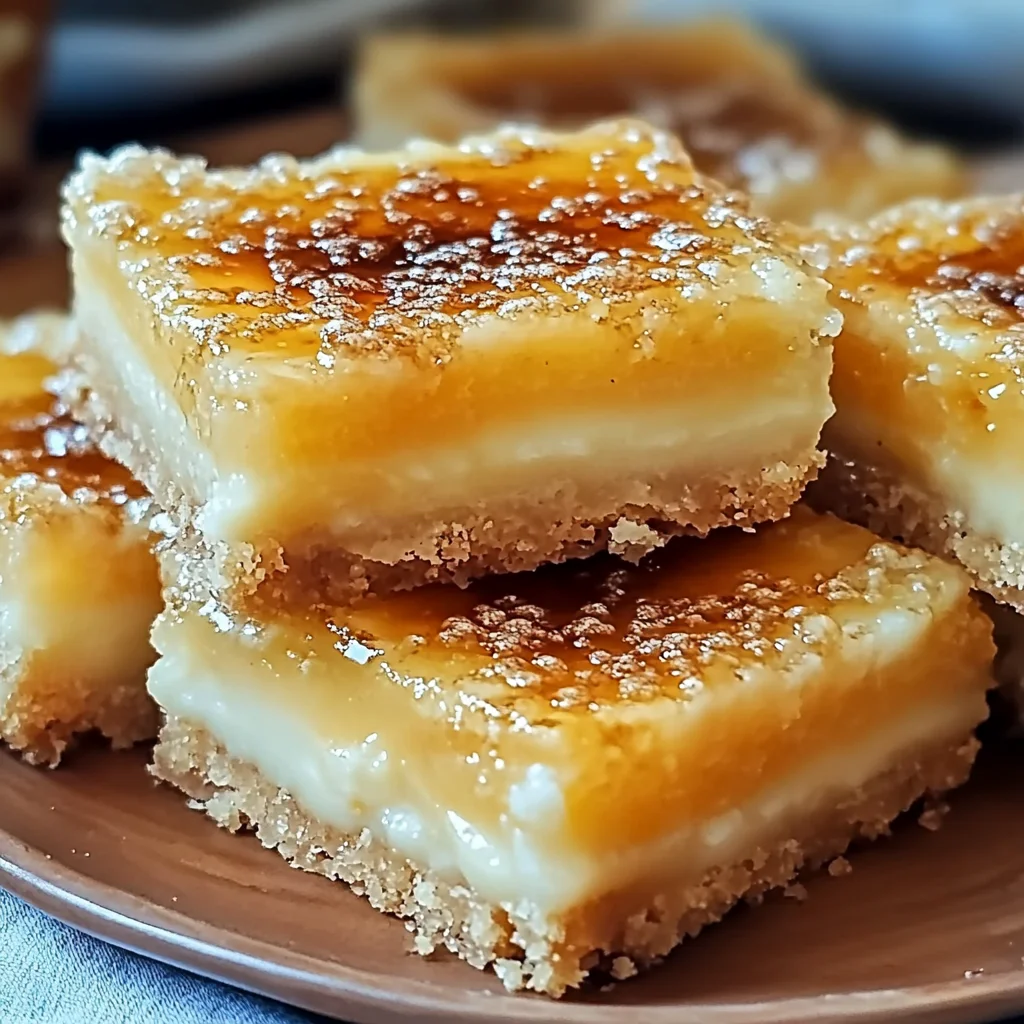
Oh honey, let me tell you, there are some desserts that just transport you, aren’t there? That first spoonful of a classic crème brûlée, with its crisp, caramelized sugar crust giving way to a silky, creamy custard… pure magic! But let’s be real, pulling out the ramekins and the torch isn’t always in the cards for a weeknight craving or a last-minute get-together. That’s where these incredible Crème Brûlée Cookie Bars swoop in to save the day!
Imagine all that dreamy flavor packed into an easy-to-make, shareable bar. Seriously, these bars are the perfect blend of a chewy cookie and that luxurious crème brûlée experience. They’re quick, they’re simple, and they disappear faster than you can say “bon appétit!” If you’re a fan of fuss-free desserts that impress, like our easy chocolate chip cheesecake bars, then you are going to adore these Crème Brûlée Cookie Bars.
Why You’ll Love Crème Brûlée Cookie Bars
- Fast: From mixing bowl to oven in minutes!
- Easy: No fancy techniques or equipment needed.
- Giftable: Perfect for sharing with neighbors, friends, or bringing to a potluck.
- Crowd-pleasing: A unique twist on a classic that everyone will rave about.
Ingredients
Gather your ingredients, my friend. You won’t need anything too wild for this recipe, just some simple pantry staples that come together beautifully.
- 1/2 cup (113g) unsalted butter: Always unsalted, so you can control the saltiness in your bake.
- 12 oz (about 2 cups or 350g) white chocolate chips: These are the star of the show, providing that creamy, sweet base. Don’t skimp on quality here!
- 1 1/4 cups (155g) all-purpose flour: The backbone of our cookie bar, giving it structure.
- 3/4 cup (149g) granulated sugar: For just the right amount of sweetness in the bar itself.
- 1 tablespoon (15ml) vanilla extract: A generous splash of vanilla brings out all those wonderful flavors.
- 1/4 teaspoon salt: Balances the sweetness and enhances the flavor profile.
- 3 large eggs: Our binding agents, creating that perfect chewy texture.
- 1 cup toffee bits: This is where the “brûlée” magic comes in for the topping, giving you that delightful crunch and buttery caramel flavor.
How to Make Crème Brûlée Cookie Bars
Alright, apron on, good tunes playing? Let’s get these delectable bars baking!
- First things first, go ahead and preheat your oven to a cozy 350°F (175°C). While it’s warming up, grab a 9×13-inch baking pan and line it with parchment paper, leaving a little overhang on the sides. This is your secret weapon for easy lifting and slicing later!
- In a medium saucepan, you’re going to gently melt that glorious butter and those white chocolate chips over low heat. Stir continuously until everything is smooth and glossy. Patience is key here; we don’t want any scorched chocolate!
- Once it’s beautifully melted, remove the saucepan from the heat and carefully transfer that warm, luscious mixture into a large mixing bowl.
- Now for the next layer of flavor! Stir in the granulated sugar, vanilla extract, and salt. Give it a good whisk until it’s all well combined and the sugar starts to dissolve into the warm mixture.
- It’s egg time! Add your eggs one at a time, making sure to mix well after each addition. You want to fully incorporate each egg before adding the next. This helps create that rich, smooth batter.
- Gently mix in the all-purpose flour until it’s just combined. Don’t overmix it, my friend! A few streaks are okay; overmixing can make your bars tough.
- Remember that prepared 9×13-inch pan? Pour your lovely batter into it and spread it out evenly with a spatula. Make sure it reaches all the corners for uniform baking.
- Pop that pan into your preheated oven and bake for 25 minutes. The edges should be just starting to turn golden, and the center will look mostly set but might still be a little soft.
- Here’s where the magic crunch comes in! Remove the pan from the oven and immediately sprinkle those delicious toffee bits evenly over the top of the partially baked bars.
- Return the pan to the oven and bake for an additional 5 to 10 minutes. Keep an eye on them! You want the edges to be nicely golden brown and the center to be fully set. The toffee bits will melt slightly and create that fantastic “brûlée” top.
- The hardest part: letting them cool completely in the pan. I know, I know, it’s tempting to dig right in, but letting them cool ensures they set properly and slice beautifully. For another dessert that benefits from a good chill, check out our easy no-bake caramel pretzel bars!
- Once fully cooled, use the parchment paper overhang to lift the entire slab out of the pan. Slice into squares, and get ready to be amazed!
Substitutions & Additions
Feeling creative? Here are a few ways to tweak these delicious cookie bars:
- For a deeper “brûlée” flavor: After sprinkling the toffee bits, you can sprinkle a thin layer of granulated sugar over them and then use a kitchen torch to caramelize it quickly. This will give you that true, glassy crème brûlée top!
- Chocolate Type: While white chocolate is traditional for the crème brûlée flavor, you could try milk chocolate or even dark chocolate chips for a different twist.
- Nutty Crunch: Instead of or in addition to toffee bits, sprinkle some chopped pecans, walnuts, or almonds on top for an extra layer of crunch.
- Espresso Boost: Add a teaspoon of instant espresso powder to the butter and white chocolate mixture for a subtle coffee note that pairs beautifully with the sweet flavors.
- Spice it Up: A pinch of cinnamon or nutmeg could add a cozy warmth to the cookie base.
- Citrus Zest: For a brighter flavor, add a teaspoon of fresh orange or lemon zest to the batter.
Tips for Success
To ensure your Crème Brûlée Cookie Bars come out perfectly every time, keep these pointers in mind:
- Don’t Overbake: Cookie bars can go from perfectly chewy to dry in a flash. Keep an eye on them in the last few minutes of baking. The center should be set, but not hard.
- Cool Completely: I can’t stress this enough! These bars need time to firm up and allow the flavors to meld. Cutting them warm will result in a messy, crumbly experience.
- Parchment Paper is Your Friend: It makes removing the bars from the pan incredibly easy and cleanup a breeze. Don’t skip this step!
- Even Spreading: Make sure your batter is spread evenly in the pan so that all parts bake uniformly.
- Room Temperature Eggs: If you remember to, let your eggs come to room temperature before mixing. They’ll incorporate more smoothly into the batter.
How to Store Crème Brûlée Cookie Bars
These bars are best enjoyed within a few days, but here’s how to keep them fresh:
- Countertop: Store leftover bars in an airtight container at room temperature for up to 3-4 days.
- Refrigerator: If you prefer them chilled or want to extend their life, you can store them in an airtight container in the refrigerator for up to a week. Just let them come to room temperature for about 15 minutes before serving for the best texture.
- Freezing: Yes, you can freeze these! Wrap individual bars tightly in plastic wrap, then place them in a freezer-safe bag or container. They’ll keep in the freezer for up to 3 months. Thaw at room temperature or in the refrigerator overnight before enjoying. For more easy make-ahead desserts, explore our full collection of recipes!
FAQs
Q: Do I need a kitchen torch for these?
A: Nope! The toffee bits give you that fantastic “brûlée” crunch and flavor without needing a torch. However, if you have one and want to add an extra layer of caramelized sugar on top of the toffee, go for it!
Q: Can I use different kinds of toffee bits?
A: Absolutely! Plain toffee bits work perfectly, but if you find chocolate-covered toffee bits or toffee bits with nuts, they’d be delicious too.
Q: My bars are crumbling when I try to cut them. What went wrong?
A: Most likely, they weren’t cooled completely before cutting. Patience is key with bar desserts! Also, a sharp, clean knife helps a lot.
Q: Can I double this recipe?
A: Yes, you can! You’ll need to use a larger pan (like a 12×18-inch half-sheet pan) and adjust the baking time slightly, possibly adding 5-10 minutes to the total baking time.
For more delightful recipes and baking inspiration, be sure to follow us on Pinterest!