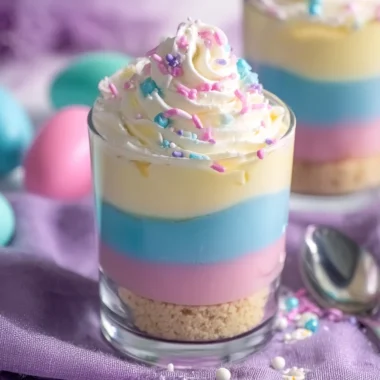
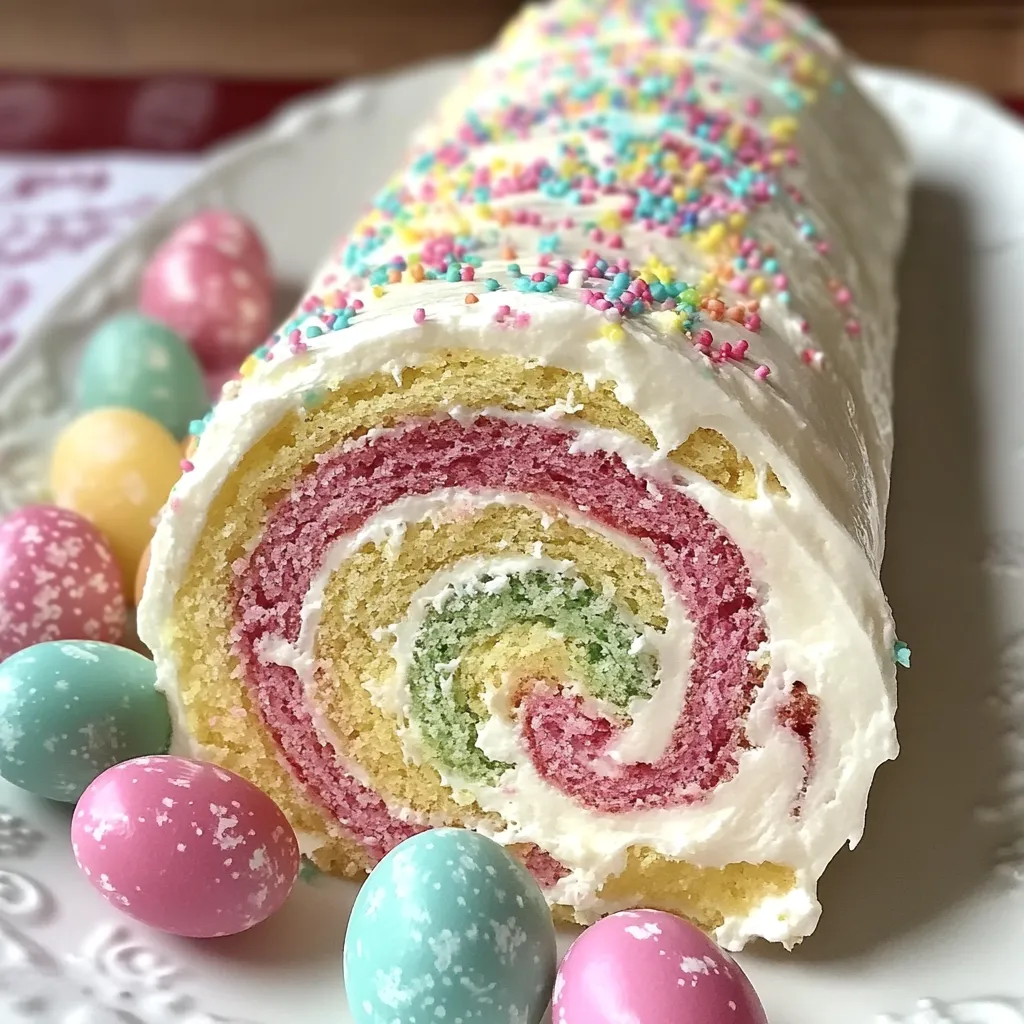
There’s something truly magical about Easter desserts that bring back childhood memories of pastel colors, family gatherings, and the joy of sharing something sweet and special. If you’re like me, you love adding a homemade touch to your holiday celebrations, and this Easter Cake Roll is just the ticket. It’s a light, fluffy sponge cake swirled with a luscious cream cheese filling, decorated with charming pastel colors that instantly brighten up any dessert table. Plus, it’s surprisingly easy to make—even if you’re not a seasoned baker!
This recipe is quick to whip up, visually stunning, and the perfect treat to impress your friends and family. Whether you’re serving it as the centerpiece dessert at your Easter brunch or gifting it to a neighbor, this cake roll is memorable and delightful. I remember the first time I made it, the pastel hues reminded me of freshly bloomed spring flowers, and the creamy filling was the perfect balance of sweet and tangy. It’s one of those nostalgic, crowd-pleasing recipes that you’ll want to make year after year.
Why You’ll Love Easter Cake Roll
- Fast: From mixing to baking, this cake roll comes together in under an hour plus chilling time.
- Easy: No complicated techniques involved—just whipping egg whites and folding batter gently.
- Giftable: Wrapped nicely, it makes a thoughtful and beautiful homemade gift for friends and family.
- Crowd-pleasing: The pastel colors and creamy filling appeal to kids and adults alike, making it perfect for gatherings.
Ingredients
Before diving in, let’s take a look at what you’ll need. The ingredients are simple and mostly pantry staples, with a few fun additions to make this springtime treat shine.
For the Pastel Sponge Cake
- ¾ cup cake flour: Cake flour keeps the sponge tender and light, giving that melt-in-your-mouth texture.
- ¼ teaspoon kosher salt: Balances sweetness and enhances flavor.
- ¼ teaspoon baking powder: Helps the sponge rise just right without being too dense.
- 6 large egg whites, at room temperature: Whipping these to stiff peaks is key to that airy cake.
- 1 teaspoon pure vanilla extract: Adds subtle warmth and sweetness to the cake batter.
- 1 teaspoon freshly squeezed lemon juice: Stabilizes the egg whites and adds a subtle bright note.
- ¼ cup granulated sugar: Sweetens the batter and helps create that glossy meringue texture.
- Pastel gel food coloring: Pick your favorite colors—pink, yellow, green, purple, or a mix—to create a beautiful, festive pattern.
For the Cream Cheese Filling
- 8 oz full-fat block cream cheese, softened: The star of the filling, creamy and tangy.
- ½ cup unsalted butter, softened: Adds richness and helps create a smooth texture.
- 1 cup powdered sugar: Sweetens and lightens the filling.
- 1 teaspoon pure vanilla extract: Rounds out the flavor with a lovely vanilla aroma.
- Extra powdered sugar, for dusting: Gives the finished roll that pretty, snowy look.
How to Make Easter Cake Roll
Now for the fun part—making this delightful cake roll. Don’t worry if you’ve never made a rolled cake before; I’ll walk you through each step carefully.
- Preheat your oven to 375°F (190°C). Line a 13×18-inch rimmed baking sheet with parchment paper, leaving a little overhang on the short sides. This will make it easier to lift the cake out when it’s baked.
- Sift together your dry ingredients: In a small bowl, combine the cake flour, kosher salt, and baking powder. Sifting ensures there are no lumps and helps keep the batter light.
- Beat the egg whites: In your stand mixer bowl fitted with a whisk attachment, add the egg whites, lemon juice, and vanilla extract. Beat on medium speed until foamy—this takes about 2-3 minutes.
- Gradually add sugar: While still mixing, slowly sprinkle in the granulated sugar. Increase your mixer speed to medium-high and continue beating until you get stiff, glossy peaks. This usually takes about 5–8 minutes. The egg whites should hold their shape firmly but still look shiny.
- Fold in the dry ingredients: Remove the bowl from the mixer. Gently fold in the sifted dry ingredients with a spatula, being careful not to deflate the egg whites. You want a smooth batter without streaks of flour but maintain the airy texture.
- Divide and color the batter: Split the batter evenly into 4 small bowls. Add different pastel gel food coloring to each bowl and fold gently until the colors are even. This is where you can get creative with your color choices!
- Create a colorful pattern: Using a spoon, drop spoonfuls of the colored batter in an alternating pattern across the prepared baking sheet. Don’t worry about perfect shapes—this will create a charming, whimsical look. Then use an offset spatula to gently spread the batter evenly to cover the entire pan. Try to keep the colors somewhat distinct so they show through after baking.
- Bake your sponge: Pop the pan in the oven for about 10–12 minutes. You’ll know it’s done when the cake feels firm to the touch and springs back gently. Don’t overbake, or it will dry out and crack when you roll it.
- Roll the cake while warm: This is the trickiest part but trust me, it’s easier than it sounds. Right after baking, run a knife around the edges to loosen the cake. Then carefully invert the pan onto a clean kitchen towel or another sheet of parchment paper. Peel off the baked parchment paper. Trim any uneven edges if needed. Starting from one short end, roll the cake tightly with the towel or parchment still inside. This helps the cake “remember” its rolled shape and prevents cracks later. Place it seam-side down on a wire rack and let it cool completely.
- Prepare the cream cheese filling: While the cake cools, beat together the softened cream cheese and butter in a medium bowl until smooth and creamy. Add the powdered sugar and vanilla extract, then beat again until light and fluffy. This filling is rich but perfectly balanced, bringing a creamy tang that pairs beautifully with the delicate sponge.
- Unroll, fill, and re-roll: Once the cake is completely cool, gently unroll it. Spread the cream cheese filling evenly over the surface, right up to the edges. Then carefully roll the cake back up—this time without the towel or parchment inside. Place the roll seam-side down on a serving platter.
- Chill and serve: Cover the cake loosely and refrigerate for at least 1 hour. Chilling helps the filling set and makes slicing easier. Just before serving, dust the top with extra powdered sugar for that classic, elegant look. Use a sharp serrated knife to cut even slices, and enjoy the colorful swirl and creamy center!
Substitutions & Additions
One of the best things about this recipe is how flexible it is. You can easily tailor the colors, flavors, and fillings to match your taste or dietary needs.
- Flour alternatives: If you can’t find cake flour, you can make a substitute by combining ¾ cup all-purpose flour minus 2 tablespoons plus 2 tablespoons cornstarch. This helps keep the cake tender.
- Food coloring: Use natural food colorings like beet juice for pink, matcha powder for green, or turmeric for yellow if you prefer to avoid gels.
- Filling variations: Instead of cream cheese filling, try whipped cream with fresh berries for a lighter option. Or combine cream cheese with a bit of lemon zest for extra zing.
- Flavor twists: Add almond extract to the batter for a nutty touch, or fold in finely chopped dried fruit into the filling.
- Decorations: Top the cake roll with edible flowers or pastel sprinkles for an extra festive look.
Tips for Success
Rolling a cake might seem intimidating, but with a few insider tips, you’ll have a flawless Easter cake roll every time.
- Beat egg whites properly: Make sure your bowl and whisk are clean and free of grease. Room temperature egg whites whip better and faster.
- Fold gently: When adding flour, fold with a spatula using a light hand to keep air bubbles intact.
- Use parchment over silicone mats: Parchment paper makes it easier to peel off the cake without sticking or tearing.
- Roll while warm: Don’t wait for the cake to cool before rolling the first time, or it may crack.
- Chill before slicing: The filling firms up in the fridge, making clean, neat slices possible.
- Prep ahead: You can bake the sponge the day before and keep it wrapped in the fridge overnight. Make the filling and roll the cake the next day for fresh tasting results.
How to Store Easter Cake Roll
After all the effort, you want to keep your Easter Cake Roll fresh and delicious. The best way is to store it tightly wrapped in plastic wrap or in an airtight container in the refrigerator. This keeps the sponge moist and the filling creamy.
The cake roll will stay fresh for up to 3 days refrigerated, making it perfect for prepping ahead of your Easter celebrations. If you want to freeze it, wrap it tightly in plastic wrap and then foil, and freeze for up to 2 months. Thaw in the refrigerator overnight before serving.
Because the cake contains cream cheese filling, it’s best not to leave it out at room temperature for extended periods to avoid spoilage.
FAQs
Can I make this cake roll without a stand mixer?
Yes! You can use a hand mixer or even whisk the egg whites by hand if you’re up for a workout. Just make sure to whip until stiff peaks form for the best texture.
What if my cake cracks when rolling?
Rolling the cake while it’s warm helps prevent cracking. If cracks appear, don’t worry—once filled and chilled, they become less noticeable, and the cake still tastes fantastic.
Can I use different fillings?
Absolutely! Feel free to experiment with fillings like whipped cream, chocolate ganache, or fruit preserves. Just keep in mind that cream cheese filling adds a nice tang and richness that balances the sweetness.
Is this recipe suitable for a beginner baker?
Definitely! This recipe is straightforward with clear steps. Just take your time with the folding and rolling, and you’ll impress everyone with your beautiful Easter Cake Roll.
If you love making delightful desserts, you might also enjoy trying out the Ultimate Classic Carrot Cake for another spring favorite or the Easy Strawberry Banana Bread for a fruity breakfast treat. Both bring that homemade warmth and flavor that make every occasion special.
And if you’re in the mood for a fun, colorful breakfast to pair with your cake roll, don’t miss the Fluffy Lemon Ricotta Pancakes. They’re light, zesty, and so easy to whip up!
So go ahead, gather your ingredients, and enjoy making this charming Easter Cake Roll that’s as beautiful as it is delicious. Happy baking and happy Easter!
For more tasty inspiration and to keep your dessert game strong, be sure to follow us on Pinterest.
Easter Cake Roll
Ingredients
Equipment
Method
- Step 1: Preheat oven to 375°F (190°C). Line a 13×18-inch rimmed baking sheet with parchment paper, leaving a slight overhang for easy removal.
- Step 2: Sift together cake flour, kosher salt, and baking powder in a small bowl to remove lumps and keep batter light.
- Step 3: In a stand mixer bowl fitted with whisk attachment, beat egg whites, lemon juice, and vanilla extract on medium speed until foamy, about 2-3 minutes.
- Step 4: Gradually add granulated sugar while mixing. Increase speed to medium-high and beat until stiff, glossy peaks form, about 5–8 minutes.
- Step 5: Remove bowl from mixer. Gently fold in sifted dry ingredients using a spatula, being careful not to deflate the egg whites.
- Step 6: Divide batter evenly into 4 small bowls. Add different pastel gel food coloring to each and fold gently until colors are even.
- Step 7: Drop spoonfuls of colored batter in alternating pattern across prepared baking sheet. Use an offset spatula to gently spread batter evenly, keeping colors somewhat distinct.
- Step 8: Bake for 10–12 minutes until cake feels firm and springs back gently. Avoid overbaking to prevent cracking when rolling.
- Step 9: Immediately loosen edges with a knife. Invert pan onto a clean kitchen towel or parchment paper. Peel off baked parchment. Trim edges if needed.
- Step 10: Starting from one short end, roll cake tightly with towel or parchment still inside. Place seam-side down on wire rack and cool completely.
- Step 11: Meanwhile, beat softened cream cheese and butter until smooth. Add powdered sugar and vanilla extract; beat until light and fluffy.
- Step 12: Once cooled, gently unroll cake. Spread cream cheese filling evenly to edges. Re-roll without towel or parchment and place seam-side down on serving platter.
- Step 13: Cover loosely and refrigerate at least 1 hour to set filling. Before serving, dust with extra powdered sugar. Slice with sharp serrated knife and enjoy.