
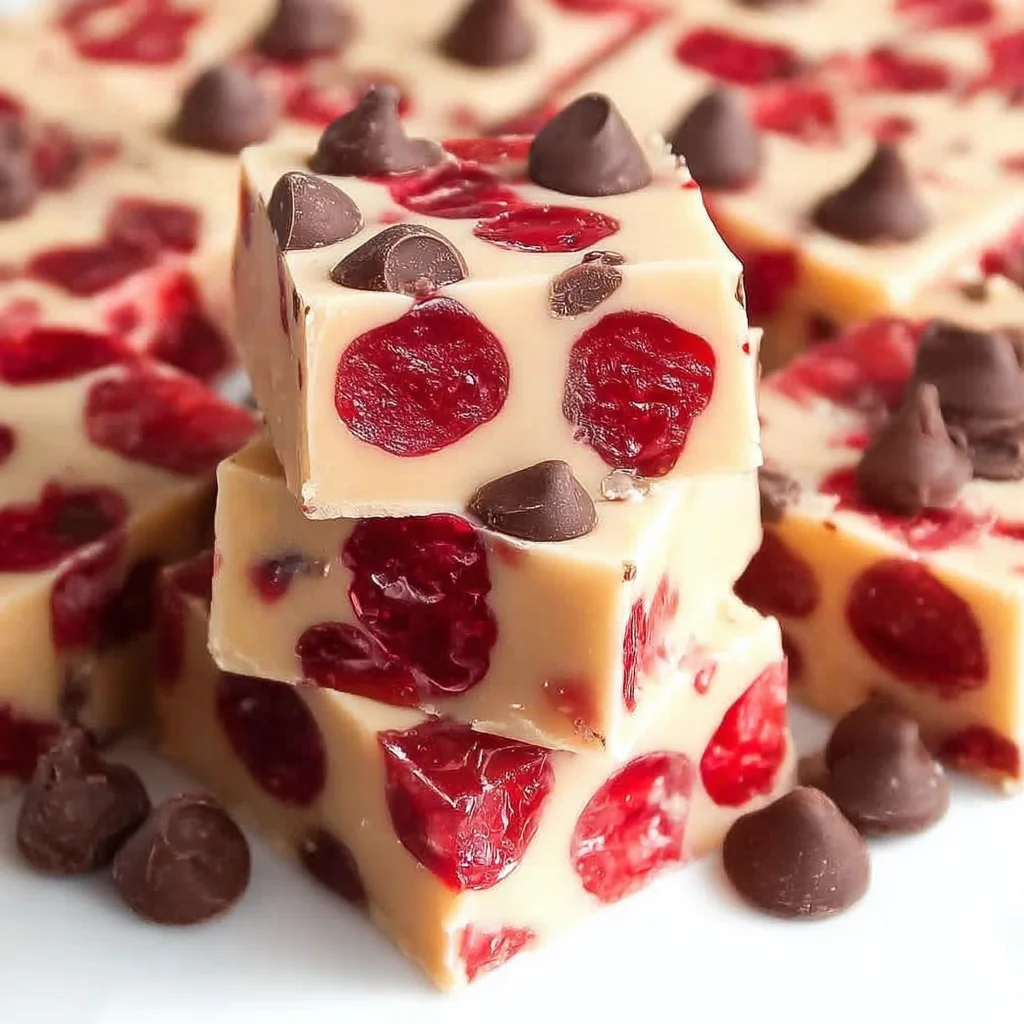
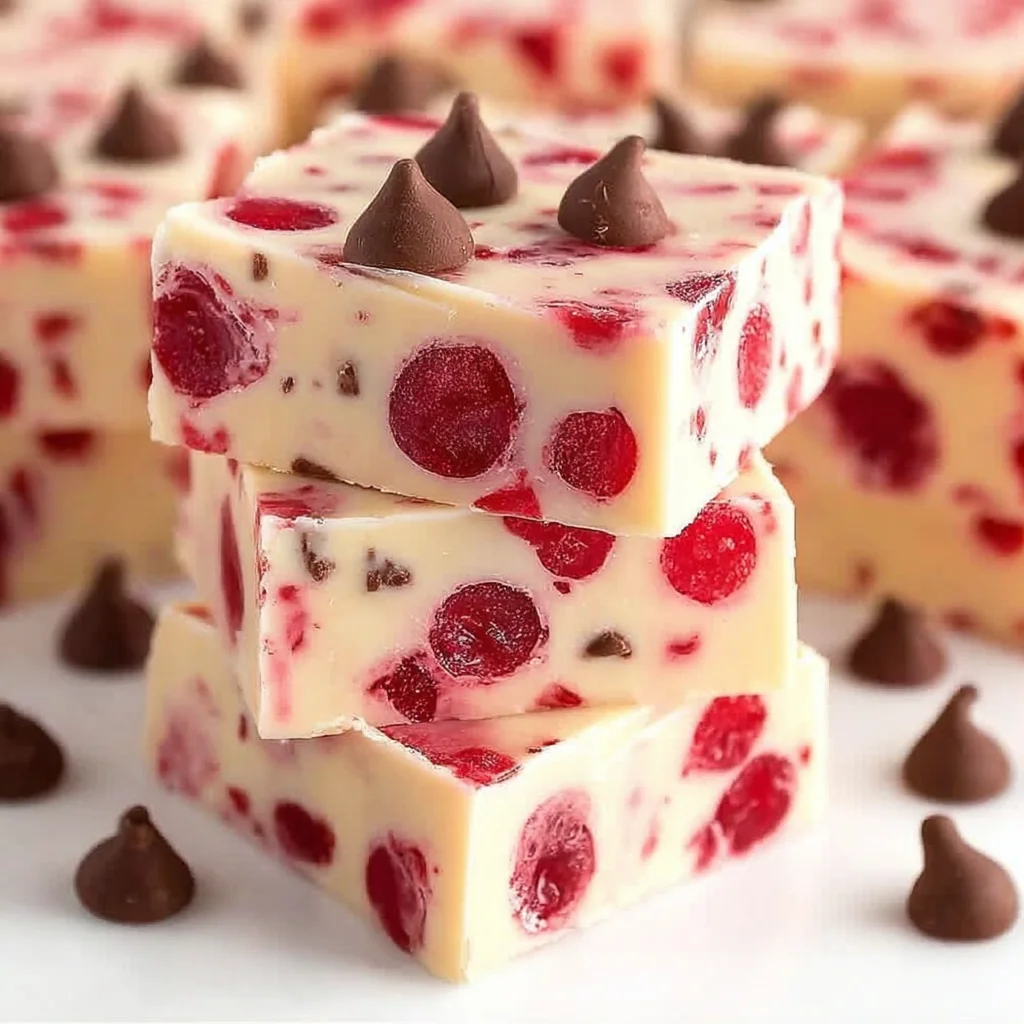
Hey there, sweet treat lover! Do you remember those lazy summer days, maybe at the beach or just hanging out with friends, and biting into that iconic scoop of Cherry Garcia ice cream? The smooth chocolate, the bursts of sweet cherry, that delightful crunch of nuts… pure happiness, right? Well, get ready, because I’m about to show you how to capture all that delicious nostalgia in a dreamy, creamy, no-bake fudge that is ridiculously easy to make. Seriously, if you can stir, you can make this fudge. It’s the perfect little bite of bliss, and it disappears in a flash whenever I make it!
Why You’ll Love This Recipe
This isn’t just any fudge recipe; it’s a little piece of joy that comes together in minutes. Here’s why it’s going to be your new go-to:
- Fast: We’re talking maybe 10-15 minutes of active time. Seriously!
- Easy: No candy thermometers, no complicated steps. Just melt, mix, and chill.
- Giftable: Package this up in a cute tin or box, and you’ve got a homemade gift that everyone will adore.
- Crowd-pleasing: Who doesn’t love the classic combo of chocolate, cherry, and nuts? It’s a guaranteed hit.
Ingredients
Gather your goodies! You only need a handful of simple ingredients to make this magic happen.
- Semi-sweet chocolate chips (3 cups): Grab your favorite brand! Good quality chips will melt smoother and give you the best flavor.
- Sweetened condensed milk (1 can, 14 oz): This is the secret sauce, the magic binder that makes this fudge incredibly creamy and no-bake.
- Vanilla extract (1 teaspoon): A little splash of vanilla enhances all those lovely flavors.
- Maraschino cherries (1 cup, drained and chopped): The stars of the “Cherry Garcia” part! Make sure they are really well drained so you don’t add extra liquid to your fudge. Pat them dry with a paper towel after chopping if needed.
- Chopped walnuts (1/2 cup, optional): For that classic crunch! Pecans work great too, or you can skip them if nuts aren’t your thing.
- Salt (1/4 teaspoon): Just a tiny pinch to balance the sweetness and bring out the chocolate flavor. Don’t skip it!
How to Make It
Okay, let’s get cooking! Or rather, melting and mixing. You won’t believe how simple this is.
1. Get Ready: First things first, prepare your pan. Grab an 8×8-inch baking dish. Line it generously with parchment paper or aluminum foil. Make sure you leave some overhang on the sides – this is your handle later to lift the fudge out easily!
2. Melt the Magic: Now, grab a medium-sized saucepan. Set it over low heat. This is key! You don’t want to scorch the chocolate. Pour in your semi-sweet chocolate chips and the can of sweetened condensed milk. Stir continuously! Be patient. It will start to melt and come together into a beautiful, glossy, smooth chocolate mixture. Keep stirring until there are absolutely no lumps left.
3. Flavor Boost: Once the chocolate and milk are perfectly melted and smooth, remove the pan from the heat. Stir in your vanilla extract and that little pinch of salt. Give it a good mix to combine everything.
4. Fold in the Fun: Now for the best part – adding the “Garcia”! Gently fold in your chopped, well-drained maraschino cherries and the chopped walnuts (if you’re using them). Stir just until they are evenly distributed throughout the chocolate mixture. You want pops of cherry and nuts in every bite!
5. Into the Pan: Quickly pour the fudge mixture into your prepared 8×8-inch dish. Use a spatula to spread it out evenly. To help it settle and get rid of any tiny air bubbles, gently tap the pan on your counter a couple of times.
6. Chill Out: Pop the dish into the refrigerator. Let it chill for at least 2 hours. You need it to get nice and firm so you can cut it cleanly. I often just leave it in there until I’m ready to slice.
7. Slice and Serve: Once the fudge is firm, use the parchment or foil overhang to lift the entire block of fudge out of the pan. Place it on a cutting board. Now, grab a sharp knife and cut it into squares. I usually wipe the knife clean with a warm, damp cloth between cuts for the neatest squares.
8. Enjoy (and Store): Time to taste your amazing creation! Try a piece (or two!). Store any leftovers… well, I’ll tell you exactly how to store them in the next section!
Substitutions & Additions
Want to play around with this recipe? Go for it! It’s super forgiving.
- Chocolate Swap: Not a semi-sweet fan? You can use milk chocolate chips for a sweeter fudge, or dark chocolate chips for a richer, less sweet version. A mix is great too!
- Nutty Options: Not keen on walnuts? Try chopped pecans, almonds, or even macadamia nuts. If you have a nut allergy or just prefer no nuts, simply leave them out.
- Dried Fruit: Don’t have maraschino cherries? You could try using well-hydrated and chopped dried cherries or even cranberries for a different twist. Soak dried fruit in hot water for about 10 minutes, then drain very well before chopping and adding.
- Extracts: A tiny splash of almond extract (maybe 1/4 teaspoon) could really enhance the cherry flavor.
- Extra Chocolate Boost: Stir in a handful of mini chocolate chips or chopped chocolate chunks with the cherries and nuts for extra texture and chocolatey goodness.
Tips for Success
Making this fudge is pretty foolproof, but here are a few pointers to make sure yours turns out perfect every time:
- Low Heat is Your Friend: When melting the chocolate and condensed milk, keep the heat low. High heat can cause the chocolate to seize or burn, and nobody wants gritty fudge! Stir constantly.
- Drain Those Cherries! I cannot stress this enough. Excess liquid from the cherries can make your fudge a little softer and potentially not set as well. Drain them in a sieve, then maybe even give them a gentle pat with paper towels after chopping.
- Line Your Pan Well: That parchment or foil overhang is a lifesaver! It makes lifting the set fudge out of the pan incredibly easy, so you don’t have to try and dig it out.
- Be Patient with Chilling: Don’t rush the chilling time. If you try to cut it before it’s fully firm, it will be messy. Give it the full two hours, or even longer if needed, until it’s solid.
- Use a Sharp Knife: For clean cuts, use a sharp knife. Running the knife under hot water and wiping it dry between cuts can also help get those really neat squares.
How to Store It
This fudge needs to be kept cool to maintain its shape and texture.
Store the cut fudge squares in an airtight container in the refrigerator. You can layer the pieces between sheets of parchment or wax paper to prevent them from sticking together. It will keep well in the fridge for up to 2 weeks (if it lasts that long!).
You can also freeze this fudge! Wrap the block or individual pieces tightly in plastic wrap, then place in a freezer-safe container or bag. It can be frozen for 2-3 months. Thaw it in the refrigerator before serving.
FAQs
Got questions? I’ve got some quick answers for you!
My fudge didn’t set. What did I do wrong?
The most common reason is not enough chilling time. Make sure you refrigerated it for at least 2 hours, maybe even longer if your fridge isn’t super cold. Also, ensure you used sweetened condensed milk (not evaporated milk!) and measured the chocolate chips correctly. Excess liquid from cherries can also be a culprit, so drain them well!
Can I use different types of chocolate chips?
Yes! Feel free to swap the semi-sweet for milk chocolate, dark chocolate, or a combination. The proportions should work the same.
Do I have to add the nuts and cherries?
Nope! If you just want a simple, delicious chocolate fudge, you can leave out the nuts and cherries. It won’t be “Cherry Garcia,” but it will still be tasty fudge!
How many servings does this make?
If you cut it into 1-inch squares, you’ll get 64 pieces. If you cut larger squares (like 2-inch), you’ll get 16. It really depends on how big you like your treats!
There you have it! A super simple, totally delicious Cherry Garcia Fudge that brings back all the good memories with hardly any effort. Whip up a batch and watch it disappear. Happy fudging!

Easy Homemade Cherry Garcia Fudge
Ingredients
Equipment
Method
- Step 1: Get Ready: Prepare an 8x8-inch baking dish by lining it generously with parchment paper or aluminum foil, leaving some overhang on the sides.
- Step 2: Melt the Magic: In a medium-sized saucepan set over low heat, combine the semi-sweet chocolate chips and the sweetened condensed milk. Stir continuously until the mixture is completely melted, smooth, and glossy with no lumps remaining. Use low heat to prevent scorching.
- Step 3: Flavor Boost: Remove the pan from the heat. Stir in the vanilla extract and salt until well combined.
- Step 4: Fold in the Fun: Gently fold in the chopped, well-drained maraschino cherries and the chopped walnuts (if using) until they are evenly distributed throughout the chocolate mixture.
- Step 5: Into the Pan: Quickly pour the fudge mixture into the prepared 8x8-inch dish. Use a spatula to spread it out evenly. Gently tap the pan on your counter a couple of times to help it settle.
- Step 6: Chill Out: Place the dish into the refrigerator. Let it chill for at least 2 hours, or until it is nice and firm so you can cut it cleanly.
- Step 7: Slice and Serve: Once the fudge is firm, use the parchment or foil overhang to lift the entire block of fudge out of the pan. Place it on a cutting board. Use a sharp knife to cut it into squares (e.g., 1-inch or 2-inch squares depending on desired size). Wipe the knife clean with a warm, damp cloth between cuts for neat squares.
- Step 8: Enjoy (and Store): Serve immediately. Store any leftovers as directed in the notes.


