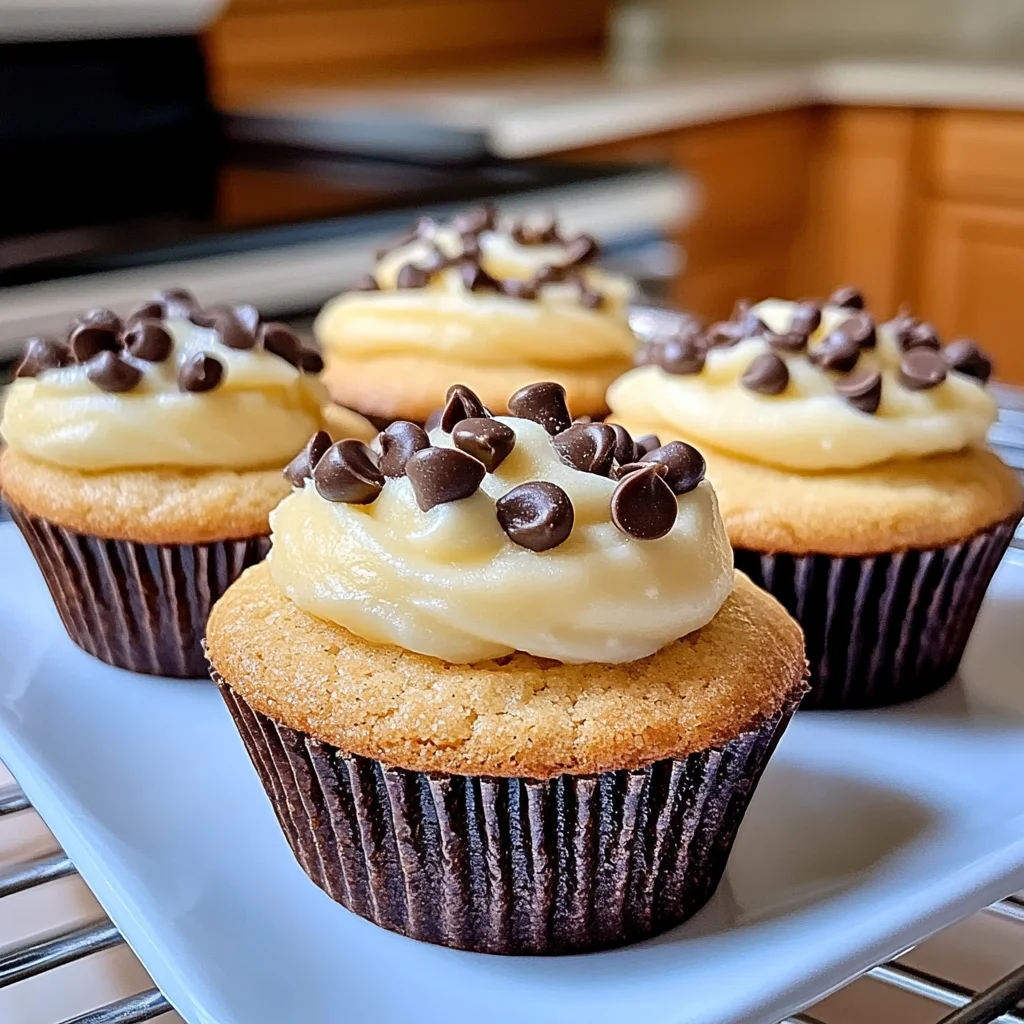
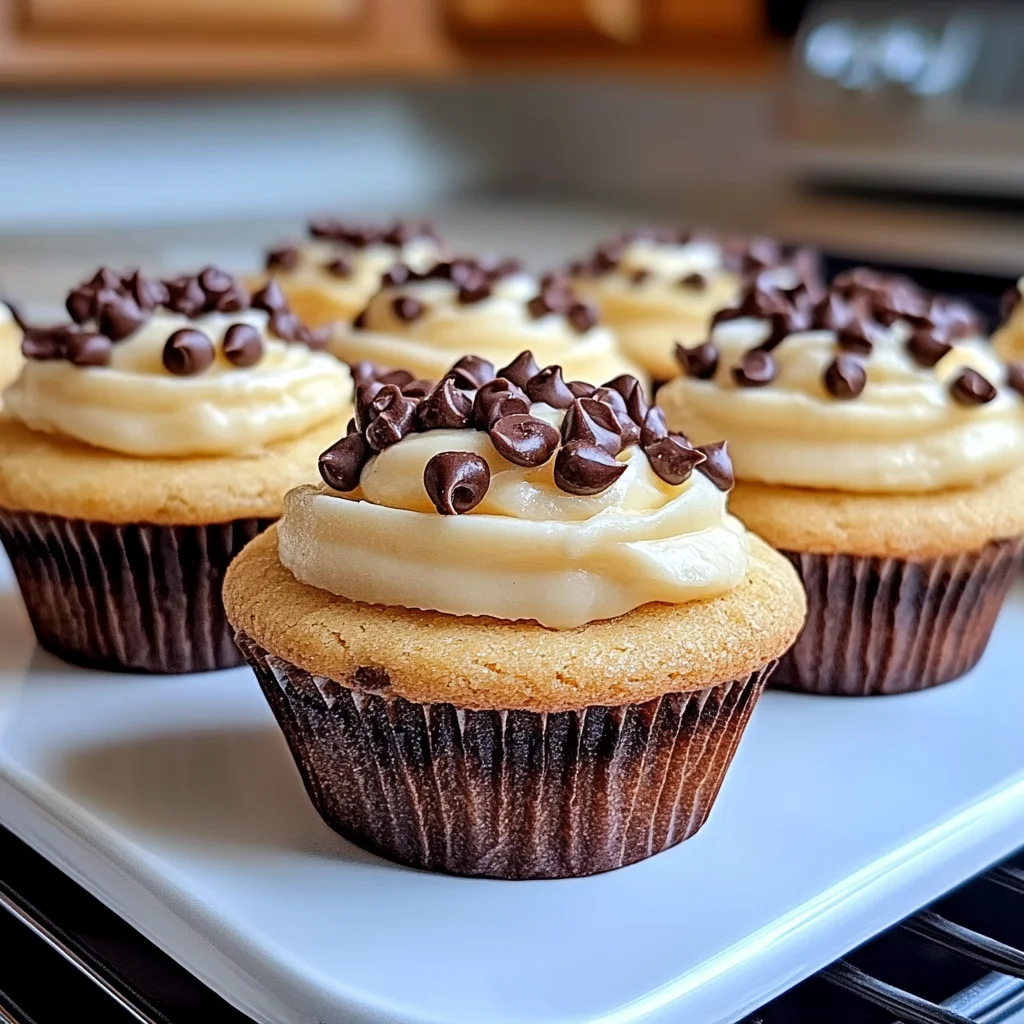
Oh, hello there, sweet friend! Come on in and pull up a chair. Today, we’re whipping up something truly special, something that brings together two of my absolute favorite things in the world: classic Italian cannoli and cozy, homemade cookies. Have you ever craved the creamy, dreamy filling of a cannoli but wished it came in an easier, less fussy package? Me too! That’s where these incredible Cannoli Cookie Cups come in. They’re like a little bite of bakery heaven, but made right here in your own kitchen with zero frying involved. Get ready to fall head over heels for this simple, show-stopping dessert!
Why You’ll Love This Recipe
- Fast: Much quicker than making traditional cannoli shells from scratch!
- Easy: If you can make drop cookies, you can make these cups. Seriously!
- Giftable: Pack these up and share the love – they make perfect edible gifts.
- Crowd-pleasing: Who can resist a mini cookie cup filled with creamy goodness?
Ingredients
Gather your ingredients, my friend. Most of these are probably staples in your pantry, but there are a couple of key players we need to talk about!
For the Cookie Cups:
- 1 cup (2 sticks) unsalted butter, softened: Make sure it’s truly softened, not melted! This is key for creaming properly.
- ¾ cup packed light brown sugar: Adds moisture and that lovely chewiness.
- ¼ cup granulated sugar: For sweetness and helps with crisping the edges.
- 2 large eggs: Our binding agents!
- 2 teaspoons vanilla extract: The soul of so many baked goods! Use good quality here.
- 2½ cups all-purpose flour: The structure for our cups.
- 1 teaspoon baking soda: Helps them puff up just right.
- ½ teaspoon salt: Balances all that sweetness.
For the Cannoli Filling:
- 1½ cups whole milk ricotta cheese (well-drained): This is the MOST important ingredient for that classic cannoli taste and texture. You absolutely must drain it well! I like to put it in a fine-mesh sieve lined with cheesecloth or a coffee filter over a bowl for at least a few hours, or even overnight in the fridge. Don’t skip this step, trust me!
- ½ cup mascarpone cheese (or softened cream cheese): Mascarpone gives it that luxurious Italian richness, but softened cream cheese works beautifully too and is easier to find for some folks. Just make sure it’s softened!
- ½ cup powdered sugar: Sweetens the filling and makes it smooth. Sift it if you have lumps.
- 1 teaspoon vanilla extract: More vanilla goodness!
- ½ teaspoon orange zest (optional): This adds a lovely, authentic hint of citrus often found in cannoli. If you don’t have a fresh orange, you can skip it, but I highly recommend it!
- ½ cup mini chocolate chips: These little bursts of chocolate are a must-have. Mini size works best for the filling.
- Powdered sugar, for dusting: For that pretty, classic finish.
How to Make It
Okay, deep breath! Making these is super straightforward. Let’s do this together, step by step.
- Get those ovens ready and tins greased! Preheat your oven to 350°F (175°C). Generously grease a mini muffin tin. This helps the cookie cups pop out easily after baking.
- Whip up the cookie dough. In a large bowl, using an electric mixer (or a strong arm and a whisk!), cream together your softened butter, brown sugar, and granulated sugar until the mixture is light and fluffy. This takes a few minutes, so be patient! Now, beat in the eggs one at a time, mixing well after each addition, then stir in the vanilla extract.
- Combine the dry ingredients. In a separate medium bowl, whisk together the flour, baking soda, and salt. Whisking them together first ensures everything is evenly distributed.
- Mix wet and dry. Gradually add the dry ingredients to the wet ingredients, mixing on low speed or by hand just until everything is combined. Don’t overmix! A few streaks of flour are okay; you’ll finish mixing when you scoop.
- Fill the muffin tin. Scoop rounded tablespoons of dough into each cup of your prepared mini muffin tin. Use your fingers or a spoon to press the dough down slightly in the center. You want to create a shallow well for the filling later.
- Bake time! Bake for 10-12 minutes, or until the edges are golden brown and the centers look set but still slightly soft.
- Shape the cups. This step is crucial! AS SOON AS they come out of the oven, while they are still hot and pliable, immediately press down the centers again with the back of a small spoon, a mini tart shaper, or even a shot glass. Be careful not to go all the way through! You’re just deepening that well.
- Cool completely. Let the cookie cups cool completely in the muffin tin before trying to remove them. This helps them hold their shape. Once fully cooled, gently run a knife around the edge of each cup if needed, and carefully pop them out.
- Make the dreamy filling. While the cookies are cooling (or up to a day ahead!), make your filling. In a medium bowl, beat together the well-drained ricotta cheese, mascarpone (or cream cheese), powdered sugar, vanilla extract, and orange zest (if using) until everything is smooth and creamy. Make sure there are no grainy bits from the ricotta – beat until it’s like silk!
- Add the chocolate chips. Gently fold in the mini chocolate chips with a spoon or spatula.
- Chill the filling. Cover the filling and refrigerate it for at least 30 minutes. This helps it firm up and makes it easier to pipe or spoon into the cups.
- Assemble and serve! Once the cookie cups are completely cool and the filling is chilled, spoon or pipe the cannoli filling into each cup. You can use a piping bag with a star tip for a fancy look, or just use two spoons. Dust generously with powdered sugar right before serving. If you want to get extra fancy, sprinkle a few extra mini chocolate chips or chopped pistachios on top!
Substitutions & Additions
Feel free to play around with these! Recipes are just a starting point, after all.
- Ricotta: You absolutely MUST use whole milk ricotta and drain it super well. Part-skim or low-fat won’t give you the right creamy consistency.
- Mascarpone vs. Cream Cheese: Mascarpone is traditional and richer, but softened full-fat cream cheese works as a fine substitute if you can’t find mascarpone.
- Chocolate Chips: Not a fan of mini semi-sweet? Use mini milk chocolate chips, mini dark chocolate chips, or even finely chopped regular chocolate.
- Add-ins: Fold in a tablespoon or two of finely chopped candied orange peel (like they do in Italy!) or some finely chopped pistachios into the filling along with the chocolate chips.
- Extracts: A tiny splash of almond extract (⅛ teaspoon) can be added to the filling along with the vanilla for a different flavor dimension. You could also add a pinch of cinnamon to the cookie dough.
Tips for Success
Little things make a big difference! Keep these tips in mind, and you’ll have perfect cookie cups every time.
- DRAIN. THAT. RICOTTA! Seriously, I cannot stress this enough. Soggy ricotta = watery filling = sad cookie cups. Put it in a sieve over a bowl in the fridge for several hours or overnight. You’ll be surprised how much liquid comes out.
- Don’t Overmix the Cookie Dough: Mix just until the dry ingredients are incorporated. Overmixing can lead to tough cookies.
- Shape While Hot: Make sure you press the centers of the cookies immediately after they come out of the oven while they are still soft and hot. If you wait too long, they’ll set and won’t form cups.
- Cool Completely: Let the cookie cups cool fully in the muffin tin before attempting to remove them. They are delicate when warm.
- Chill the Filling: The filling needs time in the fridge to firm up. This makes it much easier to work with and gives it a better texture in the finished cup.
- Prep Ahead: You can make the cookie dough a day or two in advance and store it in the fridge (let it sit at room temp for a bit to soften slightly before scooping). You can also make the filling a day ahead and keep it chilled. Bake the cookies on the day you plan to assemble, or bake them a day ahead and store them in an airtight container.
How to Store It
These are best enjoyed fresh, but they do store well! Once assembled, store the Cannoli Cookie Cups in a single layer in an airtight container in the refrigerator. The cookie cups can soften slightly over time due to the moisture from the filling.
They will keep well in the fridge for 2-3 days. If you haven’t assembled them yet, you can store the cooled cookie cups in an airtight container at room temperature for up to 3-4 days, and the filling separately in the fridge for up to 2-3 days.
FAQs
Got questions? I’ve got some answers!
Can I use a regular-sized muffin tin?
You could, but you’d need to increase the baking time significantly, and the cookie-to-filling ratio would be different. This recipe is really designed for mini muffin tins for that perfect bite-sized treat.
Is the orange zest necessary?
Nope, it’s optional, but it does add a lovely, traditional cannoli flavor that brightens up the filling. If you don’t have fresh oranges, you can definitely leave it out.
Why did my filling turn out grainy?
This is usually because the ricotta wasn’t drained properly or wasn’t beaten until completely smooth. Make sure you drain it thoroughly and beat the filling ingredients until they are silky before adding the chocolate chips.
How far in advance can I assemble these?
For the best texture, it’s ideal to assemble them within a few hours of serving. The cookie cups will soften over time once filled. You can definitely bake the cups and make the filling a day ahead, then fill right before serving.
There you have it! A little taste of Italy, wrapped up in a perfect, easy cookie cup. I just know you’re going to adore these. Happy baking!

Easy Homemade Cannoli Cookie Cups
Ingredients
Equipment
Method
- Step 1: Get those ovens ready and tins greased! Preheat your oven to 350°F (175°C). Generously grease a mini muffin tin. This helps the cookie cups pop out easily after baking.
- Step 2: Whip up the cookie dough. In a large bowl, using an electric mixer (or a strong arm and a whisk!), cream together your softened butter, brown sugar, and granulated sugar until the mixture is light and fluffy. This takes a few minutes, so be patient! Now, beat in the eggs one at a time, mixing well after each addition, then stir in the vanilla extract.
- Step 3: Combine the dry ingredients. In a separate medium bowl, whisk together the flour, baking soda, and salt. Whisking them together first ensures everything is evenly distributed.
- Step 4: Mix wet and dry. Gradually add the dry ingredients to the wet ingredients, mixing on low speed or by hand just until everything is combined. Don't overmix! A few streaks of flour are okay; you'll finish mixing when you scoop.
- Step 5: Fill the muffin tin. Scoop rounded tablespoons of dough into each cup of your prepared mini muffin tin. Use your fingers or a spoon to press the dough down slightly in the center. You want to create a shallow well for the filling later.
- Step 6: Bake time! Bake for 10-12 minutes, or until the edges are golden brown and the centers look set but still slightly soft.
- Step 7: Shape the cups. This step is crucial! AS SOON AS they come out of the oven, while they are still hot and pliable, immediately press down the centers again with the back of a small spoon, a mini tart shaper, or even a shot glass. Be careful not to go all the way through! You're just deepening that well.
- Step 8: Cool completely. Let the cookie cups cool completely in the muffin tin before trying to remove them. This helps them hold their shape. Once fully cooled, gently run a knife around the edge of each cup if needed, and carefully pop them out.
- Step 9: Make the dreamy filling. While the cookies are cooling (or up to a day ahead!), make your filling. In a medium bowl, beat together the well-drained ricotta cheese, mascarpone (or cream cheese), powdered sugar, vanilla extract, and orange zest (if using) until everything is smooth and creamy. Make sure there are no grainy bits from the ricotta – beat until it's like silk!
- Step 10: Add the chocolate chips. Gently fold in the mini chocolate chips with a spoon or spatula.
- Step 11: Chill the filling. Cover the filling and refrigerate it for at least 30 minutes. This helps it firm up and makes it easier to pipe or spoon into the cups.
- Step 12: Assemble and serve! Once the cookie cups are completely cool and the filling is chilled, spoon or pipe the cannoli filling into each cup. You can use a piping bag with a star tip for a fancy look, or just use two spoons. Dust generously with powdered sugar right before serving. If you want to get extra fancy, sprinkle a few extra mini chocolate chips or chopped pistachios on top!