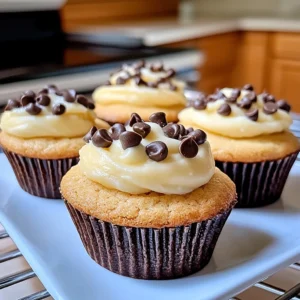
Easy Homemade Cannoli Cookie Cups
Enjoy the creamy, dreamy filling of classic Italian cannoli in an easy-to-make, no-fry cookie cup package. Perfect for sharing or a cozy treat!
Equipment
- Mini Muffin Tin
- Electric mixer
- Large bowl
- Medium bowl
- Whisk
- Fine-mesh sieve
- Cheesecloth or Coffee Filter
- Small Spoon or Tart Shaper
- Piping bag (optional)
Ingredients
For the Cookie Cups
- 1 cup unsalted butter 2 sticks, softened
- 3/4 cup packed light brown sugar
- 1/4 cup granulated sugar
- 2 large eggs
- 2 tsp vanilla extract
- 2.5 cups all-purpose flour
- 1 tsp baking soda
- 1/2 tsp salt
For the Cannoli Filling
- 1.5 cups whole milk ricotta cheese well-drained
- 1/2 cup mascarpone cheese or softened cream cheese
- 1/2 cup powdered sugar sifted if lumpy
- 1 tsp vanilla extract
- 1/2 tsp orange zest optional
- 1/2 cup mini chocolate chips
- powdered sugar for dusting
Instructions
- Step 1: Get those ovens ready and tins greased! Preheat your oven to 350°F (175°C). Generously grease a mini muffin tin. This helps the cookie cups pop out easily after baking.
- Step 2: Whip up the cookie dough. In a large bowl, using an electric mixer (or a strong arm and a whisk!), cream together your softened butter, brown sugar, and granulated sugar until the mixture is light and fluffy. This takes a few minutes, so be patient! Now, beat in the eggs one at a time, mixing well after each addition, then stir in the vanilla extract.
- Step 3: Combine the dry ingredients. In a separate medium bowl, whisk together the flour, baking soda, and salt. Whisking them together first ensures everything is evenly distributed.
- Step 4: Mix wet and dry. Gradually add the dry ingredients to the wet ingredients, mixing on low speed or by hand just until everything is combined. Don't overmix! A few streaks of flour are okay; you'll finish mixing when you scoop.
- Step 5: Fill the muffin tin. Scoop rounded tablespoons of dough into each cup of your prepared mini muffin tin. Use your fingers or a spoon to press the dough down slightly in the center. You want to create a shallow well for the filling later.
- Step 6: Bake time! Bake for 10-12 minutes, or until the edges are golden brown and the centers look set but still slightly soft.
- Step 7: Shape the cups. This step is crucial! AS SOON AS they come out of the oven, while they are still hot and pliable, immediately press down the centers again with the back of a small spoon, a mini tart shaper, or even a shot glass. Be careful not to go all the way through! You're just deepening that well.
- Step 8: Cool completely. Let the cookie cups cool completely in the muffin tin before trying to remove them. This helps them hold their shape. Once fully cooled, gently run a knife around the edge of each cup if needed, and carefully pop them out.
- Step 9: Make the dreamy filling. While the cookies are cooling (or up to a day ahead!), make your filling. In a medium bowl, beat together the well-drained ricotta cheese, mascarpone (or cream cheese), powdered sugar, vanilla extract, and orange zest (if using) until everything is smooth and creamy. Make sure there are no grainy bits from the ricotta – beat until it's like silk!
- Step 10: Add the chocolate chips. Gently fold in the mini chocolate chips with a spoon or spatula.
- Step 11: Chill the filling. Cover the filling and refrigerate it for at least 30 minutes. This helps it firm up and makes it easier to pipe or spoon into the cups.
- Step 12: Assemble and serve! Once the cookie cups are completely cool and the filling is chilled, spoon or pipe the cannoli filling into each cup. You can use a piping bag with a star tip for a fancy look, or just use two spoons. Dust generously with powdered sugar right before serving. If you want to get extra fancy, sprinkle a few extra mini chocolate chips or chopped pistachios on top!
Notes
Drain the ricotta cheese thoroughly for the best filling texture. Don't overmix the cookie dough. Shape the cookie cups immediately after they come out of the oven while hot. Cool cookie cups completely before removing from the tin and filling. Chill the filling for at least 30 minutes before assembling. Can be stored in an airtight container in the refrigerator for 2-3 days once assembled. Cookie cups can be baked a day ahead and stored at room temperature, and filling can be made a day ahead and stored in the fridge.