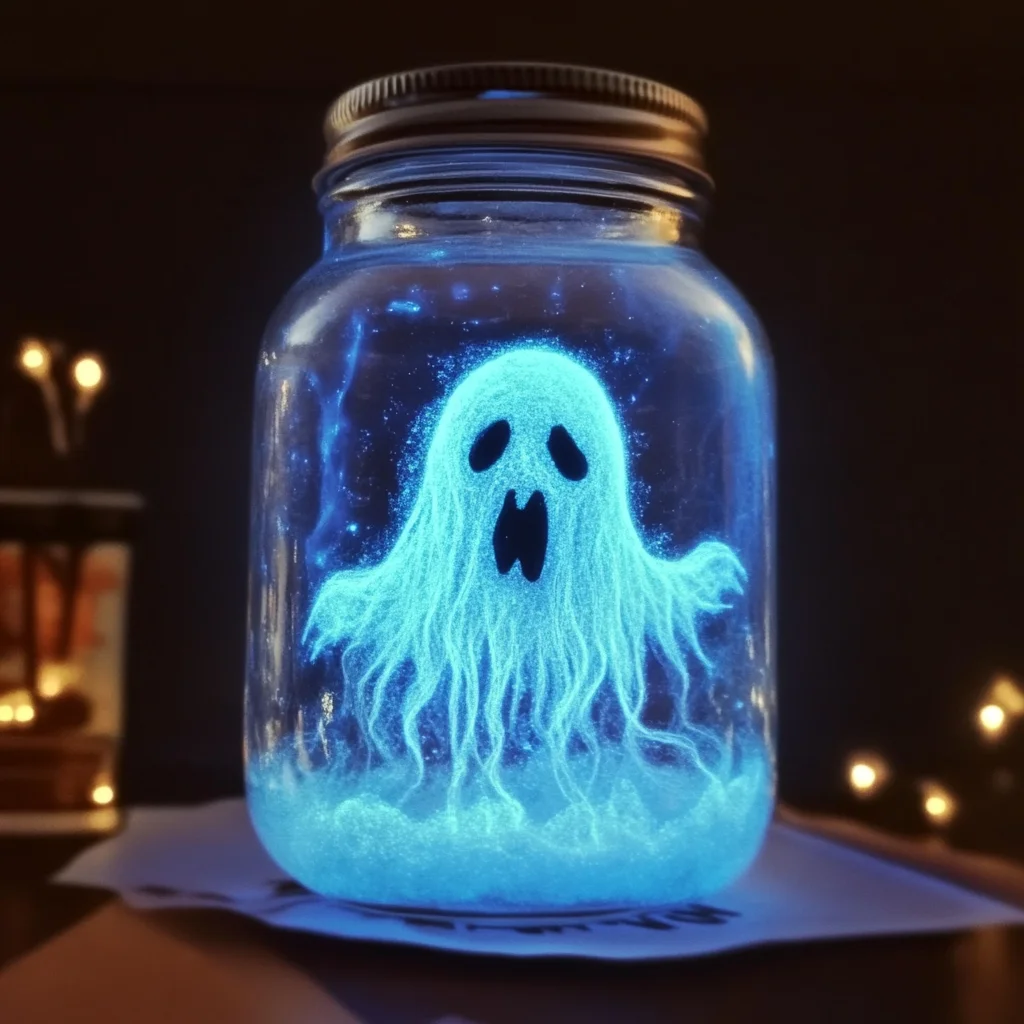
Hey there, wonderful crafters and cozy home enthusiasts! Remember those crisp autumn evenings, sipping on something warm, and getting lost in creative projects? There’s just something magical about bringing a touch of homemade charm to your decor, especially when the seasons change. Today, I’m so excited to share a project that’s not only incredibly easy and quick but also adds the sweetest, most ethereal glow to your home: the Glowing Baking Soda Ghost Jar! It’s one of those crafts that feels like a warm hug and instantly makes your space feel a little more enchanted. Seriously, if you can fluff cotton and wield a glue stick, you’ve got this!
And speaking of charming treats, if you’re planning a Halloween gathering, these jars would pair perfectly with some adorable No-Bake Ghost Cookies! Imagine the delight on everyone’s faces!
Why You’ll Love Baking Soda Glowing Ghost Jar
- Fast
- Easy
- Giftable
- Crowd-pleasing
Ingredients
- Clear Glass Jar with a Lid: This is your ghost’s cozy home! Any clean mason jar or recycled glass jar works perfectly. The clearer, the better for that spooky glow.
- Cotton Balls or Stretched Cotton Batting: Our ghostly material! Cotton is so forgiving and easy to shape into wispy, ethereal forms.
- Black Felt or Paper: For those classic ghosty eyes and mouth. Felt gives a lovely soft texture, but paper is totally fine too!
- Small Clear/Translucent Objects for the Base: Think of these as sparkling jewels for your ghost’s little world. Acrylic ice rocks, plastic gems, or even Epsom salts will do the trick.
- Small Amount of White “Snow” Material: This creates a soft, snowy base for your ghost. More cotton batting or even faux snow from the craft store works wonders.
- Baking Soda (Optional): Our secret ingredient for that extra touch of eerie, aged texture. Just a tiny sprinkle!
- 1 LED Tea Light or Small LED Puck Light: The heart of your glowing ghost! White or a soft blue light works best for that ghostly luminescence.
- Glue (craft glue or hot glue gun): To make those ghostly faces stick. A hot glue gun is super speedy, but any craft glue will work if you have a little patience.
- Scissors: For cutting out those adorable ghost features.
How to Make Baking Soda Glowing Ghost Jar
-
Prepare the Ghost Body
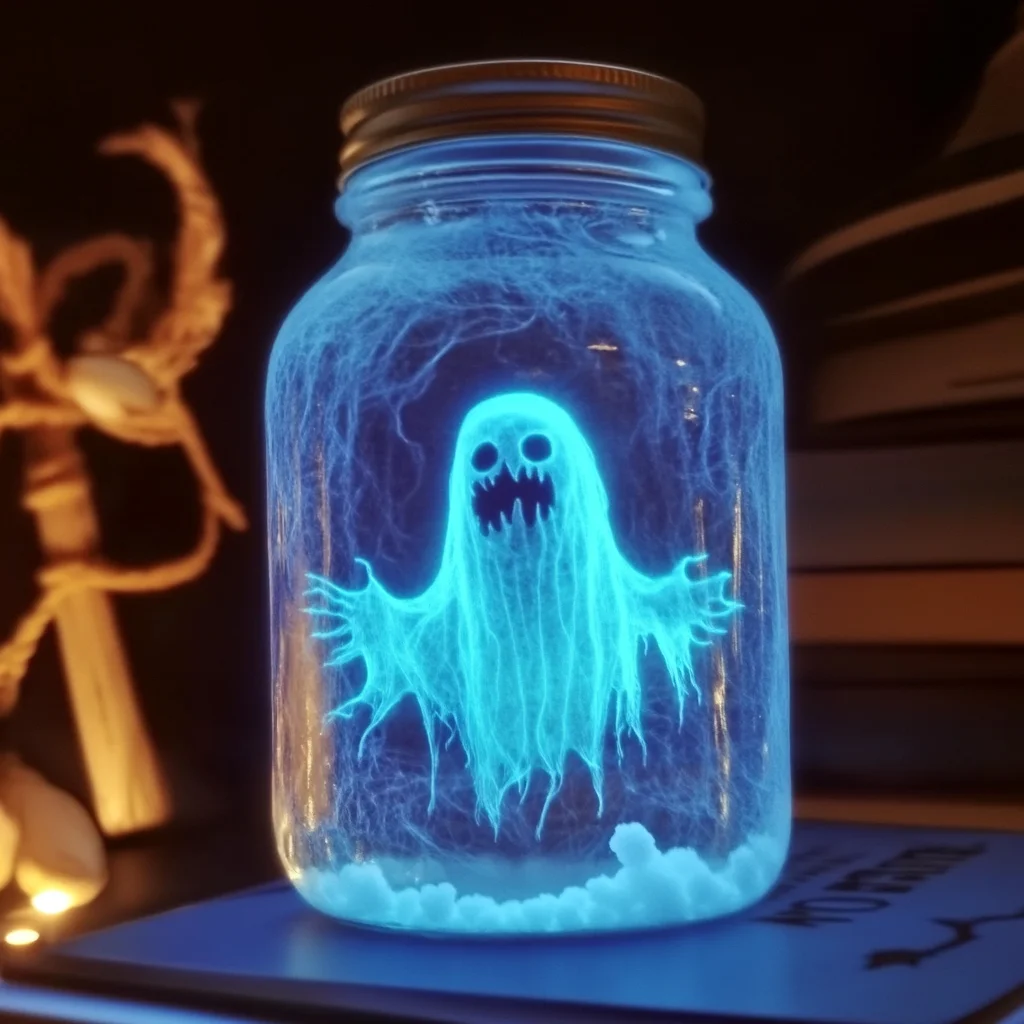
First things first, let’s bring your ghost to life! Grab your cotton balls or batting. Gently pull and fluff them until you get a shape you like. Think a slightly rounder “head” and then stretch out some wispy bits for “arms” or a flowing “tail.” The more you fluff, the more ethereal it looks! Now, here’s a little secret for an extra touch of ancient charm: take a tiny pinch of baking soda and very lightly dust your cotton ghost. It gives it this wonderful, aged, almost dusty texture. Don’t overdo it, just a whisper!
-
Create the Ghost’s Face
Every ghost needs a personality! Using your black felt or paper, cut out small, simple shapes for the eyes and mouth. I find that slightly irregular shapes make them look even more adorable and less perfect, which is exactly what we want for a friendly ghost. Carefully glue these onto the “head” of your cotton ghost. Make sure they’re secure, and then let them dry completely before moving on. This is where a hot glue gun really speeds things up, but good old craft glue just needs a bit of time.
-
Prepare the Jar’s Base
Time to set the scene for your little spectral friend! Take your clean glass jar and put a small amount of white “snow” material at the bottom. This could be more fluffed cotton or some faux snow if you have it. It creates a soft, cloudy bed. Next, if you want that extra dusting effect, lightly sprinkle about 1/2 to 1 teaspoon of baking soda over this base. Don’t worry, there won’t be any fizzing here since we’re not adding any acid, just a beautiful fine “snow” look. Then, arrange your clear or translucent objects – those pretty gems or acrylic ice rocks – on top of this snowy base. They’ll catch the light beautifully!
-
Position the LED Light
Now for the magic! Turn on your LED light. These little tea lights or puck lights are perfect because they’re safe and give off such a gentle glow. Carefully place the lit LED right in the center of your prepared base, nestled amongst the “snow” and those sparkly objects. Make sure it’s stable and won’t wobble.
-
Place the Ghost
Finally, introduce your ghost to its glowing home! Gently position your finished cotton ghost inside the jar, standing it upright on the prepared base. If you want to get really fancy and make your ghost look like it’s floating, grab a piece of clear thread or fishing line. Tie one end to the ghost’s head and tape the other end to the inside of the jar’s lid. That way, when you put the lid on, your ghost will hover magically!
Substitutions & Additions
Part of the fun of crafting is making it your own, right? Here are a few ideas to get your creative juices flowing:
- Light It Up: Try different colored LED tea lights! A soft purple or green can give your ghost a completely different vibe.
- Jar Variations: Don’t limit yourself to just one type of jar. Old pickle jars, tall glass vases, or even wide-mouthed jam jars can create unique ghostly homes.
- Add Some Sparkle: A sprinkle of fine glitter on your ghost or amongst the base elements will catch the light and add an extra touch of magic.
- Tiny Details: Tuck in some miniature faux spiders, tiny plastic bats, or even small fallen leaves for a seasonal touch around your ghost. If you’re looking for more ways to bring light and whimsical charm into your home, you could even check out how to make some DIY Light-Up Scarecrow Jars for another seasonal touch.
- Scented Experience: Place a few drops of essential oil (like cinnamon or pumpkin spice for fall) on the cotton base before adding the LED light for a subtle aroma. Just be sure it won’t interfere with the electronics!
Tips for Success
- Patience with Glue: If you’re using craft glue, give those eyes and mouths ample time to dry so they don’t slide around when you’re placing your ghost. Hot glue is instant, but craft glue needs its moment!
- Less is More with Baking Soda: For the dusting effect, remember a tiny pinch is all you need. You want an ethereal look, not a caked-on one!
- Battery Check: Before assembling, quickly check your LED light to ensure it’s working and has fresh batteries. Nothing worse than finishing your masterpiece only for it not to glow!
- Safety First: If you’re using a hot glue gun, make sure little hands are supervised or have an adult help.
- Display Power: Make a whole spooky squad! Create several glowing ghost jars of different sizes and arrange them together for a truly captivating centerpiece or mantle display. For another fun craft, you might also love making a DIY Rain Cloud Jar for a different kind of atmospheric home decor!
How to Store Baking Soda Glowing Ghost Jar
When the spooky season is over, or you just want to tuck your ghostly friend away for a bit, storing it is super simple. Since it’s not food, you don’t have to worry about refrigeration! Gently remove the ghost and LED light if you wish to store them separately to preserve battery life. Close the jar tightly with its lid to keep dust out. I usually wrap mine in a bit of tissue paper or bubble wrap and store it in a box with my other seasonal decorations. This way, it stays clean and ready to glow again next year! You can also carefully store the entire assembled jar, just be mindful of how you pack it to protect the delicate cotton ghost.
FAQs
Can kids help make these ghost jars?
Absolutely! This is a fantastic kid-friendly craft. Just supervise younger children with scissors and glue guns. They’ll love shaping the ghosts and adding the faces!
How long do the LED lights typically last?
Most LED tea lights or puck lights can glow for 50-100 hours on a single set of batteries, depending on the brand. If you plan to leave them on for extended periods, it’s a good idea to have extra batteries on hand.
Can I use a real candle instead of an LED light?
No, please don’t! For safety reasons, especially with cotton and other flammable materials, always use an LED tea light or puck light. They provide the glow without any fire hazard.
What if I don’t have felt for the eyes and mouth?
No problem at all! Black construction paper, cardstock, or even drawing the faces on with a black permanent marker will work just fine. Get creative with what you have!
For more enchanting crafts, delightful recipes, and cozy home ideas, be sure to follow us on Pinterest!

Glowing Baking Soda Ghost Jar
Ingredients
Equipment
Method
- Step 1: Prepare the Ghost Body Grab your cotton balls or batting and gently pull and fluff them into a ghost shape, with a slightly rounder "head" and wispy bits for "arms" or a "tail." For an aged charm, take a tiny pinch of baking soda and very lightly dust your cotton ghost. Don't overdo it.
- Step 2: Create the Ghost's Face Using your black felt or paper, cut out small, simple shapes for the eyes and mouth. Carefully glue these onto the "head" of your cotton ghost. Ensure they are secure and let them dry completely before proceeding.
- Step 3: Prepare the Jar's Base Place a small amount of white "snow" material (fluffed cotton or faux snow) at the bottom of your clean glass jar. Optionally, lightly sprinkle about 1/2 to 1 teaspoon of baking soda over this base for a fine "snow" look. Then, arrange your clear or translucent objects (gems or acrylic ice rocks) on top of this snowy base.
- Step 4: Position the LED Light Turn on your LED light. Carefully place the lit LED right in the center of your prepared base, nestled amongst the "snow" and sparkly objects. Make sure it's stable.
- Step 5: Place the Ghost Gently position your finished cotton ghost inside the jar, standing it upright on the prepared base. For a floating effect, tie clear thread or fishing line to the ghost's head and tape the other end to the inside of the jar's lid before putting the lid on.