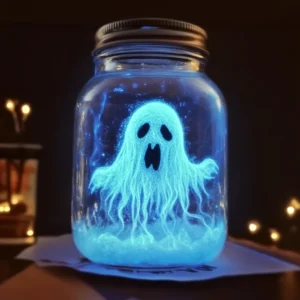
Glowing Baking Soda Ghost Jar
This easy, quick, and charming DIY project helps you create ethereal glowing ghost jars using simple materials like glass jars, cotton, and LED lights, perfect for adding a hauntingly cozy touch to your autumn and Halloween decor.
Equipment
- Glue (craft glue or hot glue gun)
- Scissors
Ingredients
- 1 clear glass jar with a lid; any clean mason jar or recycled glass jar works perfectly
- cotton balls or stretched cotton batting for ghost body and "snow" base
- black felt or paper for the ghost's eyes and mouth
- small clear/translucent objects for the base; e.g., acrylic ice rocks, plastic gems, or Epsom salts
- small amount white "snow" material more cotton batting or faux snow from the craft store
- baking soda optional; a tiny pinch for dusting the ghost, or 1/2 to 1 teaspoon for the jar's base
- 1 LED tea light or small LED puck light white or a soft blue light works best
- glue craft glue or hot glue gun
- scissors
Instructions
- Step 1: Prepare the Ghost Body Grab your cotton balls or batting and gently pull and fluff them into a ghost shape, with a slightly rounder "head" and wispy bits for "arms" or a "tail." For an aged charm, take a tiny pinch of baking soda and very lightly dust your cotton ghost. Don't overdo it.
- Step 2: Create the Ghost's Face Using your black felt or paper, cut out small, simple shapes for the eyes and mouth. Carefully glue these onto the "head" of your cotton ghost. Ensure they are secure and let them dry completely before proceeding.
- Step 3: Prepare the Jar's Base Place a small amount of white "snow" material (fluffed cotton or faux snow) at the bottom of your clean glass jar. Optionally, lightly sprinkle about 1/2 to 1 teaspoon of baking soda over this base for a fine "snow" look. Then, arrange your clear or translucent objects (gems or acrylic ice rocks) on top of this snowy base.
- Step 4: Position the LED Light Turn on your LED light. Carefully place the lit LED right in the center of your prepared base, nestled amongst the "snow" and sparkly objects. Make sure it's stable.
- Step 5: Place the Ghost Gently position your finished cotton ghost inside the jar, standing it upright on the prepared base. For a floating effect, tie clear thread or fishing line to the ghost's head and tape the other end to the inside of the jar's lid before putting the lid on.
Notes
Substitutions & Additions: Experiment with different colored LED tea lights (purple, green) for varying vibes. Don't limit yourself to one jar type; old pickle jars, tall glass vases, or wide-mouthed jam jars can create unique ghostly homes. A sprinkle of fine glitter on your ghost or base elements can add extra magic. Tuck in miniature faux spiders, tiny plastic bats, or small fallen leaves for seasonal touches. For a scented experience, place a few drops of essential oil (like cinnamon or pumpkin spice) on the cotton base *before* adding the LED light, ensuring it won't interfere with electronics.
Tips for Success: If using craft glue, allow ample drying time for eyes and mouths. For the baking soda dusting effect, a tiny pinch is all you need for an ethereal look. Always check your LED light to ensure it's working and has fresh batteries before assembly. Supervise younger children with scissors and hot glue guns. Create several ghost jars of different sizes and arrange them for a captivating display.
How to Store: When the season is over, you can gently remove the ghost and LED light to store them separately to preserve battery life. Close the jar tightly with its lid to keep dust out. Wrap the components or entire assembled jar in tissue paper or bubble wrap and store in a box with other seasonal decorations.