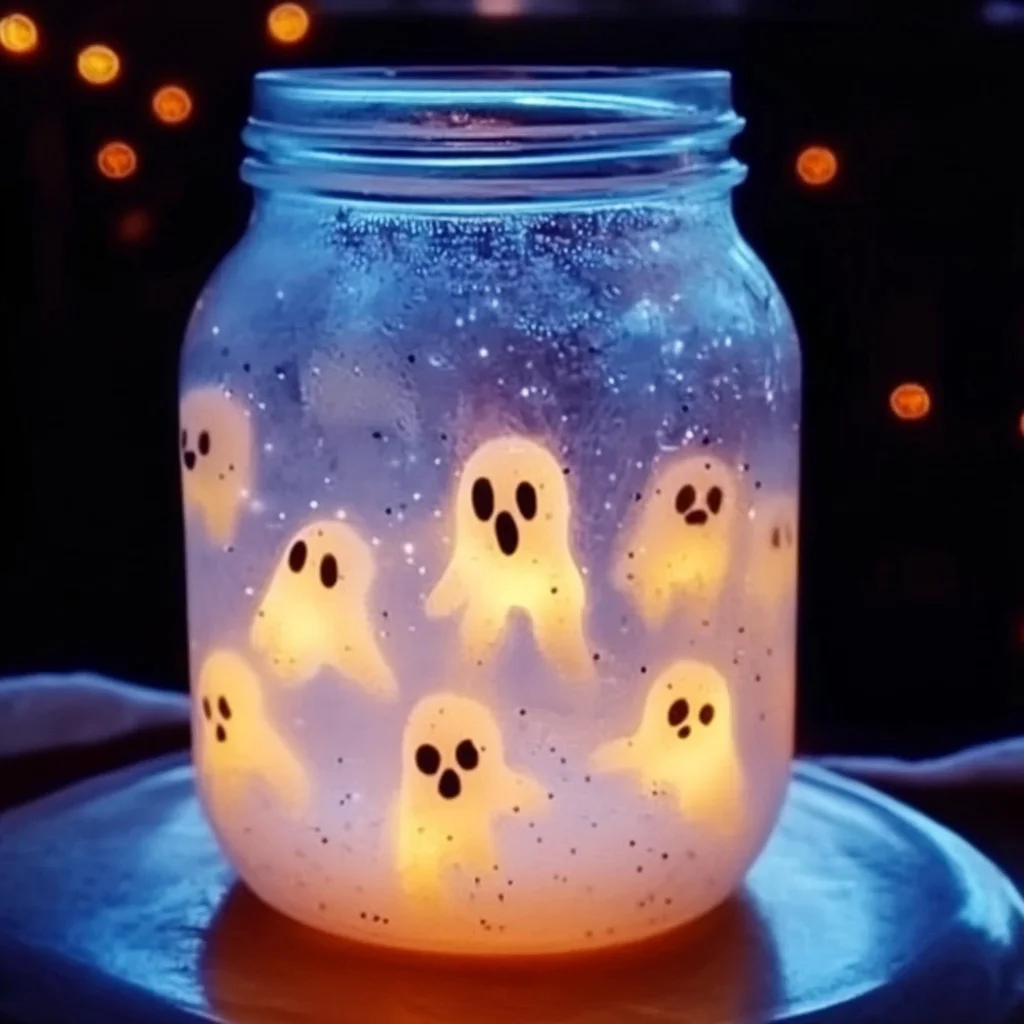
Hey there, my wonderful kitchen-crafters and creative souls! Autumn is truly in full swing, and there’s something so magical about this time of year, isn’t there? The crisp air, the cozy sweaters, and of course, all the delightful anticipation of Halloween! If you’re anything like me, you love finding simple ways to sprinkle a little extra enchantment into your home, especially when it involves a touch of DIY. Remember those days of shaking up a glittery snow globe and watching the flakes drift? Well, today, we’re tapping into that same sense of wonder with a slightly spookier, incredibly easy, and utterly captivating project: a Floating Ghost Sensory Jar!
This isn’t just a craft; it’s a little world of wonder you can shake, watch, and get lost in. It’s quick enough to whip up on a whim, memorable for kids and adults alike, and perfect for adding a charmingly eerie touch to your Halloween decor. Plus, it’s wonderfully calming to watch those tiny ghosts dance and swirl. Perfect for a cozy autumn evening in, perhaps after enjoying a batch of our warm pumpkin banana loaf?
Why You’ll Love Floating Ghost Sensory Jar
- Fast: You can have this charming little project ready in under 15 minutes!
- Easy: No complicated steps or fancy tools required. If you can stir, you can make this!
- Giftable: A handmade sensory jar makes a unique and thoughtful gift for friends or teachers.
- Crowd-pleasing: Kids adore watching the ghosts, and adults find the slow, swirling motion incredibly soothing.
Ingredients
Gathering your supplies for this ghostly creation is part of the fun! Here’s what you’ll need to bring this spooky magic to life:
- 1 clear jar or plastic bottle with a tight-fitting lid: This is your canvas! Mason jars, old jam jars, or even a clean plastic soda bottle work wonderfully. Make sure it’s super clean and dry.
- 1/2 cup clear or glitter glue: The secret ingredient that gives our liquid that lovely, thick viscosity, allowing the ghosts to float and drift slowly. Glitter glue adds an extra sparkle from the get-go!
- 1 1/2 cups warm water: Not hot, just warm enough to help that glue dissolve smoothly.
- White or iridescent glitter: For that ethereal, ghostly shimmer! A fine glitter works best for a delicate look.
- Tiny ghost cutouts (e.g., foam, sequins, laminated paper): These are the stars of our show! You can buy ghost-shaped sequins, cut small ghosts from white craft foam, or even draw and laminate tiny paper ghosts. The lighter, the better for floating!
- A few drops of black or glow-in-the-dark food coloring (optional): For an extra eerie vibe or to make your ghosts really pop in the dark.
- Super glue or hot glue: To seal that lid on super tight, especially if little hands will be handling it. Safety first!
How to Make Floating Ghost Sensory Jar
Let’s get crafting! You’ll be amazed at how quickly this comes together. Follow these simple steps, and you’ll have your own spooky little world in no time!
- First things first, grab your clear jar or bottle and fill it halfway with warm water. This gives you plenty of room to mix things up without any splashes.
- Next, pour in your 1/2 cup of clear or glitter glue. Now, get a spoon and stir it until it’s completely dissolved. You want a smooth, consistent liquid – no gluey lumps!
- Time for some sparkle! Add a good sprinkle of white or iridescent glitter to the mixture. The more you add, the snowier your ghost scene will be. I usually start with a tablespoon or two and add more if I feel it needs it.
- Here come our spooky friends! Carefully drop in your tiny ghost cutouts. Watch them float and begin to swirl around. This is where the magic really starts to happen!
- If you’re feeling extra ghoulish, now’s the time to add a few drops of black or glow-in-the-dark food coloring. A little goes a long way to create an eerie atmosphere.
- Now, slowly fill the remainder of the jar with water. Remember to leave a small airspace at the very top. This tiny bubble is crucial – it allows your ghosts to move and swirl freely when you shake the jar!
- With everything inside, it’s time to seal the deal. For safety and to prevent any leaks, especially if kids are involved, seal the lid tightly using a good dollop of hot glue or a few drops of super glue around the rim. Let it dry completely.
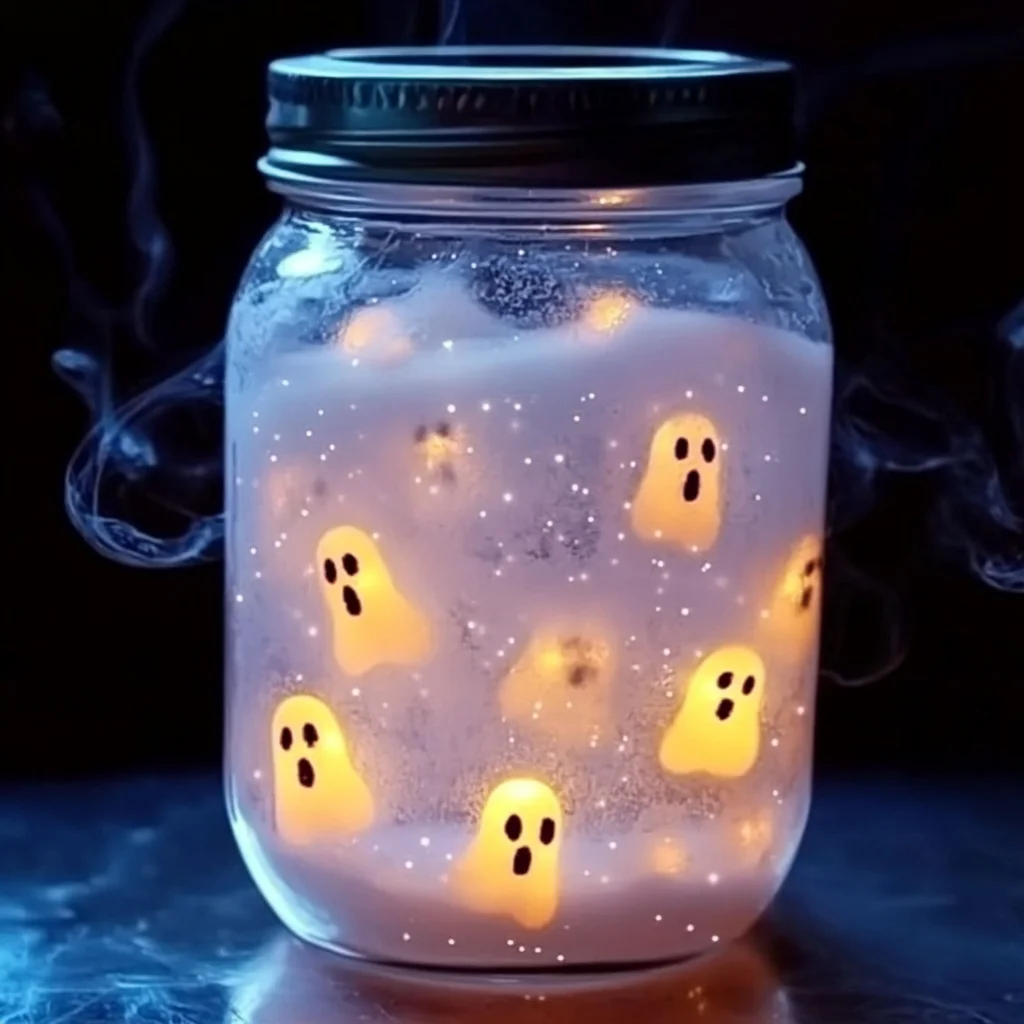
- And for the grand finale: gently shake the jar! Watch your adorable, spooky ghosts float, drift, and dance within their glittery, watery world. It’s so mesmerizing, you might find yourself shaking it again and again!
Substitutions & Additions
Part of the joy of DIY is making it your own! Here are some fun ways you can customize your Floating Ghost Sensory Jar:
- Different Spooky Shapes: Instead of ghosts, try tiny bat cutouts, mini spiders, or even small plastic eyeballs for a different Halloween theme. If you loved making this, you might also enjoy making some no-bake ghost cookies for a truly themed experience!
- Oil for Slower Motion: For an even slower, more “lava lamp” like effect, you can try substituting some of the water with clear baby oil or mineral oil. The ghosts will drift at an even more leisurely pace!
- Glycerin Boost: Adding a teaspoon or two of liquid glycerin along with the glue can help thicken the liquid further, enhancing the slow-motion effect.
- Colorful Creations: Don’t limit yourself to black food coloring. Try purple for a mystical vibe, green for a Frankenstein’s monster feel, or even orange for a pumpkin patch theme.
- Glow Stick Magic: For an extra special touch, carefully cut open a glow stick (supervise children closely!) and add the liquid to the jar just before sealing. This gives you a temporary, but super cool, glow-in-the-dark effect!
Tips for Success
Making a sensory jar is pretty straightforward, but a few little pointers can make sure your ghostly masterpiece turns out perfectly:
- Dissolve the Glue Fully: This is key! If your glue isn’t completely dissolved in the warm water, you’ll end up with unsightly clumps and your ghosts won’t float as smoothly. Stir, stir, stir!
- Ghost Material Matters: Choose lightweight materials for your ghosts. Foam, thin plastic sequins, or laminated paper work best. Cardstock might be too heavy and just sink to the bottom.
- Don’t Overfill: Resist the urge to cram too many ghosts or too much glitter in. A little space allows for better movement and a more captivating display.
- The Air Bubble is Your Friend: That small gap of air at the top? It’s essential! It creates the vacuum that allows the liquid and ghosts to slosh and swirl effectively. Without it, your jar will feel static.
- Secure the Lid: If this jar is for a child, or if you plan to shake it vigorously, make sure that lid is really sealed. Hot glue or super glue is your best bet to prevent accidental spills and keep all that glitter contained. This is similar to how you’d want to secure any DIY projects, like if you were making our DIY Rain Cloud Jar for year-round fun!
How to Store Floating Ghost Sensory Jar
Good news! Your Floating Ghost Sensory Jar is a pretty resilient little creation. Here’s how to keep it looking its best for many spooky seasons to come:
- Keep Out of Direct Sunlight: Over time, strong, direct sunlight can cause any food coloring to fade, and might even affect the clarity of the glue mixture. A spot on a shelf, desk, or table is ideal.
- Shake Periodically: If your glitter or ghosts settle at the bottom (which they will over time), just give the jar a gentle shake to redistribute everything and bring the magic back to life!
- Indefinite Shelf Life (if sealed well!): As long as your lid is tightly sealed and no air gets in to promote mold growth (which is highly unlikely with glue and water), your sensory jar should last for years. It’s a craft that keeps on giving!
FAQs
Got a few questions bubbling up? Let’s answer some common ones:
Q: My ghosts just sink to the bottom. What went wrong?
A: Most likely, your ghost cutouts are too heavy for the liquid! Try using lighter materials like thin craft foam, plastic sequins, or laminated paper ghosts. Also, ensure your glue is fully dissolved to create the right viscosity for floating.
Q: Can I use cold water instead of warm?
A: While you can use cold water, warm water helps the glue dissolve much more easily and thoroughly, leading to a smoother mixture without clumps. It makes the initial mixing step much quicker and more effective!
Q: Is this safe for toddlers?
A: Yes, once the lid is permanently sealed with strong glue (like super glue or hot glue), it’s generally safe for supervised play. However, it’s not meant for teething or oral exploration, so always keep an eye on little ones. The goal is sensory observation, not consumption!
Q: My water looks cloudy. How can I make it clearer?
A: Cloudy water can sometimes happen if you use too much glitter, or if your glue wasn’t completely clear to begin with. Using distilled water instead of tap water can also help prevent cloudiness from mineral deposits. For best results, use good quality clear glue and fine glitter.
I hope you have the most wonderfully spooky and soothing time creating your Floating Ghost Sensory Jar! Happy crafting, my friends!
For more delightful recipes and craft ideas, be sure to follow us on Pinterest!

Floating Ghost Sensory Jar
Ingredients
Equipment
Method
- Step 1: Grab your clear jar or bottle and fill it halfway with warm water.
- Step 2: Pour in your 1/2 cup of clear or glitter glue. Stir it until it's completely dissolved, ensuring a smooth, consistent liquid.
- Step 3: Add a good sprinkle of white or iridescent glitter to the mixture. Start with a tablespoon or two and add more if desired.
- Step 4: Carefully drop in your tiny ghost cutouts. Watch them begin to float and swirl around.
- Step 5: If you wish, add a few drops of black or glow-in-the-dark food coloring for an extra eerie atmosphere.
- Step 6: Slowly fill the remainder of the jar with water, remembering to leave a small airspace at the very top. This bubble is crucial for movement.
- Step 7: Seal the lid tightly using a good dollop of hot glue or a few drops of super glue around the rim. Let it dry completely.
- Step 8: Gently shake the jar and watch your adorable, spooky ghosts float, drift, and dance within their glittery, watery world.