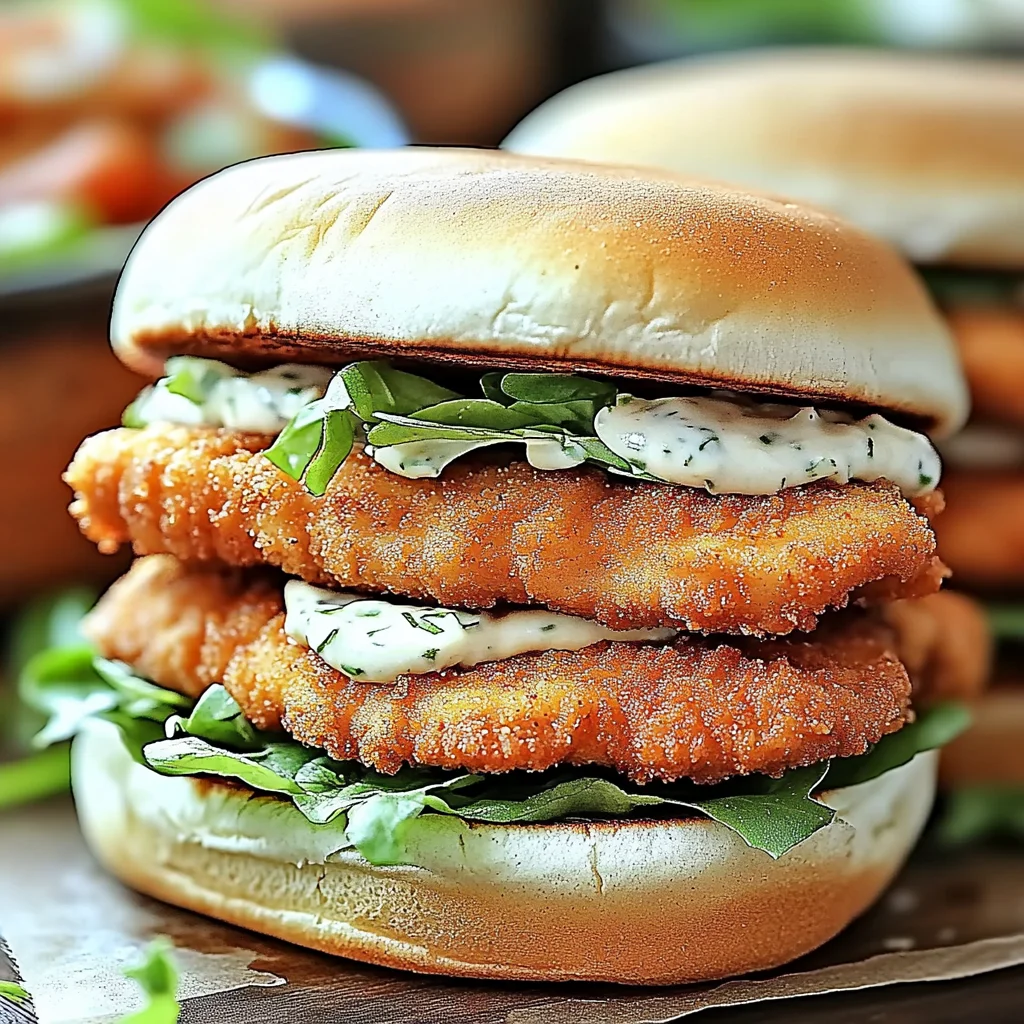
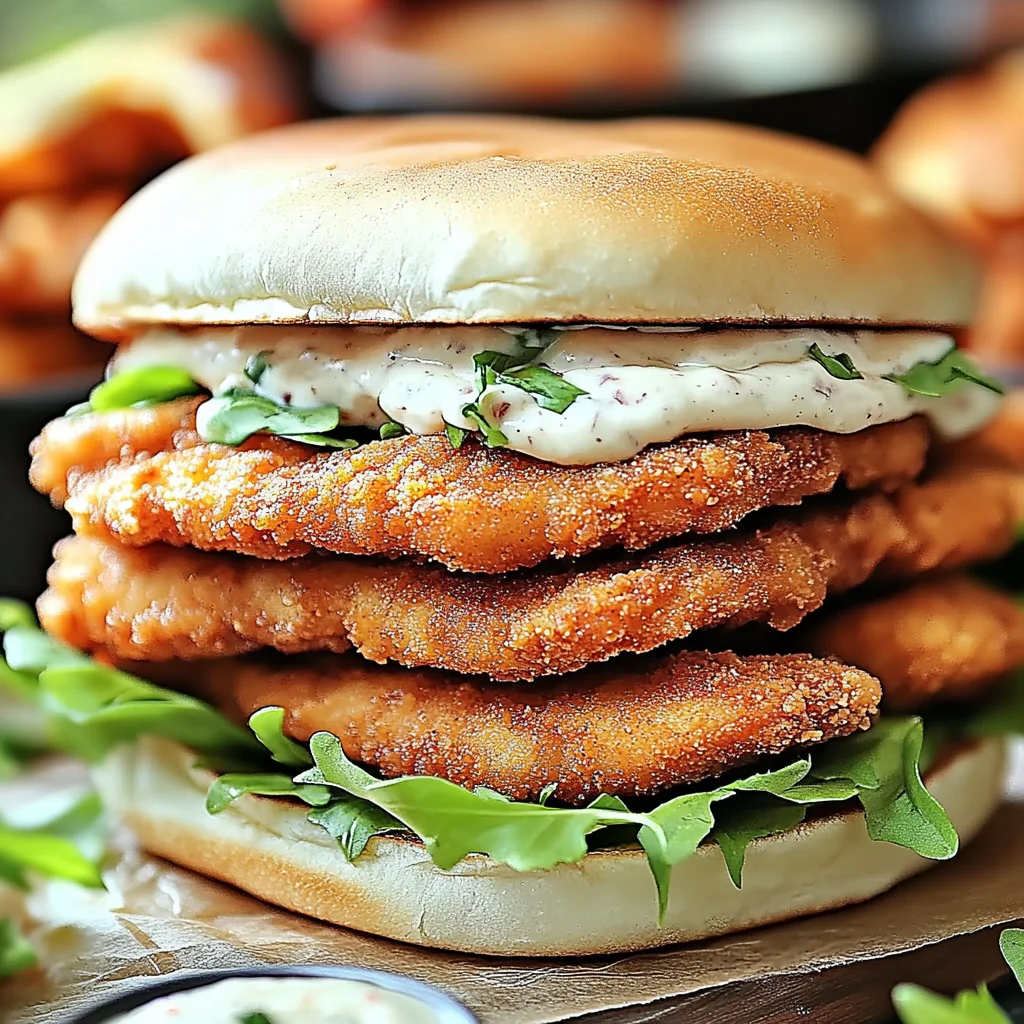
Hey there, friend! Ever have one of those days where you’re craving something truly satisfying, something that reminds you of your favorite diner but without having to leave the cozy comfort of your own kitchen? That’s exactly how I feel about a really good crispy chicken sandwich. There’s just something magical about that first bite – the crunch, the tender chicken, and that creamy, flavorful sauce tying it all together. And guess what? This recipe for Crispy Chicken Sandwich with Garlic Mayo isn’t just a craving buster; it’s also incredibly easy to make, surprisingly quick, and absolutely memorable. It’s the kind of comfort food that wraps you in a warm hug, perfect for any night of the week. Plus, much like our savory garlic butter chicken bites, this is a guaranteed crowd-pleaser that won’t keep you slaving away in the kitchen!
Why You’ll Love Crispy Chicken Sandwich with Garlic Mayo
- Fast
- Easy
- Giftable
- Crowd-pleasing
Ingredients
Gathering your ingredients is the first step to deliciousness! Here’s what you’ll need to whip up these fantastic sandwiches:
- 4 boneless, skinless chicken breasts (about 1.5 lbs): These are the stars of the show! Make sure they’re a consistent thickness for even cooking. You can pound them slightly if they’re very thick.
- 1 cup all-purpose flour: Our base for that perfect crispy coating.
- 1 cup panko breadcrumbs: The secret to next-level crispiness! Panko is flakier and absorbs less oil than regular breadcrumbs, giving you that irresistible crunch.
- 2 tsp garlic powder: We’re adding garlic powder to both the chicken coating and the mayo for a double hit of savory goodness.
- 1 cup mayonnaise: The creamy foundation for our dreamy garlic mayo. Use your favorite brand!
- 3 cloves fresh garlic, minced: Fresh garlic really elevates the mayo. Don’t skip this if you can help it!
- 2 tbsp lemon juice: A splash of citrus in the mayo brightens everything up and cuts through the richness beautifully.
- Salt to taste: Essential for seasoning every layer.
- Pepper to taste: Just like salt, it’s crucial for flavor.
- Soft buns for assembly: Brioche, potato rolls, or classic hamburger buns work wonderfully. Choose what you love!
- Optional: 1-2 large eggs, beaten: An egg wash helps the panko stick even better, resulting in an extra sturdy and crispy crust. I highly recommend it for maximum crispness!
How to Make Crispy Chicken Sandwich with Garlic Mayo
Alright, let’s get cooking! You’ll be amazed at how simple it is to bring this crispy, flavorful sandwich to life.
- Preheat Oven and Season Chicken: First things first, get your oven ready! Preheat it to a cozy 400°F (200°C). While it’s warming up, grab your chicken breasts and give them a good sprinkle of salt and pepper on both sides. Don’t be shy – proper seasoning is key to delicious chicken!
- Set Up Dredging Stations: Now, let’s create your breading assembly line. In one shallow bowl, combine your all-purpose flour with 1 teaspoon of garlic powder. In a second shallow bowl, pour your panko breadcrumbs. If you’re going for that extra-crispy, locked-in coating (which I totally recommend!), grab a third bowl and whisk up 1-2 large eggs to create an egg wash.
- Coat the Chicken: Time to get your hands a little messy! Take each seasoned chicken breast and first coat it thoroughly in the seasoned flour, shaking off any excess. Then, if you’re using the egg wash, dip the floured chicken into it, letting any extra drip off. Finally, the best part – roll the chicken generously in the panko breadcrumbs, pressing gently to make sure they stick really well. You want that chicken fully covered in those crunchy flakes!
- Bake the Chicken: Arrange your beautifully coated chicken breasts on a baking sheet. I like to line mine with parchment paper for easy cleanup, but a lightly greased sheet works too. Pop them into your preheated oven and bake for about 25-30 minutes. You’ll know they’re ready when they’re golden brown and cooked all the way through, reaching an internal temperature of 165°F (74°C). A meat thermometer is your best friend here!
- Make the Garlic Mayo: While your chicken is getting perfectly crispy in the oven, let’s whip up that incredible garlic mayo. In a medium bowl, combine your mayonnaise, the minced fresh garlic, the remaining 1 teaspoon of garlic powder, and the lemon juice. Stir it all together until it’s super smooth and creamy. Give it a taste and add a pinch more salt and pepper if you think it needs it. This mayo is seriously good, and it’s what takes this sandwich from good to absolutely glorious!
- Assemble and Serve: Once your chicken is golden and glorious, pull it out of the oven and let it rest for just a couple of minutes – this helps keep it juicy! Now for the fun part: assembling your masterpieces. Place a crispy chicken breast on the bottom half of a soft bun. Then, generously spread that zesty garlic mayo on the top bun. Add any extra toppings you love (lettuce, tomato, pickles are classics!), and serve immediately. Prepare for happy sighs all around!
Substitutions & Additions
This Crispy Chicken Sandwich is fantastic as is, but part of the fun of cooking is making it your own! Don’t be afraid to get creative.
- Chicken Variations: Not feeling chicken breast? You can absolutely use boneless, skinless chicken thighs for an even juicier sandwich. Just be sure to adjust baking time slightly. If you’re looking for another fantastic crispy chicken option, you might also love our easy crispy chicken bacon ranch wraps for a different spin!
- Breading Boosters: Want even more flavor in your crust? Try mixing a little paprika, onion powder, or a dash of cayenne pepper into your flour mixture for extra zing.
- Bun Fun: While soft buns are a classic, feel free to experiment with toasted ciabatta rolls, brioche buns, or even a pretzel bun for a different texture.
- Mayo Makeovers: The garlic mayo is incredible, but you can always customize it! Add a little sriracha for a spicy kick, a spoonful of Dijon mustard for extra tang, or a sprinkle of fresh chopped chives or parsley for herby freshness. If you’re into exploring other amazing sauces, our creamy Baja sauce is another fantastic option to try with chicken!
- Topping It Off: Lettuce, tomato, and pickles are standard, but consider adding some crispy bacon, thinly sliced red onion, a slice of cheddar or pepper jack cheese (melted on top of the hot chicken!), or even some avocado slices.
Tips for Success
A few little tricks can make all the difference when you’re aiming for crispy, juicy perfection!
- Pound Your Chicken: For really even cooking and to ensure your chicken isn’t too thick for a sandwich, I highly recommend pounding the chicken breasts to about 1/2 to 3/4 inch thickness. Use a meat mallet or a rolling pin between two sheets of plastic wrap.
- Don’t Skimp on the Pressing: When you’re coating the chicken in panko, really press those breadcrumbs onto the chicken. The more surface area they adhere to, the crispier your chicken will be.
- Parchment Paper is Your Friend: Lining your baking sheet with parchment paper not only makes cleanup a breeze but also helps prevent the breading from sticking to the pan, ensuring a beautiful, even crisp.
- Don’t Overcrowd the Pan: Give your chicken pieces space! If you crowd them on the baking sheet, they’ll steam instead of crisp, which is exactly what we don’t want. Use two baking sheets if necessary.
- Let the Chicken Rest: Once baked, let the chicken rest for 2-3 minutes before slicing or assembling. This allows the juices to redistribute, keeping your chicken moist and tender.
- Make Mayo Ahead: The garlic mayo can absolutely be made a day or two in advance. In fact, the flavors often deepen and get even better as they sit! Just store it in an airtight container in the fridge.
How to Store Crispy Chicken Sandwich with Garlic Mayo
While this sandwich is definitely best enjoyed fresh and hot, sometimes you might have leftovers or want to prep components ahead of time.
- Cooked Chicken: Store any leftover crispy chicken in an airtight container in the refrigerator for up to 3-4 days. To reheat, the best way to maintain crispness is in an air fryer or oven at 350°F (175°C) until heated through and re-crisped. Microwaving will make it soft.
- Garlic Mayo: The homemade garlic mayo can be stored in an airtight container in the refrigerator for up to 5-7 days.
- Assembled Sandwiches: I really don’t recommend storing assembled sandwiches. The mayo and other toppings will make the crispy chicken and bun soggy. It’s always best to assemble right before serving.
FAQs
Got questions? I’ve got answers!
Q: Can I air fry the chicken instead of baking it?
A: Absolutely! Air frying is a fantastic way to get extra crispy chicken. Place the coated chicken in a single layer in your air fryer basket, making sure not to overcrowd. Air fry at 375°F (190°C) for 15-20 minutes, flipping halfway, until golden brown and cooked through.
Q: What are some good side dishes to serve with this sandwich?
A: Oh, so many delicious options! Classic pairings include crispy french fries, a fresh side salad, coleslaw, or even some sweet potato fries. For something lighter, try some sliced cucumbers or carrot sticks.
Q: Can I use chicken tenders instead of breasts?
A: Yes, you can! Chicken tenders are a great option for this recipe, especially if you prefer smaller portions or are making them for kids. Adjust the baking time, as tenders will cook faster (likely 18-22 minutes) due to their smaller size.
Q: What if I don’t have fresh garlic for the mayo?
A: While fresh minced garlic offers the best flavor, you can use garlic powder in a pinch. Start with an additional 1/2 teaspoon in the mayo and taste, adding more if desired. The flavor won’t be as pungent, but it will still be delicious!
We hope you love this Crispy Chicken Sandwich with Garlic Mayo as much as we do! For more delicious recipes and kitchen inspiration, be sure to follow us on Pinterest!

Crispy Chicken Sandwich with Garlic Mayo
Ingredients
Equipment
Method
- Step 1: Preheat oven to 400°F (200°C). Season chicken breasts generously on both sides with salt and pepper.
- Step 2: Set up dredging stations: In one shallow bowl, combine all-purpose flour with 1 teaspoon of garlic powder. In a second shallow bowl, add panko breadcrumbs. In a third shallow bowl, whisk 1-2 large eggs for an optional egg wash.
- Step 3: Coat each seasoned chicken breast first in the seasoned flour (shaking off excess). If using, dip into the egg wash, letting excess drip off. Finally, roll generously in the panko breadcrumbs, pressing gently to ensure they stick well.
- Step 4: Arrange coated chicken breasts on a baking sheet (lined with parchment paper for easy cleanup, or lightly greased). Bake for 25-30 minutes, or until golden brown and cooked through to an internal temperature of 165°F (74°C).
- Step 5: While chicken bakes, prepare the garlic mayo: In a medium bowl, combine mayonnaise, minced fresh garlic, the remaining 1 teaspoon of garlic powder, and lemon juice. Stir until smooth and creamy. Taste and add more salt and pepper if needed.
- Step 6: Once chicken is done, remove from oven and let rest for 2-3 minutes to keep it juicy. Assemble sandwiches by placing a crispy chicken breast on the bottom half of a soft bun. Spread garlic mayo generously on the top bun. Add any desired extra toppings like lettuce, tomato, or pickles. Serve immediately.