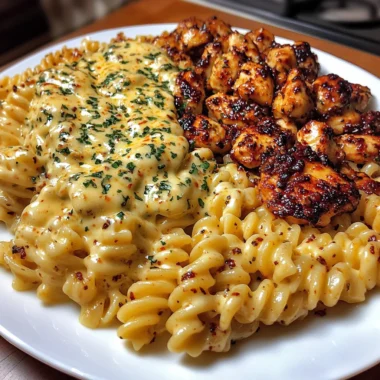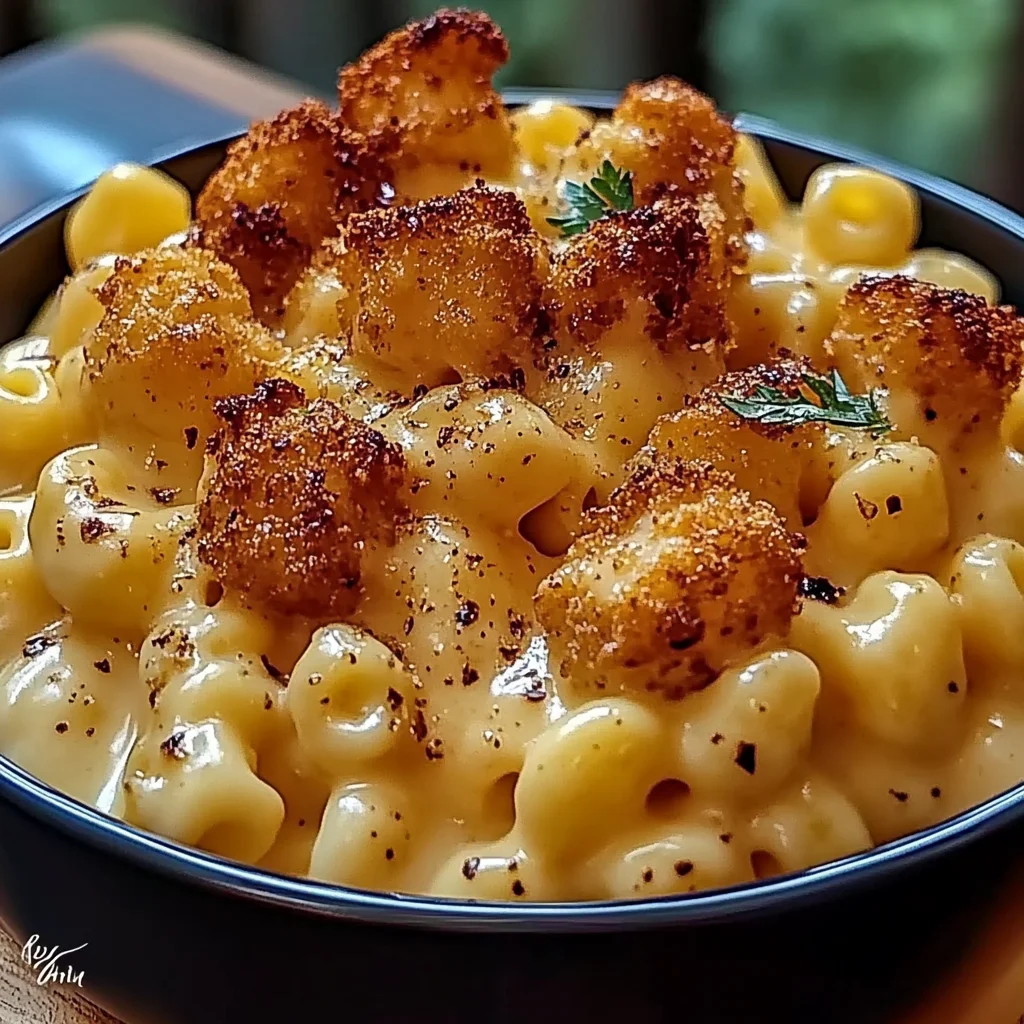
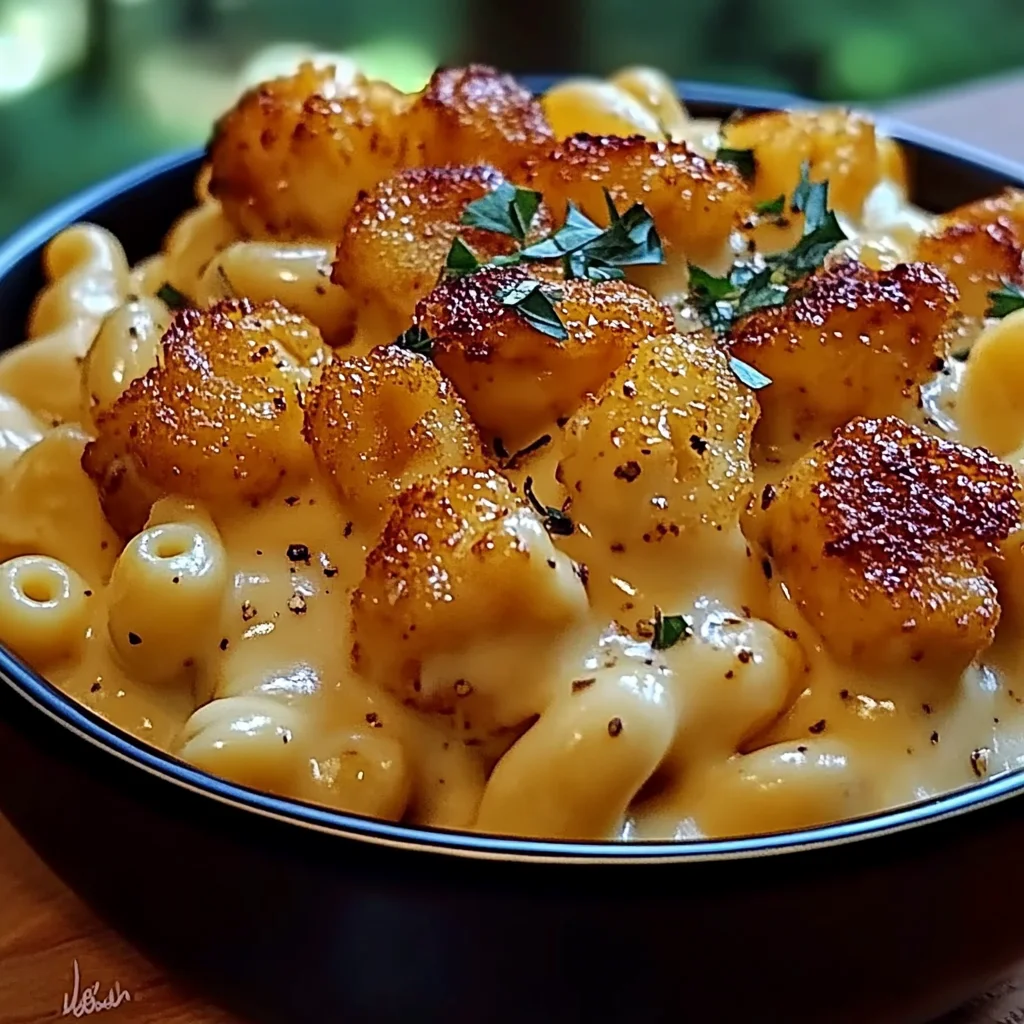
Hey there, kitchen friend! 👋 Let’s talk comfort food. You know, those dishes that wrap you up like a warm blanket on a chilly evening? For me, nothing quite hits the spot like a big bowl of creamy mac and cheese. But what if we could take that classic hug-in-a-bowl and give it a little zhuzh? Enter this absolutely incredible Creamy Honey Pepper Chicken Mac and Cheese Delight!
This isn’t just any mac and cheese; it’s an experience! We’re talking tender, juicy chicken marinated in buttermilk, fried to crispy perfection, and then tossed in a sweet and peppery honey glaze, all piled high on a mountain of the creamiest, cheesiest macaroni you’ve ever dreamed of. It sounds fancy, right? But trust me, it’s surprisingly easy to pull off, and the result is so memorable, you’ll be making it again and again. It’s the ultimate mash-up of comfort and craveable flavor!
Why You’ll Love This Recipe
- Fast(ish)! While there are a few steps, they come together quicker than you might think for such an impressive dish.
- Easy! No complicated techniques here, just simple steps for maximum deliciousness.
- Giftable? Well, maybe not the whole dish, but the idea is a gift to yourself and your loved ones!
- Crowd-pleasing! Who doesn’t love mac and cheese? Add crispy chicken and a killer glaze, and you’ve got a guaranteed hit.
Ingredients
Gather your crew! Here’s what you’ll need to create this magic in your kitchen:
- 1/2 teaspoon onion powder: Adds a little savory depth to our cheese sauce.
- 1 cup all-purpose flour (for breading): Gotta get that chicken crispy!
- 1/2 teaspoon garlic powder: Another essential for our cheesy base.
- 2 boneless, skinless chicken breasts: Our star protein, cut into bite-sized pieces. Feel free to use thighs if you prefer!
- 1/2 teaspoon black pepper (for breading): A little warmth in the coating.
- 1/3 cup honey: For that gorgeous, sweet glaze.
- 2 tablespoons butter: The start of our luscious cheese sauce roux.
- 1 cup heavy cream: Making that sauce extra rich and velvety.
- 1 teaspoon paprika: Adds color and a subtle sweetness to the chicken coating.
- 1/2 teaspoon salt (for breading): Enhancing the flavor of our crispy chicken.
- 2 cups shredded cheddar cheese: Classic, sharp, and melty goodness.
- 1 cup buttermilk: The secret weapon for super tender chicken!
- 2 tablespoons all-purpose flour (for sauce): To help thicken our cheese sauce.
- 1/2 teaspoon red pepper flakes (optional): For a little kiss of heat in the glaze. Skip if you’re sensitive to spice!
- 1 teaspoon cracked black pepper (for glaze): Adds texture and a bold peppery punch to the honey glaze.
- 1 cup mozzarella cheese: For extra stretch and creaminess in the sauce.
- 1 tablespoon soy sauce: A touch of umami that perfectly complements the honey and pepper.
- 2 cups elbow macaroni: The traditional, perfect shape for holding onto that cheesy sauce.
- 2 cups whole milk: The liquid base for our smooth cheese sauce.
- Salt and pepper to taste (for sauce): Seasoning is key!
- Vegetable oil, for frying: Enough to fry our chicken until golden.
How to Make It
Okay, let’s get cooking! Don’t be intimidated by the steps; we’re just tackling a few delicious components before bringing them all together in cheesy harmony.
- First things first, let’s get our chicken ready. Pop those bite-sized chicken pieces into a bowl. Pour the buttermilk over them, making sure every single piece gets a nice coating bath. This is where the magic happens for tender chicken!
- Cover that bowl and pop it into the fridge. Let it hang out there for at least 30 minutes. You can leave it longer if you have the time – up to a few hours is great!
- While the chicken is doing its thing, grab a large pot and fill it with water. Add a good pinch of salt – make it taste like the sea! Bring that water to a rolling boil.
- Add your elbow macaroni to the boiling water. Cook it according to the package instructions, but aim for al dente. We don’t want mushy pasta when we add the sauce!
- Once it’s cooked just right, drain the macaroni well and set it aside for a moment.
- Now, let’s make that glorious cheese sauce! In a saucepan over medium heat, melt the butter.
- Once the butter is melted and bubbly, whisk in the 2 tablespoons of all-purpose flour. This creates a roux, which will thicken our sauce. Whisk constantly for 1-2 minutes; it should be a pale golden color.
- Slowly, gradually, pour in the whole milk and heavy cream. Whisk, whisk, whisk as you pour to make sure there are no lumps. Keep whisking until the mixture is smooth.
- Add the garlic powder, onion powder, and season with salt and pepper to your taste. Keep whisking as the sauce heats up and starts to thicken.
- Once the sauce has thickened enough to coat the back of a spoon, stir in the shredded cheddar and mozzarella cheeses. Stir gently until all the cheese is melted and the sauce is beautifully smooth and creamy. Oh my goodness, try not to eat it all now!
- Remove the cheese sauce from the heat and set it aside while we finish up the chicken.
- Time for that amazing glaze! In a small saucepan, combine the honey, soy sauce, cracked black pepper, and red pepper flakes (if you’re using them for a little kick!).
- Bring this mixture to a simmer over medium heat, stirring occasionally.
- Let it simmer for just a couple of minutes until it slightly thickens into a syrupy glaze. Remove it from the heat and set it aside.
- Now back to the chicken! Get a shallow dish and mix the remaining 1 cup of all-purpose flour with the paprika, salt, and black pepper (for the breading). This is your dredging station.
- Take the chicken pieces out of the buttermilk marinade. Let any excess buttermilk drip off, but don’t wipe it dry; you want just enough to help the flour stick.
- Dredge each piece of chicken in the seasoned flour mix, turning to ensure it’s completely coated. Pat it gently if needed to help the flour adhere.
- Heat vegetable oil in a deep skillet or fryer to 350°F (175°C). You want enough oil to submerge the chicken pieces halfway or more.
- Carefully add the coated chicken pieces to the hot oil in batches. Don’t overcrowd the pan, or your chicken won’t get crispy! Fry until they’re golden brown and cooked through, which usually takes about 4-5 minutes per batch.
- Remove the fried chicken pieces using a slotted spoon and let them drain on a plate lined with paper towels to catch any excess oil.
- In a large mixing bowl, combine the cooked and drained macaroni with that dreamy cheese sauce. Stir gently until every noodle is coated in cheesy goodness.
- Transfer the mac and cheese to your serving plates or a beautiful large serving dish.
- In a separate bowl, drizzle the warm honey pepper glaze over the fried chicken pieces. Toss them gently to make sure each piece is coated in that sticky, sweet, peppery sauce.
- Finally, arrange the glorious glazed chicken pieces right on top of the creamy mac and cheese. Dig in and enjoy!
Substitutions & Additions
Want to mix things up or tailor this recipe to your liking? Here are a few ideas:
- Cheese Swap: Instead of just cheddar and mozzarella, try adding some smoked gouda, Gruyère, or Monterey Jack for a different flavor profile.
- Heat Level: If you really love spice, increase the red pepper flakes in the glaze or add a pinch of cayenne to your cheese sauce. If you prefer it mild, just omit the red pepper flakes entirely.
- Different Protein: Not a fan of chicken? You could try this with crispy fried tofu or even skip the protein and just make the incredible mac and cheese!
- Veggie Boost: Stir in some steamed broccoli florets, peas, or sautéed mushrooms into the mac and cheese before serving for extra color and nutrients.
- Pasta Shape: While elbows are classic, feel free to use shells, rotini, or penne – any pasta shape that holds sauce well works!
Tips for Success
A few little tricks to make sure your Honey Pepper Chicken Mac and Cheese turns out perfectly every time:
- Don’t Skip the Buttermilk: Seriously, this step makes the chicken incredibly tender and juicy. It’s worth the minimal effort!
- Cook Pasta Al Dente: The pasta will continue to cook slightly in the hot cheese sauce. Cooking it al dente ensures it doesn’t become mushy.
- Whisk Your Sauce!: When adding the milk and cream to the roux, whisk constantly and pour slowly to prevent lumps. If you do get a few small lumps, you can try pressing them against the side of the pan with your whisk, or even run the sauce through a fine-mesh sieve for ultimate smoothness (though I usually find whisking is enough!).
- Fry in Batches: Overcrowding the skillet lowers the oil temperature and results in greasy, less crispy chicken. Give those chicken pieces some space!
- Drain That Chicken: Letting the fried chicken rest on paper towels for a minute helps wick away excess oil, keeping it crispy for longer.
- Prep Ahead: You can marinate the chicken and even make the cheese sauce ahead of time. Reheat the sauce gently before combining with the cooked pasta. Fry the chicken just before serving for the best texture.
How to Store It
Got leftovers? Lucky you! Store any remaining Creamy Honey Pepper Chicken Mac and Cheese in an airtight container in the refrigerator. It will keep well for 3-4 days.
To reheat, the microwave works fine for individual portions, but you might find the mac and cheese benefits from a splash of milk before microwaving to bring back some creaminess. You can also gently reheat it in a saucepan over low heat, adding a little milk as needed, or in an oven-safe dish covered with foil at 300°F (150°C) until warmed through.
Note that the fried chicken will lose some of its crispiness upon refrigeration and reheating, but it will still taste delicious!
FAQs
- Can I bake this mac and cheese?
- While this recipe is designed as a stovetop dish with topping, you could transfer the mixed mac and cheese to a baking dish, top it with the glazed chicken (maybe add a little extra cheese on top too!), and bake at 375°F (190°C) for 15-20 minutes until bubbly and heated through. The chicken might lose some crispness, though.
- What can I use if I don’t have buttermilk?
- You can make a quick substitute by mixing 1 cup of milk (any kind works, but whole is best) with 1 tablespoon of white vinegar or lemon juice. Let it sit for 5-10 minutes until it curdles slightly. Stir it and use as directed!
- My cheese sauce is too thick/thin. Help!
- If it’s too thick, whisk in a little more milk or cream, a tablespoon at a time, until it reaches your desired consistency. If it’s too thin, you can make a slurry of a teaspoon of cornstarch mixed with a tablespoon of cold milk, then whisk it into the simmering sauce and cook for another minute or two until thickened.
- Can I use pre-cooked chicken?
- You could, but the buttermilk marinade and frying are key to the specific texture and flavor of the chicken in this recipe. If using pre-cooked chicken (like rotisserie), you wouldn’t marinate or fry it. You could potentially toss it in the honey pepper glaze and add it to the mac and cheese, but it will be a different experience than the crispy fried chicken intended here.

Creamy Honey Pepper Chicken Mac and Cheese
Ingredients
Equipment
Method
- Step 1: Combine chicken pieces and buttermilk in a bowl, ensuring all pieces are coated.
- Step 2: Cover and refrigerate for at least 30 minutes (or up to a few hours) to marinate.
- Step 3: While chicken marinates, fill a large pot with salted water and bring to a boil for pasta.
- Step 4: Add macaroni to boiling water and cook according to package directions until al dente.
- Step 5: Drain the cooked macaroni well and set aside.
- Step 6: In a saucepan over medium heat, melt the butter for the cheese sauce.
- Step 7: Whisk in the 2 tablespoons all-purpose flour and cook for 1-2 minutes until pale golden, creating a roux.
- Step 8: Slowly whisk in the whole milk and heavy cream, stirring constantly until smooth.
- Step 9: Add garlic powder, onion powder, and salt and pepper to taste. Continue whisking as the sauce thickens.
- Step 10: Once thickened, stir in the shredded cheddar and mozzarella cheeses until melted and the sauce is smooth and creamy.
- Step 11: Remove cheese sauce from heat and set aside.
- Step 12: In a small saucepan, combine honey, soy sauce, cracked black pepper, and red pepper flakes (if using) for the glaze.
- Step 13: Bring the glaze mixture to a simmer over medium heat, stirring occasionally.
- Step 14: Simmer for a couple of minutes until slightly thickened. Remove from heat and set aside.
- Step 15: In a shallow dish, mix the remaining 1 cup all-purpose flour with paprika, salt (for breading), and black pepper (for breading).
- Step 16: Remove chicken from buttermilk marinade, letting excess drip off.
- Step 17: Dredge each chicken piece in the seasoned flour mixture, coating completely.
- Step 18: Heat vegetable oil in a deep skillet or fryer to 350°F (175°C).
- Step 19: Carefully fry chicken in batches for about 4-5 minutes per batch, until golden brown and cooked through. Do not overcrowd the pan.
- Step 20: Remove fried chicken with a slotted spoon and drain on paper towels.
- Step 21: In a large mixing bowl, combine the cooked macaroni with the cheese sauce, stirring until coated.
- Step 22: Transfer the mac and cheese to serving plates or a dish.
- Step 23: In a separate bowl, toss the fried chicken pieces with the warm honey pepper glaze until coated.
- Step 24: Arrange the glazed chicken on top of the mac and cheese and serve immediately.