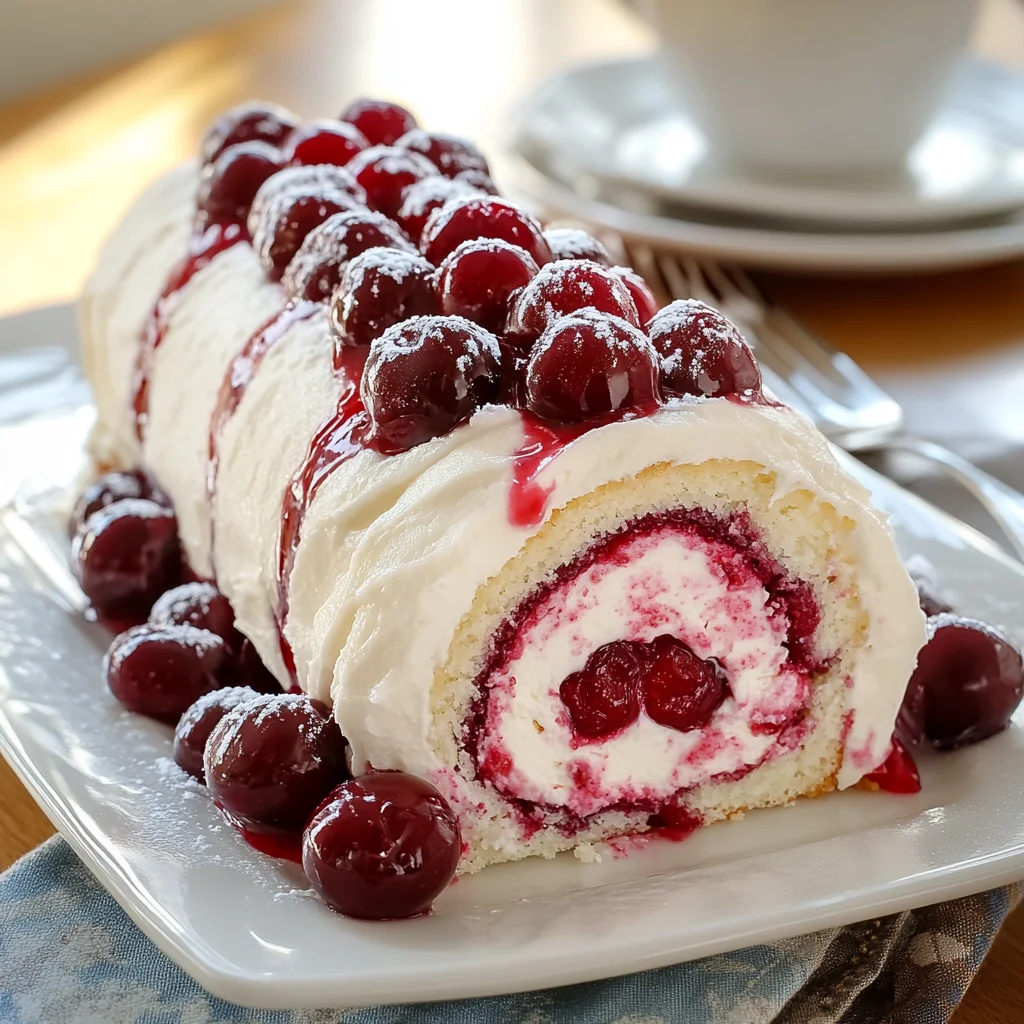
Hey there, friends! Are you ready for a dessert that looks like a million bucks but is secretly super simple? There’s something so wonderfully nostalgic and festive about a beautifully rolled cake, and this Cherry Cheesecake Cake Roll takes that cozy feeling and elevates it to pure dessert heaven. It’s got a tender sponge cake, a creamy, tangy cheesecake filling, and sweet bursts of cherry. Trust me, once you make this, it’ll become a go-to for holidays, potlucks, or just when you want to feel fancy on a Tuesday.
Why You’ll Love This Recipe
- Fast: From start to finish, you can have this rolled and chilling in no time. Perfect for when a dessert craving hits!
- Easy: Don’t let the “rolling” part scare you! I’ll walk you through it, and it’s much simpler than it looks.
- Giftable: Wrap this up nicely and share it with friends or family. It makes a beautiful edible gift.
- Crowd-pleasing: Who doesn’t love the classic combo of cherry and cheesecake tucked into a fluffy cake? It’s always a hit!
Ingredients
Gather these simple goodies:
- For the Sponge Cake:
- 4 large eggs, room temperature: Room temp eggs are key for a fluffy cake roll!
- 3/4 cup granulated sugar: Just the right amount of sweetness for the cake.
- 1 teaspoon vanilla extract: Adds that lovely warm flavor.
- 3/4 cup all-purpose flour: Our cake’s foundation.
- 1/2 teaspoon baking powder: Gives it a little lift.
- 1/4 teaspoon salt: Balances everything out.
- Powdered sugar (for dusting): Essential for rolling and finishing!
- For the Cheesecake Filling:
- 8 oz (225 g) cream cheese, softened: Make sure it’s truly soft for a smooth filling.
- 1/2 cup powdered sugar: Sweetens the filling.
- 1 teaspoon vanilla extract: More warm vanilla goodness!
- 1½ cups whipped topping: Makes the filling light and airy.
- For the Cherry Layer:
- 1 cup cherry pie filling: Easy peasy! Use your favorite brand.
How to Make It
Alright, let’s get baking! Follow these steps, and you’ll be rolling like a pro.
-
Preheat and Prep:
Preheat your oven to 350°F (175°C). This part is important! Line a 10×15-inch jelly roll pan with parchment paper, leaving some overhang on the sides to help you lift the cake later. Lightly grease the parchment paper. Lay out a clean kitchen towel (one that you don’t mind getting a little sugar on!) and dust it generously with powdered sugar. Like, REALLY generously. Trust me, this prevents sticking!
-
Make the Sponge Cake:
In a large mixing bowl, using an electric mixer, beat the room temperature eggs on high speed for about 5 minutes. They should get really thick, pale yellow, and almost ribbon-like when you lift the beaters. While still beating, gradually add the granulated sugar and vanilla extract. Continue beating until everything is well combined and slightly thicker.
- In a separate, smaller bowl, whisk together the all-purpose flour, baking powder, and salt. This helps distribute the leavening evenly.
- Now comes the gentle part! Add the dry ingredients to the egg mixture. Using a spatula, gently fold them in until just combined. Be careful not to overmix, or your cake will be tough. A few small streaks of flour are okay; you’ll mix them out as you spread the batter.
-
Bake the Cake:
Pour the batter into your prepared jelly roll pan, spreading it evenly to the edges with a spatula. Bake for 10–12 minutes. You’ll know it’s done when the top springs back lightly when you gently touch it, and the edges are just starting to look golden.
-
Roll the Cake:
This is the crucial step, but don’t stress! As soon as the cake comes out of the oven, immediately loosen the edges from the pan using a knife or offset spatula. Quickly but carefully turn the cake out onto your prepared, powdered-sugar-dusted towel. Carefully peel off the parchment paper.
- Now, starting from one of the short ends, carefully roll the cake with the towel inside, creating a spiral. Place the rolled cake (still in the towel) seam-side down on a wire rack and let it cool completely. This step “trains” the cake to roll without cracking later. Letting it cool completely is important!
-
Make the Cheesecake Filling:
While the cake cools, make your filling. In a medium bowl, beat the softened cream cheese with powdered sugar and vanilla extract until it’s super smooth and creamy. Now, gently fold in the whipped topping. Do this by hand with a spatula until it’s light and fluffy. Don’t beat it with the mixer here, or the whipped topping might deflate.
-
Assemble the Roll:
Once the cake is completely cool, gently unroll it from the towel. It should stay in its rolled shape somewhat. Spread the cheesecake filling evenly over the entire surface of the cake, leaving a small border (maybe half an inch) bare on the far short end.
- Now, dollop spoonfuls of the cherry pie filling randomly over the cream cheese layer. Don’t spread it; just let it sit in clumps.
- Carefully re-roll the cake, starting from the short end closest to you. This time, you’re rolling the cake with the filling inside, without the towel. Roll it snugly. Once rolled, gently lift it and place it seam-side down on a serving plate or cutting board.
-
Chill and Serve:
Cover the cake roll loosely with plastic wrap and refrigerate for at least 1 hour. This allows the filling to set and the cake to firm up, making it easier to slice. Before slicing, give it another dusting of powdered sugar for that classic cake roll look. Slice with a sharp knife and enjoy!

Substitutions & Additions
Want to mix things up? Here are a few ideas:
- Fruit Swaps: Not a cherry fan? Try strawberry pie filling, blueberry pie filling, or even a different fruit jam or preserve.
- Filling Flavors: Add a hint of almond extract to the filling, or swirl in a little lemon zest for brightness.
- Cake Flavors: Use a different extract like almond in the cake batter, or add a tablespoon of cocoa powder for a chocolate twist (you might need to slightly adjust flour if adding cocoa).
- Extra Goodies: Sprinkle mini chocolate chips or chopped nuts over the cheesecake filling before adding the cherries and rolling.
Tips for Success
- Room Temperature Eggs: I know I mentioned it, but it’s worth repeating! Cold eggs won’t whip up properly.
- Don’t Overmix: Folding the dry ingredients is crucial for a tender cake.
- Dust That Towel! Be generous with the powdered sugar on your towel. It’s your best friend for preventing sticking.
- Roll While Hot: Rolling the cake as soon as it comes out of the oven “sets” its shape and prevents cracking later.
- Cool Completely: Don’t be tempted to unroll and fill a warm cake! It needs to be fully cool before filling, or the filling will melt.
- Chill Time: Giving the cake roll time in the fridge allows the filling to set and makes slicing much cleaner.
How to Store It
Keep this delicious cake roll covered tightly with plastic wrap in the refrigerator. It will stay fresh and delicious for 3-4 days. I haven’t tried freezing a filled cake roll like this, as the texture of the whipped topping might change, so I recommend enjoying it fresh!
FAQs
- Why did my cake crack when I unrolled it?
Most likely, it wasn’t rolled while hot enough, or it wasn’t allowed to cool completely while rolled in the towel. Rolling it immediately out of the oven trains the fibers of the cake while they are pliable. Letting it cool completely in the rolled shape allows that ‘memory’ to set before you unroll it.
- Can I use homemade whipped cream instead of whipped topping?
You can, but whipped topping (like Cool Whip) is much more stable and holds its shape better in the filling, especially when combined with cream cheese. Homemade whipped cream might make the filling a bit too soft.
- What if I don’t have a jelly roll pan?
You need a rimmed baking sheet that’s roughly 10×15 inches. The dimensions don’t have to be exact, but it needs to be close enough that the batter spreads to a thin layer, typically about 1/2 to 3/4 inch thick before baking. A pan that’s too large will result in a cake that’s too thin and might crack easily. A pan that’s too small will result in a cake that’s too thick and hard to roll.

Easy & Festive Cherry Cheesecake Cake Roll
Ingredients
Equipment
Method
- Step 1: Preheat and Prep: Preheat your oven to 350°F (175°C). Line a 10x15-inch jelly roll pan with parchment paper, leaving some overhang on the sides. Lightly grease the parchment paper. Lay out a clean kitchen towel and dust it generously with powdered sugar.
- Step 2: Make the Sponge Cake: In a large mixing bowl, using an electric mixer, beat room temperature eggs on high speed for about 5 minutes until thick and pale. Gradually add granulated sugar and vanilla extract while beating until well combined.
- Step 3: In a separate smaller bowl, whisk together all-purpose flour, baking powder, and salt.
- Step 4: Gently fold the dry ingredients into the egg mixture using a spatula until just combined. Do not overmix.
- Step 5: Bake the Cake: Pour the batter into your prepared jelly roll pan, spreading it evenly. Bake for 10–12 minutes, until the top springs back when lightly touched and edges look golden.
- Step 6: Roll the Cake: As soon as the cake comes out of the oven, immediately loosen the edges with a knife. Quickly turn the cake out onto your prepared, powdered-sugar-dusted towel. Carefully peel off the parchment paper.
- Step 7: Starting from a short end, carefully roll the cake with the towel inside. Place the rolled cake (still in the towel) seam-side down on a wire rack and let it cool completely.
- Step 8: Make the Cheesecake Filling: While the cake cools, beat softened cream cheese with powdered sugar and vanilla extract in a medium bowl until smooth. Gently fold in the whipped topping by hand until light and fluffy.
- Step 9: Assemble the Roll: Once the cake is completely cool, gently unroll it from the towel. Spread the cheesecake filling evenly over the entire surface, leaving a small border on the far short end.
- Step 10: Dollop spoonfuls of cherry pie filling randomly over the cream cheese layer.
- Step 11: Carefully re-roll the cake, starting from the short end closest to you (without the towel this time). Roll it snugly. Place seam-side down on a serving plate.
- Step 12: Chill and Serve: Cover the cake roll loosely with plastic wrap and refrigerate for at least 1 hour to set the filling and firm up the cake. Before slicing, dust with more powdered sugar. Slice with a sharp knife and serve.