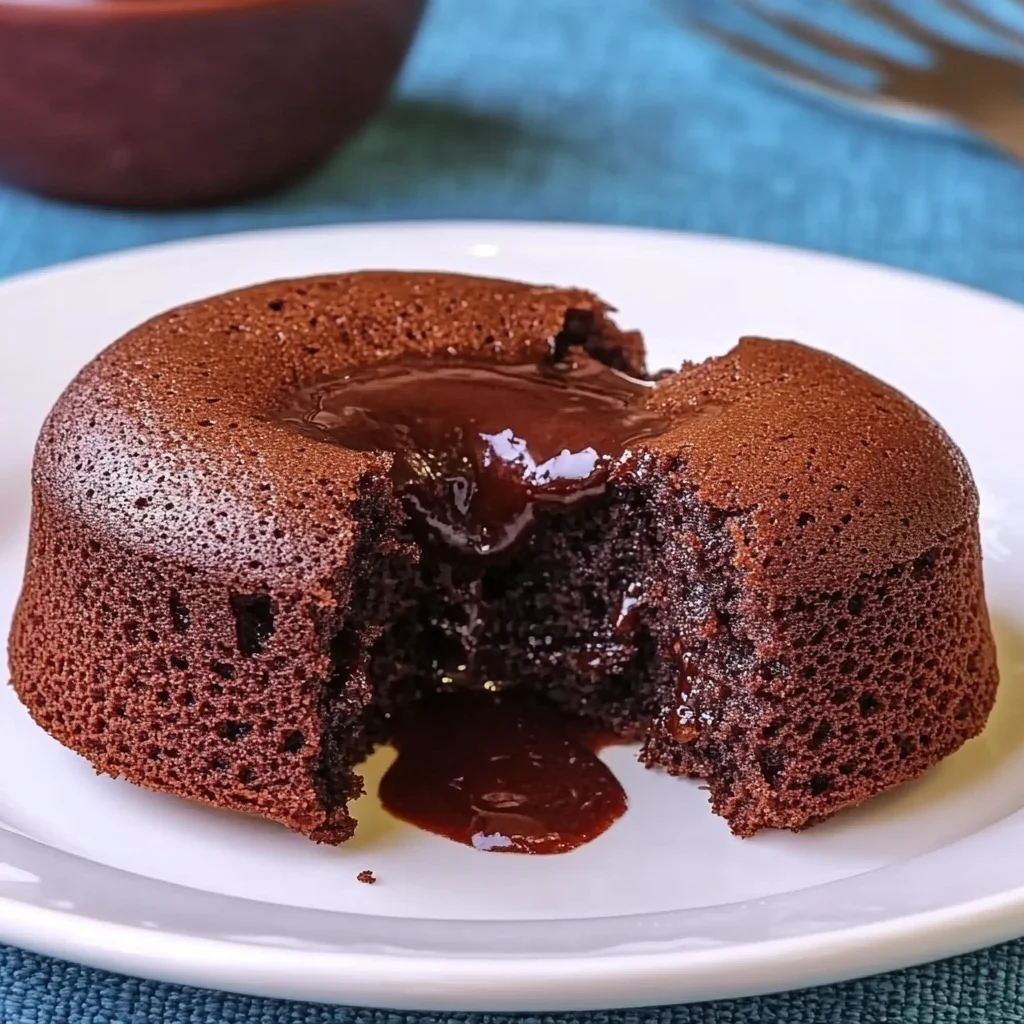
There’s something magical about the moment when you break into a warm, gooey chocolate lava cake and watch the molten center ooze out like liquid velvet. It’s a nostalgic treat that takes me right back to cozy evenings spent with loved ones, sharing stories and savoring every bite of this decadent dessert. The good news? You don’t need to wait for a special occasion or fire up your oven for an hour to enjoy this indulgence. Thanks to the magic of the air fryer, you can whip up these luscious lava cakes in under 15 minutes, with minimal fuss and maximum wow-factor. Whether you’re looking to impress guests or just treat yourself after a long day, this Air Fryer Lava Cake recipe is your new best friend in the kitchen.
Why You’ll Love Air Fryer Lava Cake
- Fast: No need to wait—these lava cakes cook perfectly in about 9 minutes.
- Easy: Simple ingredients and straightforward steps make it beginner-friendly.
- Giftable: Surprise someone special with a homemade chocolate treat that feels fancy.
- Crowd-pleasing: Rich, gooey, and chocolatey—who doesn’t love that?
Ingredients
Let’s talk about the stars of the show. This recipe uses just a handful of ingredients, but each one plays a crucial role in creating that perfect balance of rich chocolate, buttery softness, and just the right hint of sweetness.
- 160 g dark chocolate (70%): The heart of the lava cake. I prefer dark chocolate because it gives a deep, intense flavor without being overly sweet. If you want a slightly sweeter cake, you can try 60% chocolate, but 70% is my go-to for that bittersweet contrast.
- 100 g butter: Adds creaminess and richness, helping the cake stay moist and tender.
- 25 g brown sugar: Provides a subtle caramel note and moisture to the batter.
- 3 eggs: They bind everything together and give the cake its structure while keeping it tender.
- 30 g all-purpose flour: Just enough to hold the cake without making it dense. Sifting it in ensures a light texture.
- A pinch of salt: Enhances the chocolate flavor and balances the sweetness.
- 1 teaspoon vanilla extract: Adds warmth and depth to the flavor profile.
How to Make Air Fryer Lava Cake
Ready to create some magic? Here’s a step-by-step guide to making these luscious lava cakes in your air fryer. Don’t worry if you’ve never made lava cake before—I’ll walk you through every detail.
- Melt the chocolate: Start by melting the dark chocolate. You can use a double boiler if you want full control, but I often just microwave it in short 20-second bursts, stirring in between to keep it smooth and glossy. Be careful not to burn it—chocolate can be a bit temperamental!
- Add the butter: While the chocolate is still warm, stir in the butter until it melts completely and blends with the chocolate. This mixture should be silky and shiny.
- Mix in sugar and eggs: Next, add brown sugar and whisk it thoroughly into the chocolate-butter mixture. Then, beat in the eggs one at a time. This helps the batter become smooth and well combined. Finally, stir in the vanilla extract for that lovely aromatic touch.
- Fold in dry ingredients: Sift the flour over the batter to avoid lumps, then add a pinch of salt. Gently fold everything together with a spatula until just combined. Remember, don’t overmix—you want to keep the batter thick and shiny with some airiness to it.
- Prepare your ramekins: Butter three ramekins generously and dust them with sugar. This not only prevents sticking but also adds a subtle sweetness and slight crunch to the edges. Tap out the excess sugar to avoid clumps.
- Fill ramekins: Divide the batter evenly among the ramekins, filling each about three-quarters full. This gives the cakes room to rise without overflowing.
- Air fry: Place the ramekins in your air fryer basket. Cook at 180°C (356°F) for about 9 minutes. You’re looking for the edges to be set but the center to remain soft and gooey—this is the signature lava cake texture.
- Rest and invert: Let the cakes rest for 1–2 minutes after cooking. Then, carefully run a knife around the edges to loosen them and invert onto dessert plates. This step is so satisfying when the cakes come out perfectly intact.
- Finish and serve: Dust the cakes lightly with icing sugar and serve immediately while still warm. Pair it with a scoop of vanilla ice cream or a few fresh berries for an extra special touch.
Substitutions & Additions
One of the best things about this recipe is how adaptable it is. Feel free to customize your lava cake to suit your taste or what you have on hand:
- Chocolate: Swap dark chocolate for milk chocolate if you prefer a sweeter, creamier flavor. White chocolate lovers can try a white chocolate version, though you might want to reduce the sugar slightly.
- Flour: For a gluten-free option, try almond flour or a gluten-free all-purpose blend. The texture will be a bit different but still delicious.
- Sweetener: You can replace brown sugar with coconut sugar or maple syrup for a slightly different flavor profile. Just reduce the liquid elsewhere if you add syrup.
- Add-ins: Stir in some espresso powder for a mocha twist, or add a pinch of cinnamon or chili powder to the batter for a subtle kick. For a fruity surprise, place a raspberry or a piece of caramelized banana in the center before cooking.
- Toppings: Besides icing sugar, try drizzling warm caramel sauce, dusting with cocoa powder, or topping with whipped cream or homemade ice cream. If you love nuts, sprinkle chopped toasted pecans or hazelnuts on top.
Tips for Success
Making the perfect lava cake can feel a bit intimidating, but with these handy tips, you’ll nail it every time:
- Watch your cooking time: The key to lava cake is that molten center. If you cook it too long, it becomes a regular cake. Start checking around 8 minutes, and remember that air fryer models can vary, so adjust accordingly.
- Don’t overmix the batter: Once you add the flour, gently fold until just combined. Overmixing can make the cake dense and tough.
- Use room temperature eggs: This helps the batter come together smoothly and bakes more evenly.
- Butter and sugar ramekins well: This prevents sticking and makes it easier to invert the cakes neatly.
- Prep ahead: You can mix the batter and keep it in the fridge for up to 4 hours before cooking. Bring it back to room temperature before air frying for best results.
- Experiment with ramekin sizes: Smaller ramekins will need less cooking time, while larger ones will take longer. I recommend sticking with 6-ounce ramekins for this recipe.
How to Store Air Fryer Lava Cake
Lava cakes are best enjoyed fresh and warm for that gooey center, but sometimes you might have leftovers or want to prep in advance. Here’s how to store and reheat these treats:
- Refrigerate: Store any leftover lava cakes in an airtight container in the fridge for up to 2 days. The texture will firm up, and the molten center will solidify.
- Reheat gently: To bring back some of that molten magic, warm the lava cake in the microwave for 15-20 seconds or in a low oven (about 300°F) for 5-7 minutes. Be careful not to overheat, or it will cook through.
- Freeze: You can freeze unbaked batter in ramekins, covered tightly with plastic wrap and foil, for up to one month. Thaw in the fridge overnight and air fry as usual, adding a minute or two to the cook time.
FAQs
Q: Can I make this lava cake without an air fryer?
A: Absolutely! You can bake these in a conventional oven at 425°F for about 12-14 minutes, but watch closely to keep the center molten.
Q: How do I know when the lava cake is done?
A: The edges should look firm and set, but the center will still jiggle slightly when you gently shake the ramekin. That’s the sign of a perfect molten center.
Q: Can I use milk chocolate instead of dark chocolate?
A: Yes! Milk chocolate will make the lava cake sweeter and creamier. Just reduce the brown sugar slightly to avoid over-sweetness.
Q: What if I don’t have ramekins?
A: Small oven-safe bowls or even silicone muffin cups can work. Just adjust the cooking time based on size and material.
Once you’ve mastered this quick and impressive dessert, you might want to explore other delightful recipes with your air fryer. For instance, if you’re a fan of quick and cozy breakfasts, you’ll love my fluffy lemon ricotta pancakes recipe—a bright and zesty way to start your day. Or, if you’re in the mood for a nostalgic sweet treat, you could try baking some Earl Grey cookies that pair perfectly with an afternoon tea. And if you want to keep the chocolate party going, the easy no-bake caramel pretzel bars are an absolute crowd-pleaser, blending sweet, salty, and crunchy in every bite.
These recipes are all part of my collection that celebrates simple, delicious food made with love and minimal fuss. So, whether you’re a seasoned home cook or just starting out, you’ll find plenty of inspiration to make every meal special.
Ready to dazzle your family or guests with this luscious Air Fryer Lava Cake? Grab your ingredients, preheat that air fryer, and let’s get baking! Remember, the best desserts are the ones made with a little patience and a lot of love.
For more sweet inspiration and kitchen magic, don’t forget to follow my Pinterest board. You’ll find tons of recipes that bring joy to your table every day!

Air Fryer Lava Cake
Ingredients
Equipment
Method
- Step 1: Melt the dark chocolate using a double boiler or microwave in short 20-second bursts, stirring until smooth. Be careful not to burn the chocolate.
- Step 2: Stir in the butter while the chocolate is still warm until fully melted and blended, forming a silky, shiny mixture.
- Step 3: Add brown sugar and whisk thoroughly into the chocolate-butter mixture. Beat in eggs one at a time until smooth. Stir in vanilla extract.
- Step 4: Sift flour and salt over the batter. Gently fold with a spatula until just combined, taking care not to overmix.
- Step 5: Butter three ramekins generously and dust with sugar. Tap out excess sugar to avoid clumps.
- Step 6: Divide batter evenly among ramekins, filling about three-quarters full.
- Step 7: Place ramekins in air fryer basket and cook at 180°C (356°F) for about 9 minutes until edges are set but centers remain soft and gooey.
- Step 8: Let cakes rest 1–2 minutes. Run a knife around edges and invert onto plates carefully.
- Step 9: Dust with icing sugar and serve immediately, optionally with vanilla ice cream or fresh berries.