Homemade Raspberry Pectin Gummies
Relive childhood memories with these delightful homemade Raspberry Pectin Gummies. Packed with real raspberry flavor and a perfect bouncy chew, these treats are surprisingly simple to make and perfect for gifting or a sweet pick-me-up.
Equipment
- Silicone Molds or Silicone Cake Pan
- Cookie Sheet
- Blender or Food Processor
- Fine-mesh sieve
- Medium saucepan
- small saucepan
- Candy thermometer
Ingredients
- 19 oz fresh raspberries or 20-22 oz frozen raspberries, thawed
- 1.75 cup granulated sugar plus more for coating
- 3 tbsp corn syrup
- 6 tbsp regular fruit pectin e.g., Sure Jell Original
- 0.5 cup filtered water for citric acid
- 1 tsp baking soda
- 0.25 cup filtered water for pectin
- 1 tsp powdered citric acid
Instructions
- Step 1: First things first, grab your silicone molds or a silicone cake pan. Place them directly onto a cookie sheet. This makes handling a full, wobbly mold so much easier!
- Step 2: Take your fresh (or thawed frozen) raspberries and pop them into a blender or food processor. Blend them until they’re a smooth puree. Strain the puree through a fine-mesh sieve to remove all seeds, leaving you with 1 ½ cups of seedless raspberry goodness.
- Step 3: In a medium saucepan, pour in your raspberry puree. Add the 1 ¾ cup granulated sugar and the corn syrup. Stir everything together over medium heat until the sugar dissolves and the mixture comes to a full, rolling boil. Keep stirring to make sure nothing sticks to the bottom!
- Step 4: In a separate, smaller saucepan, combine the fruit pectin, baking soda, and the ¼ cup of filtered water. Whisk it well to combine, then bring this mixture to a gentle simmer. Once it's simmering, immediately add it to your boiling raspberry mixture. This quick addition helps the pectin activate properly.
- Step 5: Insert a candy thermometer into the raspberry mixture. Continue cooking over medium heat, stirring frequently. You’re looking for the mixture to reach 230-240°F (110-116°C). This temperature range is essential for the gummies to set correctly.
- Step 6: While your mixture is cooking, dissolve the powdered citric acid in the remaining ½ cup filtered water. Once your raspberry mixture hits the target temperature, remove it from the heat and stir in the dissolved citric acid. Work quickly here!
- Step 7: Immediately and carefully pour the hot mixture into your prepared silicone molds. Fill them up, but try not to overfill.
- Step 8: Allow your gummies to cool undisturbed for at least 2 hours. For the absolute best texture and firmness, let them sit overnight.
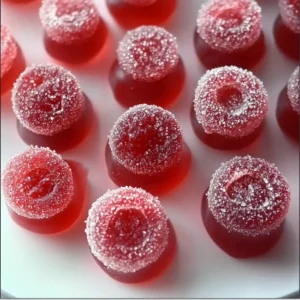
- Step 9: Once fully cooled and set, gently unmold your beautiful raspberry gummies. For that classic candy store look and feel, roll each gummy in additional granulated sugar. This adds a lovely sparkle and prevents sticking.
- Step 10: Your homemade Raspberry Pectin Gummies are ready to be savored!
Notes
Substitutions & Additions: While raspberry is fantastic, feel free to experiment with other fruit purees like strawberry, blueberry, or peach. Adjust sugar content if your chosen fruit is significantly sweeter or more tart. A tiny drop of food-grade raspberry extract can intensify the flavor. A pinch of ground ginger or a tiny splash of rosewater could add a sophisticated twist. If you prefer a less sweet gummy, you can try reducing the initial sugar by about ¼ cup, but be aware it might slightly alter the texture and shelf life. For truly low-sugar options, you'd need a different pectin specifically designed for low-sugar recipes. Use fun silicone molds like little hearts, stars, or even animal shapes. For an adventurous palate, a tiny pinch of cayenne pepper mixed in with the citric acid can give a subtle, warming kick!
Tips for Success: Investing in a good candy thermometer is crucial for this recipe. Hitting the correct temperature (230-240°F) ensures your gummies set perfectly – not too soft, not too hard. Once the citric acid is added, the mixture will start to set very rapidly; have your molds ready and pour immediately! Resist the urge to pop them out early; the longer they cool, the firmer and chewier they'll become (overnight is truly best). Make sure your equipment is clean, as any stray bits of sugar or impurities can cause crystallization. Use regular fruit pectin; low-sugar or instant pectin won't work the same way. You can puree and strain the raspberries a day in advance and keep the puree in the fridge.
How to Store Raspberry Pectin Gummies: If you plan to eat them within a few days, you can store them in an airtight container at room temperature. They'll retain a softer chew this way and last about 5-7 days. For a firmer texture and extended shelf life (up to 2-3 weeks), store your gummies in an airtight container in the refrigerator. They might get a little sticky, so an extra dusting of sugar before serving can help. You can also freeze gummies! Place them in a single layer on a parchment-lined baking sheet and freeze until firm, then transfer them to a freezer-safe bag or container. They can last for several months. Thaw at room temperature for a few minutes before enjoying. If storing for more than a day or two, especially in humid conditions, toss them with a little extra granulated sugar or a tiny bit of cornstarch to prevent them from sticking together.