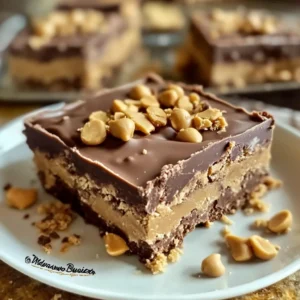
Easy No-Bake Chocolate Peanut Butter Bars
Get ready to meet your new obsession! These Easy No-Bake Chocolate Peanut Butter Bars are the ultimate comfort food, packed with that classic chocolate and peanut butter combo, and they require zero baking. They're rich, decadent, and disappear faster than you can say 'more please!'. Perfect for a last-minute potluck, a sweet craving attack, or just because you deserve something amazing today.
Equipment
- 9x13-inch baking dish
- Parchment paper
- Large mixing bowl
- Medium Microwave-Safe Bowl
- Spatula
- Sharp knife
Ingredients
- 2 cups graham cracker crumbs
- 2 cups powdered sugar confectioners' sugar
- 1 cup unsalted butter melted
- 1 cup creamy peanut butter for base
- 1.5 cups semisweet chocolate chips for topping
- 0.5 cup creamy peanut butter for topping
Instructions
- Step 1: Prep your pan: Line a 9x13-inch baking dish with parchment paper, leaving some overhang on the sides.
- Step 2: Mix the base: In a large mixing bowl, combine graham cracker crumbs, powdered sugar, melted butter, and the first cup of creamy peanut butter.
- Step 3: Combine: Stir until everything is just combined and the mixture is uniform and moist.
- Step 4: Press it down: Pour the mixture into the prepared dish and use a spatula, the bottom of a glass, or your hands to press it down firmly and evenly into a compact, flat layer.
- Step 5: Make the topping: In a medium-sized microwave-safe bowl, add your semisweet chocolate chips and the remaining ½ cup of creamy peanut butter.
- Step 6: Melt the chocolate: Microwave the bowl in 30-second bursts, stirring well after each interval, until the mixture is completely melted, smooth, and glossy.
- Step 7: Pour it on: Carefully pour the warm, melted chocolate-peanut butter mixture over the pressed graham cracker base in the dish.
- Step 8: Spread evenly: Use a spatula or the back of a spoon to gently spread the melted topping all the way to the edges, covering the base completely.
- Step 9: Chill out: Pop the dish into the refrigerator for at least 2 hours to allow the bars to firm up.
- Step 10: Let it soften slightly: Before cutting, take the dish out of the fridge and let it sit at room temperature for about 5 minutes.
- Step 11: Slice and serve: Use the parchment paper overhang to lift the slab out. Use a sharp knife (run under hot water and wipe dry for clean cuts) to slice into squares or bars. Enjoy!
Notes
Store the cut bars in an airtight container in the refrigerator for up to a week. Layer them between sheets of parchment or wax paper. For longer storage, freeze in a freezer-safe container for up to 2-3 months; thaw in the refrigerator.
Running a sharp knife under hot water and wiping it dry between cuts helps achieve clean slices.
Ensure the chocolate isn't overheated during melting; use short intervals and stir well.
Press the base down firmly into the pan for a compact layer that holds together when cut.