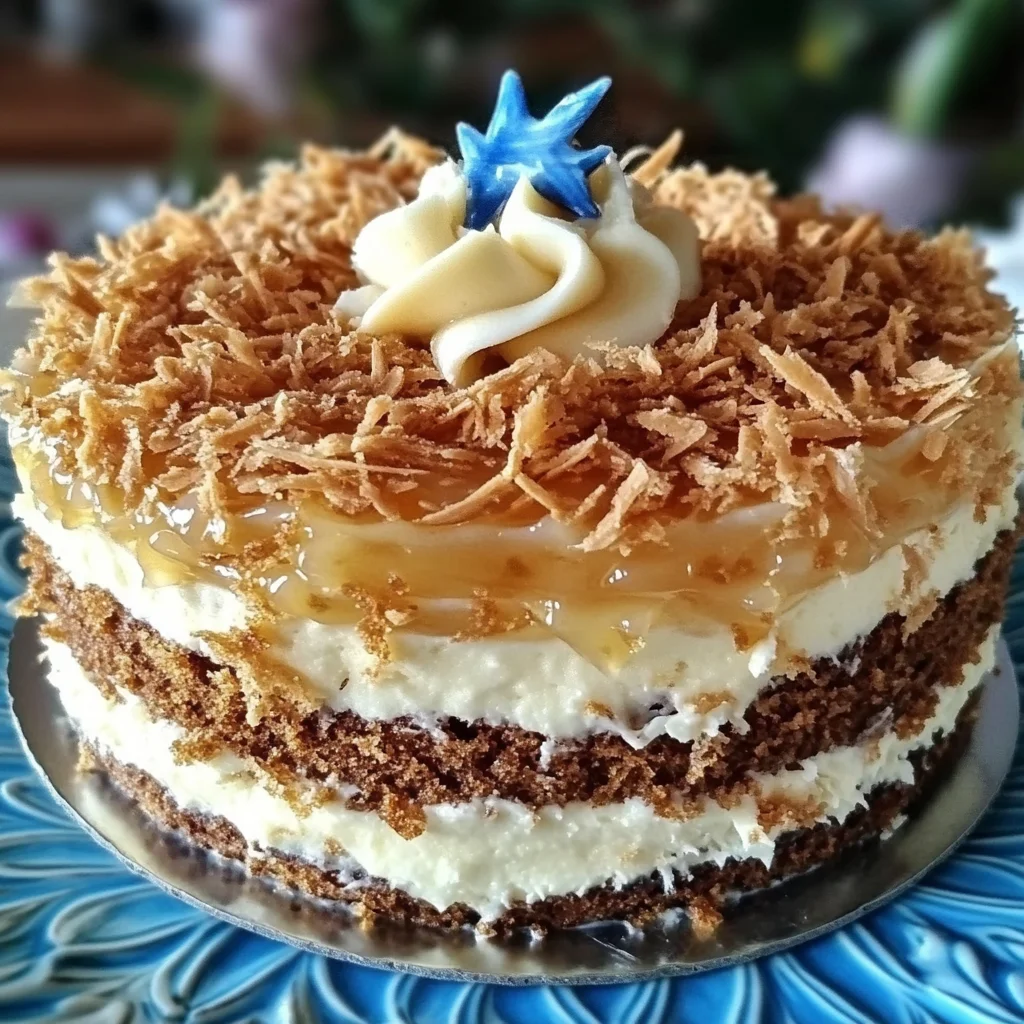
Oh boy, do I have a treat for you today! There are some recipes that just stick with you, aren’t there? Maybe they remind you of a potluck at church, a family gathering, or just a simple, cozy afternoon at home. This Texas Tornado Cake is one of those recipes for me. It’s the kind of cake that looks unassuming but packs a punch of flavor and incredible moistness. Forget complicated layers or fancy techniques – this cake is all about simple ingredients coming together to create something truly special. And honestly? It practically flies off the plate. Get ready for a cake that’s so easy and so good, it just might blow you away!
Why You’ll Love This Recipe
Let’s be real, we’re all busy! But that doesn’t mean we can’t whip up something delicious and homemade. This Texas Tornado Cake hits all the right notes:
- Fast: From start to finish, you’re looking at under an hour. Perfect for a last-minute dessert!
- Easy: If you can whisk and stir, you can make this cake. No fancy mixers required (though you can use one if you like!).
- Giftable: This cake travels well and is always a welcome sight. Perfect for sharing with neighbors or taking to a gathering.
- Crowd-pleasing: The combination of moist pineapple cake and that classic coconut-pecan topping is a universal winner. Everyone asks for the recipe!
Ingredients
Gathering your ingredients is the first step to deliciousness! Most of these are likely already in your pantry.
For the Cake:
- 2 large eggs: Our binder, helping everything come together.
- 1 (21-ounce) can crushed pineapple in juice, undrained: This is the secret to the incredible moisture and tender crumb. Don’t drain it! The juice is essential.
- 1 1/2 cups granulated sugar: Just the right amount of sweetness to balance the pineapple.
- 1 teaspoon vanilla extract: Adds that warm, classic cake flavor. Use pure vanilla for the best results if you can!
- 2 cups all-purpose flour: Our cake’s structure. Simple and reliable.
- 1 1/2 teaspoons baking soda: This is our leavening agent, giving the cake its lovely rise. It reacts beautifully with the acidic pineapple.
- 1/8 teaspoon salt: Just a pinch to enhance all the other flavors. Don’t skip it!
For the Frosting:
This frosting is less like a thick buttercream and more like a pourable, warm glaze that melts into the cake. It’s heavenly!
- 1/2 cup unsalted butter: The rich base for our frosting.
- 1 cup granulated sugar: Creates that sweet, slightly chewy topping.
- 3/4 cup evaporated milk: This is key for that cooked, caramel-like flavor and perfect consistency that seeps into the cake.
- 1 1/2 cups shredded coconut: Brings that classic tropical sweetness and texture. Sweetened or unsweetened works, depending on your preference, but sweetened is traditional here.
- 1 cup toasted pecans: Adds a delightful crunch and nutty flavor. Toasting them really brings out their aroma!
- 1 teaspoon pure vanilla extract: Finishing the frosting with another touch of warmth.
How to Make It
Alright, apron on? Let’s bake this beauty!
- Prep Your Pan: Preheat your oven to a cozy 350°F (180°C). Grab your trusty 9×13 inch baking pan. Grease and flour it really well, or just give it a good spray with baking spray. You want to make sure this moist cake comes out easily!
- Mix the Wet Ingredients: In a big bowl, whisk together the eggs, that magical undrained crushed pineapple, the granulated sugar, and the vanilla extract. Give it a good whisk until everything is happy and combined. Don’t worry about it being perfectly smooth yet!
- Combine the Dry Ingredients: In a separate bowl, measure out your flour, baking soda, and salt. Give them a quick whisk to make sure they’re evenly distributed.
- Combine Wet and Dry: Now, gently add your dry ingredients to your wet ingredients. Mix until just combined. Seriously, stop as soon as you don’t see dry streaks. Overmixing can lead to a tough cake, and we want this one super tender!
- Pour and Spread: Pour the batter into your prepared baking pan. It will seem a bit wet, and that’s totally okay! Spread it out evenly with a spatula.
- Bake Time! Pop the pan into your preheated oven. Bake for about 20-25 minutes. You’ll know it’s done when a wooden toothpick or a skewer inserted into the center comes out clean. Don’t overbake!
- Start the Frosting: While the cake is baking, get started on that dreamy frosting. In a medium saucepan (one that can handle boiling), combine the butter, granulated sugar, and evaporated milk.
- Boil Baby, Boil: Bring the mixture to a boil over medium heat, and make sure you’re stirring constantly. Once it hits a rolling boil, set a timer and let it boil for 5 minutes, stirring without stopping. This cooked sugar creates that lovely texture.
- Finish the Frosting: After 5 minutes, take the saucepan off the heat immediately. Stir in the shredded coconut, toasted pecans, and the vanilla extract. It will be thick and gooey.
- Poke Away: As soon as the cake comes out of the oven, let it hang out in the pan for just a few minutes – maybe 5-10 minutes. Then, grab a fork or a toothpick and go to town! Poke holes all over the top of the warm cake. The more holes, the more that glorious frosting can soak in.
- Pour on the Frosting: While the cake is still warm (and the frosting is also warm), pour the frosting evenly over the top. Use a spatula to gently spread it if needed, making sure it gets into all those lovely holes.
- Cool Down: This is the hardest part – letting it cool! You want that frosting to set up a bit and really meld with the cake. Let it cool completely in the pan before slicing and serving.

Substitutions & Additions
While the classic recipe is perfect as is, here are a few ways you can tweak it:
- Nuts: Not a pecan fan? Walnuts are a fantastic substitution for the toasted pecans in the frosting.
- Coconut-Free? If you absolutely cannot do coconut, you could potentially omit it, but the frosting texture will be different. You might need to slightly reduce the evaporated milk or add more nuts.
- Add Spice: A pinch of cinnamon or nutmeg could be added to the cake batter for extra warmth.
- Citrus Zest: A little lemon or orange zest added to the cake batter or the frosting could brighten the flavors.
- Different Toppings: While not traditional, you could skip the cooked frosting and opt for a simple cream cheese frosting once the cake is completely cool.
Tips for Success
A few little pointers to ensure your Texas Tornado Cake turns out perfectly every time:
- Measure Flour Correctly: Spoon your flour into the measuring cup and level it off with a straight edge. Scooping directly from the bag can pack it down and result in too much flour.
- Don’t Overmix Cake Batter: As mentioned in the steps, mixing until just combined is key for a tender cake.
- Boil Frosting for Exactly 5 Minutes: This timing is important for the consistency and how the frosting sets up. Use a timer!
- Frost Warm Cake with Warm Frosting: This is crucial for the frosting to seep into the holes and create that incredibly moist result. The cake should be warm, but not piping hot right out of the oven.
- Plenty of Holes: Don’t be shy when poking holes! The more holes, the more delicious frosting soaks into the cake.
- Prep Ahead: You can bake the cake a day ahead of time. Store it covered at room temperature. Make the frosting just before you’re ready to frost the cake (reheat the frosting gently if it cools too much before the cake is ready).
How to Store It
If there are any leftovers (a big IF!), here’s how to keep this cake delicious:
- Room Temperature: This cake is fine stored at room temperature for 2-3 days, covered tightly with plastic wrap or in an airtight container. The moistness helps it last!
- Refrigerator: For longer storage, or if your kitchen is warm, store it in the refrigerator for up to 5-7 days. Again, cover tightly to prevent it from drying out.
- Freezing: Yes, you can freeze this cake! Cool it completely, then wrap slices or the entire cake tightly in plastic wrap, followed by aluminum foil or placed in a freezer-safe container. It should last for 2-3 months. Thaw overnight in the refrigerator.
FAQs
Got questions? I’ve got (brief) answers!
Q: Why is it called Texas Tornado Cake?
A: While the exact origin isn’t crystal clear, it’s likely named for how quickly it comes together and how fast it disappears – like a delicious whirlwind!
Q: Can I use fresh pineapple instead of canned?
A: I highly recommend sticking to canned crushed pineapple in juice. The canning process and the juice provide the specific moisture level and tenderness needed for this recipe’s success.
Q: My frosting seems too thick/thin. What happened?
A: The most common culprit is the boiling time. Make sure you boil the frosting for exactly 5 minutes, stirring constantly. Humidity can also play a small role, but boiling time is key.
Q: Is this cake similar to Pig Pickin’ Cake?
A: Yes, they share similarities! Both are incredibly moist cakes often made with fruit (Pig Pickin’ usually uses mandarin oranges) and topped with a delicious, often cooked, frosting. This Texas Tornado Cake is a cousin in the family of super-moist, easy-to-make fruit cakes!
So there you have it! An easy, incredibly moist, and absolutely delicious Texas Tornado Cake ready for you to bake. I just know you’re going to love it as much as I do. Happy baking, friends!

Texas Tornado Cake
Ingredients
Equipment
Method
- Step 1: Prep Your Pan: Preheat your oven to a cozy 350°F (180°C). Grab your trusty 9x13 inch baking pan. Grease and flour it really well, or just give it a good spray with baking spray.
- Step 2: Mix the Wet Ingredients: In a big bowl, whisk together the eggs, that magical undrained crushed pineapple, the granulated sugar, and the vanilla extract. Give it a good whisk until everything is happy and combined.
- Step 3: Combine the Dry Ingredients: In a separate bowl, measure out your flour, baking soda, and salt. Give them a quick whisk to make sure they're evenly distributed.
- Step 4: Combine Wet and Dry: Gently add your dry ingredients to your wet ingredients. Mix until just combined. Stop as soon as you don't see dry streaks.
- Step 5: Pour and Spread: Pour the batter into your prepared baking pan. Spread it out evenly with a spatula.
- Step 6: Bake Time! Pop the pan into your preheated oven. Bake for about 20-25 minutes, or until a wooden toothpick or a skewer inserted into the center comes out clean. Don't overbake!
- Step 7: Start the Frosting: While the cake is baking, get started on that dreamy frosting. In a medium saucepan, combine the butter, granulated sugar, and evaporated milk.
- Step 8: Boil Baby, Boil: Bring the mixture to a boil over medium heat, stirring constantly. Once it hits a rolling boil, set a timer and let it boil for 5 minutes, stirring without stopping.
- Step 9: Finish the Frosting: After 5 minutes, take the saucepan off the heat immediately. Stir in the shredded coconut, toasted pecans, and the vanilla extract. It will be thick and gooey.
- Step 10: Poke Away: As soon as the cake comes out of the oven, let it hang out in the pan for just 5-10 minutes. Then, grab a fork or a toothpick and poke holes all over the top of the warm cake.
- Step 11: Pour on the Frosting: While the cake is still warm (and the frosting is also warm), pour the frosting evenly over the top. Use a spatula to gently spread it if needed, making sure it gets into all those lovely holes.
- Step 12: Cool Down: Let the cake cool completely in the pan before slicing and serving. This allows the frosting to set up and meld with the cake.