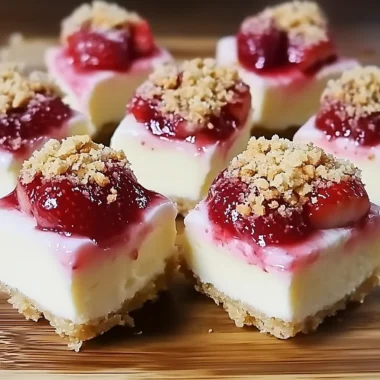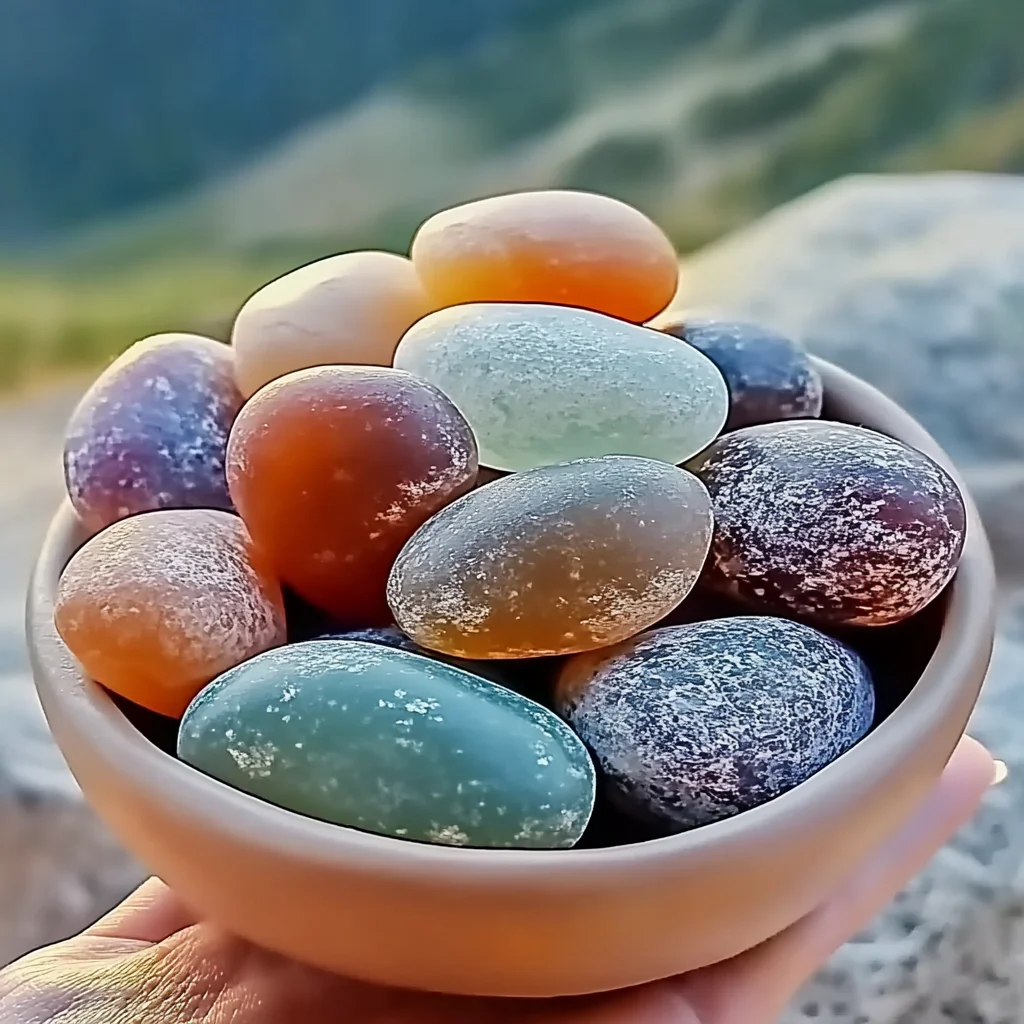
There’s something magical about the little touches that make a house feel like home. Maybe it’s the warm scent of cinnamon during the holidays or the fresh aroma of lavender on a quiet evening. I’ve always loved adding cozy scents to my space, but sometimes candles or diffusers feel a bit much or just don’t fit the vibe I want. That’s where these scented DIY aroma stones come in — simple, charming, and completely customizable little gems that fill your home with gentle fragrance while doubling as pretty decorations. Plus, they’re so easy to make, you can whip up a batch in no time, and they make thoughtful gifts too!
If you’ve ever wanted a fragrance option that’s natural, beautiful, and low-maintenance, these aroma stones are the perfect project. Whether you’re new to crafting or an experienced DIYer, this recipe will guide you through making your own scented stones that smell amazing and look delightful around your home.
Why You’ll Love Scented DIY Aroma Stones
- Fast: From mixing to molding, you’ll have your stones ready in less than 15 minutes.
- Easy: No fancy tools or hard-to-find ingredients — just simple pantry staples and your favorite essential oils.
- Giftable: These stones make heartfelt, handmade gifts for friends and family, especially during the holiday season.
- Crowd-pleasing: Everyone loves a fresh, inviting scent, and these stones add a personal touch to any space.
Ingredients
Before you start, gather these ingredients. Each one plays a special role in creating perfect aroma stones that are both fragrant and sturdy:
- 2 cups white all-purpose flour: This is the base of the dough, giving it structure and texture.
- 1 cup salt: Salt helps to preserve the stones and adds firmness.
- 1 cup cornstarch: Cornstarch keeps the dough smooth and easy to mold.
- 1 cup cooled boiled water: This activates the dry ingredients to form the dough. Cooling the water is key to avoid cooking the starches prematurely.
- 10 drops essential oils: Your choice here will define the scent of your stones — lavender, eucalyptus, peppermint, or even something seasonal like cinnamon or clove.
- 2 tablespoons mica powder or food coloring: This adds a splash of color, making your stones not only smell good but look beautiful too. Mica powder provides a subtle shimmer, while food coloring offers vibrant hues.
I love experimenting with different essential oil blends to create moods — from calming lavender blends that help me unwind after a long day to zesty citrus mixes that brighten my mornings. If you want some inspiration, you might enjoy crafting some easy no-bake treats afterward, like the delightful [no-bake caramel pretzel bars](https://easilycooked.com/easy-no-bake-caramel-pretzel-bars/) to keep your kitchen vibes sweet and cozy!
How to Make Scented DIY Aroma Stones
Ready to get your hands a little floury? Here’s a step-by-step guide to making your own scented aroma stones. Don’t worry — it’s straightforward, and I’ll walk you through every step.
- Mix the Dry Ingredients: Start by combining the 2 cups of flour, 1 cup of salt, and 1 cup of cornstarch in a large mixing bowl. Use a whisk or your hands to blend them evenly. This dry mix is the foundation of your dough, so make sure everything is well incorporated.
- Add the Water Gradually: Slowly pour in the 1 cup of cooled boiled water while stirring. It’s important that the water is cooled; hot water may cook the mixture and create lumps. Keep mixing until a soft, pliable dough forms. You might need to use your hands here — this is where the fun begins!
- Add Color and Scent: Now for the exciting part! Add 10 drops of your chosen essential oils. Don’t hesitate to mix different oils to create a personal blend. Next, stir in 2 tablespoons of mica powder or food coloring. If you use food coloring, knead it into the dough gently until evenly colored. If you want a more natural look, using mica powder adds a lovely shimmer without overpowering the scent.
- Mold Your Stones: Pinch off small pieces of dough and roll or shape them into little stones. Don’t worry about perfection — the charm is in their handmade look! You can make oval shapes, flat disks, or even press in small designs or textures with stamps or natural items like leaves.
- Dry the Stones: Place your shaped stones on a baking tray or flat surface lined with parchment paper. Let them air dry for at least 12 hours. This slow drying process ensures the stones harden fully without cracking. Patience is key here, but when they’re dry, you’ll have durable, fragrant stones that last for weeks or months.
If you’re looking for another easy DIY project to pair with your aroma stones, you might enjoy the fun and colorful [DIY color-changing treasure stones](https://easilycooked.com/diy-color-changing-treasure-stones/). They’re a great way to add some magic into your crafting time!
Substitutions & Additions
One of my favorite things about this DIY is how flexible it is. Don’t have mica powder? No problem! Here are some swaps and creative ideas to make your aroma stones uniquely yours:
- Flour alternatives: While all-purpose flour works best, you can experiment with gluten-free flour blends if needed, but results may vary slightly in texture.
- Color options: Instead of mica powder or food coloring, try natural powders like turmeric for a golden hue or beetroot powder for a subtle pink.
- Scent blends: Mix essential oils like lavender and vanilla for a cozy, sweet aroma, or eucalyptus and peppermint for a refreshing, invigorating scent.
- Adding texture: Press dried flowers, herbs, or small beads into the stones before drying for a decorative touch.
- Shape creativity: Use cookie cutters or small molds if you want uniform shapes or themed designs for holidays and seasons.
For a little kitchen inspiration after your crafting session, why not bake something comforting and flavorful, like the [ultimate classic carrot cake perfect for any occasion](https://easilycooked.com/the-ultimate-classic-carrot-cake-perfect-for-any-occasion/)? It’s a wonderful way to keep that cozy vibe going.
Tips for Success
Making aroma stones is easy, but a few tips can help you avoid common hiccups and get the best results every time:
- Use cooled boiled water: This prevents lumps and ensures the dough mixes smoothly without partial cooking.
- Don’t rush drying: Let the stones air dry naturally; using an oven can cause cracking or uneven hardening.
- Knead thoroughly: When adding color and scent, knead the dough well to distribute everything evenly for a consistent look and smell.
- Store in a dry place: Moist environments can soften the stones, so keep them somewhere cool and dry.
- Experiment with oils carefully: Some essential oils are stronger than others; start with fewer drops and adjust based on your scent preference.
- Prep ahead: You can mix the dry ingredients and store them in an airtight container, then just add water when ready to craft.
If you’re looking for more easy, no-fuss recipes or projects to enjoy at home, check out the wide variety of ideas on Easily Cooked — from quick comfort foods to creative crafts.
How to Store Scented DIY Aroma Stones
Once your stones are fully dried and hardened, proper storage will keep them fresh and fragrant for as long as possible. Here’s how to care for your little scent gems:
- Keep them dry: Store your stones in a cool, dry place away from humidity to prevent softening or mold.
- Use airtight containers: If you want to preserve the scent when not in use, seal them in an airtight jar or plastic container.
- Refresh scent: Over time, the aroma will fade. Simply add a few more drops of essential oil to the stones and let them absorb for a few hours.
- Display options: Place stones in decorative bowls, sachets, or small mesh bags to spread scent subtly throughout rooms, closets, or drawers.
With proper storage, your aroma stones can last several months, making them a lasting addition to your home or a gift that keeps on giving.
FAQs
Q: Can I bake the aroma stones to dry them faster?
A: It’s best to air dry them naturally for at least 12 hours. Baking can cause cracking or uneven drying, so patience is key!
Q: Are these stones safe to use around pets?
A: The ingredients are non-toxic, but be cautious with essential oils as some can be harmful to pets. Avoid placing stones where pets can chew them.
Q: How strong is the scent from these aroma stones?
A: The scent is subtle and gentle, perfect for creating a cozy atmosphere without overpowering. You can adjust the amount of essential oil for a stronger fragrance.
Q: Can I use these stones outdoors?
A: They can be used in covered outdoor areas, but exposure to rain or humidity may affect their durability and scent longevity.
If you love simple home projects like these, you might also enjoy the crafty fun of making your own DIY aroma stones or exploring other cozy recipes like the [fluffy lemon ricotta pancakes, a light zesty breakfast delight](https://easilycooked.com/fluffy-lemon-ricotta-pancakes-a-light-zesty-breakfast-delight/).
Making your own scented aroma stones is a wonderful way to bring warmth, fragrance, and a personal touch into your living space. Whether you keep them for yourself or gift them, these little stones are sure to brighten any room and mood. So gather your ingredients, put on some music, and enjoy the cozy crafting experience!
Don’t forget to follow us on Pinterest for more inspiring recipes and DIY ideas to keep your home feeling delicious and delightful all year round.

Scented DIY Aroma Stones
Ingredients
Equipment
Method
- Step 1: In a large mixing bowl, combine 2 cups flour, 1 cup salt, and 1 cup cornstarch. Mix thoroughly with a whisk or your hands until well blended.
- Step 2: Gradually add 1 cup cooled boiled water to the dry mixture while stirring. Mix until a soft, pliable dough forms. Knead by hand if needed.
- Step 3: Add 10 drops of your chosen essential oils and 2 tablespoons of mica powder or food coloring. Knead the dough well to evenly distribute color and scent.
- Step 4: Pinch off small pieces of dough and shape into stones—oval, flat disks, or press in small designs or textures if desired.
- Step 5: Place shaped stones on a baking tray or flat surface lined with parchment paper. Let air dry for at least 12 hours until hardened.