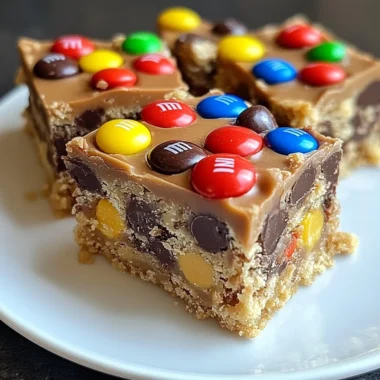
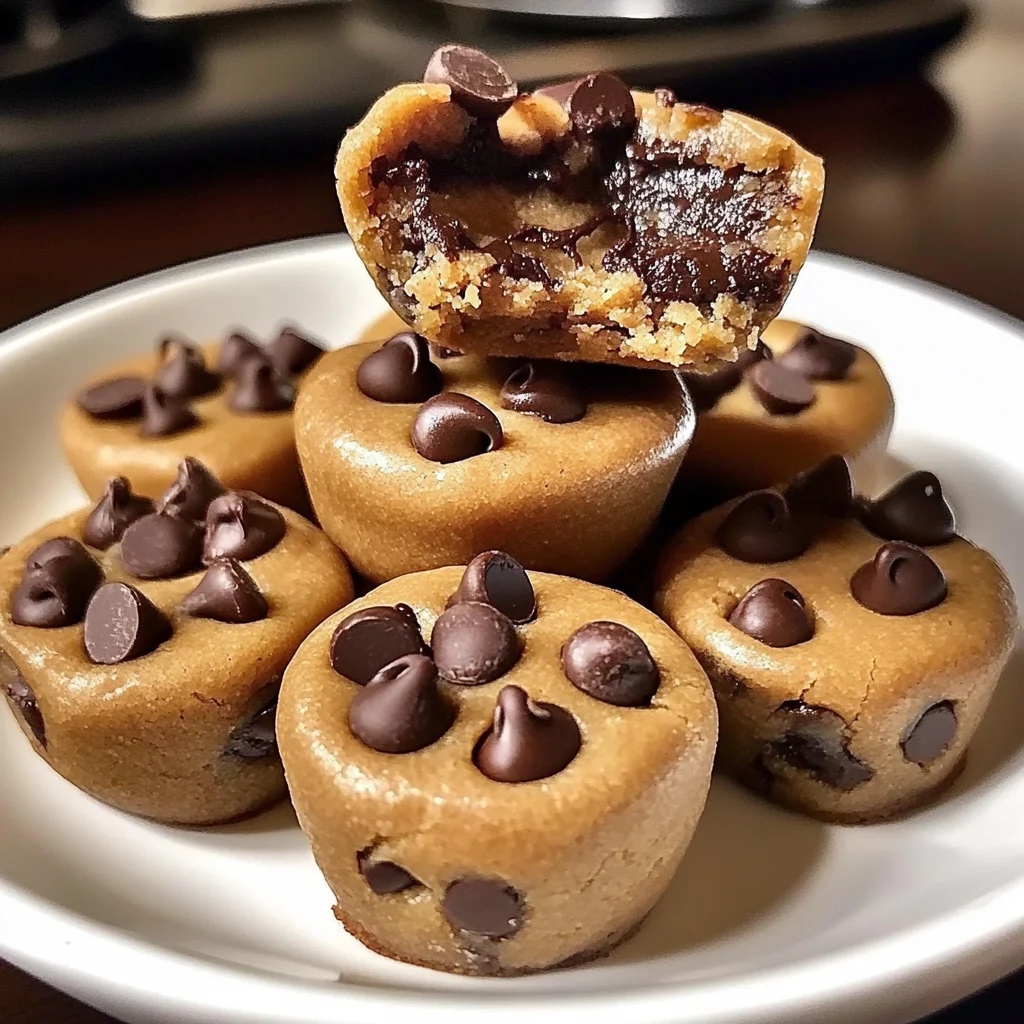
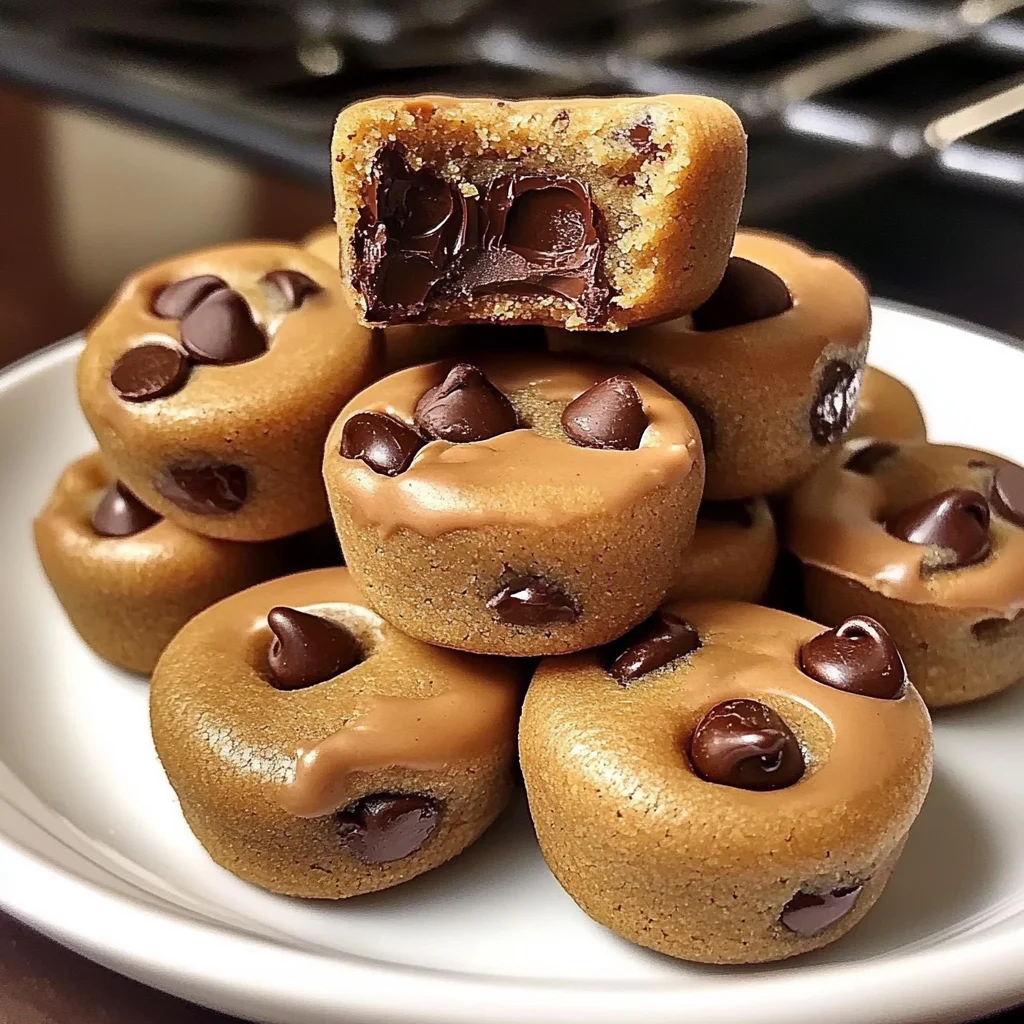
Oh, friend, do I have a treat for you today! Remember those classic peanut butter cookies from childhood, maybe with a chocolate kiss pressed on top? Well, imagine that cozy feeling, but kicked up about fifty notches with the irresistible combo of peanut butter, chocolate chips, AND those beloved Reese’s Pieces candies. These little cookie bites are pure nostalgia meets modern-day crave-ability. They’re so simple, so quick, and guaranteed to disappear faster than you can say “peanut butter cup!” Get ready to make some edible sunshine.
Why You’ll Love This Recipe
- Fast: From start to finish, you can be enjoying warm cookies in under 30 minutes. Perfect for sudden cravings!
- Easy: No fancy techniques here, just simple steps you can totally nail.
- Giftable: These make the CUTEST little edible gifts. Package them up for friends, neighbors, or teachers!
- Crowd-pleasing: Seriously, who doesn’t love the peanut butter and chocolate combo? These are always a hit.
Ingredients
Gather ’round, let’s talk ingredients. Nothing too wild here, just your pantry staples and a few special additions to make the magic happen!
- ½ cup (1 stick) unsalted butter, softened: Make sure it’s truly softened – think “room temperature” soft, not melted. This helps everything cream together beautifully.
- ½ cup creamy peanut butter: Your favorite creamy brand works great here. I usually grab whatever I have on hand!
- ½ cup granulated sugar: For that classic sweetness.
- ½ cup packed brown sugar: Adds moisture and that lovely caramel-y depth. Make sure you pack it into the measuring cup!
- 1 large egg + 1 egg yolk: The whole egg provides structure, and the extra yolk adds richness and helps keep them tender.
- 1 teaspoon vanilla extract: A must for boosting all those yummy flavors.
- 1¼ cups all-purpose flour: Our main dry ingredient.
- ½ teaspoon baking soda: Helps them puff up just right.
- ¼ teaspoon salt: Just a pinch to balance the sweetness and enhance the flavors.
- ¾ cup mini chocolate chips: I love mini chips in smaller cookies like these because you get chocolate in every bite!
- ¾ cup Reese’s Pieces candies (plus extra for topping): The star of the show! These little bursts of peanut butter candy crunch are what make these truly special.
How to Make It
Alright, let’s get baking! It’s super straightforward, I promise.
- Prep your space: First things first, get your oven preheated to 350°F (175°C). Then, line your baking sheets with parchment paper. This makes cleanup a breeze and keeps your cookies from sticking.
- Cream the wet ingredients: In a nice big mixing bowl, throw in your softened butter, creamy peanut butter, granulated sugar, and brown sugar. Cream them together with an electric mixer (or a strong arm and whisk!) until the mixture is light and fluffy. This usually takes about 3 minutes. Next, beat in your egg, the extra egg yolk, and the vanilla extract until everything is nicely combined.
- Combine the dry ingredients: In a separate bowl, give your all-purpose flour, baking soda, and salt a quick whisk. This helps distribute the leavening and salt evenly.
- Mix wet and dry: Now, gradually add the dry ingredients into the wet ingredients. Mix on low speed until everything is just combined. Be careful not to overmix – that can make cookies tough! Stop as soon as you don’t see streaks of dry flour anymore.
- Fold in the goodies: Time for the fun part! Gently fold in the mini chocolate chips and the ¾ cup of Reese’s Pieces using a spatula or wooden spoon. Make sure they’re evenly distributed throughout the dough.
- Shape and top: Roll the dough into little 1-inch balls. A small cookie scoop works wonders here for consistent sizes! Place the balls onto your prepared baking sheets, leaving about 2 inches of space around each one so they have room to spread a little. Before baking, gently press 2-3 extra Reese’s Pieces candies right onto the top of each cookie ball. This makes them look extra pretty and signals the deliciousness inside!
- Bake ’em up: Pop those sheets into your preheated oven. Bake for 9-11 minutes. You’re looking for edges that look set and lightly golden, but the centers should still look a tiny bit soft. They’ll continue to set up as they cool.
- Cooling time: Let the cookies cool on the baking sheet for about 5 minutes before carefully transferring them to a wire rack to cool completely. Waiting that little bit helps them firm up so they don’t fall apart when you move them.
Substitutions & Additions
Feel free to get creative! Here are a few ideas:
- Different Chips: Swap mini chocolate chips for regular semi-sweet, milk chocolate, or even peanut butter chips!
- Nut Butter Swap: While Reese’s Pieces lean towards classic peanut butter, you could experiment with almond butter or cashew butter, though the flavor profile will change. Just make sure it’s a smooth, drippy kind.
- Add Nuts: A handful of chopped peanuts or walnuts would add extra crunch.
- Make Them Larger: You could make larger cookies, just be sure to increase the baking time slightly (keep an eye on them!).
- Mix-in Mania: Try adding a few pretzels for a sweet and salty kick, or some toffee bits!
Tips for Success
Baking should be fun, not stressful! Here are some little tips I’ve picked up:
- Softened Butter is Key: If your butter is too cold, it won’t cream properly with the sugars, and your cookies might not spread right. If it’s melted, the dough will be greasy. Room temp is perfect!
- Don’t Overmix: Once you add the flour, mix just until it’s combined. Overmixing develops the gluten too much, leading to tougher cookies.
- Measure Flour Correctly: Scoop the flour lightly into your measuring cup and level it off with a straight edge (like a knife). Don’t pack it in! Too much flour will make your cookies dry.
- Don’t Overbake: Pull them out when the centers still look slightly soft. They finish baking on the hot pan. This is the secret to chewy cookies!
- Chilling the Dough (Optional but good!): If your dough seems very soft or you live in a warm kitchen, chilling the dough for 30 minutes to an hour before rolling can make it easier to handle and can result in slightly thicker cookies.
How to Store It
If (and that’s a BIG if!) you have any leftovers, here’s how to keep them fresh:
- Room Temperature: Store cooled cookies in an airtight container at room temperature for up to 3-4 days.
- Freezing Dough: You can roll the dough balls and freeze them on a baking sheet until solid, then transfer them to a freezer-safe bag or container. Bake from frozen, adding a minute or two to the baking time.
- Freezing Baked Cookies: Once completely cooled, you can freeze baked cookies in a single layer on a baking sheet, then transfer them to a freezer-safe container or bag for up to 2-3 months. Thaw at room temperature.
FAQs
Got questions? I’ve got answers!
Can I use natural peanut butter?
I recommend sticking with conventional creamy peanut butter (like Jif, Skippy, etc.) for this recipe. Natural peanut butters can separate and have a different consistency, which might affect the texture of the cookies.
Why did my cookies spread too much?
This can happen for a few reasons: your butter might have been too soft (or melted), you might have measured too little flour, or your oven temperature might be off. Using parchment paper and ensuring your oven is preheated correctly helps!
Can I skip the Reese’s Pieces?
Well, you could, but then they wouldn’t really be Reese’s Peanut Butter Chocolate Chip Cookie Bites! You could replace them with more chocolate chips or another mix-in, but you’d lose that iconic flavor and crunch.
How many cookies does this recipe make?
If you roll them into 1-inch balls as directed, you should get about 24-30 cookie bites, depending on your exact size.
Easy Reese's Peanut Butter Chocolate Chip Cookie Bites
Ingredients
Equipment
Method
- Step 1: Prep your space: First things first, get your oven preheated to 350°F (175°C). Then, line your baking sheets with parchment paper. This makes cleanup a breeze and keeps your cookies from sticking.
- Step 2: Cream the wet ingredients: In a nice big mixing bowl, throw in your softened butter, creamy peanut butter, granulated sugar, and brown sugar. Cream them together with an electric mixer (or a strong arm and whisk!) until the mixture is light and fluffy. This usually takes about 3 minutes. Next, beat in your egg, the extra egg yolk, and the vanilla extract until everything is nicely combined.
- Step 3: Combine the dry ingredients: In a separate bowl, give your all-purpose flour, baking soda, and salt a quick whisk. This helps distribute the leavening and salt evenly.
- Step 4: Mix wet and dry: Now, gradually add the dry ingredients into the wet ingredients. Mix on low speed until everything is just combined. Be careful not to overmix – that can make cookies tough! Stop as soon as you don't see streaks of dry flour anymore.
- Step 5: Fold in the goodies: Time for the fun part! Gently fold in the mini chocolate chips and the ¾ cup of Reese's Pieces using a spatula or wooden spoon. Make sure they're evenly distributed throughout the dough.
- Step 6: Shape and top: Roll the dough into little 1-inch balls. A small cookie scoop works wonders here for consistent sizes! Place the balls onto your prepared baking sheets, leaving about 2 inches of space around each one so they have room to spread a little. Before baking, gently press 2-3 extra Reese's Pieces candies right onto the top of each cookie ball. This makes them look extra pretty and signals the deliciousness inside!
- Step 7: Bake 'em up: Pop those sheets into your preheated oven. Bake for 9-11 minutes. You're looking for edges that look set and lightly golden, but the centers should still look a tiny bit soft. They'll continue to set up as they cool.
- Step 8: Cooling time: Let the cookies cool on the baking sheet for about 5 minutes before carefully transferring them to a wire rack to cool completely. Waiting that little bit helps them firm up so they don't fall apart when you move them.