Oh honey, do I have a treat for you today! There are some desserts that just whisper “special occasion” while still being surprisingly simple to whip up. This Red Velvet Strawberry Cheesecake? It’s exactly that kind of magic. Imagine sinking your fork into layers of moist, cocoa-kissed red velvet cake, followed by a dreamy, creamy cheesecake, all topped with a glistening, sweet strawberry sauce. It’s a dessert that feels like a warm hug and a burst of sunshine all at once, making it incredibly memorable for any gathering, or just a delightful Tuesday evening. Trust me, once you make this, it’ll be a showstopper, and everyone will be asking for the recipe!
Why You’ll Love Red Velvet Strawberry Cheesecake
- Fast: While there are a few steps, each one is straightforward and moves quickly!
- Easy: No complicated techniques, just simple baking and assembly.
- Giftable: It makes a gorgeous centerpiece and a thoughtful gift for friends and family.
- Crowd-pleasing: The combination of red velvet, cheesecake, and strawberries is universally loved!
Ingredients
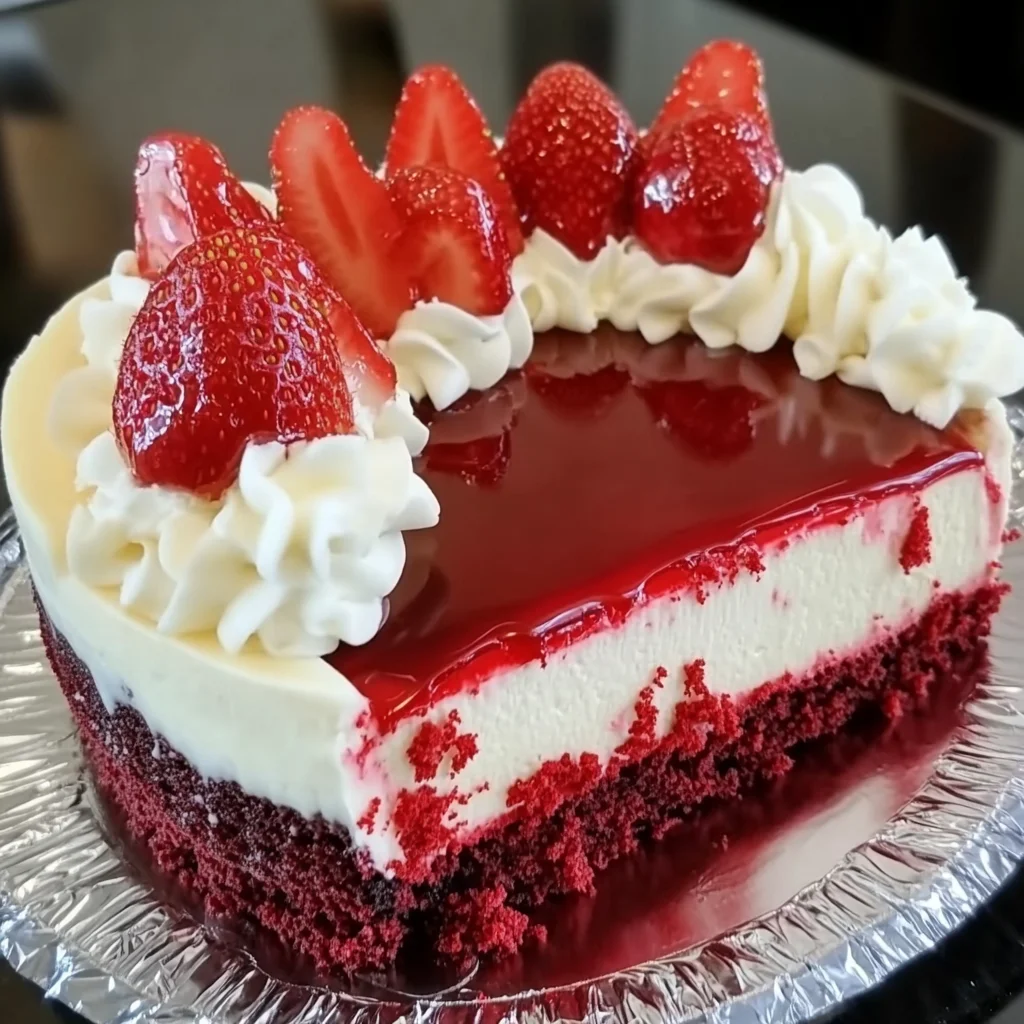
Gathering your ingredients is the first step to any baking adventure! Here’s what you’ll need for this delightful Red Velvet Strawberry Cheesecake:
- For the Red Velvet Cake Layers:
- 1 1/4 cups all-purpose flour: The base for our fluffy red velvet layers.
- 1 cup granulated sugar: For that perfect sweetness in the cake.
- 1/2 cup buttermilk: This is key for the tender texture and slight tang of red velvet. If you don’t have it, you can make your own by adding 1/2 tablespoon of lemon juice or white vinegar to regular milk and letting it sit for 5 minutes.
- 1/2 cup vegetable oil: Keeps the cake wonderfully moist.
- 1 large egg: Our binding agent for a rich cake.
- 1 tbsp cocoa powder: Just a touch for that classic red velvet flavor.
- 1 tsp vanilla extract: Always a must for enhancing sweet flavors.
- 1/2 tsp baking soda: Works with the vinegar and buttermilk to give us a beautiful rise.
- 1/2 tsp white vinegar: Reacts with the baking soda to create lift and that signature red velvet crumb.
- Red food coloring (as desired): Go for gel food coloring for a vibrant hue without adding too much liquid!
- For the Cheesecake Layer:
- 16 oz cream cheese, softened: Make sure it’s at room temperature for a super smooth, lump-free cheesecake.
- 1/2 cup granulated sugar: Sweetens our creamy cheesecake.
- 2 large eggs: Also at room temperature, they bind and enrich the cheesecake.
- 1 tsp vanilla extract: Brings out the creamy flavor.
- 1/2 cup sour cream: Adds a lovely tang and extra creaminess.
- For the Strawberry Topping:
- 1 cup strawberry preserves or jelly: The star of our topping! Preserves will give you a chunkier texture, jelly will be smoother.
- 1/4 cup water: To thin out the preserves/jelly to a pourable consistency.
- For Decoration:
- Fresh strawberries, whole or halved: For a beautiful, fresh garnish.
- Whipped cream (optional): A dollop or swirl adds an extra touch of decadence.
How to Make Red Velvet Strawberry Cheesecake
Ready to bake up some pure joy? Let’s get these delicious layers stacked!
1. Make the Red Velvet Cake Layers
First things first, preheat your oven to 350°F (175°C). Then, get two 8-inch round cake pans ready. Grease them well and line the bottoms with parchment paper – this helps ensure your cakes come out perfectly every time. In a big mixing bowl, you’re going to whisk together your flour, sugar, and cocoa powder. This helps distribute everything evenly.
In a separate bowl, combine the buttermilk, vegetable oil, egg, and vanilla. Now for the fun part: add your red food coloring! Start with a few drops and add more until you get that rich, vibrant red you’re looking for. I always go a little darker than I think, as it tends to lighten up slightly when baked. Gradually pour your wet ingredients into the dry ingredients and mix until just combined. Don’t overmix! Next, sprinkle in the baking soda and pour the white vinegar over it. Give it a quick stir – you’ll see it bubble slightly, which is exactly what you want! Divide the batter evenly between your prepared pans and bake for about 18-20 minutes, or until a toothpick inserted into the center comes out clean. Let them cool completely in the pans before turning them out onto a wire rack. This is crucial for keeping them intact.
If you love Red Velvet, you might also enjoy making some Red Velvet edible cookie dough for a quick no-bake treat!
2. Make the Cheesecake Layer
Now, let’s get that luscious cheesecake going! Reduce your oven temperature to 325°F (160°C). Grab an 8-inch round springform pan, grease it, and line the bottom with parchment paper. In a mixing bowl, beat your softened cream cheese and sugar together until it’s super smooth and creamy. Make sure there are no lumps!
Add the eggs one at a time, mixing well after each addition. Don’t beat too much air into it, as that can cause cracks. Stir in the vanilla extract and sour cream, beating just until everything is smoothly combined. Pour this heavenly batter into your prepared springform pan. Bake for 40-45 minutes, or until the edges are set but the center still has a slight wobble – it will firm up as it cools. Once baked, turn off the oven and let the cheesecake cool in the oven with the door slightly ajar for about an hour. This slow cooling prevents cracking. Then, remove it and refrigerate for at least 4 hours, or even better, overnight, until it’s perfectly firm. A well-chilled cheesecake is a happy cheesecake!
3. Assemble the Cake
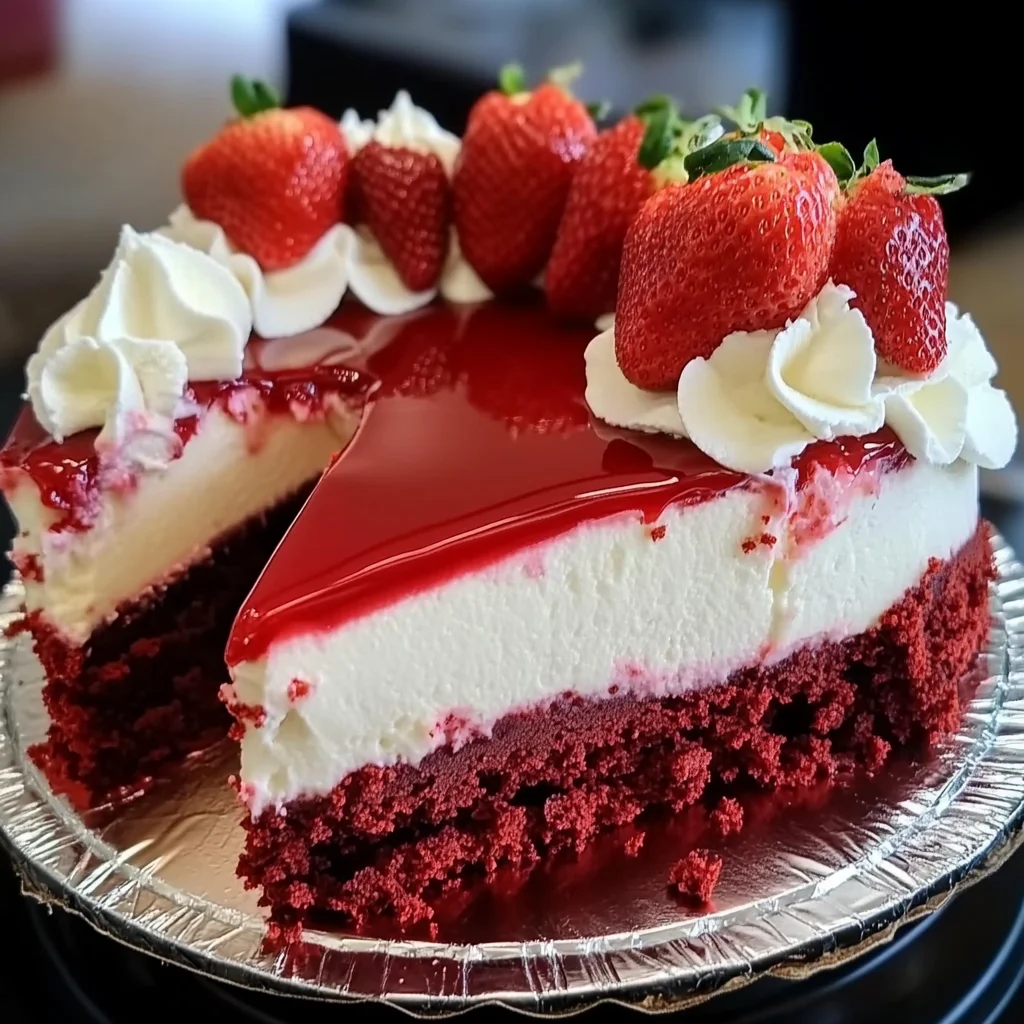
This is where it all comes together! Once your red velvet layers are cool and your cheesecake is perfectly chilled and firm, you’re ready to assemble. Place one layer of your red velvet cake on your serving plate or stand. Carefully, and I mean carefully, place the cheesecake layer directly on top of the first red velvet cake. Then, gently position the second red velvet layer on top of the cheesecake. Doesn’t it look magnificent already?
4. Add the Strawberry Topping
Time for that glorious strawberry topping! In a small saucepan, combine your strawberry preserves (or jelly) and water over low heat. Stir gently until the preserves are melted and smooth. Let it cool down just a little bit – you want it warm enough to pour but not piping hot, which could melt your whipped cream later. Once it’s slightly cooled, generously pour it over the top of your assembled cake. Let it naturally drip down the sides for a beautiful, rustic look. If you’re looking for other decadent cheesecake recipes, you might enjoy a decadent triple chocolate cheesecake!
5. Decorate
The final flourish! Arrange fresh strawberries, either whole or halved, beautifully on top of your cake. If you’re feeling extra fancy (and why not?), add some lovely dollops or swirls of whipped cream around the edges or in the center. Serve immediately and watch everyone’s eyes light up!
Substitutions & Additions
Baking is all about having fun and making it your own! Here are a few ideas to customize your Red Velvet Strawberry Cheesecake:
- Crust: Instead of relying solely on the red velvet cake, you could add a classic graham cracker crust to the bottom of your cheesecake layer for extra texture.
- Fruit: Not a strawberry fan? Or want more variety? Try raspberry preserves and fresh raspberries, or even a mixed berry compote.
- Chocolate Drizzle: A drizzle of melted white chocolate or dark chocolate over the top before adding the fresh strawberries would be absolutely divine.
- Cream Cheese Frosting: If you want to lean even more into the traditional red velvet vibe, you could make a batch of classic cream cheese frosting to spread between the cake layers and over the top, then add the strawberry topping.
Tips for Success
To make sure your Red Velvet Strawberry Cheesecake turns out perfectly every time, keep these friendly tips in mind:
- Room Temperature Ingredients: This is a big one for both your cake and cheesecake. Softened cream cheese and room temperature eggs mix smoother and prevent lumps in your cheesecake, while room temp buttermilk and egg for the cake create a more uniform batter.
- Don’t Overmix: When combining wet and dry ingredients for the cake, mix just until no streaks of flour remain. Overmixing can lead to a tough cake. For the cheesecake, over-beating eggs can incorporate too much air, leading to cracks.
- Chill Time is Crucial: The cheesecake absolutely needs its full chilling time to set properly. Rushing this step will result in a messy, unset cheesecake layer. Plan ahead!
- Parchment Paper is Your Friend: Seriously, lining the bottoms of your cake pans and springform pan with parchment paper prevents sticking and makes transferring the layers so much easier.
- Quality Ingredients: Using good quality cream cheese and fresh strawberries really makes a difference in the final taste of this showstopper.
How to Store Red Velvet Strawberry Cheesecake
This beautiful creation is best enjoyed fresh, but if you have leftovers (what are leftovers?!), you can absolutely store them. Keep your Red Velvet Strawberry Cheesecake covered loosely with plastic wrap or in an airtight container in the refrigerator. It will stay fresh and delicious for 3-4 days. While technically you can freeze cheesecake, the cake layers might dry out slightly, and the strawberry topping can become watery upon thawing. I always recommend enjoying this one fresh from the fridge!
FAQs
Q: Can I make the cake layers ahead of time?
A: Absolutely! You can bake the red velvet cake layers a day in advance. Once completely cooled, wrap them tightly in plastic wrap and store them at room temperature. The cheesecake also needs to be made ahead and chilled, so planning allows for easy assembly!
Q: What if I don’t have buttermilk?
A: No problem! You can easily make a homemade buttermilk substitute. Just add 1/2 tablespoon of lemon juice or white vinegar to your regular milk and let it sit for about 5-10 minutes until it slightly curdles. Then, use it as directed in the recipe.
Q: Can I use frozen strawberries for the topping?
A: While fresh strawberries are best for garnish, you can certainly use frozen strawberries to make your own compote for the topping! Just cook them down with a little sugar and a splash of water until they break down, then mash them slightly. If you’re a fan of strawberry cheesecake, you might also like these delightful strawberry cheesecake donut holes!
For more delicious recipes and kitchen inspiration, be sure to follow us on Pinterest!
Sweet Harmony: Easy Red Velvet Strawberry Cheesecake
Ingredients
Equipment
Method
- Step 1: Prepare Red Velvet Cake Layers. Preheat oven to 350°F (175°C). Grease and line the bottoms of two 8-inch round cake pans with parchment paper. In a large mixing bowl, whisk together flour, sugar, and cocoa powder. In a separate bowl, combine buttermilk, vegetable oil, egg, and vanilla. Add red food coloring until desired vibrant red is achieved. Gradually pour wet ingredients into dry ingredients and mix until just combined (do not overmix). Sprinkle in baking soda and pour white vinegar over it; stir quickly until slightly bubbly. Divide batter evenly between prepared pans and bake for 18-20 minutes, or until a toothpick inserted into the center comes out clean. Let cool completely in pans before turning out onto a wire rack.
- Step 2: Prepare Cheesecake Layer. Reduce oven temperature to 325°F (160°C). Grease an 8-inch round springform pan and line the bottom with parchment paper. In a mixing bowl, beat softened cream cheese and sugar together until super smooth and creamy. Add eggs one at a time, mixing well after each addition, but do not beat too much air into it. Stir in vanilla extract and sour cream until smoothly combined. Pour batter into the prepared springform pan. Bake for 40-45 minutes, or until the edges are set but the center still has a slight wobble. Turn off the oven and let the cheesecake cool in the oven with the door slightly ajar for about an hour. Remove and refrigerate for at least 4 hours, or overnight, until perfectly firm.
- Step 3: Assemble the Cake. Once red velvet layers are cool and cheesecake is chilled and firm, place one red velvet cake layer on your serving plate. Carefully place the cheesecake layer directly on top. Gently position the second red velvet layer on top of the cheesecake.
- Step 4: Add Strawberry Topping. In a small saucepan, combine strawberry preserves (or jelly) and water over low heat. Stir gently until preserves are melted and smooth. Let it cool down slightly (warm but not piping hot). Generously pour over the top of your assembled cake, allowing it to drip naturally down the sides.
- Step 5: Decorate and Serve. Arrange fresh strawberries, whole or halved, beautifully on top of your cake. Optionally, add dollops or swirls of whipped cream around the edges or in the center. Serve immediately.