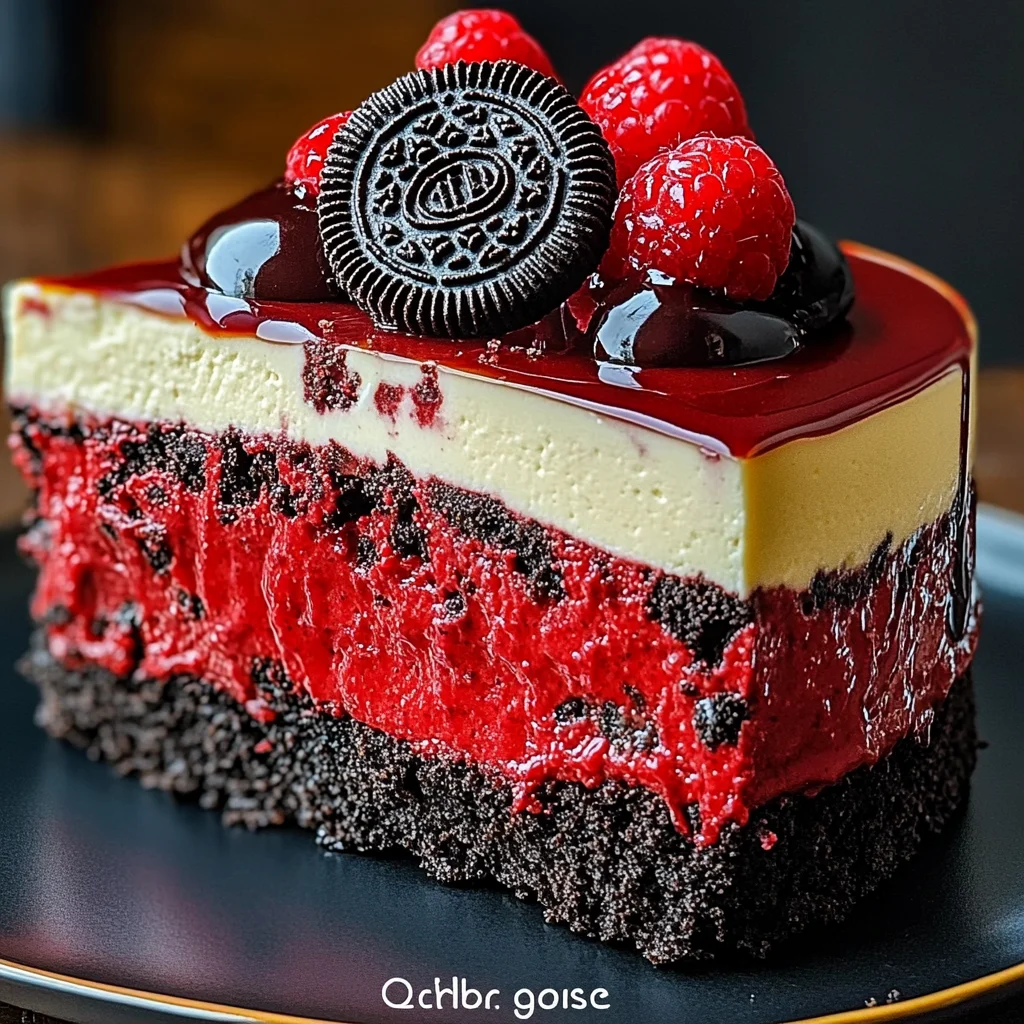
Hey sweet friends! Remember those special occasions, or maybe just a Tuesday, when you’d crave something truly decadent, something that feels like a big, warm hug in dessert form? That’s exactly how I feel about this Red Velvet Oreo Cheesecake. It brings together two absolute champions of the dessert world – the elegant, slightly tangy red velvet and the classic, creamy goodness of cheesecake, all perched on a crunchy Oreo crust. It’s a flavor explosion, a feast for the eyes, and honestly, it’s so much simpler to make than it looks. Forget spending all day in the kitchen; this beauty comes together with ease, leaving you more time to savor every glorious bite. If you’ve loved other creamy creations like my berrylicious strawberry crunch cheesecake, you are in for an absolute treat!
Why You’ll Love Red Velvet Oreo Cheesecake
- Fast – Relatively quick prep time for such an impressive dessert.
- Easy – Simple steps, no fancy techniques required.
- Giftable – Perfect for sharing with friends, family, or bringing to a potluck.
- Crowd-pleasing – The combination of red velvet, cheesecake, and Oreos is universally loved!
Ingredients
Gather your ingredients, my baking buddies! Softened cream cheese is key here, so make sure to plan a little ahead. And when it comes to Oreos, any standard pack will do – feel free to grab a family size if you want extra for snacking (I won’t tell!).
- For the Oreo Crust:
- 2 ½ cups Oreo cookie crumbs (about 25–30 cookies, crushed) – Regular Oreos work best, but feel free to experiment with Golden or Mint for a fun twist!
- 5 tbsp unsalted butter, melted – This binds your crumbly crust together into a perfect base.
- For the Red Velvet Cheesecake Layer:
- 16 oz (2 blocks) cream cheese, softened – Full-fat cream cheese gives you the best creamy texture.
- ¾ cup granulated sugar – Just the right amount of sweetness to balance the tang.
- ¼ cup sour cream – Adds moisture and a lovely subtle tang that makes cheesecake irresistible.
- 2 large eggs – Room temperature eggs incorporate better into the batter.
- 1 ½ tbsp cocoa powder – Unsweetened cocoa powder gives that classic red velvet depth.
- 1 ½ tsp vanilla extract – Enhances all the sweet flavors.
- 1 tbsp red food coloring – For that iconic vibrant red hue!
- For the Vanilla Cheesecake Layer:
- 16 oz (2 blocks) cream cheese, softened – Again, softened is crucial for a smooth batter.
- ¾ cup granulated sugar – Sweetens this classic layer perfectly.
- ¼ cup sour cream – For that signature cheesecake creaminess.
- 2 large eggs – Helps set the cheesecake beautifully.
- 1 ½ tsp vanilla extract – Pure vanilla extract makes all the difference!
- For the Chocolate Ganache Topping:
- ½ cup heavy cream – The base for our rich, silky ganache.
- ¾ cup semi-sweet chocolate chips – Good quality chocolate will yield the best ganache.
- For Garnish (Optional):
- Whipped cream – Store-bought or homemade, it’s the perfect fluffy cloud.
- Oreo cookie crumbs – For an extra pop of Oreo goodness.
- Whole Oreos – A beautiful visual touch.
How to Make Red Velvet Oreo Cheesecake
Let’s get baking! Don’t be intimidated; we’re just combining a few simple steps to create something truly spectacular.
- Make the Oreo Crust: First things first, let’s get that oven preheating to 325°F (163°C). Grab your 9-inch springform pan – it’s a cheesecake’s best friend for easy serving! Lightly grease it and line the bottom with parchment paper. Now, in a medium bowl, combine your crushed Oreo cookie crumbs with the melted butter. Mix them until they’re nicely combined, then press this mixture firmly into the bottom of your prepared pan. Use the back of a spoon or your clean hands to really get it packed in there. Pop it in the preheated oven for 8-10 minutes, then take it out and set it aside to cool completely while we work on the filling.
- Prepare the Red Velvet Layer: In a large bowl, it’s time to bring out your electric mixer! Beat the softened cream cheese and granulated sugar together until they’re wonderfully smooth and creamy. Next, beat in the sour cream, eggs, cocoa powder, vanilla extract, and that vibrant red food coloring. Mix just until everything is combined – be careful not to overmix, as that can introduce too much air and lead to cracks later. Pour this beautiful red batter over your cooled Oreo crust and gently spread it into an even layer.
- Prepare the Vanilla Layer: Now for our classic vanilla counterpart! In a separate clean bowl, use your mixer to beat the remaining softened cream cheese and granulated sugar until it’s silky smooth. Beat in the sour cream, eggs, and vanilla extract until everything is fully incorporated. This next part requires a gentle touch: carefully pour this vanilla batter over the red velvet layer. Use a spatula to gently spread it out, creating a smooth, distinct top layer.
- Bake the Cheesecake: Place your springform pan on a baking sheet – this helps catch any potential drips and makes it easier to transfer. Slide it into your 325°F (163°C) oven and bake for 50-60 minutes. You’ll know it’s ready when the edges are set, but the center still has a slight, delicate jiggle. Once it hits that perfect point, turn off the oven, prop the door open slightly, and let the cheesecake cool inside the oven for 1 hour. This slow cooling helps prevent cracks. After an hour, transfer it to the refrigerator and chill for at least 6 hours, or even better, overnight. Patience is a virtue when it comes to cheesecake setting!
- Make the Chocolate Ganache: When your cheesecake is perfectly chilled, it’s ganache time! In a small saucepan, heat the heavy cream until it’s hot and simmering, but don’t let it boil. Place your semi-sweet chocolate chips in a heatproof bowl. Pour the hot cream over the chocolate chips and let it sit undisturbed for 2 minutes. This allows the chocolate to melt. Then, gently stir until the ganache is wonderfully smooth and glossy. Let it cool slightly for a few minutes before pouring it over your chilled cheesecake, spreading it evenly across the top.
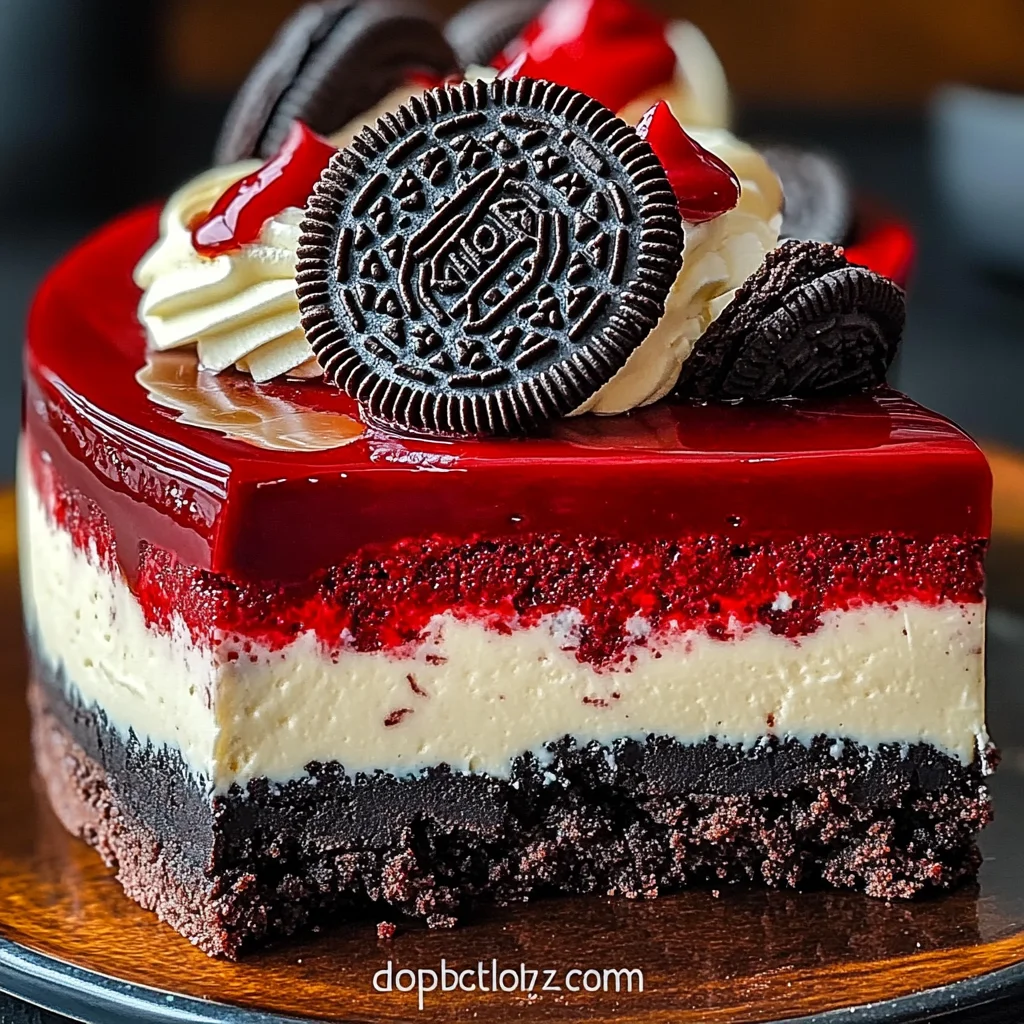
- Garnish and Serve: Now for the grand finale! Garnish your stunning cheesecake by piping whipped cream elegantly around the edges, sprinkling with extra Oreo crumbs, and placing a few whole Oreos on top for that extra wow factor. Slice this masterpiece and serve it chilled. Enjoy the compliments!
Substitutions & Additions
One of the joys of baking is making a recipe your own! Here are a few ideas to customize your Red Velvet Oreo Cheesecake:
- Oreo Variations: Don’t limit yourself to classic Oreos! Try Golden Oreos for a vanilla-forward crust and topping, or even Mint Oreos for a festive twist on the red velvet.
- Crust Alternatives: If you’re not an Oreo purist (gasp!), a traditional graham cracker crust or even a chocolate cookie crust would work beautifully here.
- Extra Toppings: Drizzle with a little extra chocolate syrup, caramel sauce, or sprinkle with chocolate shavings. A scattering of fresh raspberries or sliced strawberries would also add a lovely pop of color and freshness.
- Mini Cheesecakes: For individual servings, you can use a muffin tin lined with cupcake liners. Adjust baking time accordingly (likely 20-30 minutes).
- Different Chocolate: Instead of semi-sweet, try dark chocolate chips for a more intense ganache, or milk chocolate for a sweeter, creamier one. And if you’re a true Oreo fanatic, you might even love exploring other fun treats like my deep-fried Oreo cheesecake cookies!
Tips for Success
Cheesecake can sometimes feel intimidating, but with these simple tips, yours will be perfect every time:
- Room Temperature Ingredients: This is a non-negotiable for cheesecake! Make sure your cream cheese, sour cream, and eggs are at room temperature. This ensures they blend smoothly, creating a lump-free, creamy batter.
- Don’t Overmix: Once you add the eggs, mix just until combined. Overmixing incorporates too much air, which can cause the cheesecake to puff up in the oven and then crack as it cools.
- Slow Cooling is Key: The slow cool-down process (first in the oven, then in the fridge) is vital for preventing cracks. Drastic temperature changes are a cheesecake’s worst enemy!
- Patience, Patience, Patience: Resist the urge to cut into your cheesecake too early. Chilling for at least 6 hours (or overnight) allows the cheesecake to fully set and achieve its perfect texture. It’s worth the wait, I promise!
- Parchment Paper Base: Lining your springform pan with parchment paper on the bottom makes removing the cheesecake incredibly easy and clean.
How to Store Red Velvet Oreo Cheesecake
Once you’ve indulged in a slice (or two!), proper storage will keep your cheesecake fresh and delicious:
- Refrigerator: Store any leftover cheesecake in an airtight container in the refrigerator for up to 3-4 days. You can also cover the springform pan tightly with plastic wrap once the cheesecake is completely chilled.
- Freezer: For longer storage, you can freeze cheesecake! Wrap individual slices or the whole cheesecake (after it’s fully chilled and unfrosted, if possible) tightly in plastic wrap, then again in aluminum foil. It will keep well in the freezer for up to 1 month. Thaw in the refrigerator overnight before serving.
FAQs
Got questions? I’ve got answers!
Q: Can I use low-fat cream cheese?
A: While you can, I highly recommend using full-fat cream cheese for the best results. It provides the richness and creamy texture that makes this cheesecake so incredibly good. Low-fat versions can sometimes result in a less stable or watery cheesecake.
Q: Why did my cheesecake crack?
A: Cracks are usually caused by overmixing the batter (especially after adding eggs), overbaking, or cooling the cheesecake too quickly. Follow the instructions for gentle mixing and slow cooling, and you should have a beautiful, crack-free cheesecake!
Q: Can I make this cheesecake ahead of time?
A: Absolutely! This cheesecake is perfect for making ahead. In fact, it needs at least 6 hours to chill, so making it the day before you plan to serve it is ideal. The flavors also meld and deepen overnight, making it even more delicious.
Q: Do I need a springform pan?
A: A springform pan is highly recommended for cheesecakes. Its removable sides make it incredibly easy to release the cheesecake without damaging its beautiful structure. If you don’t have one, you could use a regular round cake pan, but serving will be a bit trickier.
For those days when you literally can’t turn on the oven, I’ve got you covered with a fantastic no-bake Oreo cheesecake recipe too!
Love this recipe? Be sure to follow us on Pinterest for more delicious treats!
The Ultimate Red Velvet Oreo Cheesecake
Ingredients
Equipment
Method
- Step 1: Preheat oven to 325°F (163°C). Lightly grease a 9-inch springform pan and line the bottom with parchment paper. In a medium bowl, combine crushed Oreo cookie crumbs with melted butter. Mix well, then press firmly into the bottom of the prepared pan. Bake for 8-10 minutes. Remove and set aside to cool completely.
- Step 2: In a large bowl, use an electric mixer to beat the softened cream cheese and granulated sugar until smooth and creamy. Beat in the sour cream, eggs, cocoa powder, vanilla extract, and red food coloring until just combined. Do not overmix. Pour this red batter over the cooled Oreo crust and gently spread into an even layer.
- Step 3: In a separate clean bowl, use your mixer to beat the remaining softened cream cheese and granulated sugar until silky smooth. Beat in the sour cream, eggs, and vanilla extract until fully incorporated. Carefully pour this vanilla batter over the red velvet layer and use a spatula to gently spread it out, creating a smooth, distinct top layer.
- Step 4: Place the springform pan on a baking sheet. Bake in the preheated 325°F (163°C) oven for 50-60 minutes, or until the edges are set but the center still has a slight jiggle. Once baked, turn off the oven, prop the door open slightly, and let the cheesecake cool inside the oven for 1 hour. After an hour, transfer to the refrigerator and chill for at least 6 hours, or overnight, to allow it to fully set.
- Step 5: Once the cheesecake is perfectly chilled, make the ganache. In a small saucepan, heat the heavy cream until hot and simmering (do not boil). Place semi-sweet chocolate chips in a heatproof bowl. Pour the hot cream over the chocolate chips and let sit undisturbed for 2 minutes. Gently stir until the ganache is smooth and glossy. Let it cool slightly for a few minutes before pouring it over your chilled cheesecake, spreading evenly across the top.
- Step 6: Garnish your cheesecake by piping whipped cream around the edges (optional), sprinkling with extra Oreo crumbs, and placing a few whole Oreos on top. Slice and serve chilled.