Oh boy, does this recipe bring back memories! Remember those hot summer days, the sound of the ice cream truck in the distance, and the sheer joy of slurping down a frozen creamsicle? That perfect mix of bright orange and creamy vanilla? Pure nostalgia in a stick!
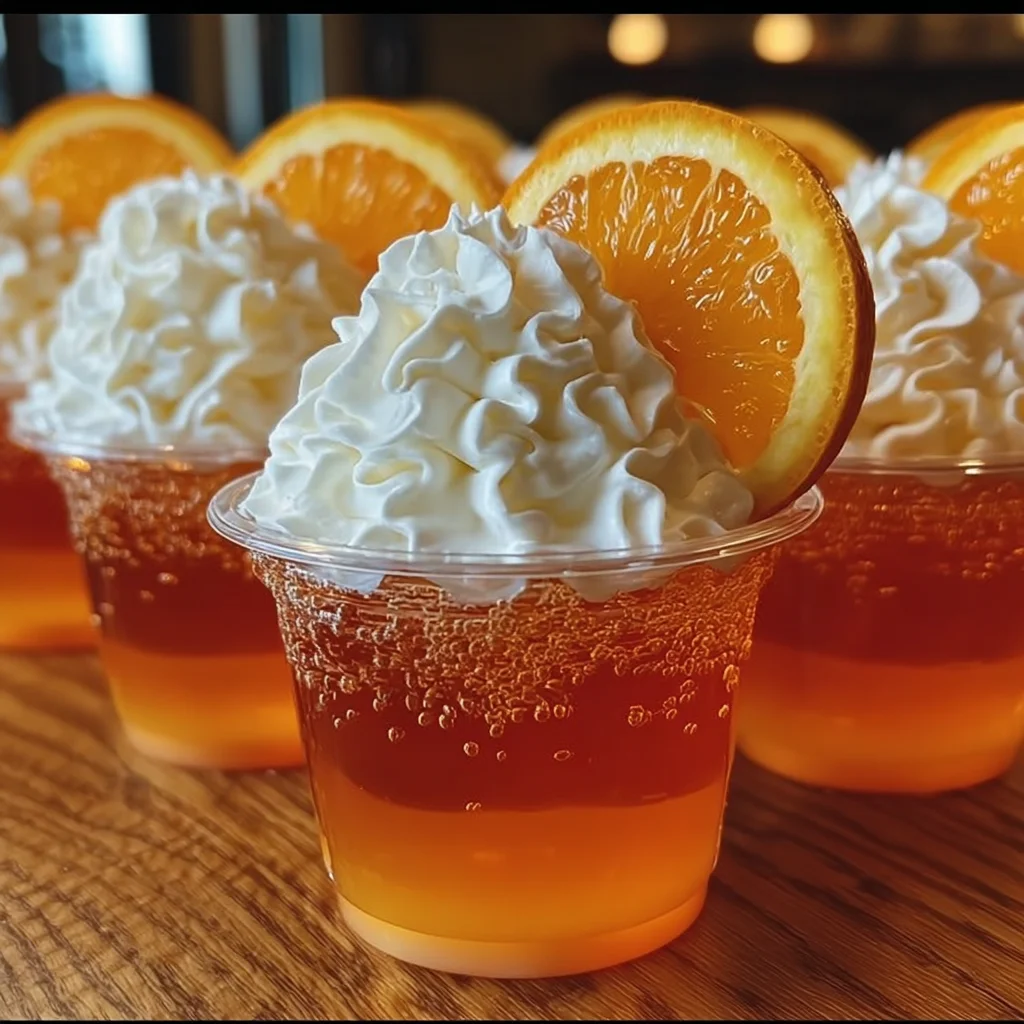
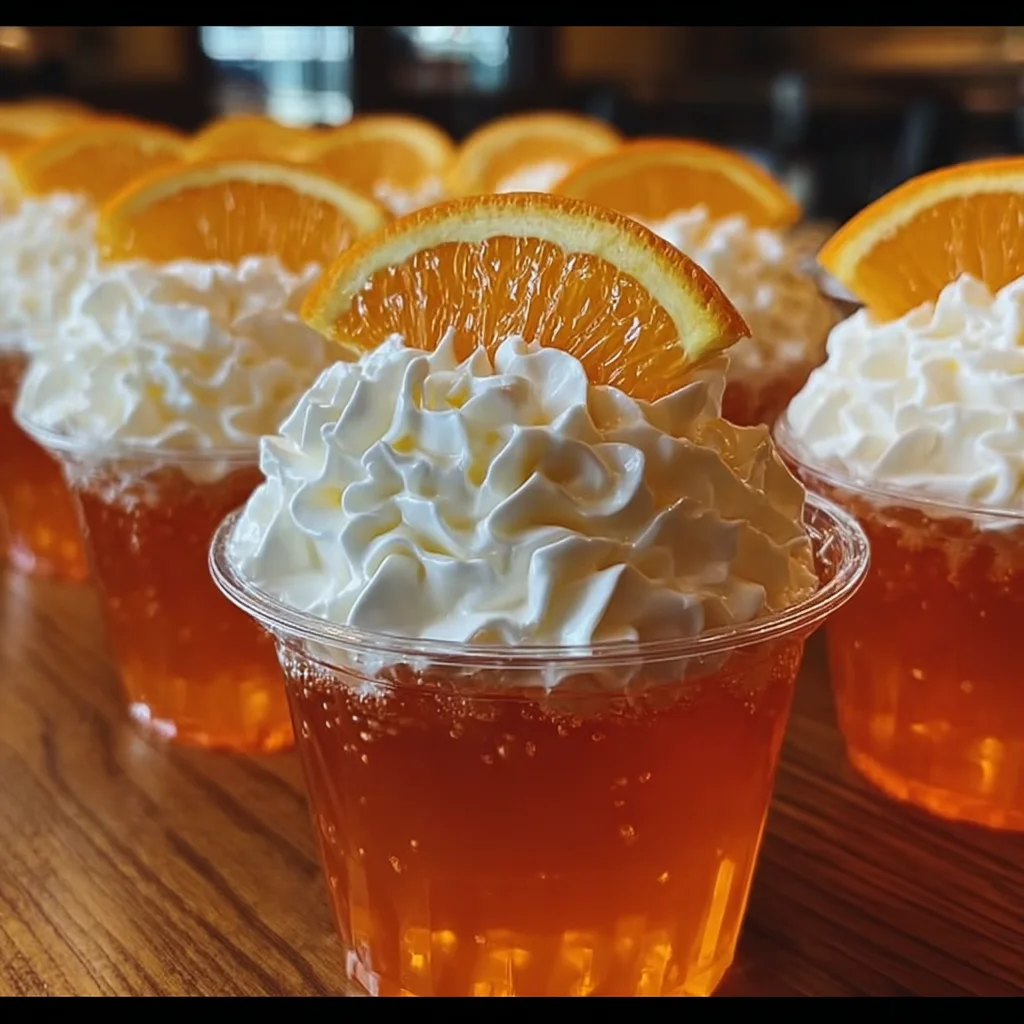
Well, guess what? I’ve found a way to capture that magical flavor combination in a fun, wobbly, delightful little bite that everyone (yes, everyone!) can enjoy. These Orange Vanilla Cream Jellies are like a creamsicle in Jell-O form, and they are SO easy to make, incredibly fast to whip up, and guaranteed to disappear in a flash at any gathering. They’re perfect for parties, summer BBQs, or just a sweet treat after dinner. And the best part? This version is totally non-alcoholic, making them perfect for the kiddos too!
Why You’ll Love This Recipe
- Fast: Seriously, you can have these mixed and in the fridge in less than 15 minutes of active time.
- Easy: If you can heat water and stir, you can make these. No fancy skills needed!
- Giftable: Pour them into cute little jars or containers and you’ve got a sweet, homemade gift or party favor.
- Crowd-pleasing: Who doesn’t love the classic orange and vanilla combo? It’s a guaranteed hit with all ages.
Ingredients
You don’t need a huge list of obscure ingredients for these little beauties. Just a few pantry staples and a couple of fresh items!
- 1 cup orange juice: Use your favorite! Pulp-free works best for that smooth texture.
- 1 cup water: Just plain old water from the tap is fine.
- 1 tablespoon unflavored gelatin: This is the magic that makes them set! Make sure it’s unflavored.
- 1/4 cup granulated sugar: Just enough sweetness to balance the orange.
- 1/2 cup whipped cream: This is what gives them that lovely, creamy, dreamsicle vibe. Store-bought or homemade works great.
- 1/2 teaspoon vanilla extract: Essential for that classic vanilla cream flavor.
- Orange slices, for garnish (optional): A little pop of color and freshness on top!
How to Make It
Ready to make some magic? Grab a saucepan and let’s get started. It’s really just a few simple steps!
1. Warm things up: Get out a medium saucepan and pour in your 1 cup of orange juice and 1 cup of water. Pop it on the stove over medium heat. You want it to get warm, warm enough to dissolve things, but don’t let it boil just yet. Just a gentle warmth is perfect.
2. Hello, Gelatin!: Once the liquid is warm, take the saucepan off the heat. Now, gently and evenly sprinkle that tablespoon of unflavored gelatin right over the surface of the warm liquid. Don’t stir it in yet! This is called “blooming,” and it helps the gelatin dissolve smoothly later. Just let it sit there undisturbed for about 5 minutes. You’ll see it kind of wrinkle and hydrate.
3. Sweeten the Deal: After the gelatin has bloomed (it’ll look a bit wrinkled and thickened on top), it’s time to add the sugar. Gently stir in the 1/4 cup of granulated sugar until you can see it’s completely dissolved. The liquid will look clear again.
4. Dissolve the Gelatin (Carefully!): Put the saucepan back on the stove, but this time, turn the heat down to low. Now, stir constantly. You’re just warming it gently to help the gelatin fully dissolve into the liquid. You’ll see any little granules disappear. This should only take a couple of minutes. The absolute key here is do not boil it. Boiling can mess with the gelatin’s setting power.
5. Let it Chill (a little): Once everything is dissolved, take the pan off the heat again. Let the orange mixture cool down slightly. About 5-10 minutes is good. You don’t want it hot when you add the creamy part!
6. Whip Up the Creamy Goodness: While the orange mixture is cooling, grab a separate bowl. Gently fold together your 1/2 cup of whipped cream and 1/2 teaspoon of vanilla extract. Don’t overmix it; you just want them combined. This step is where that lovely creamy vanilla flavor comes from!
7. Combine the Flavors: Now for the magical merge! Carefully take your slightly cooled orange gelatin mixture and gently fold the whipped cream mixture into it. Fold until it’s all combined and you have a lovely, uniform peachy-orange color. Don’t whisk or beat it vigorously, or you’ll lose that light, airy texture from the whipped cream.
8. Pour and Prepare: Get out your shot glasses or small cups. Carefully pour the mixture into each one, filling them about three-quarters full. Leave a little room at the top if you plan to garnish later.
9. Set Sail (to the Fridge!): Pop those filled glasses into the refrigerator. They need time to firm up properly. Give them at least 4 hours, but letting them chill until they are completely set and firm is best. Overnight is totally fine!
10. Garnish and Serve!: Once they are perfectly set, you can add a little flourish! Before serving, place a small orange slice on top of each one if you like. It makes them look extra special and highlights that delicious orange flavor.
Substitutions & Additions
Want to play around with the recipe? Here are a few ideas!
- Make it Alcoholic (Adults Only!): This recipe is written to be kid-friendly. To make an adult version, reduce the water to 1/2 cup and add 1/2 cup of vodka, white rum, or even whipped cream flavored vodka (like Pinnacle Whipped) in step 7 after the mixture has cooled completely and before adding the whipped cream. Never boil alcohol.
- Different Juice: Try substituting the orange juice with pineapple juice, grape juice, or cranberry juice for different flavor combinations. Adjust sugar as needed based on the sweetness of the juice.
- Add Zest: For an extra punch of orange flavor, add a little finely grated orange zest (about 1 teaspoon) to the saucepan with the juice and water in step 1.
- Use Frozen Whipped Topping: If you don’t have whipped cream, you can gently fold in an equal amount of thawed frozen whipped topping (like Cool Whip) in step 6 and 7.
Tips for Success
Gelatin can be a little finicky sometimes, but follow these tips, and you’ll have perfect jellies every time!
- Bloom the Gelatin: Don’t skip step 2! Sprinkling the gelatin over the warm liquid and letting it sit for 5 minutes is crucial for ensuring it dissolves smoothly later without clumps.
- Don’t Boil After Adding Gelatin: Remember, boiling the mixture after the gelatin is added (step 4) can weaken its setting ability. Keep the heat low and just stir until dissolved.
- Cool Slightly Before Adding Cream: Adding the whipped cream mixture to a hot liquid can cause it to separate or melt improperly. Letting the orange mixture cool for 5-10 minutes (step 5) is important before folding in the whipped cream.
- Chill Time is Key: Be patient! Giving the jellies enough time in the fridge (at least 4 hours, preferably longer) is essential for them to set up nice and firm.
- Prep Ahead: These are perfect for making ahead! You can make them a day or two in advance and keep them covered in the fridge until you’re ready to serve.
How to Store It
These Orange Vanilla Cream Jellies need to stay cool! Keep them stored in their shot glasses or containers in the refrigerator. If you made them in something larger, cover the dish tightly with plastic wrap.
They will keep well in the fridge for 3-5 days. Just know that over time, the texture might change ever so slightly, but the flavor will still be delicious.
FAQs
Got questions? I’ve got answers!
Can I use flavored gelatin instead of unflavored?
This recipe relies on unflavored gelatin and adding the orange flavor from juice and the vanilla cream flavor separately. Using orange flavored gelatin would change the flavor profile and you’d likely need to adjust the sugar. Stick to unflavored for the best creamsicle taste!
Why didn’t my jellies set?
The most common reasons are: the gelatin wasn’t bloomed properly, the mixture boiled after the gelatin was added (which can break down the protein), or they simply didn’t chill for long enough. Make sure you follow the steps carefully, especially the blooming and the chilling time!
Can I make a large batch?
Absolutely! This recipe is easy to double or triple. Just make sure you use a large enough saucepan and potentially pour into a single serving dish or multiple shot glasses.
Do I have to use shot glasses?
Nope! Small ramekins, mini muffin tins (sprayed lightly with non-stick spray for easy removal), or even a single square or round dish work perfectly well. If using a single dish, you can cut them into squares or use cookie cutters after they’ve set.

Dreamy Orange Vanilla Cream Jellies
Ingredients
Equipment
Method
- Step 1: Warm things up: Get out a medium saucepan and pour in your 1 cup of orange juice and 1 cup of water. Pop it on the stove over medium heat. You want it to get warm, warm enough to dissolve things, but don't let it boil just yet. Just a gentle warmth is perfect.
- Step 2: Hello, Gelatin!: Once the liquid is warm, take the saucepan off the heat. Now, gently and evenly sprinkle that tablespoon of unflavored gelatin right over the surface of the warm liquid. Don't stir it in yet! This is called "blooming," and it helps the gelatin dissolve smoothly later. Just let it sit there undisturbed for about 5 minutes. You'll see it kind of wrinkle and hydrate.
- Step 3: Sweeten the Deal: After the gelatin has bloomed (it'll look a bit wrinkled and thickened on top), it's time to add the sugar. Gently stir in the 1/4 cup of granulated sugar until you can see it's completely dissolved. The liquid will look clear again.
- Step 4: Dissolve the Gelatin (Carefully!): Put the saucepan back on the stove, but this time, turn the heat down to low. Now, stir constantly. You're just warming it gently to help the gelatin fully dissolve into the liquid. You'll see any little granules disappear. This should only take a couple of minutes. The absolute key here is do not boil it. Boiling can mess with the gelatin’s setting power.
- Step 5: Let it Chill (a little): Once everything is dissolved, take the pan off the heat again. Let the orange mixture cool down slightly. About 5-10 minutes is good. You don't want it hot when you add the creamy part!
- Step 6: Whip Up the Creamy Goodness: While the orange mixture is cooling, grab a separate bowl. Gently fold together your 1/2 cup of whipped cream and 1/2 teaspoon of vanilla extract. Don't overmix it; you just want them combined. This step is where that lovely creamy vanilla flavor comes from!
- Step 7: Combine the Flavors: Now for the magical merge! Carefully take your slightly cooled orange gelatin mixture and gently fold the whipped cream mixture into it. Fold until it's all combined and you have a lovely, uniform peachy-orange color. Don't whisk or beat it vigorously, or you'll lose that light, airy texture from the whipped cream.
- Step 8: Pour and Prepare: Get out your shot glasses or small cups. Carefully pour the mixture into each one, filling them about three-quarters full.
- Step 9: Set Sail (to the Fridge!): Pop those filled glasses into the refrigerator. They need time to firm up properly. Give them at least 4 hours, but letting them chill until they are completely set and firm is best. Overnight is totally fine!
- Step 10: Garnish and Serve!: Once they are perfectly set, you can add a little flourish! Before serving, place a small orange slice on top of each one if you like. It makes them look extra special and highlights that delicious orange flavor.