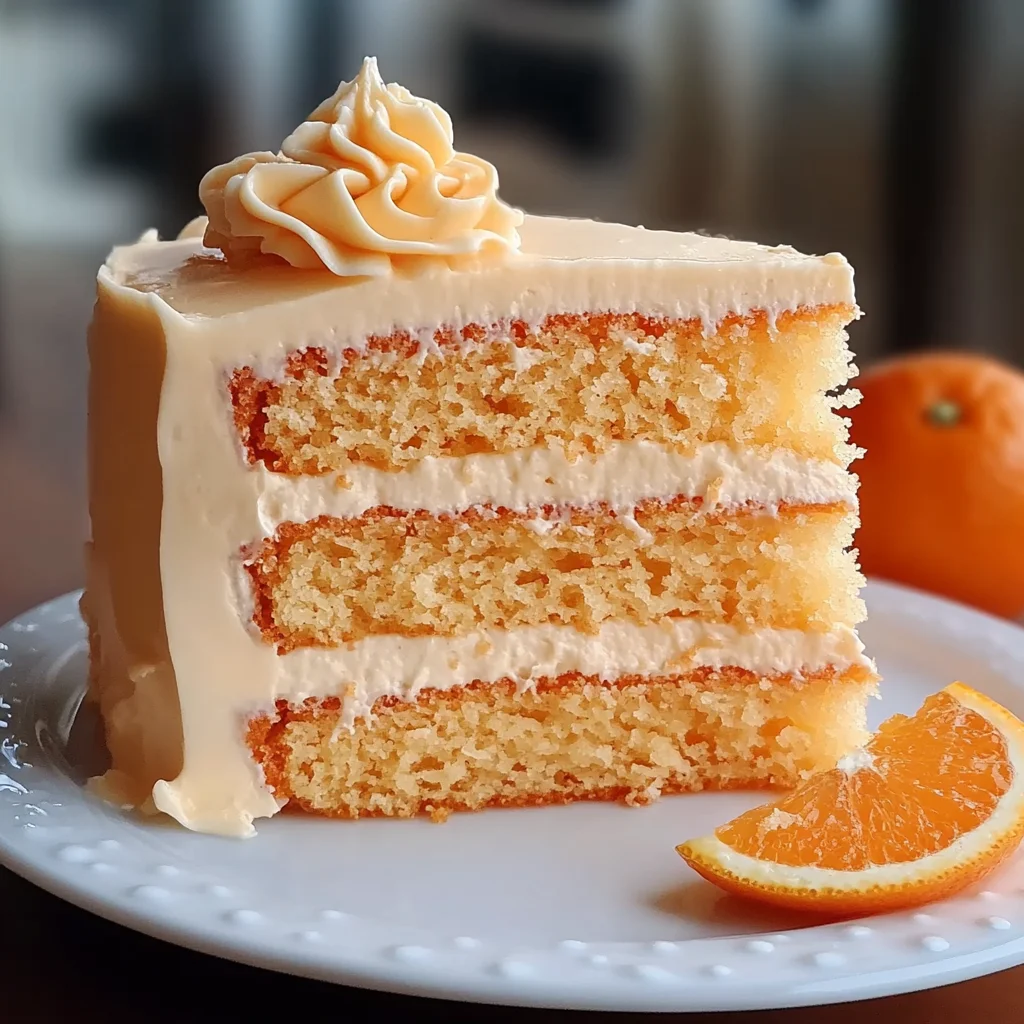
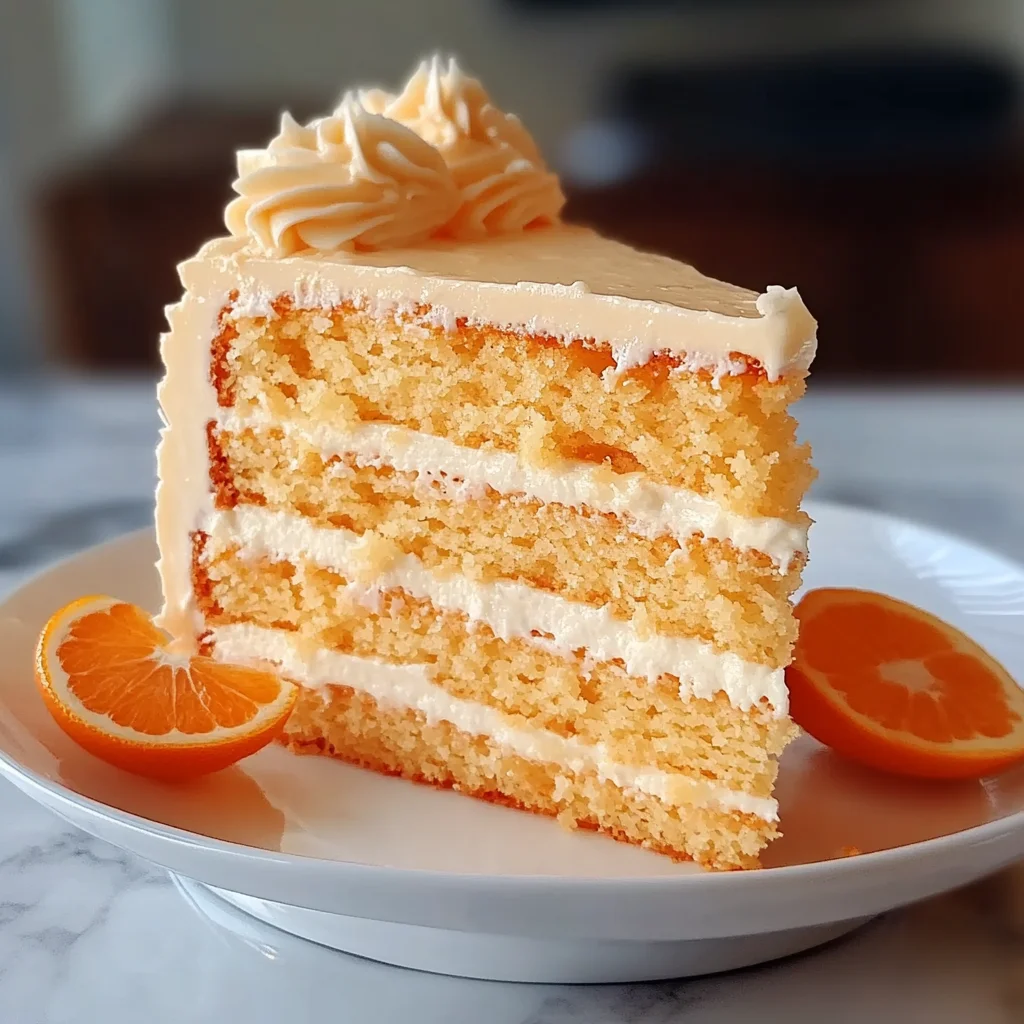
Hey there, sweet friend! Do you ever get hit with a wave of nostalgia for those sunny summer days, running after the ice cream truck and grabbing a classic orange creamsicle? That perfect blend of tangy orange and sweet, creamy vanilla… pure bliss, right? Well, get ready to capture that exact feeling in cake form! This Easy & Dreamy Orange Creamsicle Cake is like a slice of pure sunshine on a plate. It’s unbelievably simple to make, starts with a box mix (shhh, it’ll be our secret!), and tastes like your favorite childhood frozen treat all grown up. It’s the perfect dessert for birthdays, potlucks, or just because you want to treat yourself to a little bit of happy.
Why You’ll Love This Recipe
Seriously, what’s not to love about bringing that iconic creamsicle flavor to your kitchen? Here are just a few reasons this cake will become your new go-to:
- Fast: Thanks to a little help from a box mix, you’ll have this cake ready for frosting in no time. Perfect for last-minute cravings!
- Easy: We’re talking minimal steps, simple ingredients, and maximum flavor. Anyone can make this!
- Giftable: Need a sweet treat for a friend or neighbor? This cake is always a welcomed surprise and looks absolutely beautiful.
- Crowd-pleasing: Kids and adults alike swoon over this flavor combo. Get ready for requests for the recipe!
Ingredients
Gather ’round, let’s get our ingredients together! Most of these are likely already in your pantry, making this cake even easier to whip up.
- Vanilla Cake Mix: Our lovely shortcut! Any standard size box will do.
- Orange Gelatin Mix (3 oz box): This is the secret weapon that infuses the cake with that vibrant color and classic orange flavor. Don’t use sugar-free here for best results.
- Orange Juice: Instead of water, we’re using orange juice for an extra punch of citrusy goodness. Pulp-free works great!
- Vegetable Oil: Adds moisture and tenderness to the cake.
- Large Eggs: The binders that bring everything together.
- Vanilla Extract: Enhances the vanilla flavor from the mix and pairs perfectly with the orange.
- Orange Zest: A little fresh zest brightens up the flavor even more. Don’t skip this if you can help it!
And for that dreamy, creamy frosting:
- Butter, softened: Make sure it’s truly softened to room temperature for smooth, lump-free frosting.
- Powdered Sugar: Also known as confectioners’ sugar. Sifting it can help make your frosting extra smooth!
- Heavy Cream: Adds richness and makes the frosting wonderfully spreadable. Milk can work in a pinch, but cream is divine.
- Orange Extract (Optional): If you want to double down on that intense orange flavor in the frosting, a little extract does the trick. You could also use a tiny bit of orange zest here instead!
How to Make It
Okay, let’s get baking! You’ve got this. Just follow these simple steps, and you’ll be enjoying a slice of sunshine in no time.
1. First things first, preheat your oven to 350°F (175°C). This gives it time to get nice and hot. While it’s heating up, grease and flour two 8-inch round cake pans. Make sure you get into all those nooks and crannies so your beautiful cakes don’t stick.
2. Grab a large mixing bowl. Pour in your box of vanilla cake mix and that little box of orange gelatin mix. Give them a quick whisk together just to combine.
3. Now, add the wet ingredients: the orange juice, vegetable oil, large eggs, vanilla extract, and that lovely orange zest. Beat everything together with an electric mixer (or by hand if you want a workout!) until the batter is smooth. Be careful not to overmix – just until everything is combined and looks lovely and uniform.
4. Divide the batter evenly between your two prepared pans. You can eyeball it, or use a kitchen scale for perfectly even layers if you’re feeling fancy! Pop them into the preheated oven.
5. Bake for about 25–30 minutes. You’ll know they’re done when a toothpick inserted into the center comes out clean. Keep an eye on them in the last few minutes, as oven times can vary.
6. Once they’re out of the oven, let the cakes cool in their pans for about 10 minutes. This helps them firm up before you move them. Then, carefully invert them onto wire racks to cool completely. Patience is key here! Make sure they are totally cool before you even think about frosting them, or you’ll have a melty mess.
7. While the cakes cool, let’s make that dreamy frosting! In a medium bowl, beat your softened butter until it’s light and fluffy. This incorporates air and makes the frosting super smooth.
8. Gradually add the powdered sugar, one cup at a time, beating on low speed until it’s combined with the butter. Once it’s mostly incorporated, you can turn the speed up a little to make it fluffy.
9. Now, add the heavy cream and the orange extract (if you’re using it). Beat everything together until the frosting is smooth, creamy, and wonderfully spreadable. If it seems a little stiff, add another tiny splash of cream. If it’s too thin, beat in a little more powdered sugar, a spoonful at a time.
10. Time to assemble! Place one completely cooled cake layer on your serving plate or cake stand. Spread a generous layer of that delicious orange-vanilla frosting on top, right to the edges.
11. Carefully place the second cake layer on top of the frosted layer. Now, use an offset spatula or knife to frost the top and sides of the entire cake. Make it as smooth or as rustic as you like! You can add extra orange zest on top or some cute sprinkles if you want to make it extra festive.
Substitutions & Additions
Want to get creative? Here are a few ideas to switch things up or add a little extra flair:
- Different Citrus: Swap the orange juice and zest for lemon or lime for a citrusy twist. You could even use a different flavor of gelatin mix!
- Add Zest to Frosting: If you’re skipping the orange extract, you can beat a teaspoon of fresh orange zest into the frosting for natural citrus flavor.
- Make Cupcakes: Instead of layers, bake this batter as cupcakes! Fill liners about two-thirds full and bake for 18-22 minutes. Frost once cooled.
- Add Food Coloring: If you want a more intense orange color in the cake or frosting, add a drop or two of orange food coloring.
- Cream Cheese Frosting: Not a fan of buttercream? A cream cheese frosting would also be delicious, especially with a little orange zest mixed in!
Tips for Success
Even though this cake is super easy, a few pro tips can ensure it turns out perfect every time:
- Don’t Overmix: Once the wet and dry ingredients are just combined, stop mixing. Overmixing can lead to a tough cake.
- Cool Completely: I know I said it before, but seriously, make sure your cakes are completely cool before frosting. Warm cakes + frosting = sliding layers and melty mess!
- Soften Butter Properly: For the frosting, the butter should be soft enough to easily indent with your finger but not melted.
- Sift Powdered Sugar: For the smoothest frosting, sift your powdered sugar before adding it to the butter. This gets rid of any pesky clumps.
- Prep Ahead: You can bake the cake layers a day ahead of time, wrap them tightly in plastic wrap once cooled, and store them at room temperature until you’re ready to frost.
How to Store It
Once frosted, this Orange Creamsicle Cake is best stored at room temperature for up to 2-3 days, covered loosely. If your kitchen is very warm, or if you’ve added any ingredients to the frosting that require refrigeration (like cream cheese), you can store it in the refrigerator. Just be sure to let it sit at room temperature for about 15-20 minutes before serving for the best flavor and texture.
FAQs
Can I use different sized cake pans?
Yes, you can! If you use a 9×13 inch pan, the baking time will likely be similar, maybe slightly longer (around 30-35 minutes). For cupcakes, see the substitution tip above! Just adjust baking time and always check for doneness with a toothpick.
Can I omit the gelatin mix?
While you could make a vanilla cake with orange juice, omitting the gelatin will change the flavor and texture significantly. The gelatin is key to getting that distinct creamsicle flavor and vibrant color in the cake itself.
Why is my frosting too stiff or too thin?
Frosting consistency can be tricky! If it’s too stiff, beat in heavy cream (or milk) a tablespoon at a time until it’s the right consistency. If it’s too thin, add more powdered sugar, a quarter cup at a time, beating until smooth.
Can I freeze this cake?
Yes! You can freeze unfrosted cake layers by wrapping them tightly in plastic wrap and then foil. They’ll keep for up to 2-3 months. You can also freeze frosted cake, but it’s best to freeze it solid on a plate first, then wrap it tightly in plastic wrap and foil. Thaw in the refrigerator overnight.

Easy & Dreamy Orange Creamsicle Cake
Ingredients
Equipment
Method
- Okay, let's get baking! You've got this. Just follow these simple steps, and you'll be enjoying a slice of sunshine in no time.
- 1. First things first, preheat your oven to 350°F (175°C). This gives it time to get nice and hot. While it's heating up, grease and flour two 8-inch round cake pans. Make sure you get into all those nooks and crannies so your beautiful cakes don't stick.
- 2. Grab a large mixing bowl. Pour in your box of vanilla cake mix and that little box of orange gelatin mix. Give them a quick whisk together just to combine.
- 3. Now, add the wet ingredients: the orange juice, vegetable oil, large eggs, vanilla extract, and that lovely orange zest. Beat everything together with an electric mixer (or by hand if you want a workout!) until the batter is smooth. Be careful not to overmix – just until everything is combined and looks lovely and uniform.
- 4. Divide the batter evenly between your two prepared pans. You can eyeball it, or use a kitchen scale for perfectly even layers if you're feeling fancy! Pop them into the preheated oven.
- 5. Bake for about 25–30 minutes. You'll know they're done when a toothpick inserted into the center comes out clean. Keep an eye on them in the last few minutes, as oven times can vary.
- 6. Once they're out of the oven, let the cakes cool in their pans for about 10 minutes. This helps them firm up before you move them. Then, carefully invert them onto wire racks to cool completely. Patience is key here! Make sure they are totally cool before you even think about frosting them, or you'll have a melty mess.
- 7. While the cakes cool, let's make that dreamy frosting! In a medium bowl, beat your softened butter until it's light and fluffy. This incorporates air and makes the frosting super smooth.
- 8. Gradually add the powdered sugar, one cup at a time, beating on low speed until it's combined with the butter. Once it's mostly incorporated, you can turn the speed up a little to make it fluffy.
- 9. Now, add the heavy cream and the orange extract (if you're using it). Beat everything together until the frosting is smooth, creamy, and wonderfully spreadable. If it seems a little stiff, add another tiny splash of cream. If it's too thin, beat in a little more powdered sugar, a spoonful at a time.
- 10. Time to assemble! Place one completely cooled cake layer on your serving plate or cake stand. Spread a generous layer of that delicious orange-vanilla frosting on top, right to the edges.
- 11. Carefully place the second cake layer on top of the frosted layer. Now, use an offset spatula or knife to frost the top and sides of the entire cake. Make it as smooth or as rustic as you like! You can add extra orange zest on top or some cute sprinkles if you want to make it extra festive.