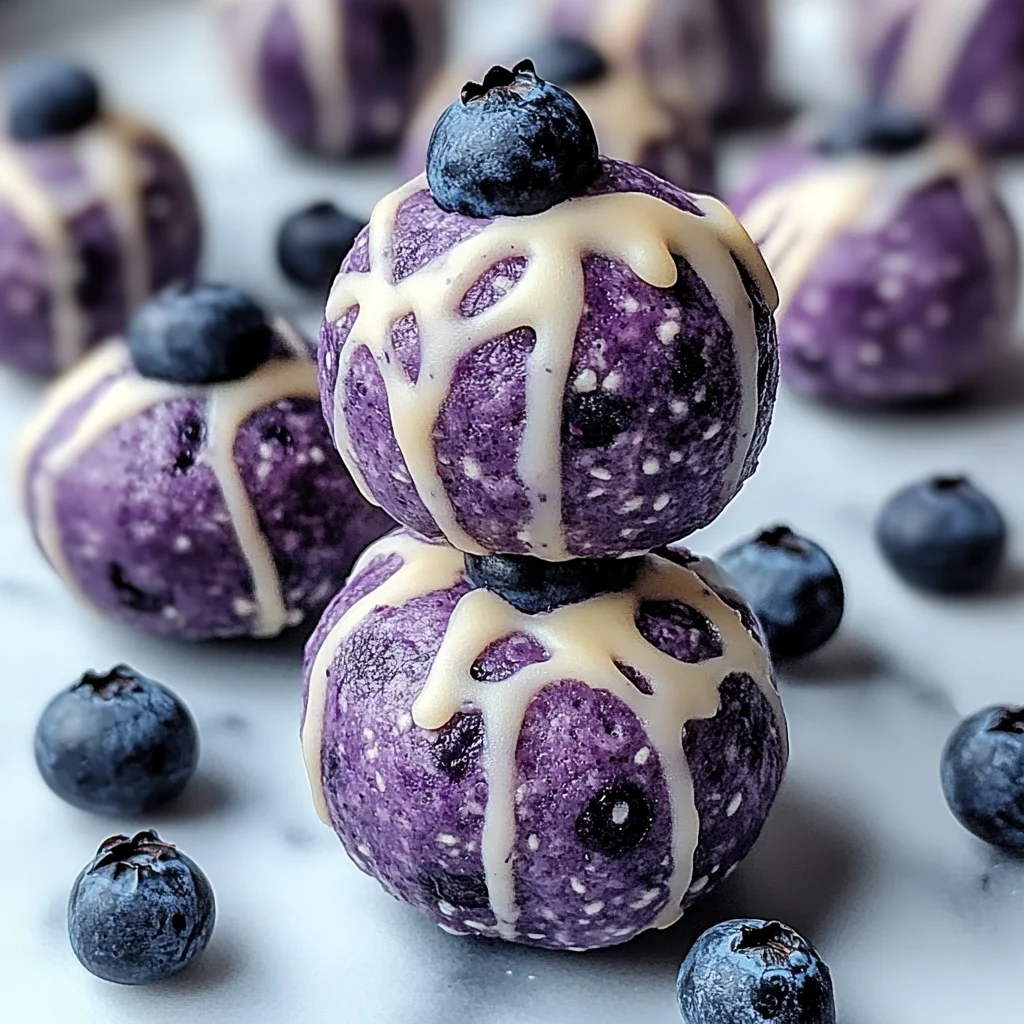
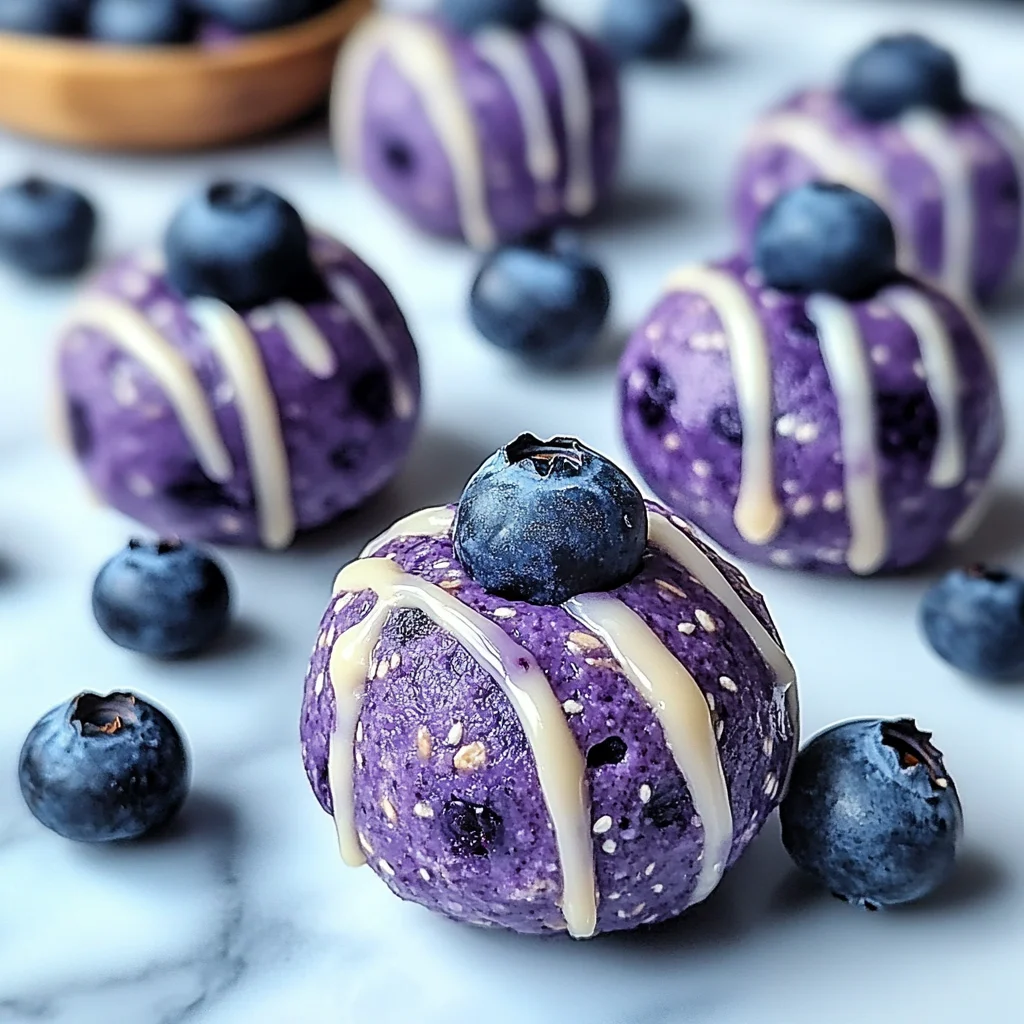
Hey there, sweet friends! Do you ever get that craving for something indulgent, something that whispers “cheesecake” to your soul, but then your inner voice reminds you about all the baking, the chilling, the waiting? Well, I’ve been there countless times! That’s why I am SO excited to share these incredible No-Bake Blueberry Cheesecake Protein Bites with you today. They’re like a little hug for your taste buds, packed with that dreamy cheesecake flavor and bursts of juicy blueberry, all without turning on your oven. Plus, they’re loaded with protein, making them the perfect guilt-free snack, breakfast on the go, or even a post-workout treat. Seriously, you won’t believe how easy, quick, and utterly delightful these bites are to whip up!
Why You’ll Love Blueberry Cheesecake Protein Bites – A No-Bake, High-Protein Snack
- Fast: From prep to chill, you’re looking at minimal time in the kitchen. Perfect for when that craving hits hard!
- Easy: No complicated steps, no tricky baking. Just mix, roll, and enjoy.
- Giftable: Pop these into a cute container, and you’ve got a thoughtful, delicious gift for friends, family, or your gym buddy.
- Crowd-pleasing: Who doesn’t love cheesecake? And these bite-sized wonders are universally adored.
Ingredients
Get ready to gather your simple ingredients. You likely have most of these in your pantry already!
- 1 cup rolled oats: The base of our bites, providing that satisfying chew and fiber.
- ½ cup vanilla protein powder: Your protein punch! Use your favorite brand here – I prefer a whey-based powder for the best texture.
- ¼ cup freeze-dried blueberries, finely ground: This is the secret to that intense blueberry flavor without adding too much moisture. Grind them up for an even distribution!
- ¼ cup unsweetened applesauce (or mashed banana): Adds natural sweetness and moisture. Applesauce gives a lighter flavor, while banana adds a touch more sweetness and density.
- ¼ cup cream cheese, softened (or vegan alternative): Hello, cheesecake! Make sure it’s softened so it blends beautifully.
- 2 tablespoons honey or maple syrup: For a touch more natural sweetness. Adjust to your preference!
- 1 tablespoon chia seeds or flax seeds (optional): An extra boost of omega-3s and fiber!
- ¼ cup frozen blueberries, thawed and drained: These provide little bursts of fresh, juicy blueberry goodness. Make sure they’re drained well to avoid a watery mixture.
- 1-2 tablespoons milk (dairy or non-dairy), as needed: Our binder! Just a little bit to get the perfect rolling consistency.
For the Glaze:
- 2 tablespoons cream cheese, softened: The base for our luscious, tangy glaze.
- 1-2 tablespoons milk (dairy or non-dairy): To thin out the glaze to a drizzly consistency.
- ½ teaspoon vanilla extract: Enhances that classic cheesecake flavor.
- 1-2 teaspoons powdered sugar (optional): For a little extra sweetness in the glaze, if you like.
For Topping:
- Fresh blueberries: For a pretty garnish and an extra pop of freshness.
How to Make Blueberry Cheesecake Protein Bites – A No-Bake, High-Protein Snack
Let’s get cooking (or, rather, no-cooking)! You’ll be amazed at how quickly these come together.
- Prepare Dried Blueberries: First things first, grab your freeze-dried blueberries and get them ready. Using a blender or food processor, blitz them into a fine powder. This really infuses that blueberry essence throughout our bites!
- Combine Dry Ingredients: In a medium-sized mixing bowl, combine your rolled oats, vanilla protein powder, and the freshly ground freeze-dried blueberry powder. If you’re using them, toss in your chia or flax seeds here too. Give it a good whisk to make sure everything is evenly distributed.
- Combine Wet Ingredients: In a separate bowl, it’s time for the magic of the “cheesecake” part! Whisk together your softened cream cheese, unsweetened applesauce (or mashed banana), and honey or maple syrup until smooth and creamy.
- Mix and Adjust: Now, add the wet ingredients into the dry ingredients. Mix everything thoroughly until it’s well combined. The mixture should be thick. Gently fold in your thawed and well-drained frozen blueberries. This step is crucial for bursts of fruit without adding too much liquid. If your mixture feels too dry and crumbly to form balls, don’t fret! Add the milk one tablespoon at a time, mixing after each addition, until you reach a consistency that can easily be rolled into firm balls. It should be pliable but not sticky. If you love how simple no-bake recipes are, you might also want to check out my No-Bake Oreo Bars for another easy dessert fix!
- Form Bites and Chill: Scoop out portions of the mixture and roll them into bite-sized balls, about 1-inch in diameter. Place these little beauties on a parchment-lined plate or baking sheet. Pop them into the refrigerator for at least 30 minutes. This chilling time is super important – it helps them firm up and holds their shape perfectly. These little beauties are so much fun to make, a bit like my popular No-Bake Strawberry Cheesecake Protein Bites, just with a blueberry twist!
- Prepare Glaze: While your bites are chilling, let’s make that dreamy glaze. In a small bowl, whisk together the softened cream cheese, milk, vanilla extract, and powdered sugar (if you’re using it). Whisk until it’s completely smooth and has a nice, drizzly consistency. If it’s too thick, add a tiny bit more milk; too thin, add a pinch more powdered sugar.
- Drizzle and Serve: Once your protein bites are nicely chilled, retrieve them from the fridge. Drizzle the cream cheese glaze generously over each bite. For that final, beautiful touch, top each one with a fresh blueberry. If you want the glaze to set firmly, you can refrigerate them for an additional 10 minutes. Then, serve them up and enjoy! Store any leftover bites in an airtight container in the refrigerator.
Substitutions & Additions
One of the best things about these protein bites is how adaptable they are! Feel free to play around and make them your own.
- Protein Powder: While vanilla is classic, try a plain or unflavored protein powder and add a bit more vanilla extract. A berry-flavored protein could also be fun!
- Sweetener: Instead of honey or maple syrup, you could use agave nectar or even a sugar-free syrup if you’re watching your sugar intake.
- Fruit Power: Not a blueberry fan? Swap out the freeze-dried and frozen blueberries for raspberries, strawberries, or even a mixed berry blend. Just be sure to drain thawed fruit thoroughly!
- Cream Cheese: If you’re dairy-free or looking for a lighter option, a vegan cream cheese alternative works beautifully. You could also try Greek yogurt (thick, plain) for a tangier, even higher-protein bite – start with less and adjust consistency.
- Nut Butter Boost: For extra healthy fats and flavor, you could add a tablespoon of almond butter or cashew butter to the main mixture.
- Crunch Factor: Mix in a tablespoon of chopped nuts like almonds or walnuts, or even some mini white chocolate chips for a treat!
Tips for Success
- Soften Your Cream Cheese: This is key for a smooth mixture and glaze. Take it out of the fridge at least 30 minutes before you start.
- Drain Frozen Blueberries Well: Excess moisture can make your bites too soft and hard to roll. Pat them dry with a paper towel after thawing.
- Chill Time is Your Friend: Don’t skip the refrigeration step! It helps the oats absorb moisture and allows the bites to firm up, making them much easier to handle and enjoy.
- Adjust Milk Gradually: When adding milk to the main mixture, do it slowly. You want just enough to bring everything together into a rollable dough, not a sticky mess.
- Parchment Paper is a Must: It prevents sticking and makes cleanup a breeze.
- Batch Prep: These are fantastic for meal prep! Make a double batch at the beginning of the week for healthy snacks whenever you need them.
How to Store Blueberry Cheesecake Protein Bites – A No-Bake, High-Protein Snack
These delicious bites are best stored in the refrigerator to maintain their shape and freshness. Place them in an airtight container, and they’ll stay good for up to 5-7 days. For longer storage, you can freeze them for up to 1-2 months. Just be sure to separate layers with parchment paper to prevent sticking. Thaw them in the refrigerator or at room temperature for a few minutes before enjoying.
FAQs
Q: Can I use fresh blueberries instead of frozen?
A: You can, but frozen (thawed and drained) blueberries tend to be softer and incorporate more easily without adding too much extra moisture. If using fresh, chop them finely.
Q: What if my mixture is too sticky to roll?
A: Add a tiny bit more protein powder or finely ground oats, about a teaspoon at a time, until it’s easier to handle. Ensure your cream cheese was softened, but not melted, and your thawed blueberries were well-drained.
Q: Can I make these ahead for a party?
A: Absolutely! These are perfect for making ahead. Prepare them completely, including the glaze and fresh blueberry topping, and store them in an airtight container in the fridge. They’ll be ready to impress!
For more delicious and easy recipes, make sure to follow us on Pinterest!
No-Bake Blueberry Cheesecake Protein Bites
Ingredients
Equipment
Method
- Step 1: First things first, grab your freeze-dried blueberries and get them ready. Using a blender or food processor, blitz them into a fine powder. This really infuses that blueberry essence throughout our bites!
- Step 2: In a medium-sized mixing bowl, combine your rolled oats, vanilla protein powder, and the freshly ground freeze-dried blueberry powder. If you're using them, toss in your chia or flax seeds here too. Give it a good whisk to make sure everything is evenly distributed.
- Step 3: In a separate bowl, it’s time for the magic of the "cheesecake" part! Whisk together your softened cream cheese, unsweetened applesauce (or mashed banana), and honey or maple syrup until smooth and creamy.
- Step 4: Now, add the wet ingredients into the dry ingredients. Mix everything thoroughly until it's well combined. The mixture should be thick. Gently fold in your thawed and well-drained frozen blueberries. This step is crucial for bursts of fruit without adding too much liquid. If your mixture feels too dry and crumbly to form balls, don't fret! Add the milk one tablespoon at a time, mixing after each addition, until you reach a consistency that can easily be rolled into firm balls. It should be pliable but not sticky.
- Step 5: Scoop out portions of the mixture and roll them into bite-sized balls, about 1-inch in diameter. Place these little beauties on a parchment-lined plate or baking sheet. Pop them into the refrigerator for at least 30 minutes. This chilling time is super important – it helps them firm up and holds their shape perfectly.
- Step 6: While your bites are chilling, let’s make that dreamy glaze. In a small bowl, whisk together the softened cream cheese, milk, vanilla extract, and powdered sugar (if you're using it). Whisk until it's completely smooth and has a nice, drizzly consistency. If it's too thick, add a tiny bit more milk; too thin, add a pinch more powdered sugar.
- Step 7: Once your protein bites are nicely chilled, retrieve them from the fridge. Drizzle the cream cheese glaze generously over each bite. For that final, beautiful touch, top each one with a fresh blueberry. If you want the glaze to set firmly, you can refrigerate them for an additional 10 minutes. Then, serve them up and enjoy! Store any leftover bites in an airtight container in the refrigerator.