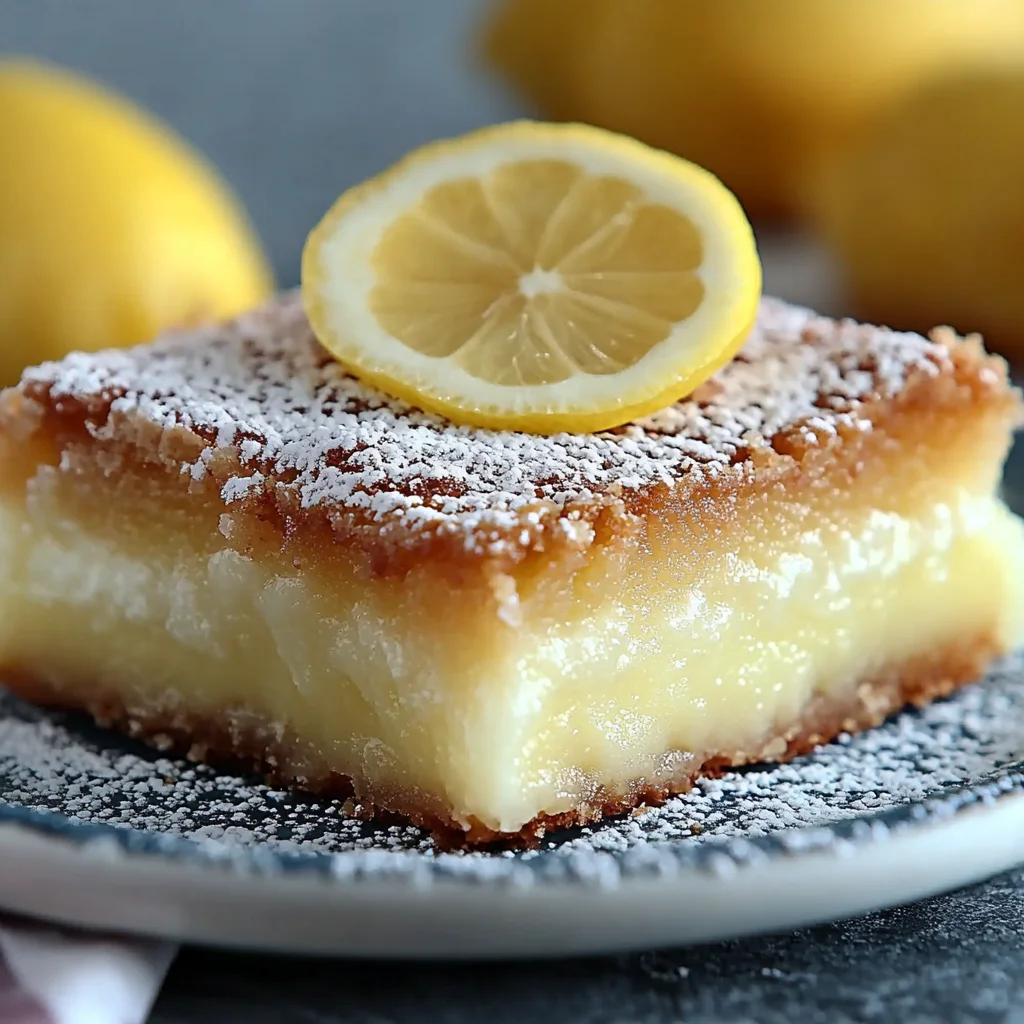
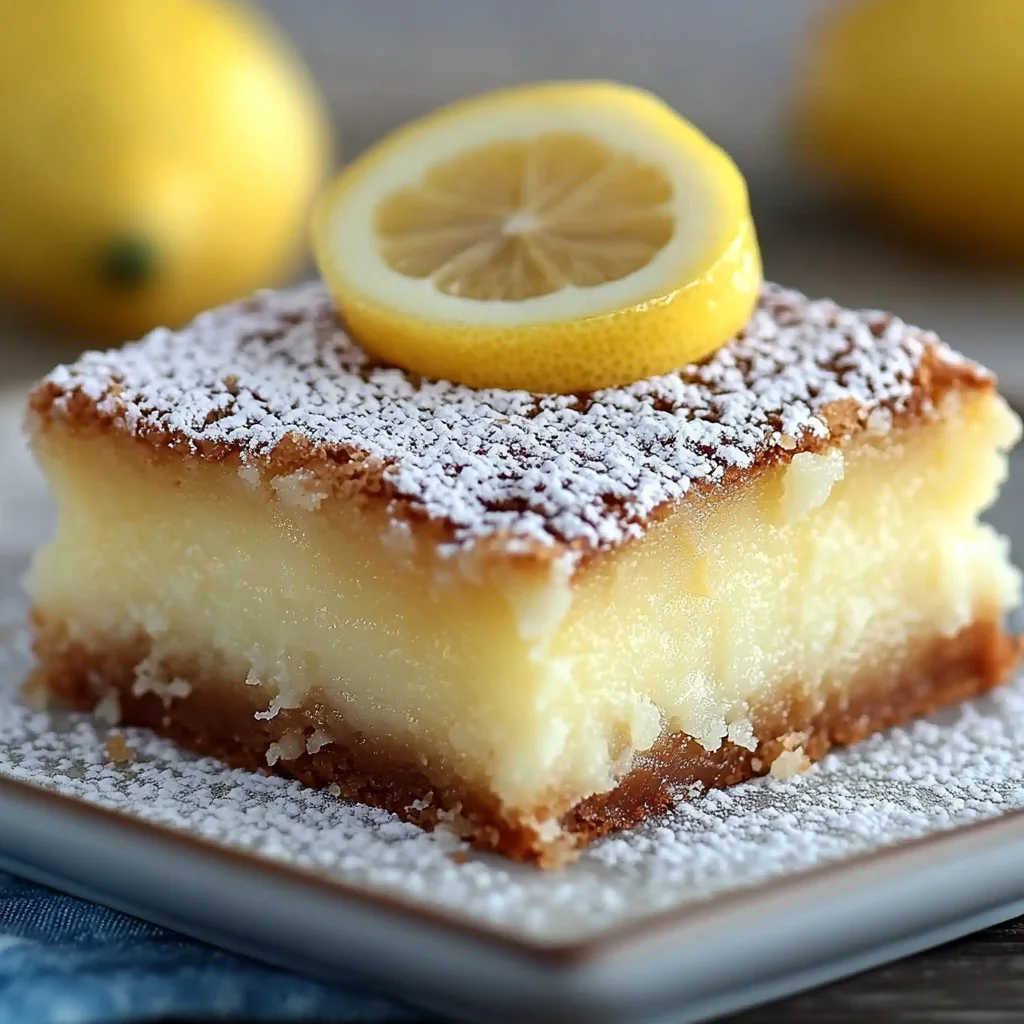
Oh, friend, do you ever get that craving for something that’s both wonderfully familiar and excitingly new? Something that brings back memories of sunshine-filled afternoons and fresh-baked goodness, but with a little twist? Well, pull up a chair and let me tell you about a recipe that does just that: my Lemon Bar White Chocolate Brownies!
Imagine the rich, chewy goodness of a classic white chocolate brownie, then layer it with the bright, tangy zest of a homemade lemon bar. It’s like your two favorite desserts decided to have a delicious, melt-in-your-mouth baby! And the best part? These beauties are surprisingly easy to whip up, quick enough for a last-minute get-together, and trust me, they’re so memorable, everyone will be asking for the recipe. If you love the sunny flavor of lemon, like in these fluffy lemon ricotta pancakes, you are going to adore these bars!
Why You’ll Love Lemon Bar White Chocolate Brownies
- Fast: Ready to bake in a flash, perfect for spontaneous baking urges.
- Easy: Simple ingredients and straightforward steps mean anyone can make them.
- Giftable: These make a stunning and delicious homemade gift or potluck contribution.
- Crowd-pleasing: The irresistible combination of sweet and tart ensures there are never any leftovers!
Ingredients
Gather ’round your pantry, sweet friends! Here’s what you’ll need to create these little squares of joy:
- ¾ cup salted butter: (or unsalted butter with a pinch of salt) This is our fat for that rich, tender brownie base.
- 6 ounces white chocolate, chopped: Go for a good quality white chocolate bar or baking chunks, not chips, for the best melt and flavor.
- 1 ½ cups granulated sugar: For sweetness in both layers, balancing the lemon’s tang.
- 2 large eggs (for brownies): Our binder for a perfectly chewy brownie texture.
- 2 teaspoons vanilla extract: A hint of warmth that plays beautifully with white chocolate and lemon.
- 1 teaspoon fresh lemon zest (for brownies): Don’t skip this! It adds an incredible aromatic burst to the brownie.
- 2 ½ cups all-purpose flour (for brownies): The backbone of our brownie structure.
- ¼ teaspoon salt (for brownies): Enhances all the flavors and cuts through the sweetness.
- ½ teaspoon baking powder: Gives just enough lift to the brownies.
- 4 large eggs (for lemon layer): The base for our silky-smooth lemon curd topping.
- 1 ⅓ cups granulated sugar (for lemon layer): Sweetens the lemon layer to perfection.
- 1 teaspoon fresh lemon zest (for lemon layer): Even more bright, fresh lemon flavor!
- ⅔ cup fresh lemon juice: Essential for that vibrant, tangy lemon punch. Freshly squeezed is always best here!
- ¼ cup all-purpose flour (for lemon layer): Helps to thicken the lemon layer into a custardy dream.
- Powdered sugar, for dusting: Our final flourish for a beautiful presentation.
How to Make Lemon Bar White Chocolate Brownies
Alright, let’s get our hands a little messy (in the best way possible, of course!). Follow these steps, and you’ll have these dazzling bars ready to impress in no time.
1. Prepare Oven and Pan: First things first, let’s get that oven warmed up. Preheat your oven to a cozy 350°F (175°C). Then, grab a 9×13-inch baking pan. You’ll want to generously grease it and then dust it lightly with flour. This little trick helps ensure your brownies pop out easily and perfectly once they’re cool.
2. Make Brownie Batter: Now for the good stuff! In a heatproof bowl, melt your butter and chopped white chocolate together. You can do this by setting the bowl over a saucepan of simmering water (make sure the bowl doesn’t touch the water!) and stirring gently until everything is wonderfully smooth and luscious. Once melted, take it off the heat.
Next, stir in the granulated sugar until it’s well combined. Then, one at a time, whisk in those eggs. This helps create that rich, fudgy brownie texture we all adore. Finish by whisking in the vanilla extract and that beautiful fresh lemon zest. I just love how the lemon brightens up the white chocolate in this base! It’s a delightful twist that sets these apart from your standard fudgy brownie, though if you’re ever in the mood for a classic, you can’t beat traditional lemon bars for that pure citrus zing!
In a separate, medium-sized bowl, quickly whisk together your all-purpose flour, salt, and baking powder. Now, gradually add these dry ingredients to your wet mixture. Mix it gently until everything is just combined. Be careful not to overmix here; we want tender brownies, not tough ones! Once it’s all happy and combined, spread the batter evenly into your prepared pan. This will be the sturdy, sweet foundation for our lemon layer.
3. Make Lemon Layer: While your brownie base is waiting patiently, let’s whip up that bright lemon topping. In a medium bowl, whisk together the four large eggs and granulated sugar until the mixture is light and fluffy. It should look pale yellow and airy. Stir in the remaining fresh lemon zest and the tart fresh lemon juice. Ah, the smell of fresh lemon just fills the kitchen, doesn’t it?
Finally, gradually whisk in the ¼ cup of all-purpose flour. Keep whisking until the mixture is completely smooth. This flour helps give the lemon layer that delightful, almost custardy texture when baked.
4. Assemble and Bake: This is where the magic happens! Very carefully, pour the lemon mixture evenly over the brownie batter you’ve already spread in the pan. Don’t worry if it looks a little runny; it will bake up beautifully.
Pop the pan into your preheated oven and bake for 30-35 minutes. You’ll know it’s done when the edges look nicely set, and a toothpick inserted into the center of the lemon layer comes out with moist crumbs. If it’s totally clean, it might be a tad overbaked, but still delicious!
5. Cool and Serve: The hardest part of this recipe is waiting! You absolutely must let these brownies cool completely in the pan before you even think about slicing them. Trust me on this one – if you cut them while warm, the lemon layer will be too soft and messy. Once they’re completely cool (which can take a couple of hours, or you can speed it up in the fridge), slice them into beautiful bars. For a final, elegant touch, dust them with a little powdered sugar right before serving. Enjoy your little taste of sunshine!
Substitutions & Additions
One of the things I love most about baking is getting creative! Here are some ideas to make these Lemon Bar White Chocolate Brownies even more “you”:
- Chocolate Swap: Not a white chocolate fan? You could try using semi-sweet chocolate chips or dark chocolate for the brownie base for a classic chocolate-lemon combo.
- Extra Zest: If you’re a true lemon lover, feel free to add another ½ teaspoon of lemon zest to either the brownie or the lemon layer for an even more intense citrus kick.
- Berries, Anyone?: A handful of fresh or frozen (not thawed) raspberries or blueberries scattered over the brownie batter before pouring the lemon layer would be absolutely divine!
- Coconut Craze: A sprinkle of shredded coconut in the brownie batter would add a lovely texture and flavor.
- Glaze It: Instead of (or in addition to!) powdered sugar, you could drizzle a simple lemon glaze over the cooled bars. Just whisk powdered sugar with a little lemon juice until it’s drizzly.
Tips for Success
Baking is all about those little details that make a big difference. Here are my top tips for these lemon bar white chocolate brownies:
- Don’t Overbake: Brownies can go from perfectly fudgy to dry in a blink. Keep an eye on them towards the end of the baking time. The lemon layer should be set but still have a slight jiggle in the very center when you gently shake the pan.
- Fresh Lemon is Key: For the best, brightest lemon flavor, always use fresh lemon juice and zest. Bottled juice just doesn’t compare!
- Cool Completely: I know, I know, I said it before, but it’s so important! Patience is a virtue when it comes to cutting clean, beautiful bars. If you can, make them the day before and chill them overnight.
- Room Temperature Eggs: For both layers, using room temperature eggs helps them incorporate more smoothly into the batter, leading to a better texture. If you forget to take them out, place them in a bowl of warm (not hot!) water for 5-10 minutes.
- Prep Ahead: You can prepare the brownie batter and the lemon layer mixes separately and store them covered in the fridge for up to 24 hours. Just bring them to room temperature before assembling and baking. These are so easy, they’re on par with my favorite no-bake caramel pretzel bars for a quick dessert option!
How to Store Lemon Bar White Chocolate Brownies
Got leftovers? (Highly unlikely, but let’s pretend!) Here’s how to keep these delightful bars fresh and delicious:
- Countertop: If your kitchen isn’t too warm, these bars can be stored in an airtight container at room temperature for up to 2 days.
- Refrigerator: For longer storage, or if you prefer a firmer texture, store them in an airtight container in the refrigerator for up to 5 days. Chilling them also makes them super easy to slice!
- Freezer: Yes, you can freeze them! Wrap individual bars tightly in plastic wrap, then place them in a freezer-safe bag or container. They’ll keep well for up to 1-2 months. Thaw them in the refrigerator overnight or at room temperature for a few hours before serving.
FAQs
Got questions? I’ve got answers!
Q: Can I use lemon extract instead of fresh lemon zest and juice?
A: While lemon extract will give you a lemon flavor, it won’t be as bright, nuanced, or natural as fresh lemon zest and juice. I highly recommend sticking to fresh for the best results!
Q: Why did my lemon layer crack on top?
A: A few small cracks are pretty normal, especially as the bars cool and contract. It usually means the lemon layer is beautifully set! Overbaking can sometimes cause more pronounced cracking, so try to pull them out as soon as the edges are set.
Q: Can I make these in a different size pan?
A: A 9×13-inch pan is ideal for this recipe to get the right thickness for both layers. If you use a smaller pan, the layers will be thicker and require a longer baking time. A larger pan will result in thinner bars and a shorter baking time, so adjust accordingly and keep a close eye on them!
For more delicious and easy recipes, be sure to follow us on Pinterest!
Brighten Your Day with Zesty Lemon Bar White Chocolate Brownies: A Perfect Sweet Treat!
Ingredients
Equipment
Method
- Step 1: Prepare Oven and Pan. Preheat your oven to 350°F (175°C). Generously grease a 9x13-inch baking pan and dust it lightly with flour. This helps ensure your brownies pop out easily.
- Step 2: Make Brownie Batter. In a heatproof bowl, melt butter and chopped white chocolate together by setting the bowl over a saucepan of simmering water (ensuring the bowl does not touch the water), stirring gently until smooth. Once melted, remove from heat.Stir in 1 ½ cups granulated sugar until well combined. Whisk in 2 large eggs, one at a time, until incorporated, then whisk in 2 teaspoons vanilla extract and 1 teaspoon fresh lemon zest.In a separate medium bowl, whisk together 2 ½ cups all-purpose flour, ¼ teaspoon salt, and ½ teaspoon baking powder. Gradually add these dry ingredients to your wet mixture, mixing gently until just combined. Do not overmix. Spread the batter evenly into your prepared pan.
- Step 3: Make Lemon Layer. In a medium bowl, whisk together 4 large eggs and 1 ⅓ cups granulated sugar until the mixture is light, fluffy, and pale yellow. Stir in the remaining 1 teaspoon fresh lemon zest and ⅔ cup fresh lemon juice. Finally, gradually whisk in ¼ cup all-purpose flour until the mixture is completely smooth.
- Step 4: Assemble and Bake. Carefully pour the lemon mixture evenly over the brownie batter in the pan. Pop the pan into your preheated oven and bake for 30-35 minutes. It's done when the edges look nicely set, and a toothpick inserted into the center of the lemon layer comes out with moist crumbs.
- Step 5: Cool and Serve. Let these brownies cool completely in the pan before slicing. This can take a couple of hours, or you can speed it up in the fridge. Once completely cool, slice them into bars. For a final elegant touch, dust them with a little powdered sugar right before serving. Enjoy!