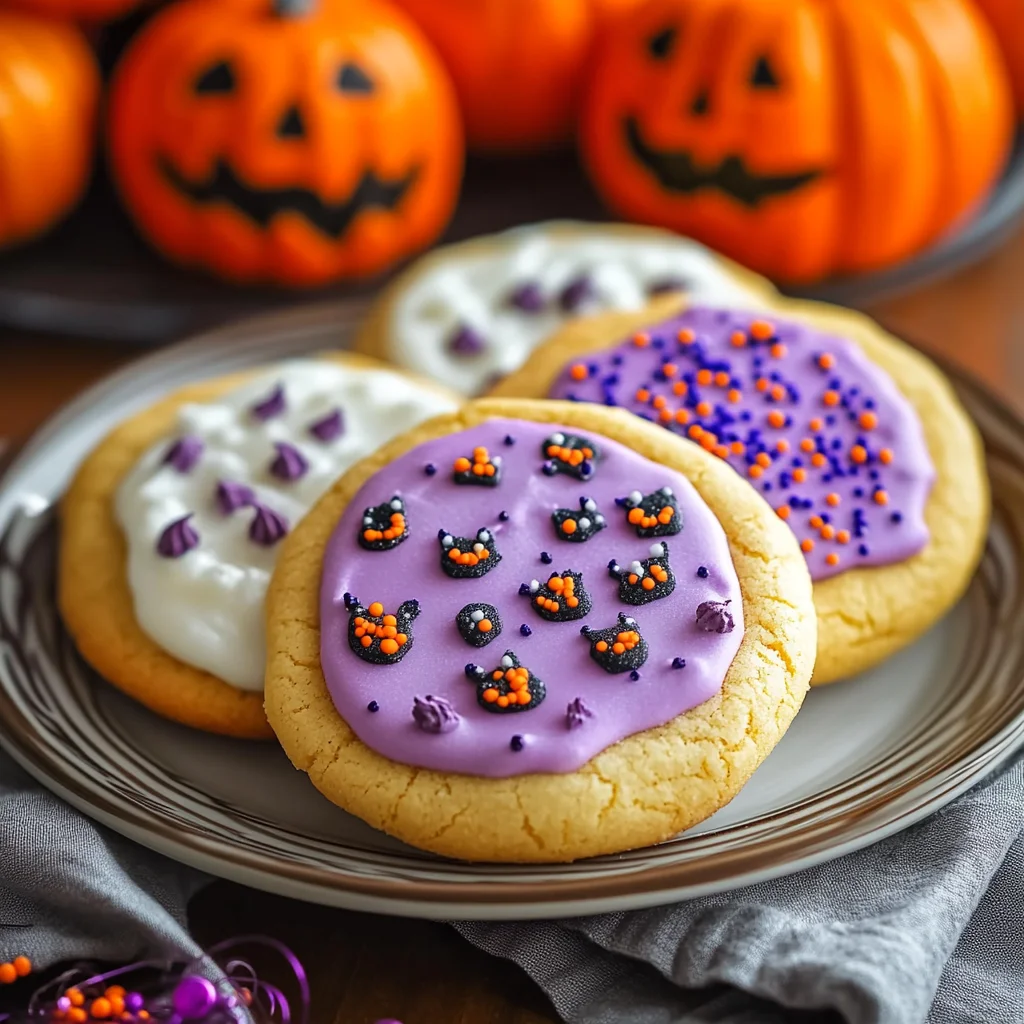
Oh, friend, there’s just something magical about autumn, isn’t there? The crisp air, the rustling leaves, and that unmistakable feeling of Halloween drawing near. For me, it always brings back memories of baking with my grandma, the kitchen filled with the sweet scent of sugar and vanilla. And if there’s one cookie that truly embodies that cozy, nostalgic feeling, it’s the classic Lofthouse-style sugar cookie. You know, those incredibly soft, pillowy circles with that thick, dreamy buttercream frosting you find at the grocery store? Well, today, I’m going to show you how to recreate that magic right in your own kitchen, with a festive Halloween twist!
These Halloween Lofthouse-Style Sugar Cookies aren’t just a treat; they’re a hug in cookie form. They’re unbelievably easy to whip up, shockingly quick, and so memorable, you’ll want to make them every year. Whether you’re planning a ghoulish gathering, need a fun activity with the kids, or just want to brighten up your own day with a little seasonal sweetness, this recipe is your golden ticket!
Why You’ll Love Halloween Lofthouse-Style Sugar Cookies
- Fast: From mixing bowl to cooling rack, these cookies come together in a flash.
- Easy: No fancy techniques here, just straightforward steps for delicious results.
- Giftable: Box them up for neighbors, teachers, or trick-or-treaters – they’re always a hit!
- Crowd-pleasing: Their soft texture and sweet frosting make them irresistible to all ages.
Ingredients

Gather your pantry staples and let’s get baking! Here’s what you’ll need to create these delightful Halloween treats:
- 2 ¼ cups all-purpose flour: The backbone of our soft, tender cookies.
- ½ teaspoon baking powder: Gives our cookies that lovely lift.
- ¼ teaspoon baking soda: Works with the sour cream for ultimate tenderness.
- 1 tablespoon cornstarch: My secret weapon for that signature soft, almost cakey texture! Don’t skip it!
- ½ teaspoon salt: Just a pinch to balance all that wonderful sweetness.
- ½ cup unsalted butter, softened: Room temperature butter is key for a smooth, creamy dough. If it’s too cold, it won’t cream properly; too warm, and your cookies might spread too much.
- 1 cup granulated sugar: Our main sweetener for the cookies.
- 1 large egg: Binds everything together and adds richness.
- ¼ cup sour cream: This is a game-changer for Lofthouse-style cookies! It adds moisture and tenderness that’s unmatched.
- 1 ½ teaspoons vanilla extract: Classic and comforting flavor.
- ¼ teaspoon almond extract: This little touch makes all the difference, giving the cookies that distinctive bakery taste.
For the Buttercream Frosting:
- ½ cup butter, softened: Again, softened butter is crucial for a smooth, spreadable frosting.
- 2 cups powdered sugar: The foundation of our sweet, fluffy frosting.
- 1 teaspoon vanilla extract: Enhances the overall flavor.
- 2 tablespoons milk: Helps achieve the perfect creamy consistency.
- Orange food coloring: For that vibrant Halloween glow!
- Purple food coloring: Adds a spooky, fun touch.
- Green food coloring: Perfect for monster eyes or spooky slime!
- Halloween sprinkles: The final festive flourish! Ghosts, bats, pumpkins – get creative!
How to Make Halloween Lofthouse-Style Sugar Cookies
Ready to get your hands a little floury? Let’s walk through this simple process together!
- Prepare Cookie Dough: In a medium bowl, start by whisking together all your dry ingredients: the flour, baking powder, baking soda, cornstarch, and salt. Give them a good whisk to make sure everything is evenly distributed. In a separate, large bowl, use an electric mixer (a stand mixer works wonders here, just like when I make homemade Pizza Hut breadsticks!) to cream together your softened butter and granulated sugar until the mixture is wonderfully light and fluffy. This can take 2-3 minutes. Next, beat in the egg, sour cream, vanilla extract, and almond extract until everything is fully combined and smooth. Finally, gradually add your dry ingredients to the wet mixture, mixing on low speed until everything is just combined. Be careful not to overmix; we want these cookies tender!
- Chill Dough: This step is important for easy handling and to prevent your cookies from spreading too much. Divide the dough in half, gently flatten each half into a disc, and wrap them snugly in plastic wrap. Pop them into the refrigerator for at least 1 hour. If you’re planning ahead, you can chill them for up to 24 hours!
- Bake Cookies: Preheat your oven to a comfortable 350°F (175°C). Line your baking sheets with parchment paper; this makes for easy cleanup and prevents sticking. On a lightly floured surface, take one disc of chilled dough and roll it out to approximately ¼-inch thickness. Now for the fun part: use your favorite Halloween-themed cookie cutters to cut out spooky shapes! Carefully transfer your cut-out cookies to the prepared baking sheets, leaving about an inch of space between each one to allow for a little expansion. Bake for 8-10 minutes, or until the edges are just a light golden brown. You want them to remain pale in the center for that signature soft texture. Let the cookies cool on the baking sheets for a few minutes before moving them to a wire rack to cool completely.
- Prepare Frosting: While your cookies are cooling down, it’s time to make that dreamy buttercream! In a large bowl, beat the softened butter until it’s creamy and smooth. Gradually add the powdered sugar, alternating with the milk, beating until the frosting is wonderfully smooth and fluffy. Stir in the vanilla extract. Now for the Halloween magic! Divide the frosting into separate bowls (I usually do three, one for each color) and add a few drops of orange, purple, and green food coloring to each bowl, mixing until you reach your desired vibrant hues.
- Decorate: Patience is a virtue here! Make sure your cookies are completely cool before frosting. Once they are, generously spread or pipe the colored frosting onto each cookie. For a super smooth finish, I like to use a small offset spatula. Then, before the frosting sets, shower them with your favorite Halloween sprinkles! They’re ready to serve and enjoy!

Substitutions & Additions
This recipe is incredibly versatile! Here are some fun ways to switch things up:
- Extracts: Don’t have almond extract? No worries! You can use an extra ½ teaspoon of vanilla, or try lemon extract for a zesty twist, especially if you love bright, citrusy flavors like in these easy lemon blueberry trifles.
- Sour Cream Swap: If you don’t have sour cream on hand, plain Greek yogurt or buttermilk can work as a substitute, offering a similar tang and tenderness.
- Frosting Flavors: Experiment with different frosting flavors! A touch of orange zest in the frosting would be amazing, or a hint of maple extract for a fall twist. You could even swirl in some melted white chocolate!
- Glitter & Ghouls: Beyond sprinkles, think edible glitter, small candy eyeballs, or use black gel food coloring to draw spooky spiderwebs or bat silhouettes on the frosted cookies.
- Cookie Shapes: While Halloween cutters are perfect, these cookies are delicious in any shape! Stars, circles, or even just cut into squares will be equally tasty.
Tips for Success
To ensure your Lofthouse cookies are perfectly soft every time, keep these tips in mind:
- Softened Butter is Key: For both the cookies and the frosting, make sure your butter is truly softened (room temperature, but not melted). This allows it to cream properly with the sugar, incorporating air for that light, fluffy texture.
- Don’t Overmix the Dough: Once you add the dry ingredients, mix just until combined. Overmixing develops the gluten in the flour, leading to tougher cookies instead of soft ones.
- Chill, Chill, Chill: Seriously, don’t skip the chilling step! It helps the dough firm up, making it much easier to roll and cut, and prevents the cookies from spreading too much in the oven.
- Don’t Overbake: Lofthouse-style cookies are meant to be soft and pale. Bake them just until the edges are lightly golden, but the centers still look soft and slightly undone. They will continue to cook slightly on the hot baking sheet after you pull them from the oven.
- Cool Completely: Frosting warm cookies is a messy business! Always wait until your cookies are fully cooled before adding the buttercream.
How to Store Halloween Lofthouse-Style Sugar Cookies
Once your beautiful cookies are frosted and ready, here’s how to keep them fresh and delicious:
- Room Temperature: Store the frosted cookies in an airtight container at room temperature for up to 3-4 days. For best results, place a piece of parchment paper between layers to prevent sticking.
- Refrigeration: If your kitchen is particularly warm, or if you prefer a firmer frosting, you can store them in the refrigerator. Just be sure to bring them back to room temperature before serving for the best texture. They’ll last about 5-7 days in the fridge.
- Freezing: These cookies freeze beautifully! You can freeze the unfrosted cookies for up to 3 months in an airtight container or freezer bag. Thaw at room temperature and then frost as desired. You can also freeze frosted cookies (place them in a single layer on a baking sheet to freeze solid first, then transfer to an airtight container). Thaw in the refrigerator or at room temperature.
FAQs
Got questions? I’ve got answers!
- Q: Why are my Lofthouse cookies not soft?
A: The most common culprits are overmixing the dough or overbaking the cookies. Remember to mix just until combined and pull them from the oven when the edges are barely golden. Using cornstarch and sour cream also greatly contributes to their softness. - Q: Can I make the cookie dough ahead of time?
A: Absolutely! The dough can be made up to 2 days in advance and stored, wrapped tightly, in the refrigerator. Just let it sit out for 10-15 minutes before rolling if it’s too firm. - Q: Can I use different colors for other holidays?
A: Of course! This is the beauty of a classic sugar cookie. Swap out the Halloween colors for pastels for Easter, red and green for Christmas, or festive colors for birthdays. - Q: What’s the difference between baking powder and baking soda in this recipe?
A: Baking powder provides an initial lift, while baking soda reacts with the acidic sour cream to create more leavening and tenderness, contributing to that distinctive soft, pillowy texture.
I hope you have as much fun making (and eating!) these Halloween Lofthouse-Style Sugar Cookies as I do. They’re truly a taste of homemade happiness. Happy baking, and Happy Halloween!
For more delicious and easy recipes, be sure to follow us on Pinterest!
Spooktacularly Soft & Pillowy Halloween Lofthouse-Style Sugar Cookies: A Trick-or-Treat Dream!
Oh, friend, there’s just something magical about autumn, isn’t there? The crisp air, the rustling leaves, and that unmistakable feeling of Halloween drawing near. For me, it always brings back memories of baking with my grandma, the kitchen filled with the sweet scent of sugar and vanilla. And if there’s one cookie that truly embodies that cozy, nostalgic feeling, it’s the classic Lofthouse-style sugar cookie. You know, those incredibly soft, pillowy circles with that thick, dreamy buttercream frosting you find at the grocery store? Well, today, I’m going to show you how to recreate that magic right in your own kitchen, with a festive Halloween twist!
These Halloween Lofthouse-Style Sugar Cookies aren’t just a treat; they’re a hug in cookie form. They’re unbelievably easy to whip up, shockingly quick, and so memorable, you’ll want to make them every year. Whether you’re planning a ghoulish gathering, need a fun activity with the kids, or just want to brighten up your own day with a little seasonal sweetness, this recipe is your golden ticket!
Why You’ll Love Halloween Lofthouse-Style Sugar Cookies
- Fast
- Easy
- Giftable
- Crowd-pleasing
Ingredients
Gather your pantry staples and let’s get baking! Here’s what you’ll need to create these delightful Halloween treats:
- 2 ¼ cups all-purpose flour: The backbone of our soft, tender cookies.
- ½ teaspoon baking powder: Gives our cookies that lovely lift.
- ¼ teaspoon baking soda: Works with the sour cream for ultimate tenderness.
- 1 tablespoon cornstarch: My secret weapon for that signature soft, almost cakey texture! Don’t skip it!
- ½ teaspoon salt: Just a pinch to balance all that wonderful sweetness.
- ½ cup unsalted butter, softened: Room temperature butter is key for a smooth, creamy dough. If it’s too cold, it won’t cream properly; too warm, and your cookies might spread too much.
- 1 cup granulated sugar: Our main sweetener for the cookies.
- 1 large egg: Binds everything together and adds richness.
- ¼ cup sour cream: This is a game-changer for Lofthouse-style cookies! It adds moisture and tenderness that’s unmatched.
- 1 ½ teaspoons vanilla extract: Classic and comforting flavor.
- ¼ teaspoon almond extract: This little touch makes all the difference, giving the cookies that distinctive bakery taste.
For the Buttercream Frosting:
- ½ cup butter, softened: Again, softened butter is crucial for a smooth, spreadable frosting.
- 2 cups powdered sugar: The foundation of our sweet, fluffy frosting.
- 1 teaspoon vanilla extract: Enhances the overall flavor.
- 2 tablespoons milk: Helps achieve the perfect creamy consistency.
- Orange food coloring: For that vibrant Halloween glow!
- Purple food coloring: Adds a spooky, fun touch.
- Green food coloring: Perfect for monster eyes or spooky slime!
- Halloween sprinkles: The final festive flourish! Ghosts, bats, pumpkins – get creative!
How to Make Halloween Lofthouse-Style Sugar Cookies
Ready to get your hands a little floury? Let’s walk through this simple process together!
- Prepare Cookie Dough: In a medium bowl, start by whisking together all your dry ingredients: the flour, baking powder, baking soda, cornstarch, and salt. Give them a good whisk to make sure everything is evenly distributed. In a separate, large bowl, use an electric mixer (a stand mixer works wonders here, just like when I make homemade Pizza Hut breadsticks!) to cream together your softened butter and granulated sugar until the mixture is wonderfully light and fluffy. This can take 2-3 minutes. Next, beat in the egg, sour cream, vanilla extract, and almond extract until everything is fully combined and smooth. Finally, gradually add your dry ingredients to the wet mixture, mixing on low speed until everything is just combined. Be careful not to overmix; we want these cookies tender!
- Chill Dough: This step is important for easy handling and to prevent your cookies from spreading too much. Divide the dough in half, gently flatten each half into a disc, and wrap them snugly in plastic wrap. Pop them into the refrigerator for at least 1 hour. If you’re planning ahead, you can chill them for up to 24 hours!
- Bake Cookies: Preheat your oven to a comfortable 350°F (175°C). Line your baking sheets with parchment paper; this makes for easy cleanup and prevents sticking. On a lightly floured surface, take one disc of chilled dough and roll it out to approximately ¼-inch thickness. Now for the fun part: use your favorite Halloween-themed cookie cutters to cut out spooky shapes! Carefully transfer your cut-out cookies to the prepared baking sheets, leaving about an inch of space between each one to allow for a little expansion. Bake for 8-10 minutes, or until the edges are a light golden brown. You want them to remain pale in the center for that signature soft texture. Let the cookies cool on the baking sheets for a few minutes before moving them to a wire rack to cool completely.
- Prepare Frosting: While your cookies are cooling down, it’s time to make that dreamy buttercream! In a large bowl, beat the softened butter until it’s creamy and smooth. Gradually add the powdered sugar, alternating with the milk, beating until the frosting is wonderfully smooth and fluffy. Stir in the vanilla extract. Now for the Halloween magic! Divide the frosting into separate bowls (I usually do three, one for each color) and add a few drops of orange, purple, and green food coloring to each bowl, mixing until you reach your desired vibrant hues.
- Decorate: Patience is a virtue here! Make sure your cookies are completely cool before frosting. Once they are, generously spread or pipe the colored frosting onto each cookie. For a super smooth finish, I like to use a small offset spatula. Then, before the frosting sets, shower them with your favorite Halloween sprinkles! They’re ready to serve and enjoy!
Substitutions & Additions
This recipe is incredibly versatile! Here are some fun ways to switch things up:
- Extracts: Don’t have almond extract? No worries! You can use an extra ½ teaspoon of vanilla, or try lemon extract for a zesty twist, especially if you love bright, citrusy flavors like in these easy lemon blueberry trifles.
- Sour Cream Swap: If you don’t have sour cream on hand, plain Greek yogurt or buttermilk can work as a substitute, offering a similar tang and tenderness.
- Frosting Flavors: Experiment with different frosting flavors! A touch of orange zest in the frosting would be amazing, or a hint of maple extract for a fall twist.
- Glitter & Ghouls: Beyond sprinkles, think edible glitter, small candy eyeballs, or use black gel food coloring to draw spooky spiderwebs or bat silhouettes on the frosted cookies.
- Cookie Shapes: While Halloween cutters are perfect, these cookies are delicious in any shape! Stars, circles, or even just cut into squares will be equally tasty, perfect for any time of year!
Tips for Success
To ensure your Lofthouse cookies are perfectly soft every time, keep these tips in mind:
- Softened Butter is Key: For both the cookies and the frosting, make sure your butter is truly softened (room temperature, but not melted). This allows it to cream properly with the sugar, incorporating air for that light, fluffy texture.
- Don’t Overmix the Dough: Once you add the dry ingredients, mix just until combined. Overmixing develops the gluten in the flour, leading to tougher cookies instead of soft ones. This is a common pitfall when baking any tender treat, from cookies to easy homemade soft pretzels.
- Chill, Chill, Chill: Seriously, don’t skip the chilling step! It helps the dough firm up, making it much easier to roll and cut, and prevents the cookies from spreading too much in the oven.
- Don’t Overbake: Lofthouse-style cookies are meant to be soft and pale. Bake them just until the edges are lightly golden, but the centers still look soft and slightly undone. They will continue to cook slightly on the hot baking sheet after you pull them from the oven.
- Cool Completely: Frosting warm cookies is a messy business! Always wait until your cookies are fully cooled before adding the buttercream.
How to Store Halloween Lofthouse-Style Sugar Cookies
Once your beautiful cookies are frosted and ready, here’s how to keep them fresh and delicious:
- Room Temperature: Store the frosted cookies in an airtight container at room temperature for up to 3-4 days. For best results, place a piece of parchment paper between layers to prevent sticking.
- Refrigeration: If your kitchen is particularly warm, or if you prefer a firmer frosting, you can store them in the refrigerator. Just be sure to bring them back to room temperature before serving for the best texture. They’ll last about 5-7 days in the fridge.
- Freezing: These cookies freeze beautifully! You can freeze the unfrosted cookies for up to 3 months in an airtight container or freezer bag. Thaw at room temperature and then frost as desired. You can also freeze frosted cookies (place them in a single layer on a baking sheet to freeze solid first, then transfer to an airtight container). Thaw in the refrigerator or at room temperature.
FAQs
Got questions? I’ve got answers!
- Q: Why are my Lofthouse cookies not soft?
A: The most common culprits are overmixing the dough or overbaking the cookies. Remember to mix just until combined and pull them from the oven when the edges are barely golden. Using cornstarch and sour cream also greatly contributes to their softness. - Q: Can I make the cookie dough ahead of time?
A: Absolutely! The dough can be made up to 2 days in advance and stored, wrapped tightly, in the refrigerator. Just let it sit out for 10-15 minutes before rolling if it’s too firm. - Q: Can I use different colors for other holidays?
A: Of course! This is the beauty of a classic sugar cookie. Swap out the Halloween colors for pastels for Easter, red and green for Christmas, or festive colors for birthdays. - Q: What’s the difference between baking powder and baking soda in this recipe?
A: Baking powder provides an initial lift, while baking soda reacts with the acidic sour cream to create more leavening and tenderness, contributing to that distinctive soft, pillowy texture.
I hope you have as much fun making (and eating!) these Halloween Lofthouse-Style Sugar Cookies as I do. They’re truly a taste of homemade happiness. Happy baking, and Happy Halloween!
For more delicious and easy recipes, be sure to follow us on Pinterest!
Spooktacularly Soft & Pillowy Halloween Lofthouse-Style Sugar Cookies: A Trick-or-Treat Dream!
Ingredients
Equipment
Method
- Step 1: Prepare Cookie Dough. In a medium bowl, whisk together the flour, baking powder, baking soda, cornstarch, and salt until evenly distributed. In a separate, large bowl, use an electric mixer to cream together the softened butter and granulated sugar until light and fluffy (2-3 minutes). Beat in the egg, sour cream, vanilla extract, and almond extract until fully combined and smooth. Gradually add the dry ingredients to the wet mixture, mixing on low speed until just combined. Do not overmix.
- Step 2: Chill Dough. Divide the dough in half, flatten each half into a disc, and wrap snugly in plastic wrap. Refrigerate for at least 1 hour, or up to 24 hours.
- Step 3: Bake Cookies. Preheat oven to 350°F (175°C). Line baking sheets with parchment paper. On a lightly floured surface, roll one disc of chilled dough to approximately ¼-inch thickness. Use Halloween-themed cookie cutters to cut out shapes. Carefully transfer cut-out cookies to the prepared baking sheets, leaving about an inch of space between each. Bake for 8-10 minutes, or until the edges are a light golden brown and the centers remain pale. Let cookies cool on the baking sheets for a few minutes before moving to a wire rack to cool completely.
- Step 4: Prepare Frosting. While cookies cool, make the buttercream. In a large bowl, beat the softened butter until creamy and smooth. Gradually add the powdered sugar, alternating with the milk, beating until the frosting is smooth and fluffy. Stir in the vanilla extract. Divide the frosting into separate bowls (e.g., three) and add a few drops of orange, purple, and green food coloring to each bowl, mixing until desired vibrant hues are reached.
- Step 5: Decorate. Ensure cookies are completely cool before frosting. Generously spread or pipe the colored frosting onto each cookie. Garnish with Halloween sprinkles before the frosting sets. Serve immediately and enjoy!