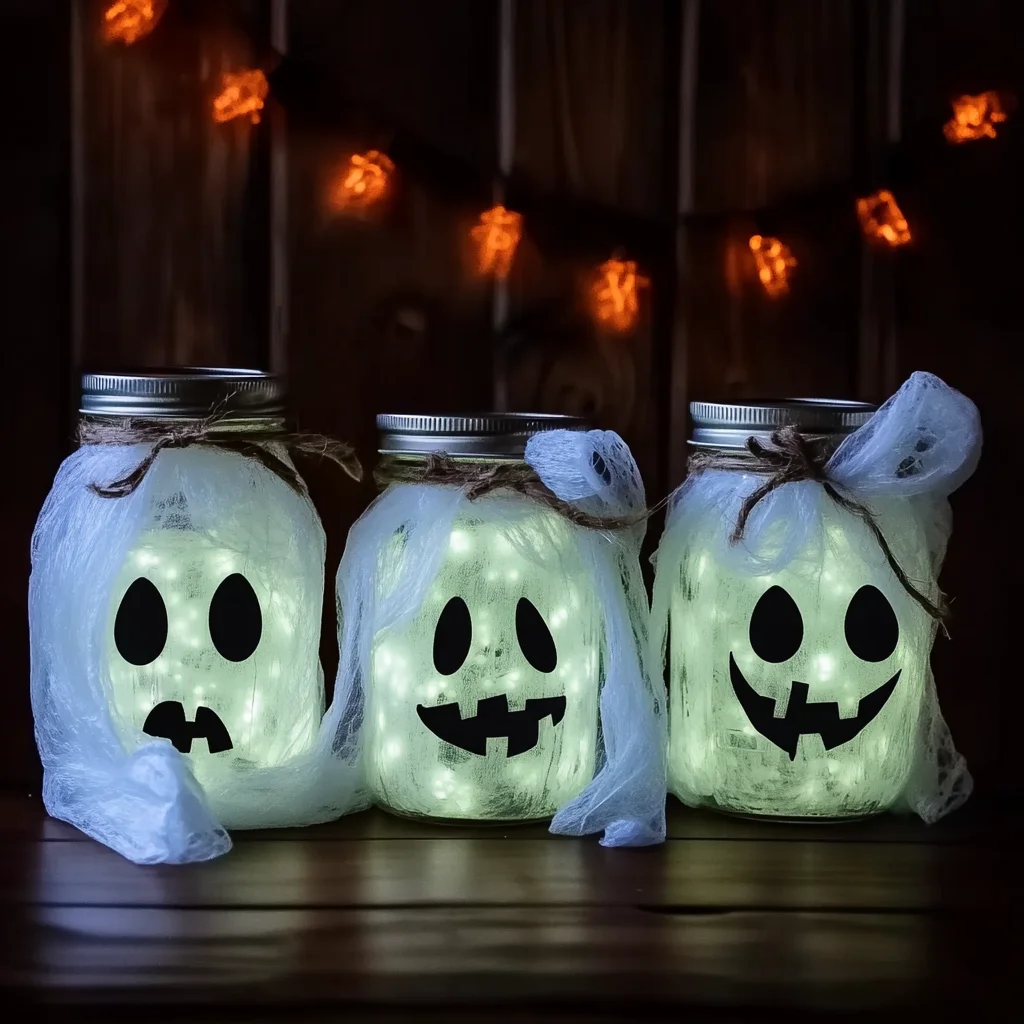
Oh, friend, there’s just something magical about autumn, isn’t there? The crisp air, the cozy sweaters, and the undeniable pull towards all things spooky and fun! I remember when I was a kid, Halloween was all about the trick-or-treating, but as an adult, I find so much joy in creating that festive, slightly eerie atmosphere right at home. This year, I’m sharing a little project that’s so incredibly simple, so quick, and so utterly charming, it’ll bring a smile to your face and a ghostly glow to your home: DIY Glow-in-the-Dark Ghost Jars! These little guys are guaranteed to be a memorable part of your fall decor, adding a touch of whimsical spookiness that everyone will adore.
Why You’ll Love DIY Glow-in-the-Dark Ghost Jars
- Fast: You’ll have these glowing beauties ready in no time at all.
- Easy: No complicated steps or fancy tools needed, perfect for all skill levels!
- Giftable: They make adorable handmade gifts for neighbors or party hosts.
- Crowd-pleasing: Kids and adults alike will be enchanted by their spooky glow.
Ingredients
Gathering your supplies for these ghostly jars is almost as fun as making them! You likely have most of these lying around your house already.
- Empty Glass Jars: Mason jars, old jam jars, pickle jars – any clean glass jar will work! I love using a mix of sizes for a dynamic display.
- White Tissue Paper or Gauze: This gives our ghosts their ethereal, floaty look. Tissue paper is a classic choice, but gauze can add a wonderful texture too.
- Glow-in-the-Dark Paint (or Glow Spray): The star of our show! Make sure it’s good quality for the best glow. You can usually find this at craft stores.
- Foam Brush: Perfect for smooth, even application of the glow paint.
- Black Construction Paper: For those expressive, spooky ghost faces!
- Scissors: To cut out our ghostly features.
- Glue or Mod Podge: To adhere the tissue paper and facial features. Mod Podge works wonders here as both a glue and a sealant!
How to Make DIY Glow-in-the-Dark Ghost Jars
Alright, let’s get crafting! You won’t believe how straightforward this is, and the magic of watching them glow is truly something special. Plus, they pair perfectly with a warm mug of Vampire Hot Chocolate on a chilly evening.
- Clean Slate: First things first, you’ll want to make sure your glass jars are sparkling clean and completely dry. Any lingering dust or moisture can affect how well the paint adheres and glows.
- Get Your Glow On: Now for the fun part! Take your foam brush and apply a generous, even coat of glow-in-the-dark paint to the entire outside surface of each jar. Don’t be shy! I usually find that two to three coats give the best, most vibrant glow. Just be sure to let each coat dry completely before applying the next. This might take a little patience, but trust me, it’s worth it for a truly luminous ghost!
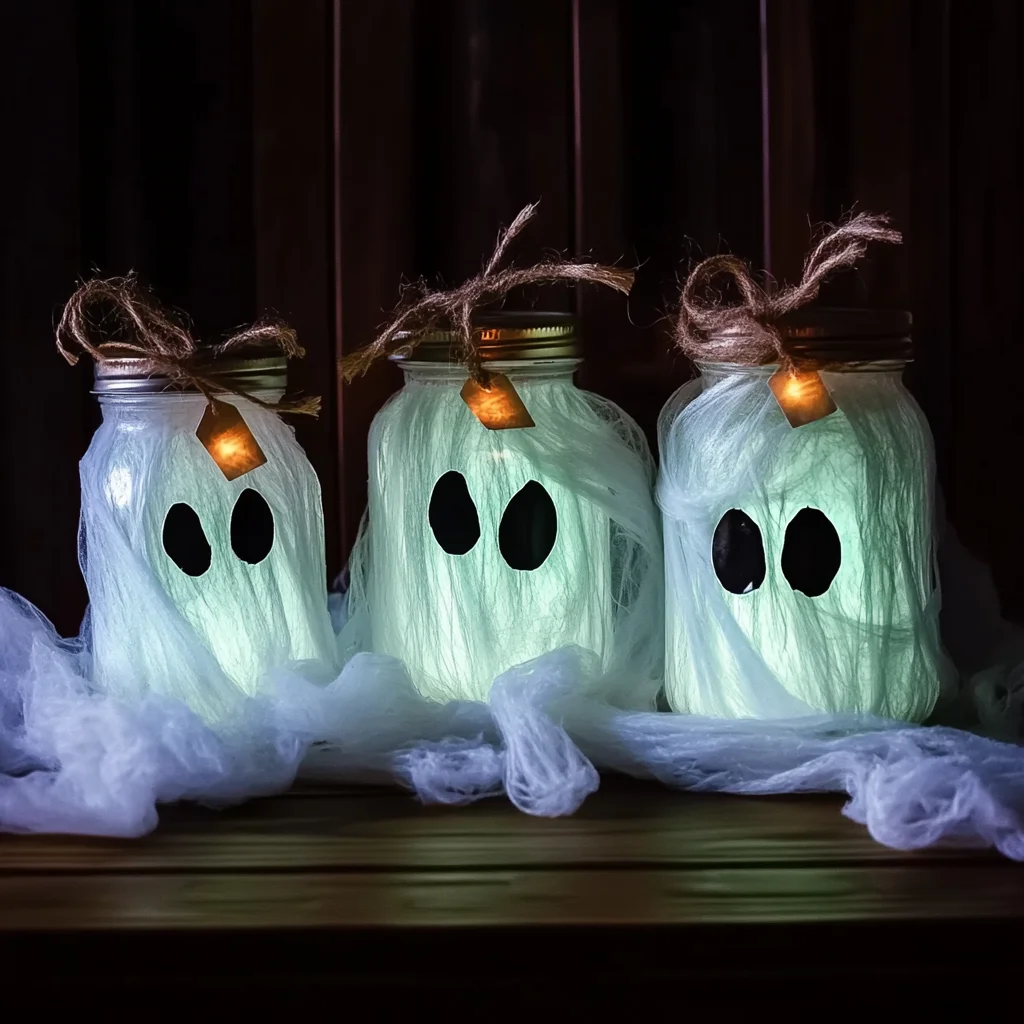
- Wrap Your Ghosts: Once the glow paint is fully dry (and you’ve perhaps given it a quick “charge” under a light to test!), it’s time to give your ghosts their ghostly bodies. Carefully wrap white tissue paper or gauze around each jar. You can make it smooth or slightly crinkled for a more ethereal look. Secure the paper in place with a bit of glue or Mod Podge. You want it to stay put, but don’t worry about perfection – ghosts are naturally a bit whimsical!
- Facial Features: Grab your black construction paper and scissors. This is where you bring your ghosts to life (or, well, afterlife!). Cut out various shapes for eyes and mouths. Think round eyes, oval eyes, jagged mouths, or even a simple “O” for a surprised ghost. Glue these shapes onto the wrapped jars. Play around with different expressions – some can be spooky, some silly, some just plain cute!
- Charge and Shine!: Your ghost jars are almost ready for their grand debut! Place the finished jars under a bright light for several minutes. A sunny window, a desk lamp, or even your kitchen lights will work. The longer they “charge,” the brighter and longer they’ll glow. Then, when night falls, or you’re ready for some indoor Halloween ambiance, turn off the lights and watch your adorable, spooky ghost jars glow in the dark! It’s truly magical.
Substitutions & Additions
Crafting is all about creativity, and these ghost jars are super flexible! Don’t feel limited by the basic recipe; let your imagination glow!
- Color it Up: While classic white ghosts are charming, why not experiment with different colored tissue paper? Light blue or purple could create a wonderfully eerie effect. You could even use colored glow paint if you can find it!
- Textural Fun: Instead of plain tissue paper, try cheesecloth for a more ragged, authentic “ghostly” appearance.
- Add Some Sparkle: Before applying the tissue paper, sprinkle a little glitter into your wet glow paint for a shimmering effect.
- Go Bigger or Smaller: Use tiny baby food jars for mini ghost lights, or a large cookie jar for a statement piece.
- String ‘Em Up: Once complete, you could drill small holes (with caution!) into the lids of your jars and string them together with fairy lights for a ghostly garland.
- Beyond Ghosts: This technique isn’t just for ghosts! You could cut out bat shapes, spider webs, or even friendly pumpkin faces from black paper and apply them to the glowing jars for a variety of Halloween scenes. Or, if you’re looking for another fun, whimsical DIY project, you might love making some DIY Rain Cloud Jars!
Tips for Success
Even the simplest crafts have a few tricks to make them shine! Here are my personal tips for making your ghost jars the best they can be:
- Layer the Paint: Don’t rush the glow paint! Thin, even layers that are fully dry between coats will give you a much better glow than one thick, gloppy coat.
- Mod Podge is Your Friend: For securing the tissue paper and paper cut-outs, Mod Podge is fantastic. It dries clear, holds well, and gives a nice, smooth finish. You can even do a thin layer over the entire tissue paper for extra durability.
- Placement is Key: To maximize the glow, place your finished jars where they can “charge” for a good amount of time under direct light before you want them to shine in the dark.
- Kids in the Kitchen (or Craft Room!): This is a wonderful activity for kids! Let them help with painting (supervised, of course) and especially with cutting out and gluing the faces. Their unique ghost expressions will be priceless.
- Seasonal Gifting: These make fantastic fall or Halloween gifts! Pair them with a homemade treat like some no-bake peanut butter cheesecake bars for a delightful present.
How to Store DIY Glow-in-the-Dark Ghost Jars
Once Halloween passes (or whenever you decide to put them away), storing your ghost jars is easy-peasy. Gently wipe them down with a dry cloth if they’ve collected any dust. I recommend wrapping them individually in tissue paper or newspaper and storing them in a box in a cool, dry place. This will protect the delicate tissue paper and ensure they’re ready to glow again for next year’s festivities! They should last indefinitely if cared for properly.
FAQs
Got a few lingering questions? I’ve got answers!
Q: Can I use regular paint and just glue glow sticks inside?
A: While you could glue glow sticks inside, the effect won’t be as consistent or long-lasting as glow-in-the-dark paint on the outside. Plus, glow sticks only last for a few hours, whereas the painted jars can be “recharged” endlessly!
Q: Is glow-in-the-dark paint safe for kids?
A: Most craft glow paints are non-toxic, but always check the label on your specific brand. It’s best to supervise children during painting and ensure they don’t ingest the paint.
Q: My jars aren’t glowing very brightly, what gives?
A: The most common reasons are not enough paint coats or insufficient “charging” time. Make sure you applied 2-3 coats of paint and let them sit under a bright light for at least 15-30 minutes before turning out the lights. Some glow paints are also brighter than others, so quality matters!
Q: Can I put a candle inside these jars?
A: I wouldn’t recommend putting a real flame candle inside, especially with the tissue paper. For safety, stick to battery-operated tea lights or fairy lights if you want an internal light source in addition to the glow paint.
For more delicious recipes and fun DIYs, be sure to follow us on Pinterest!