Remember those perfect summer days, picnics in the park, or cozy family gatherings where dessert was the star? For me, a slice of creamy cheesecake always brings back the warmest memories. But let’s be honest, sometimes cheesecake can feel a little… daunting. Not today, my friend! I’m about to share a recipe that’s so ridiculously easy, incredibly quick to assemble, and utterly memorable, it’ll become your new signature dessert. Get ready for the White Chocolate Strawberry Swirl Cheesecake that’s going to make your taste buds sing!
Why You’ll Love White Chocolate Strawberry Swirl Cheesecake
- Fast: With minimal active prep time, you’ll be chilling this beauty in no time.
- Easy: No fancy techniques, just simple steps for a show-stopping dessert.
- Giftable: It makes a stunning centerpiece or a thoughtful treat for friends and family.
- Crowd-pleasing: The combination of sweet white chocolate and tart strawberries is universally adored.
Ingredients
- For the Crust:
- 2 cups graham cracker crumbs: The classic foundation for that buttery crunch. You can even use shortbread or vanilla wafer crumbs for a different flavor!
- 1/2 cup unsalted butter, melted: Helps bind that crust together beautifully.
- 1/4 cup granulated sugar: Just the right amount of sweetness to complement the crackers.
- For the Cheesecake Filling:
- 24 oz (680g) cream cheese, softened: This is key! Make sure it’s properly soft so your cheesecake is super smooth.
- 1 cup granulated sugar: For the perfect balance of sweetness in your creamy filling.
- 3 large eggs: They help set the cheesecake, so don’t overmix after adding them!
- 1/2 cup sour cream: My secret weapon for that signature tangy, super-creamy cheesecake texture.
- 1 tsp vanilla extract: Adds warmth and depth to the flavor.
- 6 oz (170g) white chocolate, melted and slightly cooled: The star of the show! Make sure it’s not too hot when you add it, or it might cook your eggs.
- For the Strawberry Swirl:
- 1 cup fresh strawberries, hulled and chopped: The vibrant, fresh burst of berry goodness.
- 2 tbsp granulated sugar: To sweeten the berries and create a lovely sauce.
- 1 tsp lemon juice: Brightens up the strawberry swirl and cuts through the sweetness.
- 1 tsp cornstarch mixed with 1 tbsp water: This little slurry thickens our strawberry sauce just right.
How to Make White Chocolate Strawberry Swirl Cheesecake
- Prep Your Pan & Crust: Preheat your oven to 325°F (163°C). Grab your 9-inch springform pan – it’s a cheesecake’s best friend! Lightly grease it and then line the bottom with a circle of parchment paper. This makes removal a breeze. Now, for that perfect crust! In a medium bowl, combine your graham cracker crumbs, melted butter, and the sugar. Mix it all together until it looks like wet sand. Press this mixture firmly into the bottom of your prepared pan. Use the back of a spoon or the bottom of a flat glass to get it nice and even. Pop it in the preheated oven for just 8-10 minutes. Once it’s lightly golden, pull it out and let it cool completely. A cool crust is crucial for a smooth cheesecake.
- Craft Your Strawberry Swirl: Time for the gorgeous strawberry swirl! In a small saucepan, combine your chopped strawberries, 2 tablespoons of granulated sugar, and the lemon juice. Cook this over medium heat, stirring occasionally, until the strawberries soften and release their juices – usually about 5 minutes. While that’s bubbling, quickly mix your cornstarch with 1 tablespoon of water in a tiny bowl to create a slurry. Pour this into the simmering strawberries and stir constantly for another 2-3 minutes until the sauce thickens up. If you prefer a smoother sauce without seeds, you can strain it now. I usually do, but it’s totally optional! Let this cool completely. You want it cool, not hot, when it meets the cheesecake batter.
- Whip Up the Filling: Alright, let’s make that dreamy cheesecake filling! In a large mixing bowl (or the bowl of your stand mixer), beat the softened cream cheese and 1 cup of granulated sugar together until they’re wonderfully smooth and creamy. Scrape down the sides of the bowl often. Now, add your large eggs, one at a time, mixing just until each egg is incorporated before adding the next. Be careful not to overmix here – too much air can cause cracks later on! Gently stir in the sour cream, vanilla extract, and finally, your slightly cooled melted white chocolate. Make sure it’s cooled enough so it doesn’t scramble the eggs, but still liquid enough to blend.
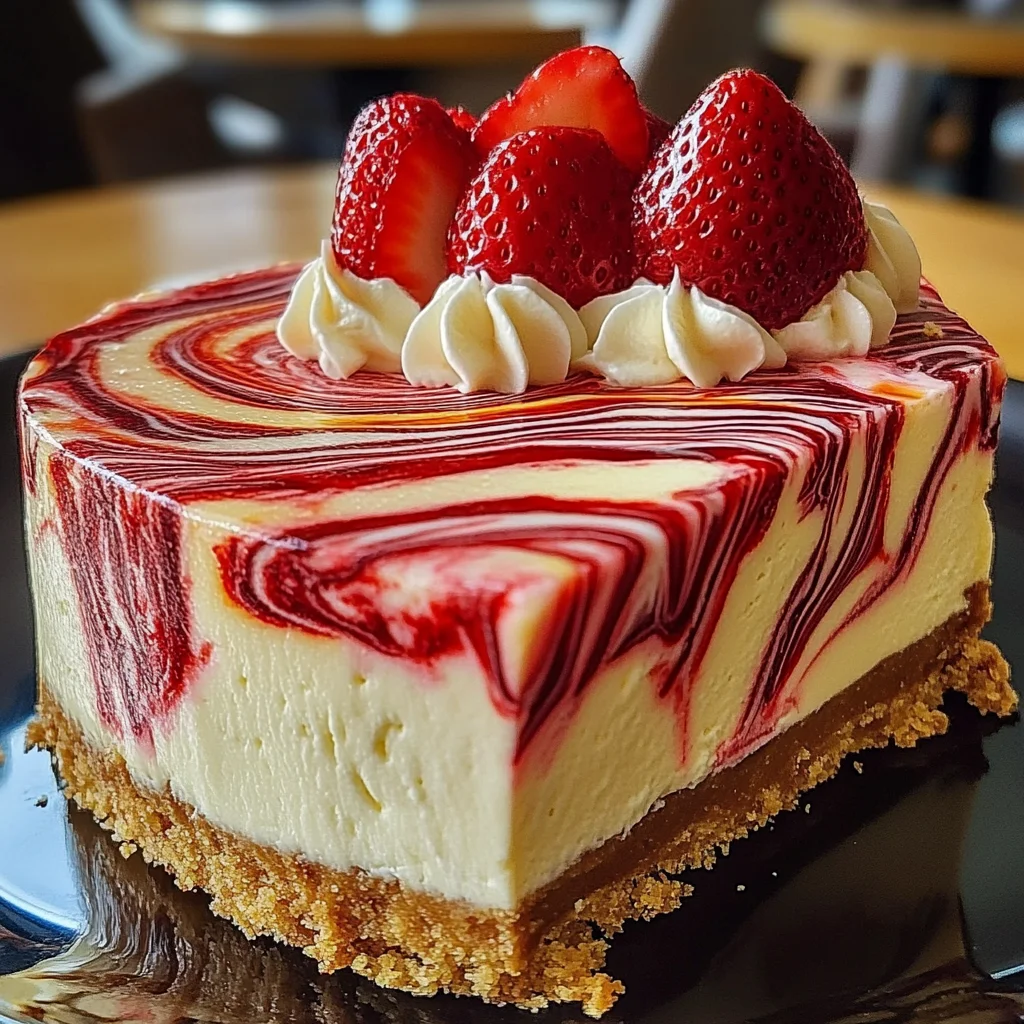
- Swirl & Bake: Time to bring it all together! Pour your creamy cheesecake batter evenly over your cooled graham cracker crust. Now for the fun part – the swirl! Drop spoonfuls of your cooled strawberry sauce randomly over the top of the cheesecake batter. Grab a toothpick or a butter knife and gently swirl the strawberry sauce through the white cheesecake, creating beautiful ribbons. Don’t overmix; you want distinct swirls!
- The Water Bath Secret: For a perfect, crack-free cheesecake, we’re going to use a water bath (bain-marie). Place your springform pan inside a larger roasting pan. Carefully pour hot water into the roasting pan, making sure it comes about halfway up the sides of your springform pan. This creates a moist environment that helps the cheesecake bake evenly and prevents cracking. Carefully transfer the whole setup to your oven. Bake for 55-65 minutes. You’re looking for the edges to be set, but the center should still have a slight jiggle when you gently shake the pan. Don’t worry, it will firm up as it cools!
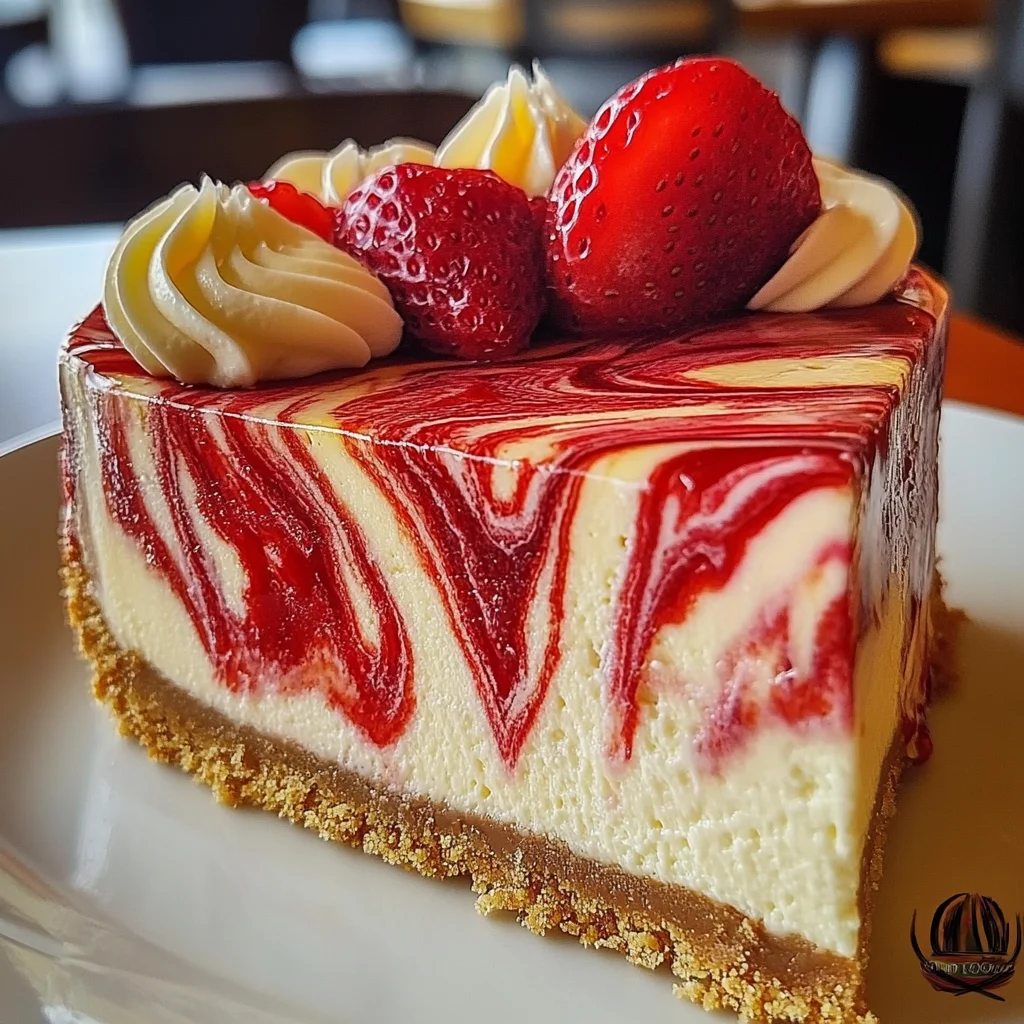
- Cool & Chill: Once baked, turn off the oven, crack the door open slightly, and let the cheesecake cool inside the oven for 1 hour. This slow cooling also helps prevent cracks. After its oven rest, carefully remove the cheesecake from the water bath and the roasting pan. Let it cool completely on a wire rack at room temperature. Once cool, cover it loosely with plastic wrap and transfer it to the refrigerator for at least 6 hours, or even better, overnight. Chilling is essential for the cheesecake to firm up and for the flavors to fully develop. When you’re ready to serve, carefully remove the springform pan sides. Garnish with a dollop of whipped cream, some fresh strawberry slices, and a sprinkle of white chocolate shavings for that extra touch of elegance!
Substitutions & Additions
Part of the joy of baking is making a recipe your own! This White Chocolate Strawberry Swirl Cheesecake is incredibly versatile. Here are a few ideas to get your creative juices flowing:
- Crust Variations: Instead of graham crackers, try crushed shortbread cookies, vanilla wafers, or even chocolate sandwich cookies (Oreo-style) for a chocolate crust.
- Berry Swaps: Not a fan of strawberries? You can easily substitute the strawberry swirl with raspberry, blueberry, or cherry puree. Just follow the same steps for cooking and thickening. For a different twist on cheesecake, why not try a Decadent Triple Chocolate Cheesecake next time? It’s another fantastic indulgent option!
- Flavor Boosts: Add a hint of almond extract to the cheesecake filling for a subtle nutty note, or a touch of orange zest for a brighter flavor.
- Garnish Galore: Beyond whipped cream and fresh berries, consider white chocolate curls, a dusting of powdered sugar, or even a few fresh mint leaves for a pop of color.
Tips for Success
This recipe is practically foolproof, but a few little tricks can make all the difference to ensure your White Chocolate Strawberry Swirl Cheesecake turns out absolutely perfect:
- Softened Cream Cheese is a Must: Seriously, this is crucial! Cold cream cheese will result in a lumpy batter. Let it sit on the counter for at least an hour, or even longer, until it’s truly soft to the touch.
- Don’t Overmix the Eggs: Once you add the eggs, mix just until they are incorporated. Overmixing introduces too much air, which can cause your cheesecake to puff up and then crack as it cools.
- The Water Bath is Your Friend: While some no-bake cheesecakes skip this, for a classic baked cheesecake, a water bath provides consistent, gentle heat that prevents cracking and ensures a silky-smooth texture. Don’t skip it!
- Cooling is Key: Resist the urge to pull your cheesecake out of the oven too quickly. The slow cooling process, first in the oven and then at room temperature, is vital for preventing cracks.
- Chill, Chill, Chill: Seriously, don’t skimp on the refrigeration time. A fully chilled cheesecake is easier to slice, has a firmer texture, and allows the flavors to meld beautifully. Just like perfecting the crunch in my Strawberry Crunch Cheesecake, getting that perfect swirl is key here.
- Strawberry Swirl Temperature: Make sure your strawberry sauce is completely cool before swirling it into the cheesecake batter. If it’s warm, it can affect the texture of your cheesecake.
How to Store White Chocolate Strawberry Swirl Cheesecake
Once your cheesecake is perfectly chilled and ready to enjoy, you’ll want to store any leftovers properly to keep them fresh and delicious.
- Refrigeration: The best way to store your cheesecake is in an airtight container in the refrigerator. It will stay fresh and delicious for 4-5 days.
- Freezing: Yes, you can freeze cheesecake! If you plan to freeze it, do so before garnishing. Wrap the cooled, un-garnished cheesecake tightly in several layers of plastic wrap, then a layer of aluminum foil. You can freeze it for up to 1-2 months. When ready to enjoy, thaw it overnight in the refrigerator before adding your garnishes.
FAQs
Got questions? I’ve got answers!
- Q: Can I make this cheesecake ahead of time?
A: Absolutely! This cheesecake is actually even better on the second day after the flavors have had more time to develop and meld. It’s perfect for making a day or two before an event. - Q: Why did my cheesecake crack?
A: Common culprits for cheesecake cracks are overmixing the batter (especially after adding eggs), not using a water bath, or cooling the cheesecake too rapidly. Following the slow cooling steps in the recipe helps prevent this! - Q: Can I use frozen strawberries for the swirl?
A: Yes, you can! Just be sure to thaw them completely before cooking them down for the swirl. You might find they release a bit more liquid, so just cook them a minute or two longer until thickened. - Q: Do I really need a springform pan?
A: While you could theoretically use a regular cake pan lined with parchment paper, a springform pan truly makes removing the delicate cheesecake much easier and allows for a clean presentation. It’s a great kitchen investment if you love baking!
For more delicious recipes and kitchen inspiration, be sure to follow my Pinterest account!

The Dreamiest White Chocolate Strawberry Swirl Cheesecake
Ingredients
Equipment
Method
- Step 1: Prep Your Pan & Crust: Preheat your oven to 325°F (163°C). Lightly grease a 9-inch springform pan and line the bottom with parchment paper. In a medium bowl, combine graham cracker crumbs, melted butter, and 1/4 cup granulated sugar. Mix until it looks like wet sand. Press firmly into the bottom of the prepared pan. Bake for 8-10 minutes until lightly golden. Remove and let cool completely.
- Step 2: Craft Your Strawberry Swirl: In a small saucepan, combine chopped strawberries, 2 tablespoons granulated sugar, and lemon juice. Cook over medium heat, stirring occasionally, for about 5 minutes until strawberries soften and release juices. In a tiny bowl, mix 1 tsp cornstarch with 1 tbsp water to create a slurry. Pour this into the simmering strawberries and stir constantly for another 2-3 minutes until the sauce thickens. Let cool completely; optional to strain for a smoother sauce.
- Step 3: Whip Up the Filling: In a large mixing bowl (or stand mixer), beat softened cream cheese and 1 cup granulated sugar until smooth and creamy. Scrape down sides. Add large eggs, one at a time, mixing just until incorporated (do not overmix). Gently stir in sour cream, vanilla extract, and finally, your slightly cooled melted white chocolate. Ensure white chocolate is cool enough not to scramble eggs but still liquid enough to blend.
- Step 4: Swirl & Bake: Pour the creamy cheesecake batter evenly over your cooled graham cracker crust. Drop spoonfuls of your cooled strawberry sauce randomly over the top of the cheesecake batter. Grab a toothpick or a butter knife and gently swirl the strawberry sauce through the white cheesecake, creating beautiful ribbons. Do not overmix.
- Step 5: The Water Bath Secret: Place your springform pan inside a larger roasting pan. Carefully pour hot water into the roasting pan, ensuring it comes about halfway up the sides of your springform pan. Carefully transfer the whole setup to your preheated oven. Bake for 55-65 minutes, until the edges are set and the center has a slight jiggle.
- Step 6: Cool & Chill: Once baked, turn off the oven, crack the door open slightly, and let the cheesecake cool inside for 1 hour. Carefully remove the cheesecake from the water bath and roasting pan. Let it cool completely on a wire rack at room temperature. Once cool, cover loosely with plastic wrap and transfer to the refrigerator for at least 6 hours, or overnight. When ready to serve, remove springform pan sides and garnish with whipped cream, fresh strawberry slices, and white chocolate shavings, if desired.