Oh, the sweet smell of a campfire on a cool evening, the crackle of the flames, and that magical moment when a perfectly toasted marshmallow meets chocolate and graham cracker. Pure bliss, right? But what if you’re craving that s’mores perfection without the campfire hassle? What if you want to bring that cozy, gooey goodness indoors, maybe for a party, a potluck, or just because it’s Tuesday and you deserve a treat?
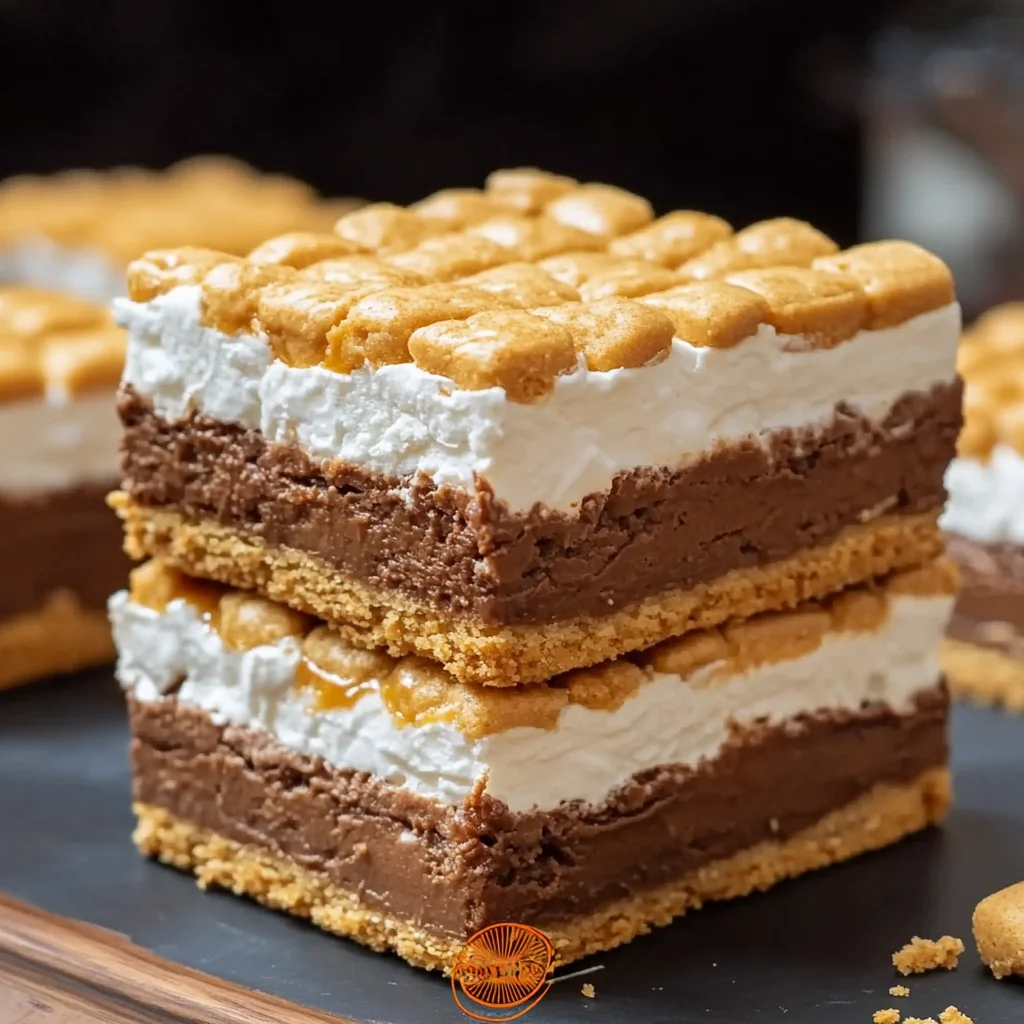
Well, my friend, you’re in luck! These Gooey S’mores Bars capture everything you love about classic s’mores – the buttery graham cracker flavor, the melty chocolate, the stretchy, toasted marshmallows – all in one easy, portable bar. They are ridiculously simple to whip up and disappear even faster! Trust me, this recipe is about to become a staple in your baking rotation.
Why You’ll Love This Recipe
Get ready to fall head over heels for these bars because they are:
- Fast: From start to finish, you’re looking at minimal time in the kitchen.
- Easy: No fancy techniques or equipment needed. Just simple mixing and layering!
- Giftable: Wrap them up individually or pack a box – they make the perfect sweet surprise.
- Crowd-pleasing: Seriously, who can say no to a s’mores bar? They’re a guaranteed hit with kids and adults alike!
Ingredients
Here’s what you’ll need to gather from your pantry. Simple, classic ingredients for classic flavor!
- 1/2 cup unsalted butter, melted: The base of our delicious dough. Melting helps it incorporate beautifully.
- 1/2 cup brown sugar, packed: Adds moisture and that lovely, slightly caramel-y chewiness we love in bars.
- 1/4 cup granulated sugar: For sweetness and structure.
- 1 egg: Our binder, helping to hold everything together in perfect bar form.
- 1 tsp vanilla extract: A splash of warmth that enhances all the other flavors. Don’t skip this!
- 1 cup all-purpose flour: The main dry ingredient for our cookie base.
- 1 cup graham cracker crumbs: This is where the magic starts! Make your own by crushing graham crackers or buy them pre-crushed.
- 1/2 tsp baking powder: Just a little lift to keep the base from being too dense.
- 1/4 tsp salt: Balances out all that sweetness. Essential!
- 1 1/2 cups mini marshmallows: The star of the show! Mini marshmallows melt perfectly for that classic gooey pull.
- 1 cup milk chocolate chips: Because what are s’mores without chocolate? Milk chocolate keeps it classic, but feel free to mix it up!
- 1/2 cup crushed graham crackers for topping: An optional but highly recommended sprinkle for extra crunch and that unmistakable graham flavor on top.
How to Make It
Ready to make some magic? Follow these simple steps:
1. First things first, let’s get the oven ready. Preheat your oven to 350°F (175°C). While it’s heating up, grab an 8×8-inch baking pan. Lining it with parchment paper is a little trick I always use – leave a little overhang on the sides, and lifting the cooled bars out will be a breeze!
2. In a nice big bowl, pour in your melted butter. Add the brown sugar and granulated sugar. Give it a good stir until everything is combined and looks nice and smooth. You’re building the flavor base here!
3. Now, crack in your egg and add the vanilla extract. Mix everything together really well until it’s fully incorporated and looks glossy. This helps create that lovely, slightly chewy texture.
4. Time for the dry ingredients! In a separate medium bowl, whisk together the all-purpose flour, those essential graham cracker crumbs, baking powder, and salt. Make sure it’s all evenly distributed.
5. Gradually add the dry ingredients from the second bowl into your wet ingredients. Mix just until everything is combined. Don’t overmix! You should have a soft, thick dough.
6. Now for the fun part! Grab about two-thirds of that glorious dough. Press it evenly into the bottom of your prepared baking pan. Use your fingers or the back of a spoon to get a nice, compact layer.
7. Evenly layer your milk chocolate chips right on top of the dough base. Get them into all the corners!
8. Next up, scatter those mini marshmallows over the chocolate layer. Don’t be shy! They’re going to get all melty and wonderful.
9. Remember the remaining dough? Crumble it right over the top of the marshmallows and chocolate. It doesn’t need to be perfect; the rustic crumble looks great! Gently press it down a little bit to help it hold together.
10. If you’re using them (and you should!), sprinkle the extra crushed graham crackers over the top layer. This adds such a lovely finish and extra graham flavor.
11. Pop the pan into your preheated oven. Bake for about 25 minutes, or until the top looks golden brown and the edges are set. The center might still look a little soft, and that’s okay – it will firm up as it cools.
12. Here’s the hardest part: resisting! Let the bars cool completely in the pan on a wire rack before attempting to cut them. I know, I know, the gooey center is calling your name, but letting them cool is key for clean, beautiful bars. Once cool, lift the parchment paper to remove the whole slab, then slice into squares using a sharp knife.

Substitutions & Additions
Want to mix things up? Here are a few ideas:
- Chocolate: Swap milk chocolate chips for dark chocolate, semi-sweet, white chocolate, or even peanut butter chips!
- Graham Crackers: Try using cinnamon graham crackers or even chocolate graham crackers for a fun twist.
- Marshmallows: While mini marshmallows are ideal for even melting, you could chop up larger marshmallows (though they might spread more). Marshmallow fluff could also be swirled in the center layer (reduce chips slightly maybe), though I personally love the chew of real marshmallows.
- Butter: Need dairy-free? Use a good quality plant-based butter substitute.
- Flour: A 1:1 gluten-free baking blend can often work well, though texture might vary slightly.
- Add-ins: Swirl in some caramel sauce before baking, sprinkle in some chopped nuts (like pecans or walnuts), or add a pinch of cinnamon to the dough for extra warmth.
Tips for Success
A few pointers to make sure your bars turn out perfectly every time:
- Don’t Overbake: Keep an eye on them around the 20-25 minute mark. They should be golden brown, but the center will set as they cool. Overbaking leads to dry bars, and we want GOOEY!
- Line the Pan: Seriously, this is a game-changer. Parchment paper with overhang makes removing and cutting so much easier, especially with sticky marshmallows.
- Cool Completely: I cannot stress this enough! Warm s’mores bars are delicious with a spoon, but if you want to slice them neatly, you HAVE to let them cool fully. Pop them in the fridge for 30-60 minutes after they’ve cooled on the counter for extra firm bars before cutting.
- Measuring Graham Crumbs: If making your own crumbs, crush them finely. 1 cup of crumbs is usually about 7-8 full graham cracker sheets.
How to Store It
If there are any left (a big ‘if’!), store the cooled and cut s’mores bars in an airtight container at room temperature. They should stay fresh and wonderfully gooey for 3-4 days. If you want to keep them longer, you can refrigerate them for up to a week, though the marshmallows might get a little firmer. You can also freeze them! Wrap individual bars tightly in plastic wrap, then place in a freezer-safe bag or container for up to 3 months. Thaw at room temperature or zap them in the microwave for a few seconds for that warm s’mores feeling.
FAQs
Got questions? I’ve got answers!
Q: Can I use regular-sized marshmallows instead of mini?
A: You can, but I find mini marshmallows work best for melting evenly throughout the layer and giving that classic, all-over gooeyness. If using large ones, you’d need to cut them up, and the texture might be slightly different.
Q: My bars seem too soft or crumbly after baking. What happened?
A: They might not have cooled completely! The cooling time is crucial for setting. If they still seem too soft after cooling, next time try baking for an extra minute or two, or ensure your measurements were precise, especially the flour and graham crumbs.
Q: How can I get clean cuts?
A: Letting them cool completely is the number one trick. Using a sharp knife is also key. For extra clean cuts, you can pop the fully cooled bars in the freezer for 15-20 minutes before slicing.
Q: Can I make the dough ahead of time?
A: Yes! You can prepare the dough (steps 1-5) and wrap it tightly in plastic wrap. Refrigerate for up to 2 days. Let it come to room temperature slightly before pressing into the pan.

Gooey S'mores Bars
Ingredients
Equipment
Method
- Step 1: Preheat your oven to 350°F (175°C). Line an 8×8-inch baking pan with parchment paper, leaving an overhang on the sides.
- Step 2: In a large bowl, combine the melted butter, brown sugar, and granulated sugar. Stir until smooth.
- Step 3: Add the egg and vanilla extract to the bowl. Mix well until fully incorporated and glossy.
- Step 4: In a separate medium bowl, whisk together the all-purpose flour, graham cracker crumbs, baking powder, and salt.
- Step 5: Gradually add the dry ingredients to the wet ingredients. Mix just until everything is combined into a soft, thick dough.
- Step 6: Take about two-thirds of the dough and press it evenly into the bottom of the prepared baking pan.
- Step 7: Evenly layer the milk chocolate chips over the dough base.
- Step 8: Scatter the mini marshmallows over the chocolate layer.
- Step 9: Crumble the remaining one-third of the dough over the top of the marshmallows and chocolate. Gently press it down slightly.
- Step 10: If using, sprinkle the extra crushed graham crackers over the top layer.
- Step 11: Bake for about 25 minutes, or until the top is golden brown and the edges are set.
- Step 12: Let the bars cool completely in the pan on a wire rack before attempting to cut them. Once cool, lift out using the parchment paper and slice into squares.