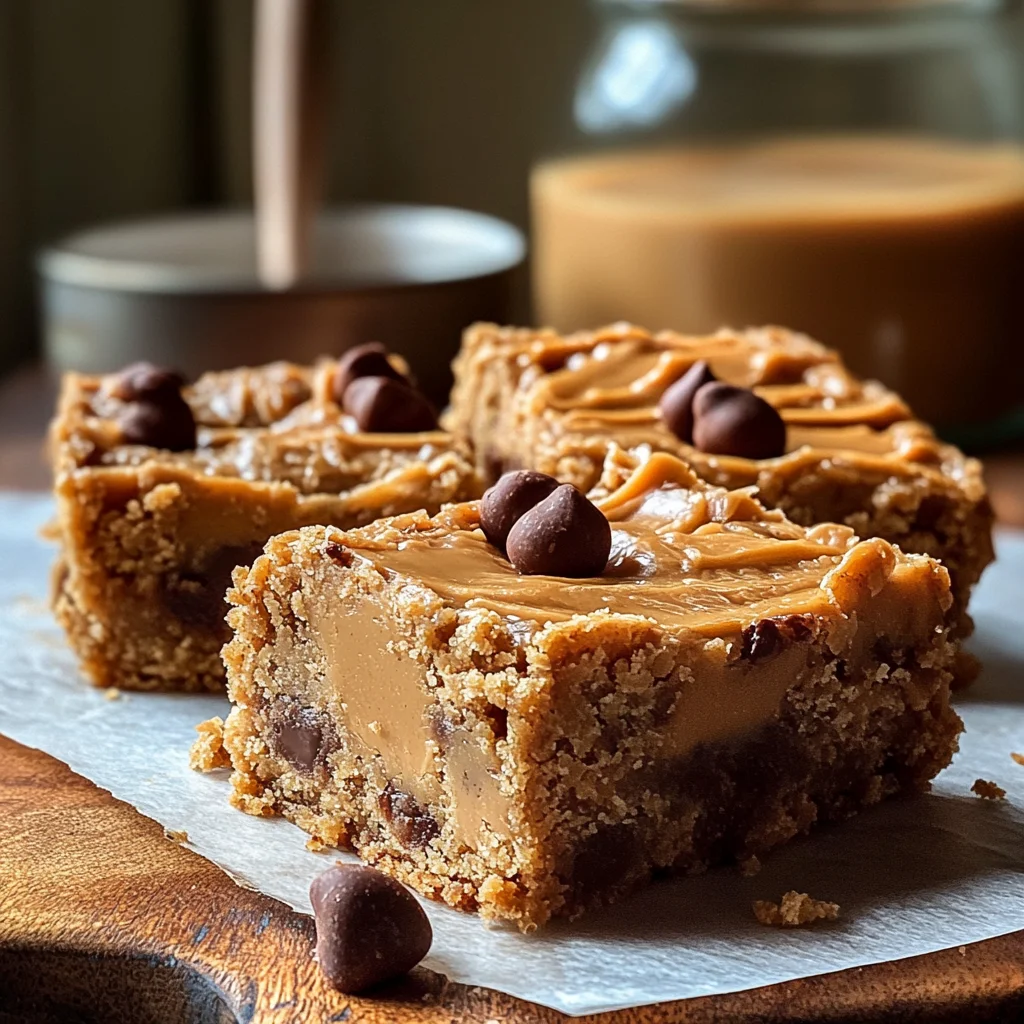
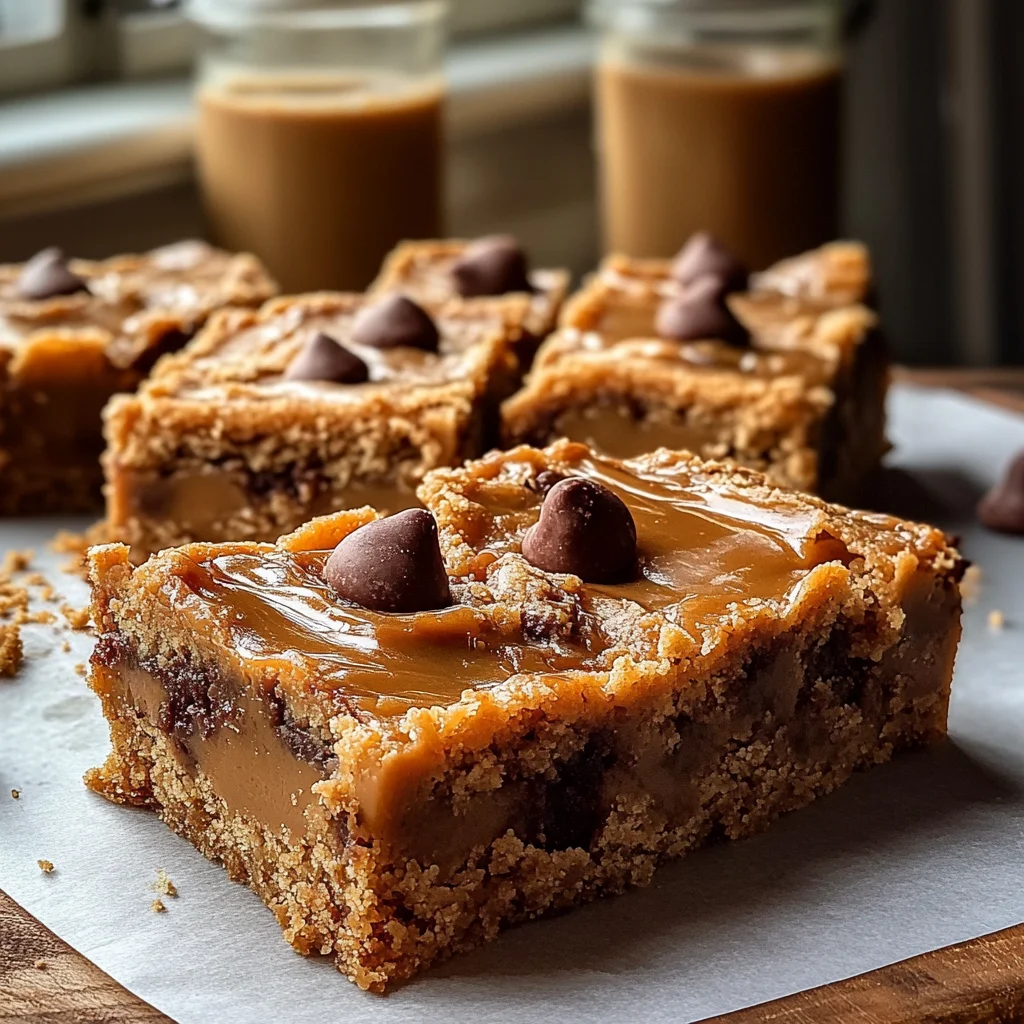
Oh, friend, do you ever get that craving for a dessert that just feels like coming home? You know, the kind that reminds you of childhood bake sales, grandma’s kitchen, or cozy afternoons with a good book? Well, these Peanut Butter Butterscotch Bars are exactly that! They’re delightfully chewy, bursting with that classic sweet and nutty combo, and honestly, they’re so ridiculously easy to whip up, you’ll wonder where they’ve been all your life. Forget complicated desserts – this recipe is pure, unadulterated comfort in a bar, and it comes together in a flash, leaving you more time to enjoy those sweet moments.
Why You’ll Love Peanut Butter Butterscotch Bars
- Fast: From start to oven in minutes, perfect for those sudden dessert cravings.
- Easy: Simple ingredients, straightforward steps – a beginner baker’s dream!
- Giftable: These bars travel beautifully and make a thoughtful homemade gift for friends, neighbors, or teachers.
- Crowd-pleasing: Who doesn’t love peanut butter and butterscotch? They’re a guaranteed hit at any gathering, just like a plate of easy chocolate chip cheesecake bars or a batch of your favorite cookies.
Ingredients
Gather your ingredients, my dear, because you’re just moments away from a little slice of heaven!
- 1/2 cup unsalted butter, melted: This is our base, providing that lovely richness. Melting it makes for a super smooth batter.
- 1 cup creamy peanut butter: The star of the show! Make sure it’s creamy for that smooth texture. I prefer a classic processed peanut butter for baking here, as natural ones can sometimes separate in unpredictable ways.
- 1 cup packed brown sugar: Brings a deep, molasses-y sweetness and contributes to that fantastic chewy texture.
- 1/4 cup granulated sugar: Just a touch of white sugar to balance the sweetness and help with browning.
- 2 large eggs: Our binding agents, helping to hold everything together and give the bars structure.
- 1 teaspoon vanilla extract: A must-have flavor enhancer that truly elevates all the sweet notes.
- 1 1/2 cups all-purpose flour: The main dry ingredient, giving our bars body.
- 1 teaspoon baking powder: This little helper ensures our bars rise just enough to be perfectly light and chewy, not dense.
- 1/4 teaspoon salt: Don’t skip the salt! It balances the sweetness and really makes all the flavors pop.
- 1 cup butterscotch chips: The other star! These melt into gooey pockets of butterscotch bliss.
- 1/2 cup chocolate chips (optional): Because peanut butter and chocolate are soulmates, aren’t they? I usually add them in, but if you’re a pure butterscotch lover, feel free to skip!
How to Make Peanut Butter Butterscotch Bars
Ready to get baking? It’s going to be so simple, you’ll be smiling the whole time!
- Prep Your Pan: First things first, go ahead and preheat your oven to a cozy 350°F (175°C). Then, grab a 9×13-inch baking dish. You can either grease it really well, or for super easy removal (my personal preference!), line it with parchment paper, leaving a little overhang on the sides. This creates “handles” for lifting the cooled bars out later.
- Wet Ingredients First: In a large mixing bowl, pour in your melted butter. Add the creamy peanut butter, brown sugar, and granulated sugar. Now, grab a whisk and get to it! Whisk everything together until it’s beautifully smooth and well combined. You want to make sure there are no lumps of sugar hanging out.
- Eggs & Vanilla: Next, crack in your two large eggs and drizzle in the vanilla extract. Give it another good whisk until everything is thoroughly combined. The mixture should look glossy and smooth.
- Add Dry Ingredients: Now, for the flour, baking powder, and salt. Sprinkle these over your wet mixture. With a spatula or a wooden spoon, gently stir until everything is just combined. The key here is not to overmix! Overmixing can lead to tough bars, and we want them perfectly tender and chewy. As soon as you see no more streaks of flour, stop.
- Fold in the Chips: Time for the good stuff! Fold in your butterscotch chips and those optional chocolate chips until they’re evenly distributed throughout the batter. Aren’t they looking good already?
- Into the Pan: Pour your glorious batter into the prepared pan. Use your spatula to spread it out evenly, reaching all the corners. It might be a little thick, and that’s totally fine.
- Bake Time!: Pop the pan into your preheated oven. Bake for 25 to 30 minutes. You’ll know they’re done when the edges are a beautiful light golden brown and a toothpick inserted into the center comes out with only a few moist crumbs clinging to it. Remember, ovens can vary, so keep an eye on them! If you love peanut butter desserts, you might also enjoy making a batch of peanut butter brownie cookies too!
- Cool Down: This is the hardest part, I know! Let the bars cool completely in the pan before you even think about slicing them. Cooling allows them to set up properly, giving you those clean, perfect squares. Plus, the flavors deepen as they cool.
Substitutions & Additions
Part of the fun of baking is making a recipe your own! Here are a few ideas:
- Nut Butter Swap: While classic creamy peanut butter is recommended for consistency, you could experiment with almond butter or cashew butter for a different flavor profile. Just be aware that the texture might vary slightly.
- Chocolate Overload: Instead of or in addition to chocolate chips, try adding white chocolate chips, dark chocolate chunks, or even mini peanut butter cups for extra decadence.
- Crunch Factor: Want some crunch? Fold in about 1/2 cup of chopped peanuts, pretzels, or even crushed potato chips for a sweet and salty twist!
- Toppings Galore: Once cooled, drizzle with melted chocolate, a little extra melted peanut butter, or a sprinkle of flaky sea salt before serving.
Tips for Success
Even the simplest recipes have a few little secrets to make them truly shine!
- Don’t Overmix: I mentioned it in the instructions, but it’s worth repeating! Overmixing the flour can develop the gluten too much, leading to tough, cakey bars instead of the delightfully chewy ones we’re aiming for. Mix until just combined, then stop.
- Parchment Paper is Your Friend: Seriously, lining your pan with parchment paper makes these bars so incredibly easy to remove and slice cleanly. No sticking, no fuss!
- Cool Completely: This is crucial! Slicing warm bars will result in a crumbly, messy situation. Let them cool down fully, ideally for several hours or even in the fridge for a bit if you’re in a hurry. Patience is a virtue when it comes to perfect bar slices!
- Don’t Overbake: These bars are meant to be soft and chewy. If you bake them too long, they’ll become dry and hard. Look for those lightly golden edges and a mostly set center with a few moist crumbs on a toothpick. If you’re looking for another gooey, delightful bar, I highly recommend checking out these cinnamon roll gooey butter cake bars!
How to Store Peanut Butter Butterscotch Bars
If you manage to have any left, here’s how to keep them fresh!
- Room Temperature: Store cooled bars in an airtight container at room temperature for up to 3-4 days. For best results, place parchment paper between layers if stacking.
- Refrigerator: To extend their freshness, you can store them in an airtight container in the refrigerator for up to a week. They might firm up a bit, but they’re still delicious!
- Freezer: These bars freeze beautifully! Cut them into squares, then wrap each bar individually in plastic wrap, and then place them in a freezer-safe bag or container. They’ll keep in the freezer for up to 3 months. Thaw at room temperature or pop them in the microwave for a few seconds for a warm, gooey treat.
FAQs
Got questions? I’ve got answers!
- Q: Can I use crunchy peanut butter?
A: Yes, you absolutely can! Using crunchy peanut butter will give your bars a lovely added texture. Just be aware it might make them slightly less uniform in chewiness. - Q: My bars came out crumbly, what went wrong?
A: The most common culprit for crumbly bars is overbaking. Keep an eye on the baking time and rely on the toothpick test for doneness. Ensure you also let them cool completely before cutting. - Q: Can I halve this recipe?
A: Yes, you can halve the recipe and bake it in an 8×8-inch baking dish. The baking time might be slightly shorter, so start checking for doneness around 20 minutes.
For more delicious and easy recipes, be sure to follow us on Pinterest!

Chewy & Dreamy: Easy Peanut Butter Butterscotch Bars
Ingredients
Equipment
Method
- Step 1: Preheat your oven to a cozy 350°F (175°C). Then, grab a 9x13-inch baking dish. You can either grease it really well, or for super easy removal (my personal preference!), line it with parchment paper, leaving a little overhang on the sides. This creates "handles" for lifting the cooled bars out later.
- Step 2: In a large mixing bowl, pour in your melted butter. Add the creamy peanut butter, brown sugar, and granulated sugar. Now, grab a whisk and get to it! Whisk everything together until it’s beautifully smooth and well combined. You want to make sure there are no lumps of sugar hanging out.
- Step 3: Next, crack in your two large eggs and drizzle in the vanilla extract. Give it another good whisk until everything is thoroughly combined. The mixture should look glossy and smooth.
- Step 4: Now, for the flour, baking powder, and salt. Sprinkle these over your wet mixture. With a spatula or a wooden spoon, gently stir until everything is just combined. The key here is not to overmix! Overmixing can lead to tough bars, and we want them perfectly tender and chewy. As soon as you see no more streaks of flour, stop.
- Step 5: Time for the good stuff! Fold in your butterscotch chips and those optional chocolate chips until they're evenly distributed throughout the batter. Aren't they looking good already?
- Step 6: Pour your glorious batter into the prepared pan. Use your spatula to spread it out evenly, reaching all the corners. It might be a little thick, and that’s totally fine.
- Step 7: Pop the pan into your preheated oven. Bake for 25 to 30 minutes. You’ll know they’re done when the edges are a beautiful light golden brown and a toothpick inserted into the center comes out with only a few moist crumbs clinging to it. Remember, ovens can vary, so keep an eye on them! Don't overbake, as these bars are meant to be soft and chewy.
- Step 8: This is the hardest part, I know! Let the bars cool completely in the pan before you even think about slicing them. Cooling allows them to set up properly, giving you those clean, perfect squares. Plus, the flavors deepen as they cool.