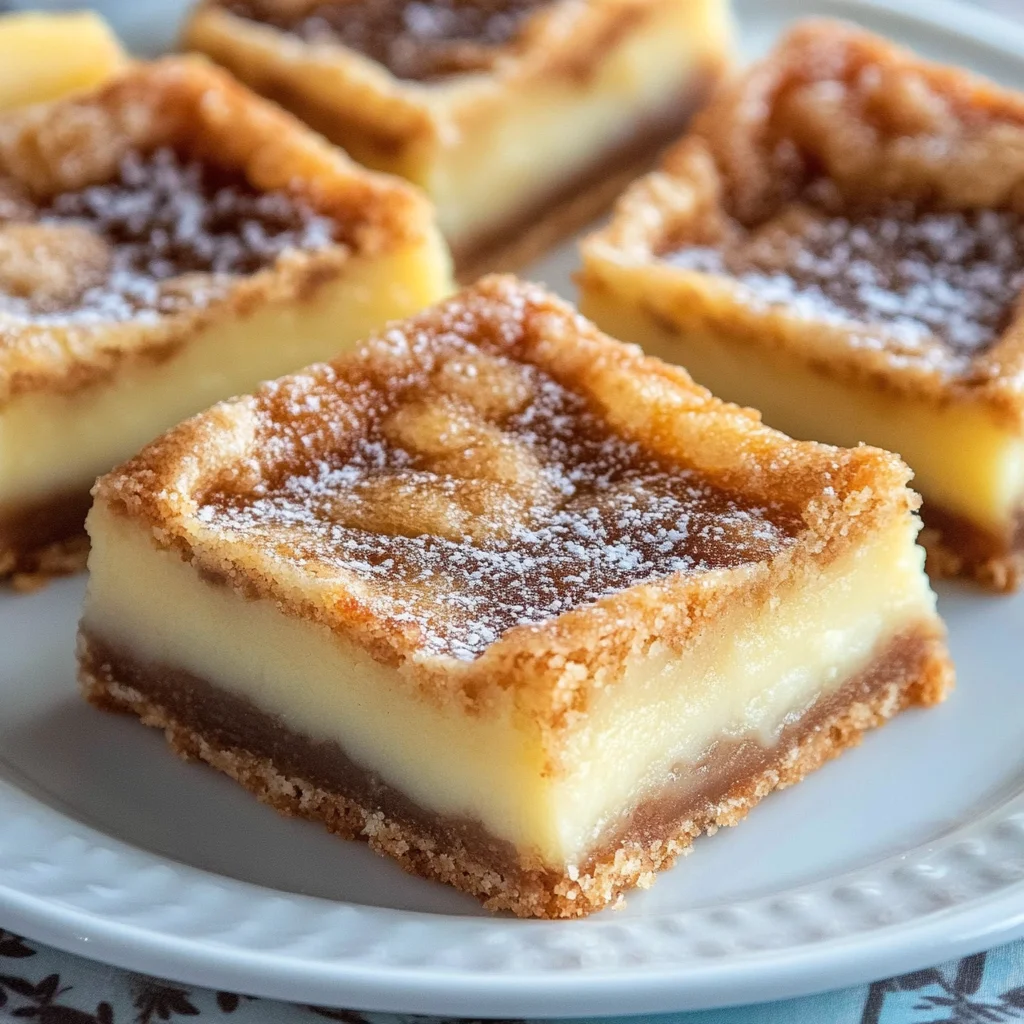
Oh my goodness, let me tell you about these bars. They’re the kind of dessert that instantly transports you back to childhood bake sales, potlucks, or maybe just a cozy afternoon snack that felt like pure magic. These aren’t fancy; they’re just GOOD. Like, seriously, ridiculously good. They’re soft, they’re sweet, and the name ‘Ooey Gooey’ is exactly right. If you need a dessert that’s a total crowd-pleaser, super simple to whip up, and disappears in minutes, you HAVE to try these. Trust me, your taste buds will thank you!
Why You’ll Love This Recipe
- Fast: Seriously quick prep time.
- Easy: Uses simple ingredients and steps, perfect for beginners.
- Giftable: Package them up for friends or neighbors – they make everyone smile!
- Crowd-pleasing: Who can resist that sweet, soft, gooey deliciousness?
- Nostalgic: Tastes just like classic comfort!
Ingredients
Gather ’round, sweet friends! Here’s what you’ll need for this buttery bliss:
- 1 box yellow cake mix, dry: This is our magical shortcut! Don’t add the ingredients listed on the box, just use the dry mix straight from the package.
- 2 sticks butter, melted: Yep, a full cup! Butter makes everything better, right? Melt it gently.
- 1 egg: Just one for the bottom layer to help bind things together.
- 8 oz cream cheese, softened: Make sure this is at room temperature! It needs to be lovely and soft so it beats up smooth. I usually leave mine out for an hour or two.
- 2 eggs, beaten: These are for the luscious filling!
- 3 1/2 cups powdered sugar: Also known as confectioners’ sugar. This is what gives our filling that signature sweet, slightly fudgy texture once baked and cooled.
How to Make It
Alright, let’s get baking! Follow these simple steps, and you’ll have gooey heaven in no time.
1. Get the oven ready! Preheat your oven to 350°F (175°C). This is a standard temperature for many bar recipes.
2. Whip up the base. In a medium bowl, you’re going to combine that dry yellow cake mix, the melted butter, and just one egg. Stir it all together until it looks like a thick dough. It will be a little crumbly, but it should hold together when pressed.
3. Prep your pan. Grab a 9×13 inch baking dish. You’ll want to grease this well! I like to use cooking spray, but butter or shortening works great too. Make sure you get the corners and sides.
4. Press the crust. Take that lovely dough you just made and press it evenly into the bottom of the greased baking pan. I find the back of a spoon or even lightly floured hands work well here to get a nice, flat layer. This is your crust!
5. Start the filling. Now, grab a large bowl. Add your softened cream cheese. Beat it with an electric mixer (or whisk really, really well by hand!) until it’s super smooth and creamy. No lumps allowed!
6. Add the eggs. Pour in the two beaten eggs and whisk them into the smooth cream cheese until everything is perfectly combined and smooth again.
7. Sweeten things up! Gradually add the powdered sugar, whisking as you go. Start with a cup or two and mix until incorporated, then add the rest. Keep whisking until the filling is wonderfully thick and creamy. It should look smooth and pourable, but substantial.
8. Pour and spread. Gently pour the rich cream cheese filling over the cake mix crust in the pan. Use a spatula to spread it out evenly, making sure it covers the entire crust layer.
9. Bake time! Pop the pan into your preheated oven. Bake for 25-30 minutes. You’re looking for the top to be just slightly golden brown around the edges, but the center should still look a little soft and jiggly. This is key to the “ooey gooey” part! Don’t overbake, or they won’t be as gooey.
10. The hardest part: Waiting! Remove the pan from the oven and place it on a wire rack. This is crucial! You MUST let them cool completely, ideally for 1-2 hours, maybe even longer. The filling needs this time to set up properly. Cutting them too early will result in a delicious, but very messy puddle (ask me how I know!). For the cleanest cuts, you can even pop them in the fridge after they’ve cooled on the counter for about 30 minutes.
11. Cut and devour! Once fully cooled and set, cut the bars into squares or rectangles right in the pan. Use a sharp knife and wipe it clean between cuts for perfect portions. Now, dig in and enjoy your little piece of heaven!
Substitutions & Additions
Want to play around a little? These bars are super forgiving and fun to customize!
- Different Cake Mix: Try a chocolate cake mix for chocolate gooey bars, red velvet, lemon, or even a spice cake mix!
- Add Ins (Crust): Stir in 1/2 cup of mini chocolate chips or chopped nuts into the crust mixture before pressing.
- Add Ins (Filling): Swirl in some caramel sauce, peanut butter, or a handful of chocolate chips into the cream cheese layer before baking. Add a teaspoon of vanilla extract to the filling for extra flavor!
- Top it Off: Sprinkle with powdered sugar, a drizzle of chocolate or caramel, or a sprinkle of flaky sea salt after they’ve cooled.
Tips for Success
Want to make sure your bars turn out absolutely perfect every time? Keep these pointers in mind!
- Room Temperature Ingredients: Make sure your cream cheese and eggs for the filling are at room temperature. This is essential for a smooth, lump-free filling.
- Don’t Overmix the Crust: Just mix the crust ingredients until they’re combined. Overmixing can make the crust tough.
- Grease the Pan Well: This prevents the delicious bars from sticking, making cutting and serving a breeze.
- Trust the Jiggly Center: It’s okay, more than okay, for the center to be a little jiggly when you pull them out. They will continue to set as they cool. This is the secret to the gooey texture!
- Cooling is Key: I know it’s tempting, but seriously, let them cool completely. Patience is rewarded with perfect bars. Chilling in the fridge after cooling can make cutting even easier.
How to Store It
Assuming you have any leftovers (a big assumption!), here’s how to keep these bars fresh:
Once completely cooled, you can store the bars in an airtight container.
- At Room Temperature: They’re fine on the counter for a day or two, especially if your house isn’t too warm.
- In the Refrigerator: For longer storage or in warmer climates, keep them in the fridge. They’ll last for 4-5 days. Chilling also makes them delightfully chewy!
- Freezing: Yes, you can freeze them! Cut into squares, wrap individual bars tightly in plastic wrap, then place in a freezer-safe container or bag. Thaw at room temperature or in the fridge. They should last in the freezer for 2-3 months.
FAQs
Got questions? I’ve got answers!
Q: My bars are still really soft in the middle after cooling. What happened?
A: A slightly soft middle is part of their charm and the “gooey” factor! However, if it’s too soft and liquidy, they might have been slightly underbaked or not cooled long enough. Ensure they have ample cooling time, ideally in the fridge for an hour after initial cooling if you want them firmer.
Q: Can I use a different size pan?
A: This recipe is best in a 9×13 inch pan. Using a smaller pan will result in thicker bars that need longer baking time. A larger pan will make them thinner and might reduce the gooeyness. Stick to 9×13 for best results!
Q: Can I make these ahead of time?
A: Absolutely! These are perfect for making a day or two in advance. Store them covered in the refrigerator. They’re even better the next day once the flavors have mingled.
Q: Do I really use the dry cake mix?
A: Yep! That’s the magic trick! Don’t prepare the cake mix as directed on the box; just use the powder straight from the bag for the crust.

The Best Easy Ooey Gooey Butter Bars
Ingredients
Equipment
Method
- Step 1: Preheat your oven to 350°F (175°C).
- Step 2: In a medium bowl, combine the dry yellow cake mix, melted butter, and 1 egg. Stir until it forms a thick, slightly crumbly dough that holds together when pressed.
- Step 3: Grease a 9x13 inch baking dish well with cooking spray, butter, or shortening, ensuring corners and sides are covered.
- Step 4: Press the dough evenly into the bottom of the greased baking pan to form the crust. Use the back of a spoon or lightly floured hands.
- Step 5: In a large bowl, beat the softened cream cheese with an electric mixer or whisk until super smooth and creamy.
- Step 6: Add the 2 beaten eggs to the cream cheese and whisk until perfectly combined and smooth.
- Step 7: Gradually add the powdered sugar, whisking as you go, until the filling is thick, creamy, smooth, and substantial.
- Step 8: Gently pour the cream cheese filling over the cake mix crust in the pan. Use a spatula to spread it out evenly.
- Step 9: Bake for 25-30 minutes in the preheated oven. The top should be just slightly golden brown around the edges, with the center still looking a little soft and jiggly. Do not overbake.
- Step 10: Remove from the oven and place the pan on a wire rack. Let them cool completely for 1-2 hours or longer. The filling needs this time to set. For the cleanest cuts, you can chill them in the fridge after they've cooled on the counter for about 30 minutes.
- Step 11: Once fully cooled and set, cut the bars into squares or rectangles using a sharp knife, wiping the knife clean between cuts. Serve and enjoy!